20 Polka Dot Nail Designs: Classic, Micro & Statement Looks
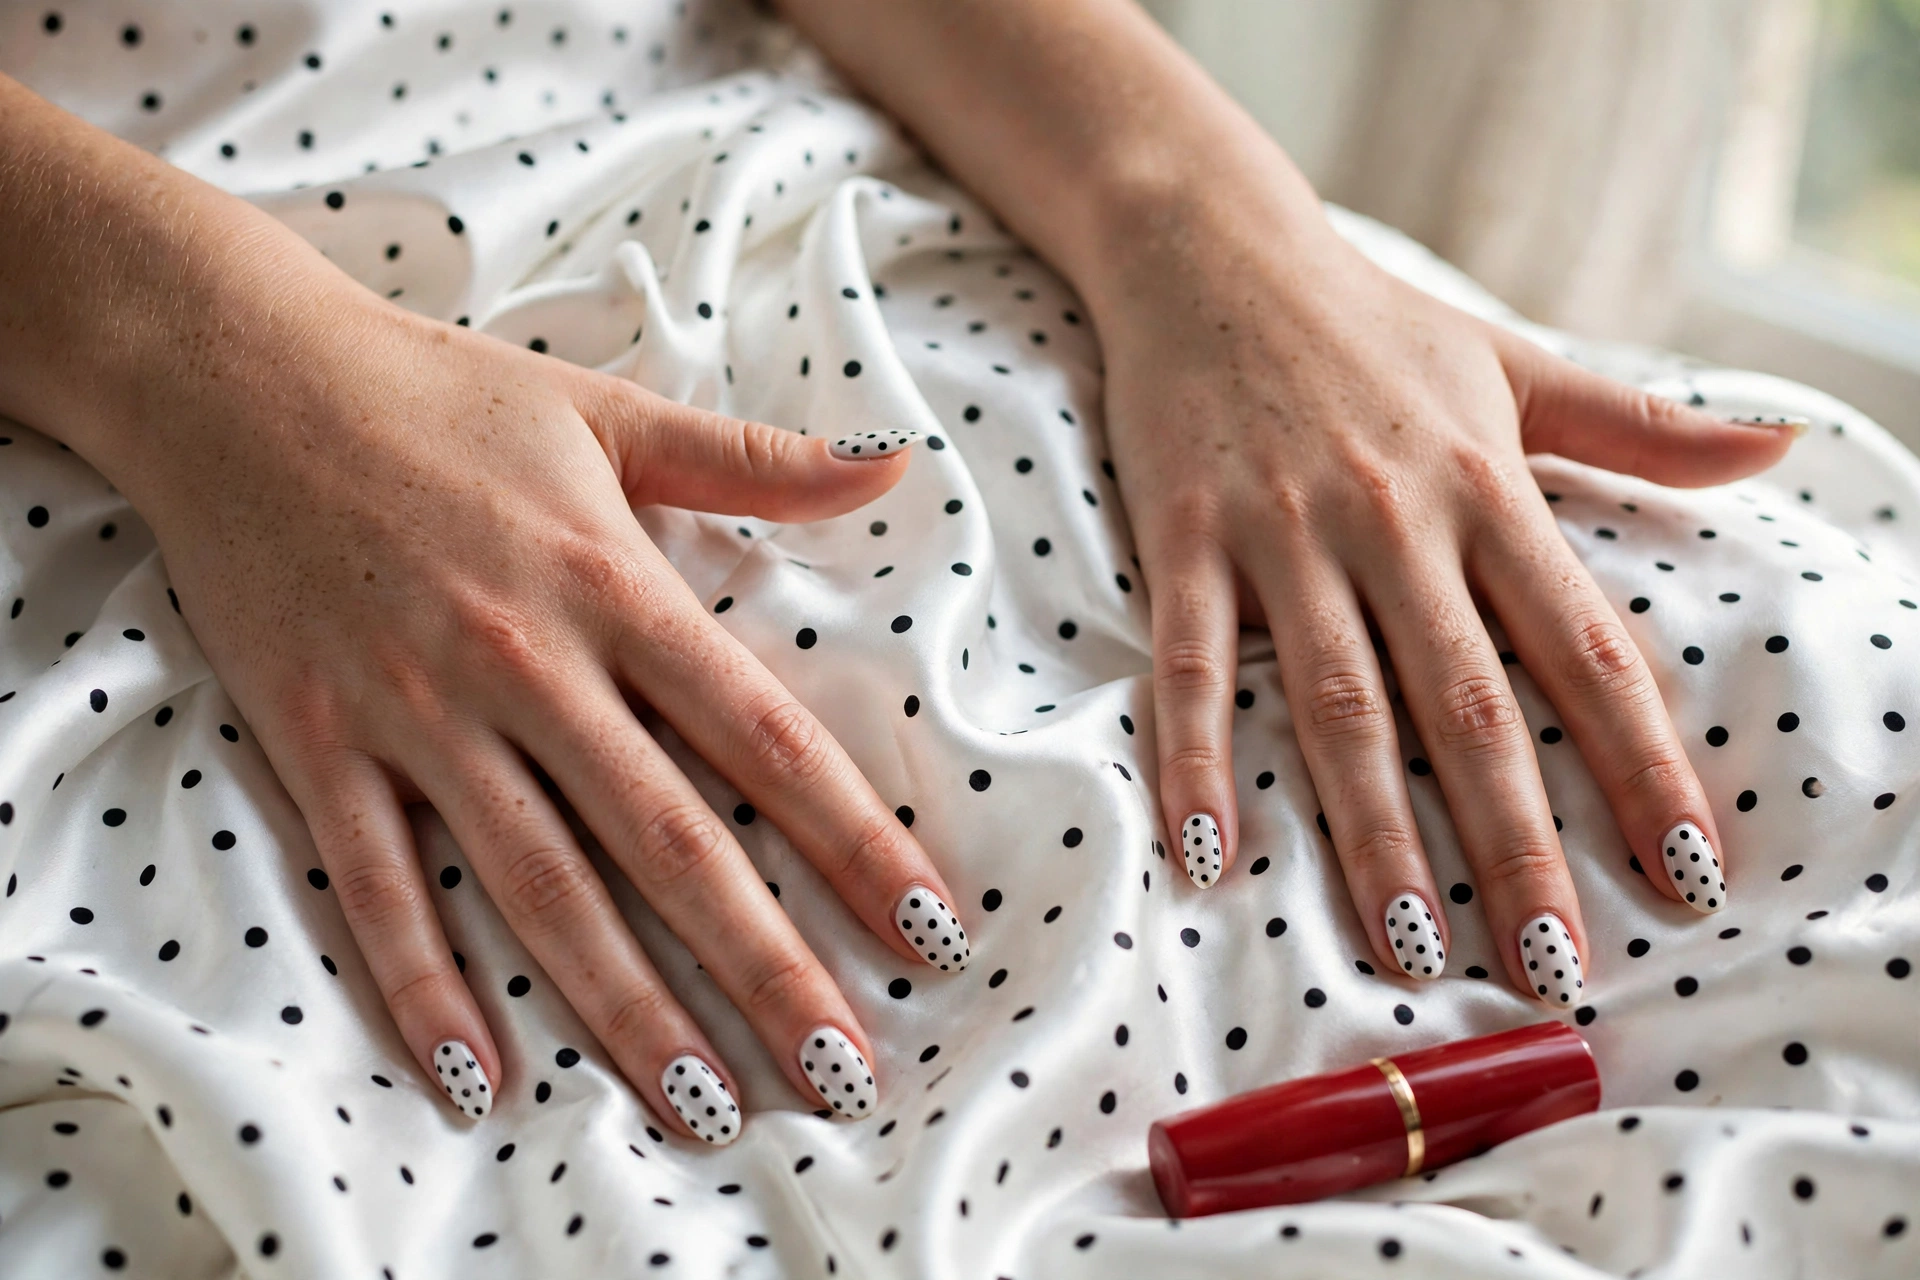
Polka dot nails are the rare nail art that suits everyone: a steady hand is not required, the tool costs almost nothing, and the result looks polished instead of plain. Dots have cycled through every era of fashion, from 1950s pin-up dresses to current runway manicures, and they keep coming back because they are genuinely easy to wear and easy to paint.
This guide collects 20 designs organized by the dot itself: classic retro sizes, tiny micro detail, oversized statement dots, and dot art that builds pictures from dots alone. You will also find a full how-to on dotting technique, a tool and size comparison table, and honest answers to the questions beginners actually ask.
Are Polka Dot Nails in Style in 2026?
The short answer: yes, and the current version is smaller and more deliberate than the retro original. The 2026 dot is tiny, precisely placed, and usually paired with a sheer or neutral base, which is why it reads as modern instead of costume.
Two shifts explain the comeback. First, the micro nail art boom made small graphic detail feel more current than bare minimalism, and a dot is the smallest graphic there is. Second, the dotted French manicure — a row of dots along the smile line instead of a solid white tip — crossed over from runway backstage sets to everyday salons, and it works on short nails, which most trend nail art does not. The designs in this guide are organized so both eras are covered: the classic retro sizes first, then the micro detail the current moment is built on, then the oversized statement dots that never really left.
How to Do Polka Dot Nails at Home
The short answer: paint your base color, let it dry fully, then press a dotting tool (or a bobby pin or toothpick) loaded with a small amount of polish straight down onto the nail. Re-dip for every dot, do not drag the tool, and seal with top coat.
Polka dots are the most beginner-friendly nail art there is, but a few technique details separate clean, professional-looking dots from smudged ones.
What you need
- A base coat and a glossy top coat
- Two or more polish colors (one for the base, one for the dots)
- A dotting tool set, which costs very little and gives you several dot sizes in one kit
- Household alternatives that genuinely work: the rounded end of a bobby pin, a toothpick, the blunt end of a pencil, or a ballpoint pen for very small dots
- A piece of foil or coated paper as a palette for your dot color
The technique, step by step
- Apply base coat and two coats of your base color. Let it dry until it is completely touch-dry, which takes 20 to 30 minutes for regular polish. This is the step most people rush, and it causes most failures.
- Drop a small blob of your dot color onto the foil palette. Never dot straight from the bottle, where the brush loads too much polish.
- Pick up polish on the tool by dipping it once into the blob. Touch the tool straight down onto the nail, hold for a beat, and lift straight up. The dot forms from contact, not from movement, so there is no brushing or dragging.
- Re-dip the tool for every dot. This keeps dots round and even-sized instead of shrinking into teardrops.
- Wipe the tool clean between colors, and finish with top coat once the dots are dry to the touch, about 10 minutes.
Common mistakes and how to avoid them
Dots that smear into commas: the base was not dry, or the tool dragged sideways. Dry longer, and press straight down and lift straight up.
Dots with a spike in the middle: too much polish on the tool. Dip shallower and give the blob a moment to thin out.
Dots that shrink smaller each time: polish was not reloaded between dots. Re-dip every time.
Top coat dragging the dots: the dots were not dry yet, or the top coat brush was pressed too hard. Float the brush lightly over the nail without pressing.
For gel polish, the same steps apply, but cure the base color fully under the lamp before dotting, and give gel dots a quick flash cure before top coat so they cannot shift. Nail techs recommend working one hand at a time with gel, since uncured gel dots will slide if you bump the nail.
Dotting with your non-dominant hand
The hand you paint with gets a steady target; the other one does not, and this is where most home dot manicures fall apart. Three things fix it. First, brace both elbows on the table and rest the hand being painted flat and still: move the tool, never the nail. Second, paint your dominant hand first while your patience is fresh, because it is the harder job. Third, choose forgiving designs for the second hand: larger dots hide small placement wobbles better than micro dots, and scattered layouts (designs 5 and 8) hide them best of all. If one hand still refuses to cooperate, dot only an accent nail on that hand and leave the rest a clean solid; asymmetry between hands is a legitimate design choice, not a failure.
Dot size guide: which tool and shape for each look
| Dot style | Dot size | Best tool | Suits these shapes | Difficulty |
|---|---|---|---|---|
| Micro dots | 1 mm and under | Fine dotting tool, toothpick, ballpoint pen | Oval, almond, short squoval | Easy; needs a steady rest for the hand |
| Classic dots | 2 to 3 mm | Medium dotting tool or bobby pin end | Every shape, including short nails | Beginner friendly |
| Statement dots | 4 to 6 mm | Large dotting tool or pencil end | Almond, coffin, long square (room for the dot) | Easy, but placement matters more |
| Dot art (flowers, hearts) | Mixed sizes | Small and medium tools together | Almond, oval, long squoval | Intermediate |
If you are choosing a shape specifically for dots, our nail shapes guide walks through which lengths and silhouettes flatter different nail beds.
Short nails? Start with these
Short nails are not a limitation for dots; they just set the size. Keep dots at 2 mm or under, place them toward the center of the nail rather than the edges, and the pattern reads as intentional instead of crowded. From the 20 designs below, the ones that flatter short nails most are Classic Black Dots on Crisp White (1), Navy Dots on Sheer Nude (3), Tiny White Dots on Sheer Pink (6), Pastel Confetti on Milky White (8), White Micro Dots on Sage Green (9), Nude-on-Nude Barely-There Dots (10), Butter Yellow with White Dots (15), Dot Daisy Flowers (16), and Polka Dot French Tips (18). Save the oversized statement dots (designs 11 and 13) for longer nails, where each dot has room to sit without touching the edges.
Classic Dots: The Timeless Retro Set
The short answer: classic dots are the 2 to 3 mm, high-contrast retro size that reads as pure vintage: black on white, red on white, or navy on nude. They suit every nail shape and work on short nails, which makes them the easiest entry point.
1. Classic Black Dots on Crisp White
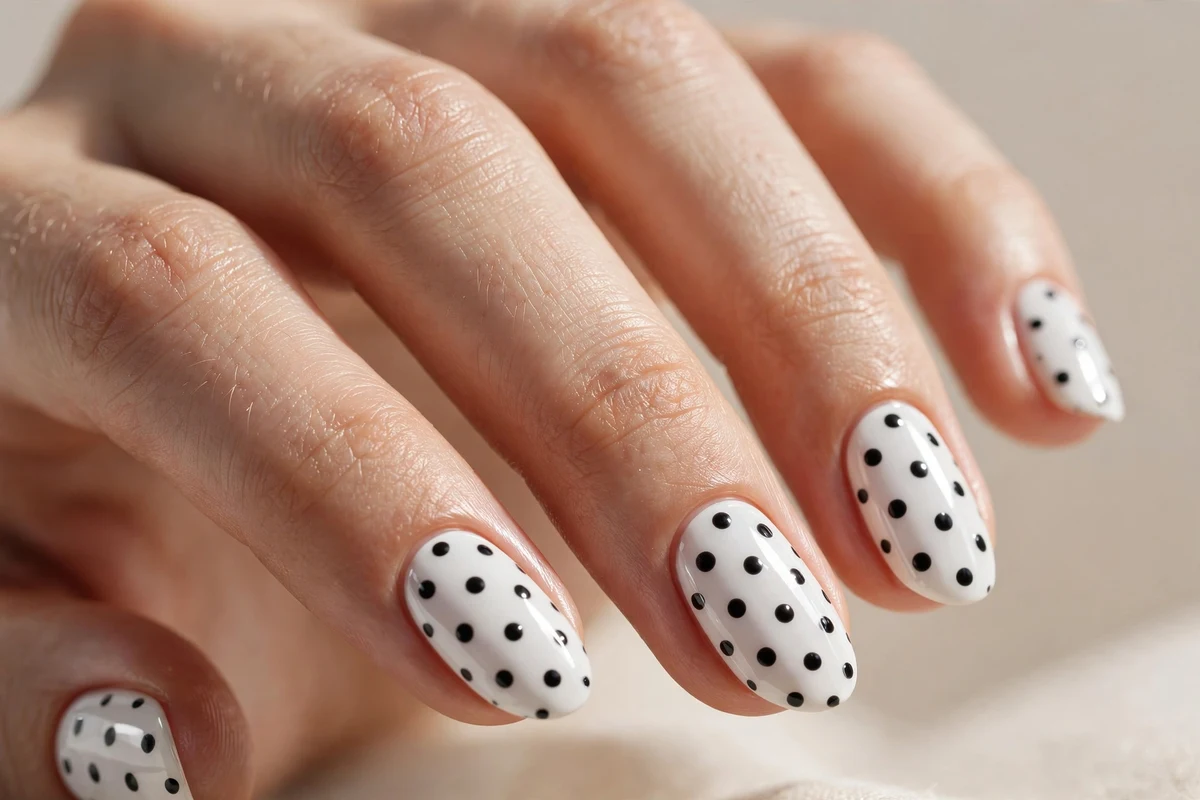
The original polka dot manicure, and still the one that photographs best. A clean white creme base with evenly spaced black dots gives you the full 1950s diner energy in about 20 minutes, and it matches literally everything you own. Space the dots with intention: start with one center dot per nail, then fill around it, which keeps the spacing natural without measuring.
Shape and finish: short almond or squoval, glossy. Difficulty: beginner. Wearability: high; chips are barely visible on white.
2. Red and White Pin-Up Dots
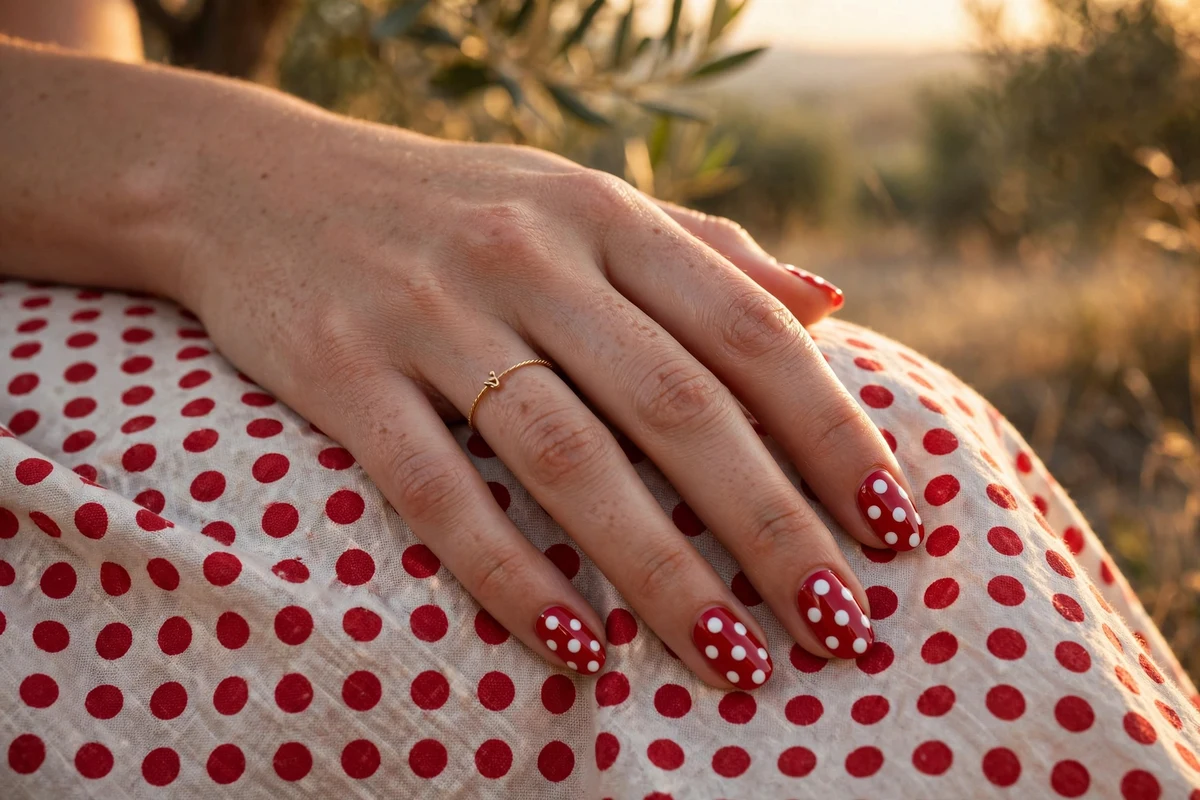
A glossy true-red base with bold white dots channels vintage pin-up without looking costumey, especially on medium-length almond nails. The key is a red opaque enough to cover in two coats, because a streaky base fights with the dots. Keep the dots large and confident, roughly 3 mm, and slightly irregular placement looks more authentically retro than a rigid grid.
Shape and finish: medium almond, high gloss. Difficulty: beginner. Wearability: medium; red shows tip wear, so seal the free edge with top coat.
3. Navy Dots on Sheer Nude
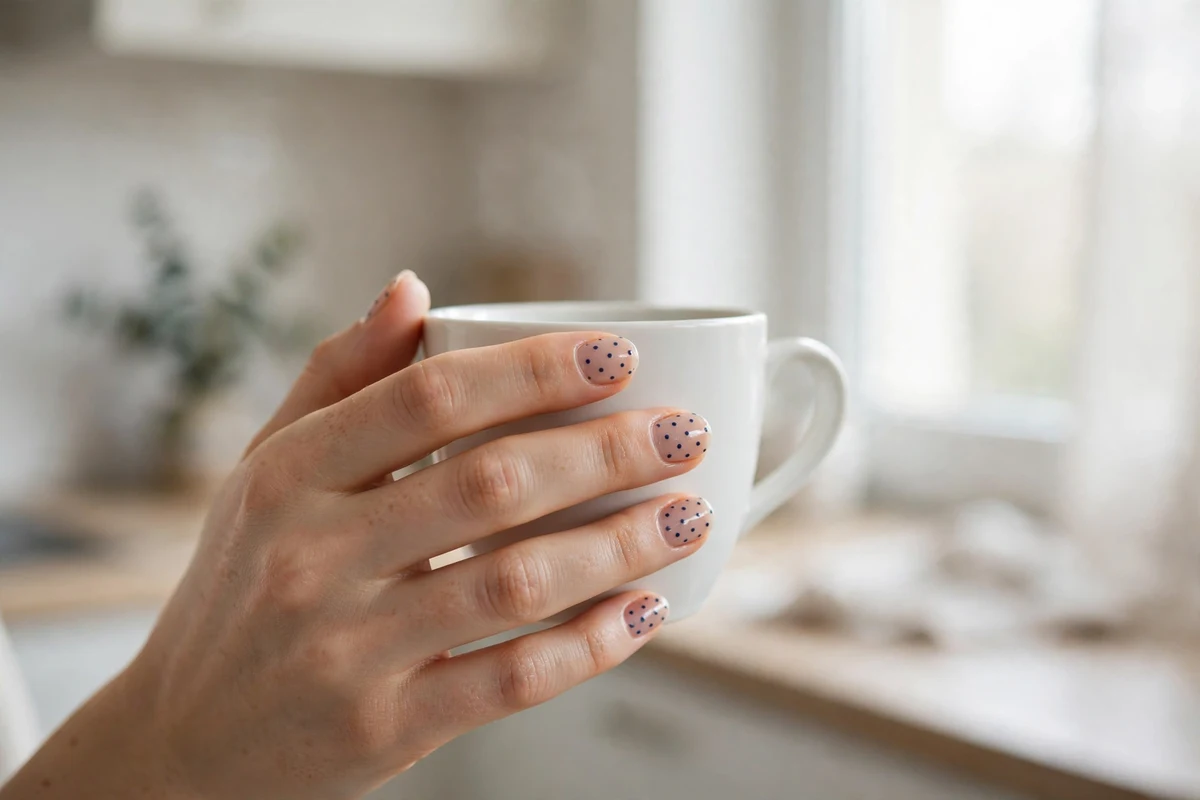
For a preppy, office-safe take, sheer nude with small navy dots reads as polka dot without shouting. The dots sit on the natural nail visible through the sheer base, which keeps the look light and modern. This is one of the most forgiving designs for uneven nail surfaces, since sheer bases and small dots both camouflage ridges.
Shape and finish: short oval or squoval, glossy. Difficulty: beginner. Wearability: very high; regrowth blends into the nude.
4. Chocolate and Cream Dots
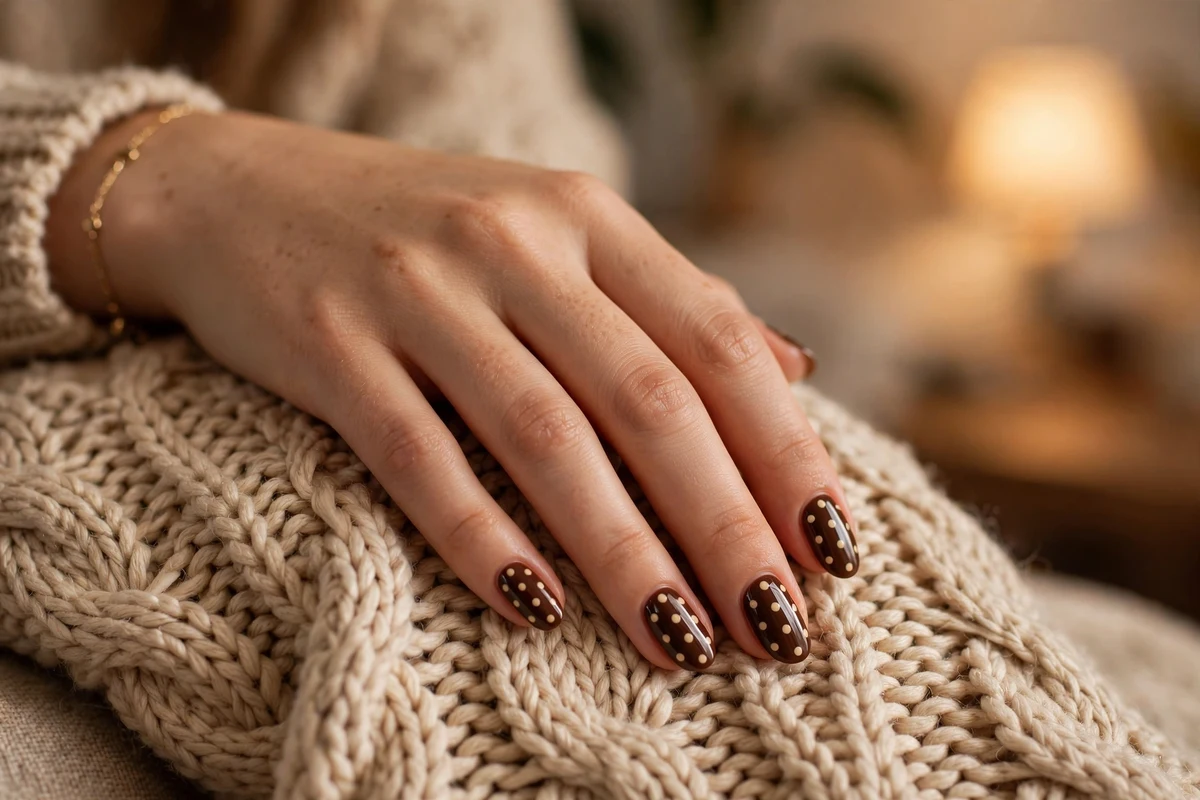
Rich chocolate brown with cream dots is the autumn-coded cousin of black and white, warm enough for fall wardrobes and noticeably softer against the skin than stark black. It pairs naturally with gold jewelry, which is worth planning for since your hands are the frame. For the full tonal story, see our brown nail designs guide.
Shape and finish: medium almond or oval, glossy. Difficulty: beginner. Wearability: high.
5. Retro Black-and-White Skittle Mix
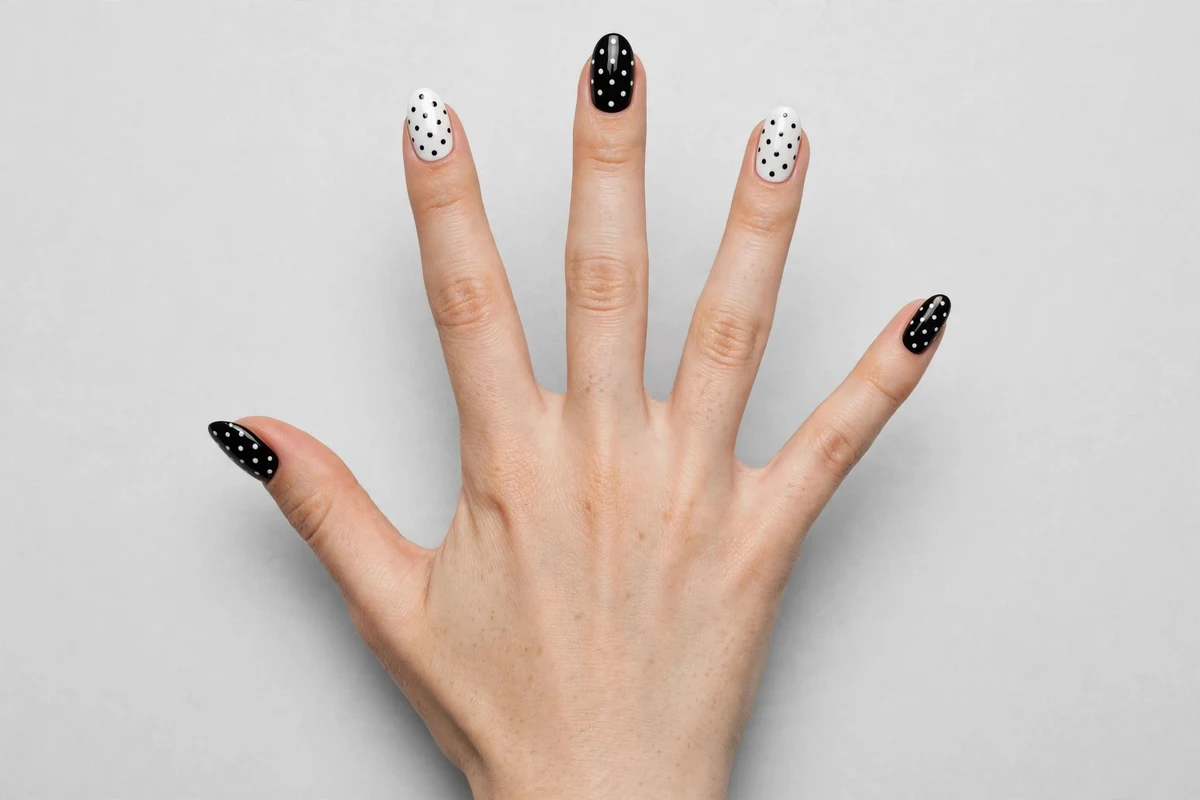
Each nail gets a different base, white or black, with the opposite color dotted on top. The mixed bases make the set feel playful instead of uniform, and small imperfections disappear because no two nails are supposed to match. This is the design to try when your dotting is still a little wobbly, since asymmetry is the whole point.
Shape and finish: any shape, glossy. Difficulty: beginner. Wearability: high.
Micro Dots: Barely-There Detail
The short answer: micro dots are 1 mm and smaller, painted with a toothpick or fine tool over sheer or nude bases. They add texture and interest to minimal manicures without reading as loud nail art, which makes them the polka dot version of quiet luxury. If you love subtle looks, our minimalist nail designs collection is built around the same idea.
6. Tiny White Dots on Sheer Pink
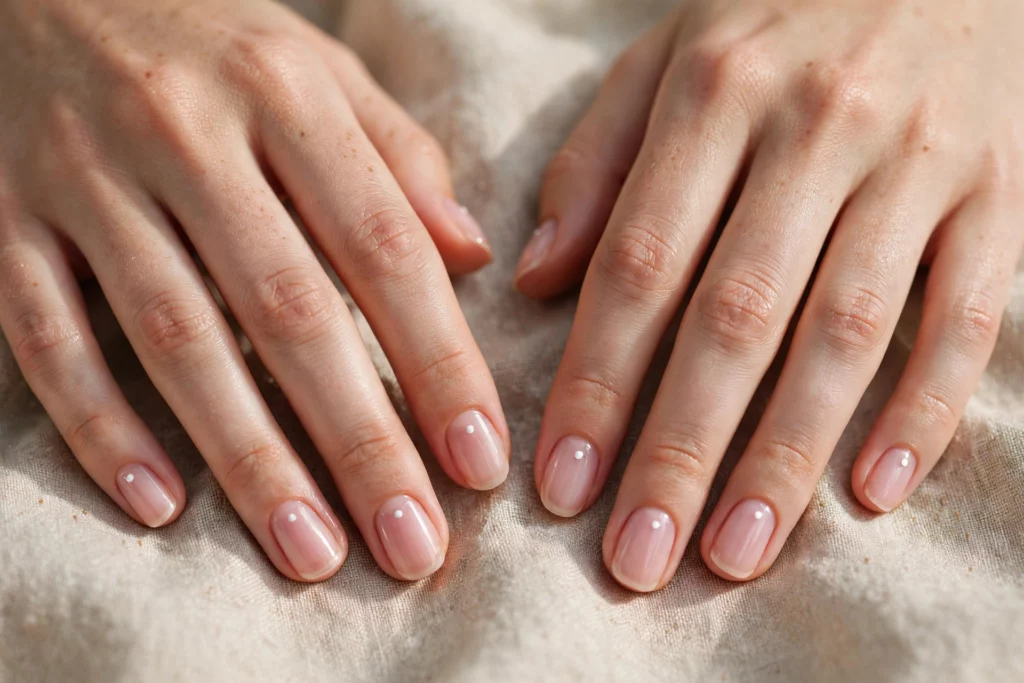
The minimalist classic: sheer pink, almost bare, with one tiny white dot per nail, usually centered. It looks like jewelry for the nail rather than nail art, and it is genuinely appropriate anywhere, including conservative workplaces and weddings. Rest your painting hand on a table while dotting, since micro dots punish shaky placement more than large ones.
Shape and finish: short oval or squoval, glossy. Difficulty: easy but fiddly. Wearability: very high.
7. Micro Gold Dots on Black
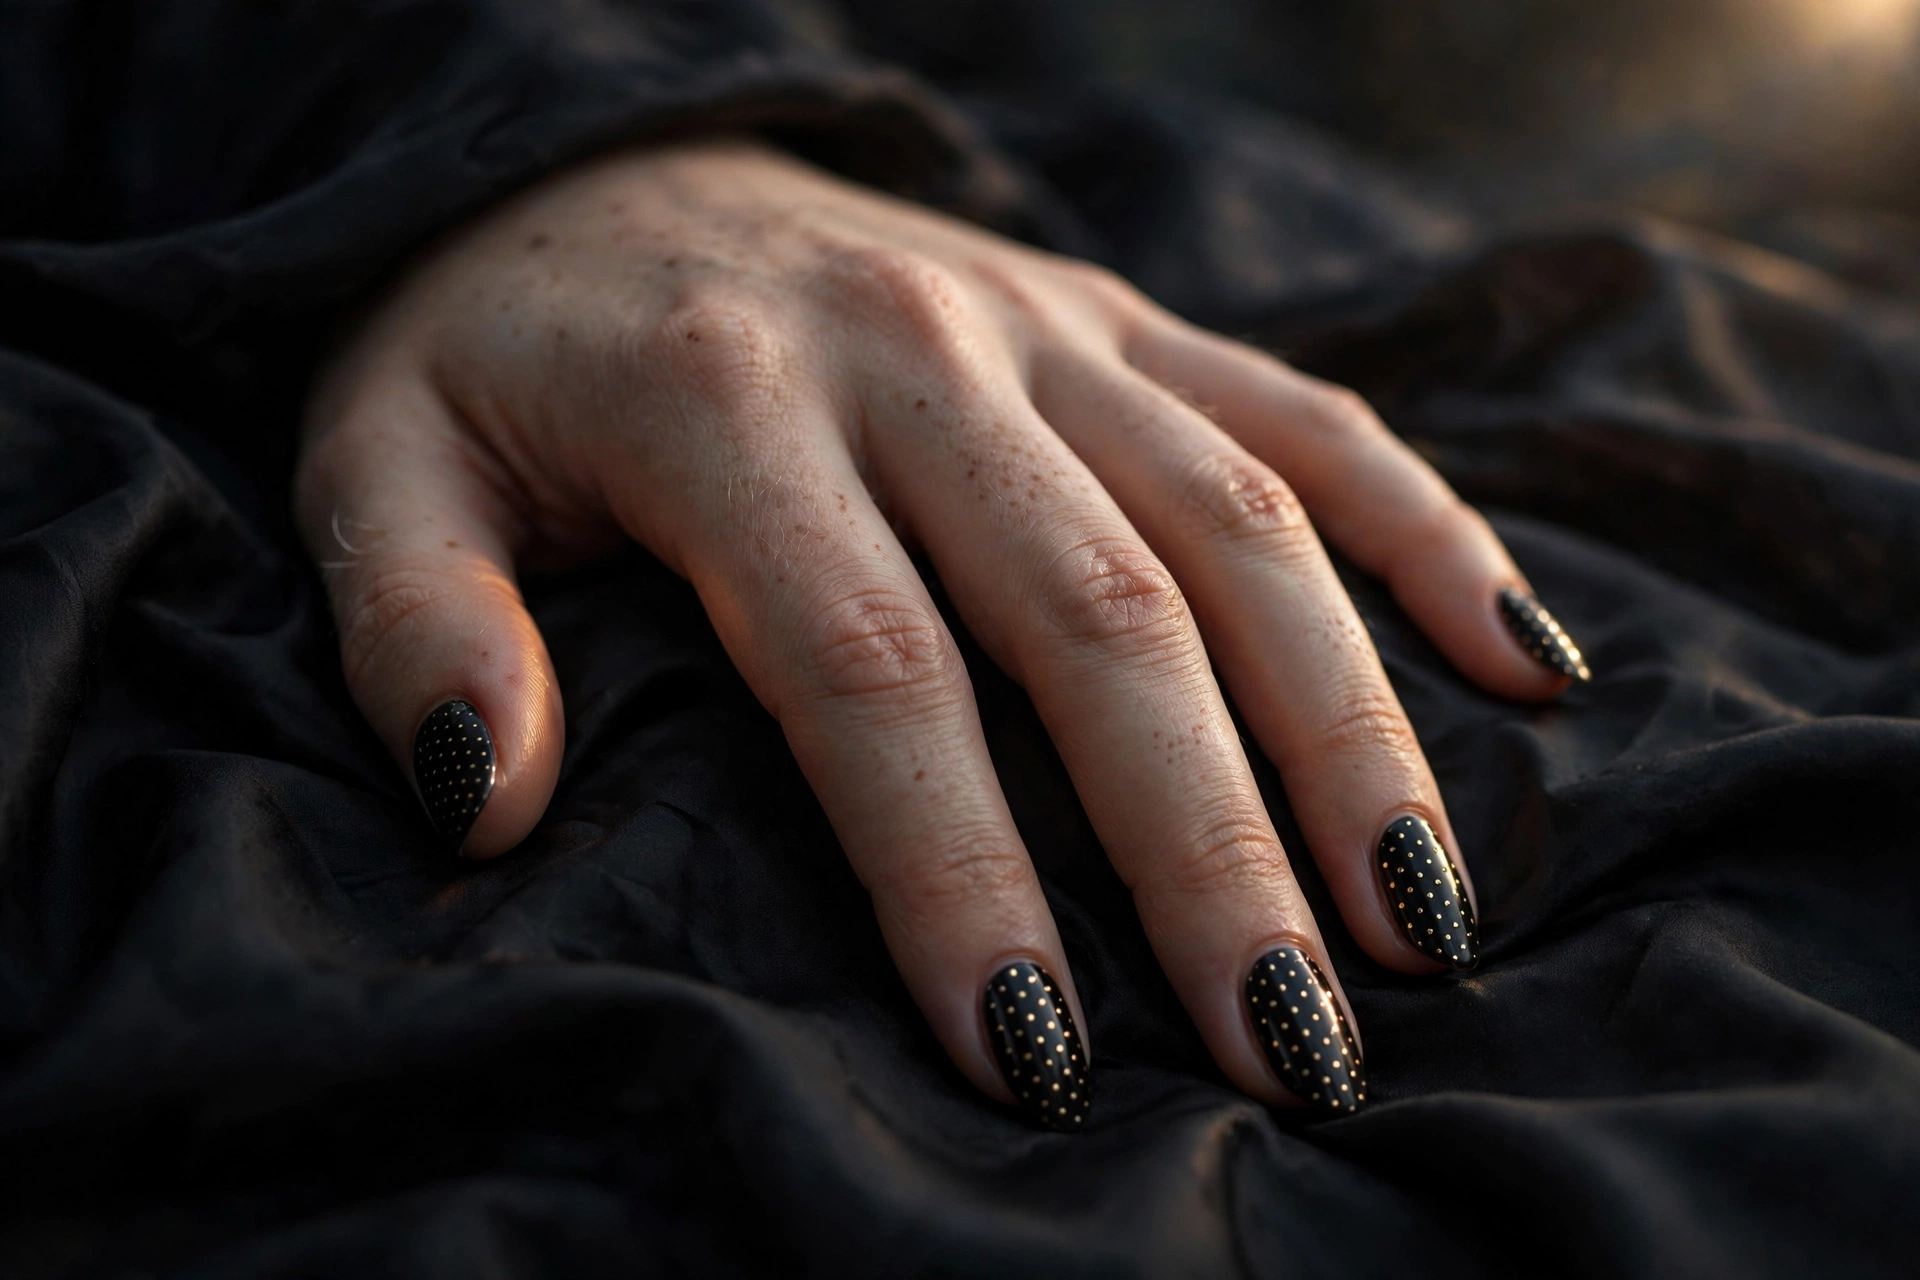
Metallic gold micro dots scattered over jet black read as starlight, and the tiny scale keeps it elegant rather than costumey. Use a fine tool and vary the spacing so it looks like a night sky instead of a grid. A gel top coat gives this the glassy depth it deserves; for more gold inspiration, our gold nail designs article covers the full metallic range.
Shape and finish: almond or stiletto-adjacent lengths, high gloss. Difficulty: easy. Wearability: medium; black chips show, so cap the edges.
8. Pastel Confetti on Milky White
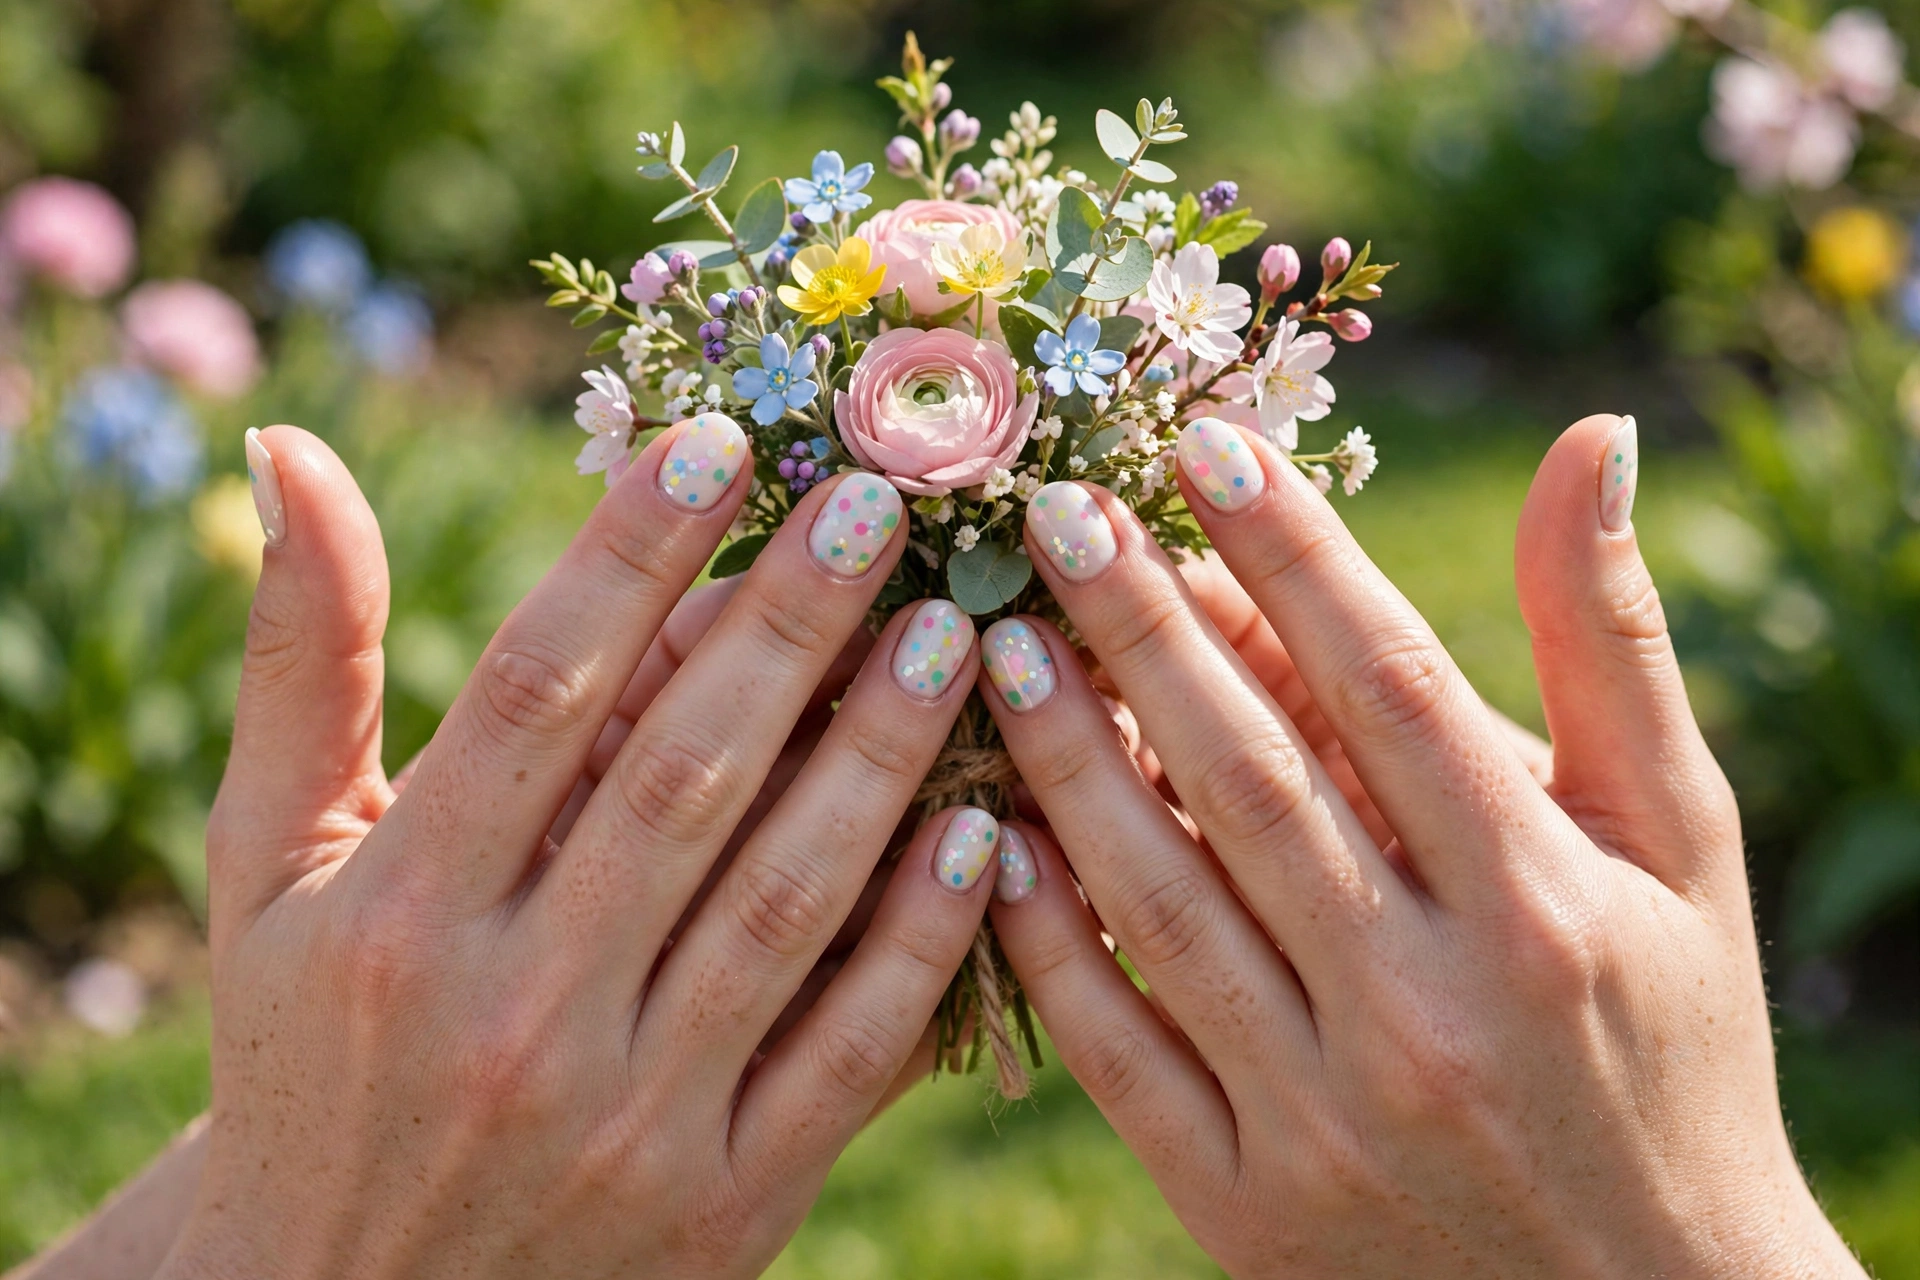
A milky white base sprinkled with tiny pastel dots in pink, blue, yellow, and mint gives confetti energy without the mess of real confetti nails. Keep the dots small and the colors soft, and this stays sweet instead of loud. Pastel lovers will find the full shade range in our pastel nail designs guide.
Shape and finish: short almond or squoval, glossy. Difficulty: beginner. Wearability: high.
9. White Micro Dots on Sage Green
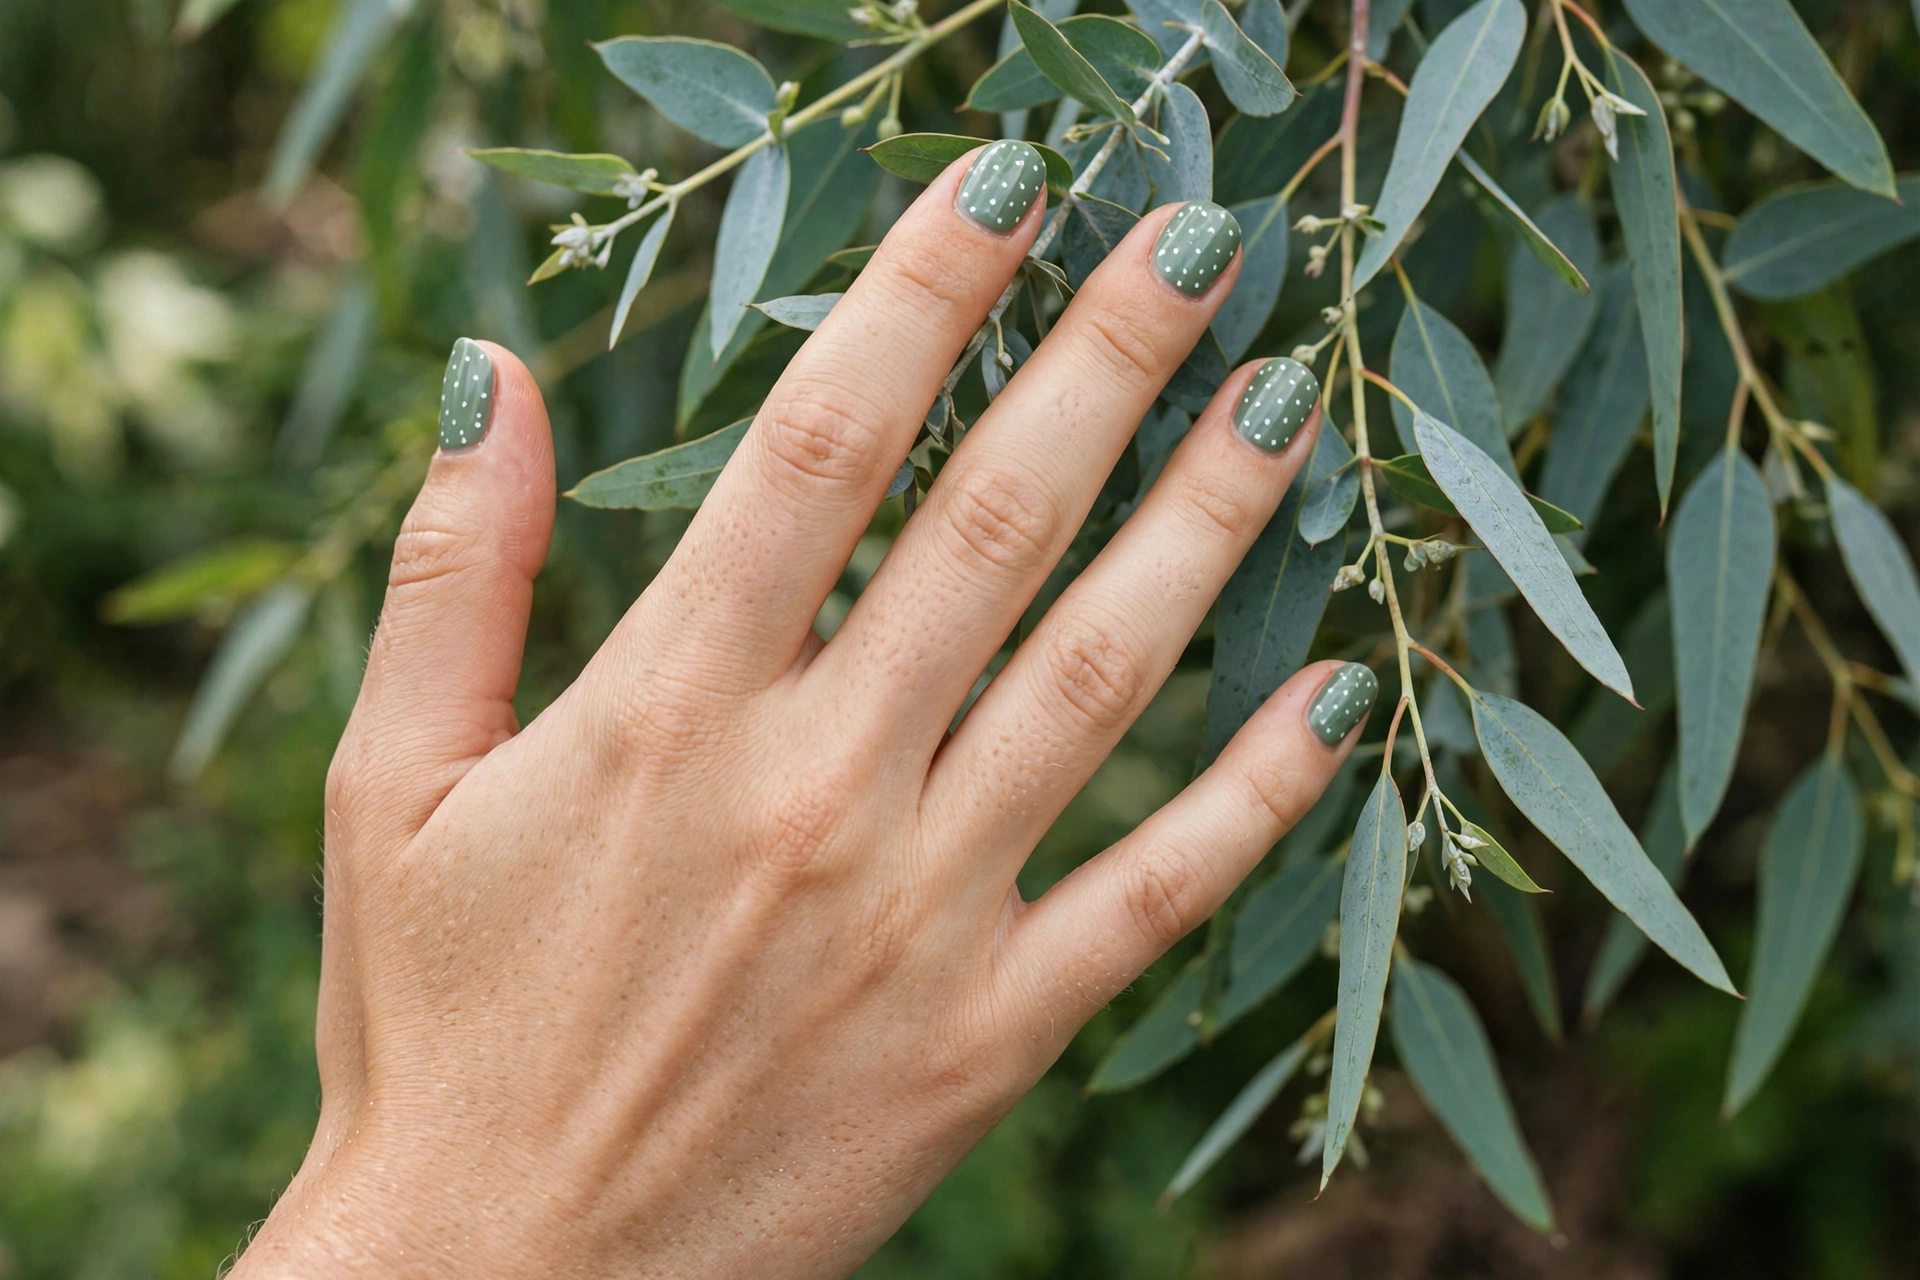
Muted sage with crisp white micro dots is the modern botanical version of polka dots: calm, fresh, and quietly different from the black-and-white default. Sage flatters most skin tones because it sits between warm and cool, and white dots keep it light. Space the dots evenly in rows for this one, since the calm mood depends on order.
Shape and finish: medium almond or oval, glossy or satin. Difficulty: beginner. Wearability: high.
10. Nude-on-Nude Barely-There Dots
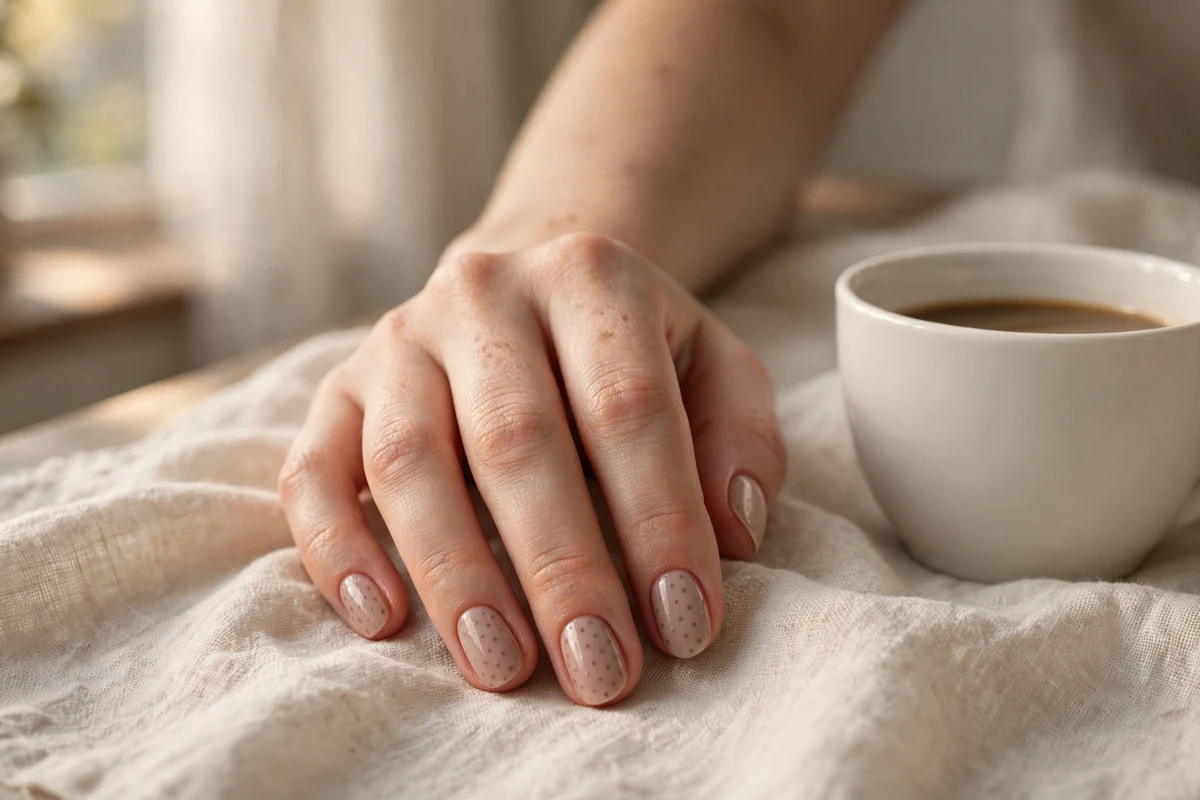
Dots in a shade one tone darker than the nude base, visible only in good light, are the subtlest design on this list. It reads as a clean nude manicure from a distance and reveals its pattern up close, which is exactly the appeal. Use a creme nude base and a slightly deeper nude for the dots, both with the same undertone so they blend.
Shape and finish: short oval, glossy. Difficulty: beginner. Wearability: very high; wear is nearly invisible.
Statement & Oversized Dots: Go Bold
The short answer: oversized dots, 4 mm and up, turn the pattern from background detail into the main event. They need longer nails to breathe and confident color pairings, but they are just as easy to paint as small dots, since one large dot is more forgiving than twenty small ones.
11. Oversized Cream Dots on Burgundy
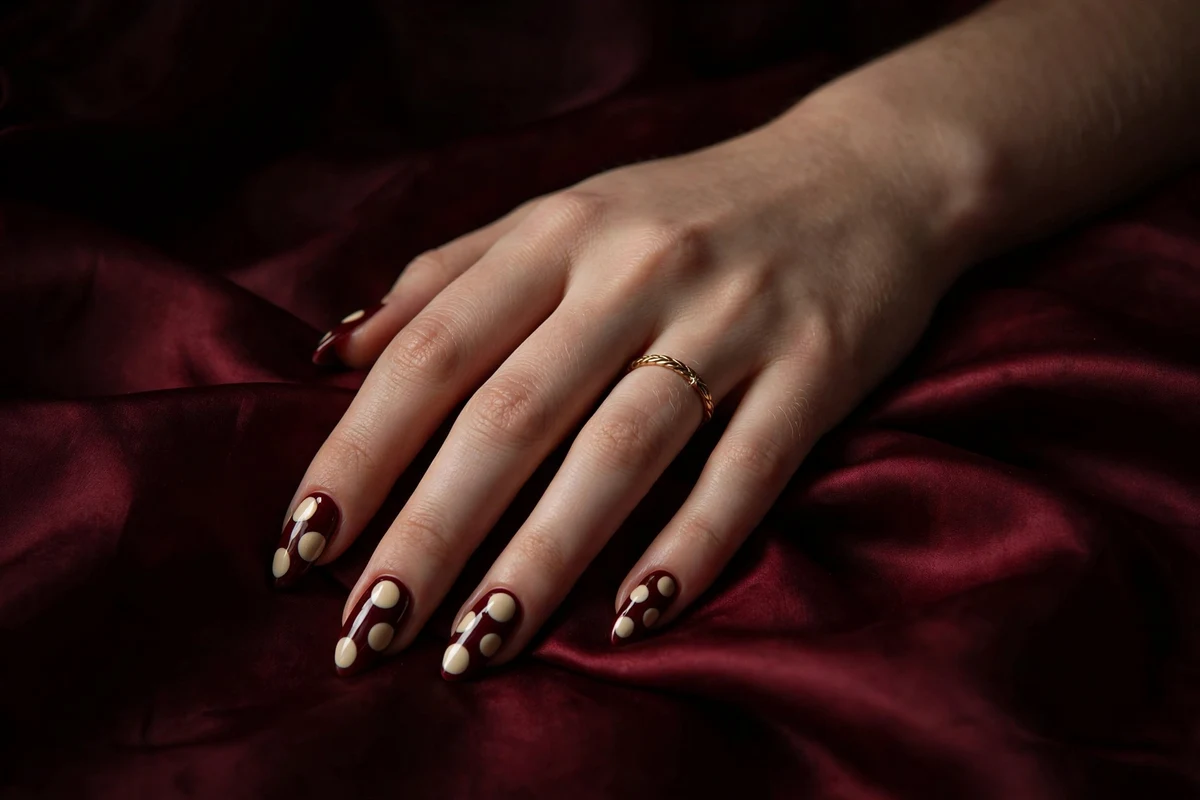
Two or three large cream dots per nail over deep burgundy is dramatic in a grown-up way, like a vintage silk scarf translated to nails. Longer nails carry this best, since each dot needs room to sit without touching the edges. For more burgundy pairings, our burgundy nail designs article goes deep.
Shape and finish: long almond or coffin, glossy. Difficulty: easy. Wearability: medium; large dots show chips at their edges, so top coat generously.
12. Color-Block Dots

Each nail gets a different bold base color with contrasting white or black dots on top: cobalt, tangerine, fuchsia, emerald, lemon. The dots unify the chaos into one coherent set, and the result is pure joy. If you love multi-color manicures, our rainbow nail designs collection explores the same maximalist instinct.
Shape and finish: medium to long, any shape, glossy. Difficulty: beginner. Wearability: high; busy patterns hide wear.
13. Y2K Glossy Bubble Dots
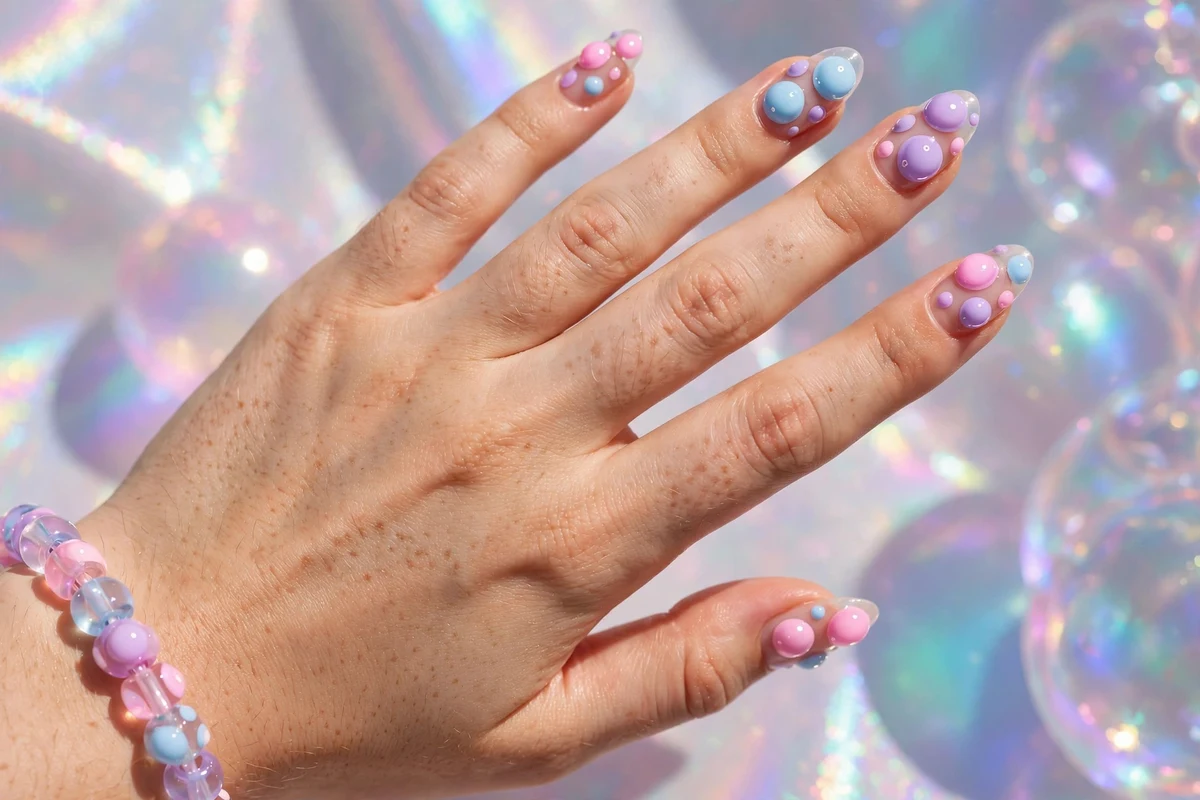
Big, domed, ultra-glossy dots in candy colors over a sheer or clear base bring back early-2000s bubble aesthetics. The trick is layering: paint the dot, let it dry, then add a second smaller dot of a lighter shade inside it to fake a 3D bubble highlight. It is playful, nostalgic, and surprisingly photogenic. For more dimensional looks, see our 3D nail designs guide.
Shape and finish: medium to long almond, high gloss. Difficulty: intermediate. Wearability: medium.
14. Neon Dots on Jet Black

Electric pink, lime, and orange dots over jet black glow with a near-UV intensity, especially under bright light. Neon polish can be thin, so paint the dots in two rounds, letting the first round dry before topping up. This is a statement for nights out and festivals rather than the office, and it photographs dramatically.
Shape and finish: medium to long, any shape, glossy. Difficulty: easy. Wearability: medium; neons fade in sun, so top coat with UV protection helps.
15. Butter Yellow with White Dots
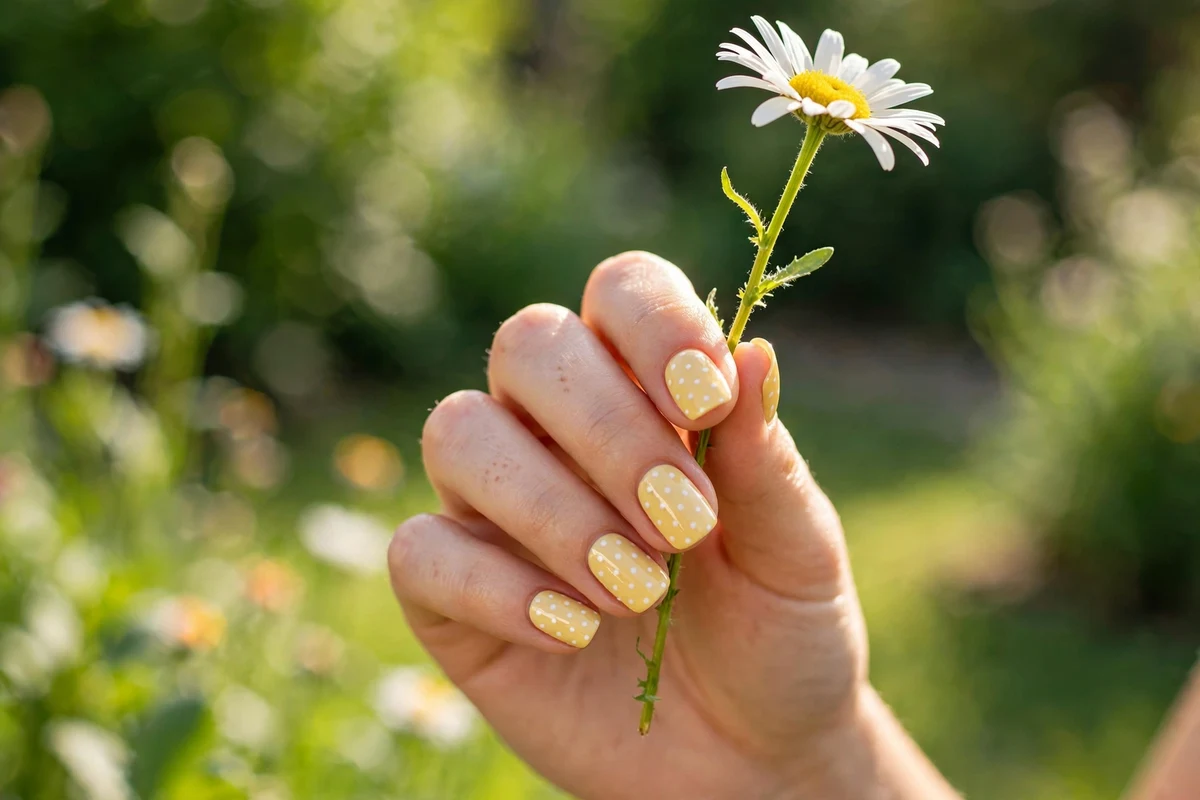
Soft butter yellow with small white dots is the sweetest pairing on this list, fresh and cheerful without tipping into neon. Yellow polish is notoriously streaky, so three thin coats beat two thick ones, and the white dots will look cleanest over a fully opaque base. Butter yellow is having a genuine moment, and our butter yellow nail designs article covers it in full.
Shape and finish: short to medium almond or squoval, glossy. Difficulty: beginner. Wearability: high.
Dot Art & Patterns: Beyond the Basic Dot
The short answer: once you can place a clean dot, you can arrange dots into shapes: flowers, hearts, French tips, and texture patterns. These designs take a little more planning, but they use the same single technique throughout, so the learning curve is gentler than it looks.
16. Dot Daisy Flowers
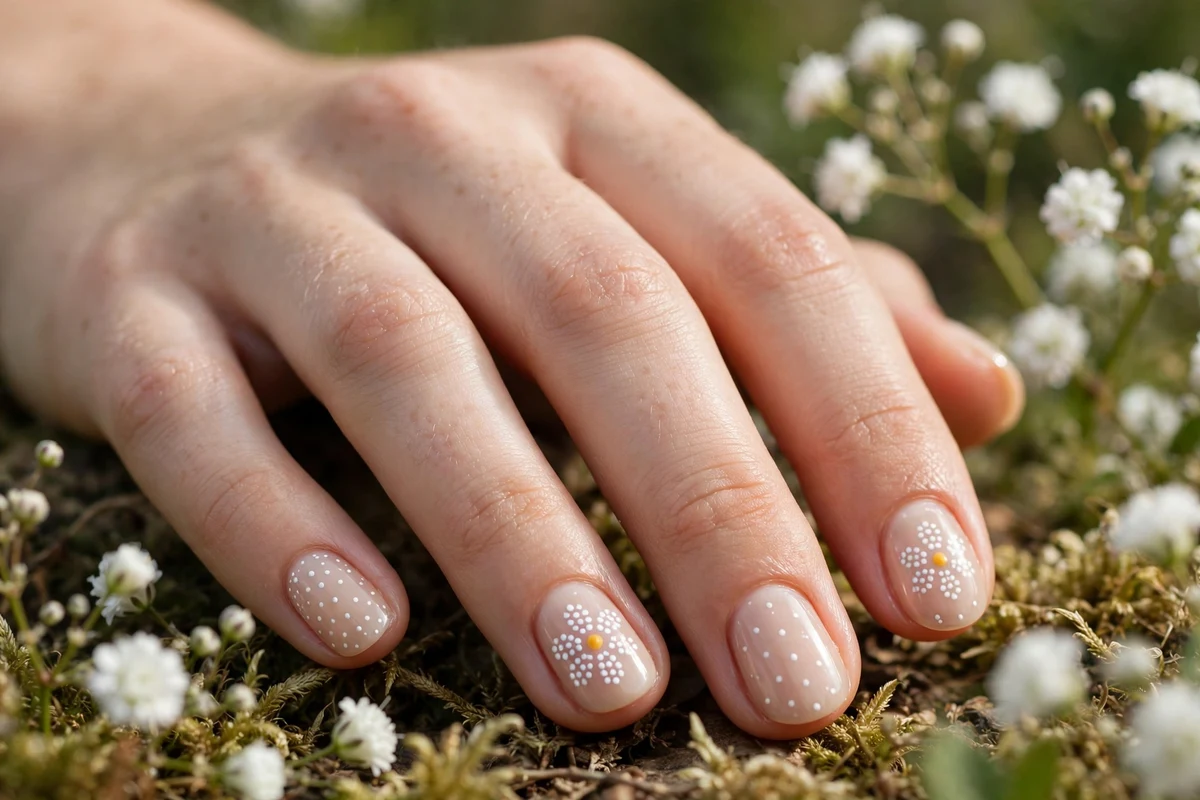
Daisies are the perfect beginner flower because they are literally just dots: five white dots in a circle for petals, one yellow dot in the center. Paint them over a nude or pale base, one daisy per nail or a few scattered on an accent nail. It is the fastest floral nail art that still reads as floral. For more dot-built botanicals, see our floral nail designs collection.
Shape and finish: short to medium oval or almond, glossy. Difficulty: intermediate. Wearability: high.
17. Heart-Shaped Dot Clusters
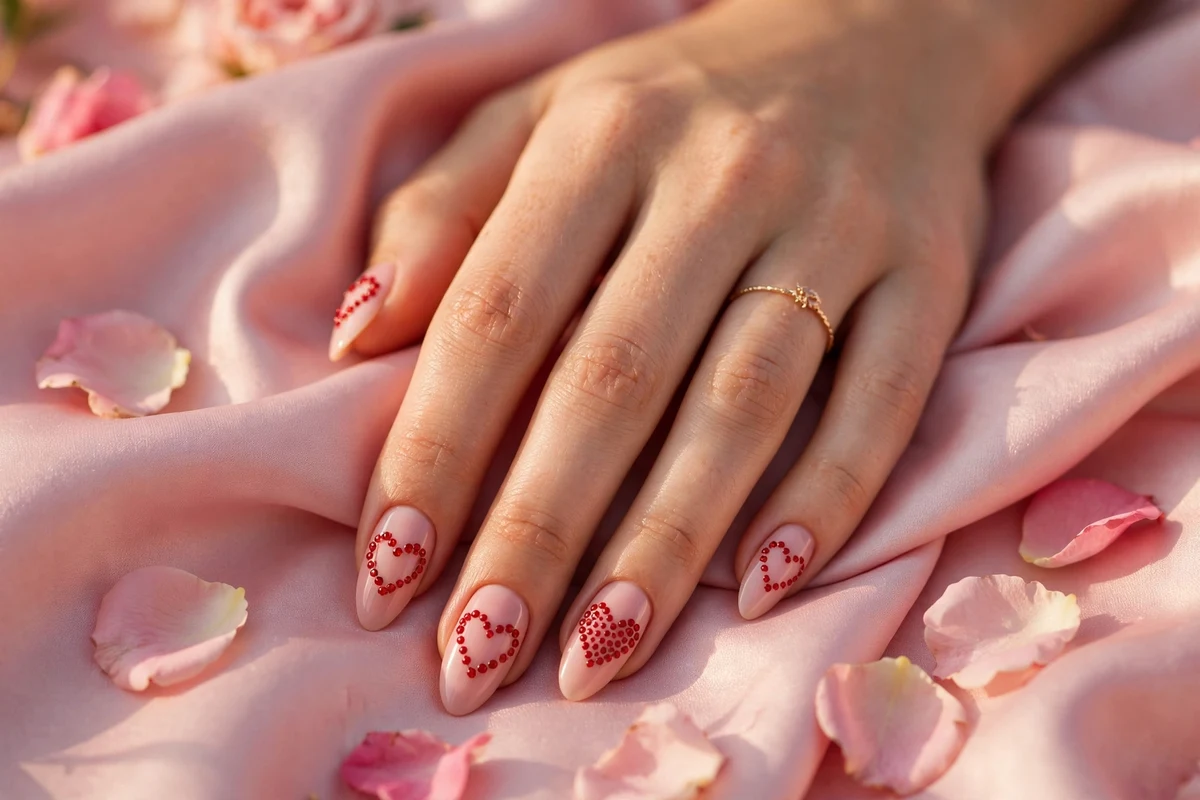
Two dots side by side with a third dot pulled slightly downward between and below them form a heart, which is a lovely trick for Valentine’s season or anniversaries. Paint the heart from three dots of one color over a neutral base, or make each heart from several tiny dots for a confetti-heart effect. The technique is forgiving because hearts are naturally organic shapes.
Shape and finish: any shape, glossy. Difficulty: intermediate. Wearability: high.
18. Polka Dot French Tips
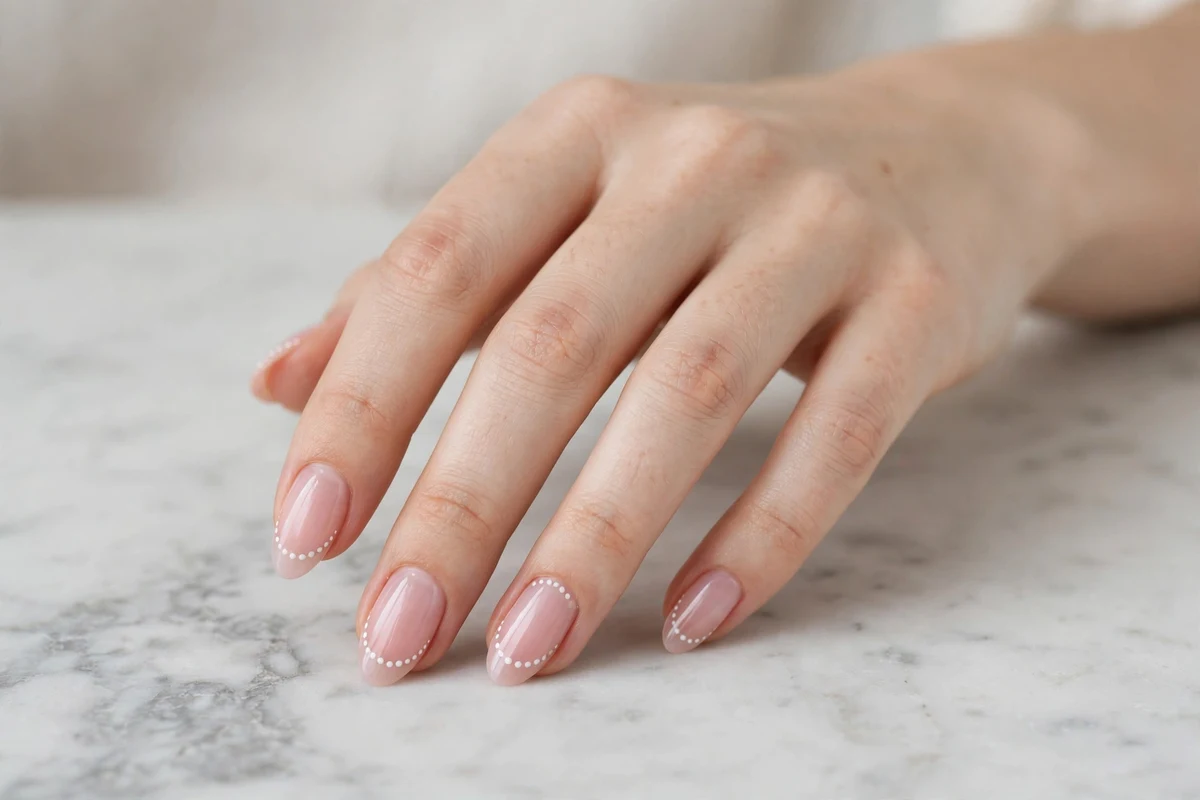
Replace the classic white French tip with a row of dots along the smile line: tiny white dots over a sheer pink base, or colored dots for a playful twist. It modernizes the French manicure without abandoning what makes it elegant. Keep the dots small and evenly spaced, and run them in a gentle curve that follows the natural tip.
Shape and finish: almond or oval, glossy. Difficulty: intermediate. Wearability: very high; tip wear is camouflaged by the pattern.
19. Matte Black with Glossy Dots
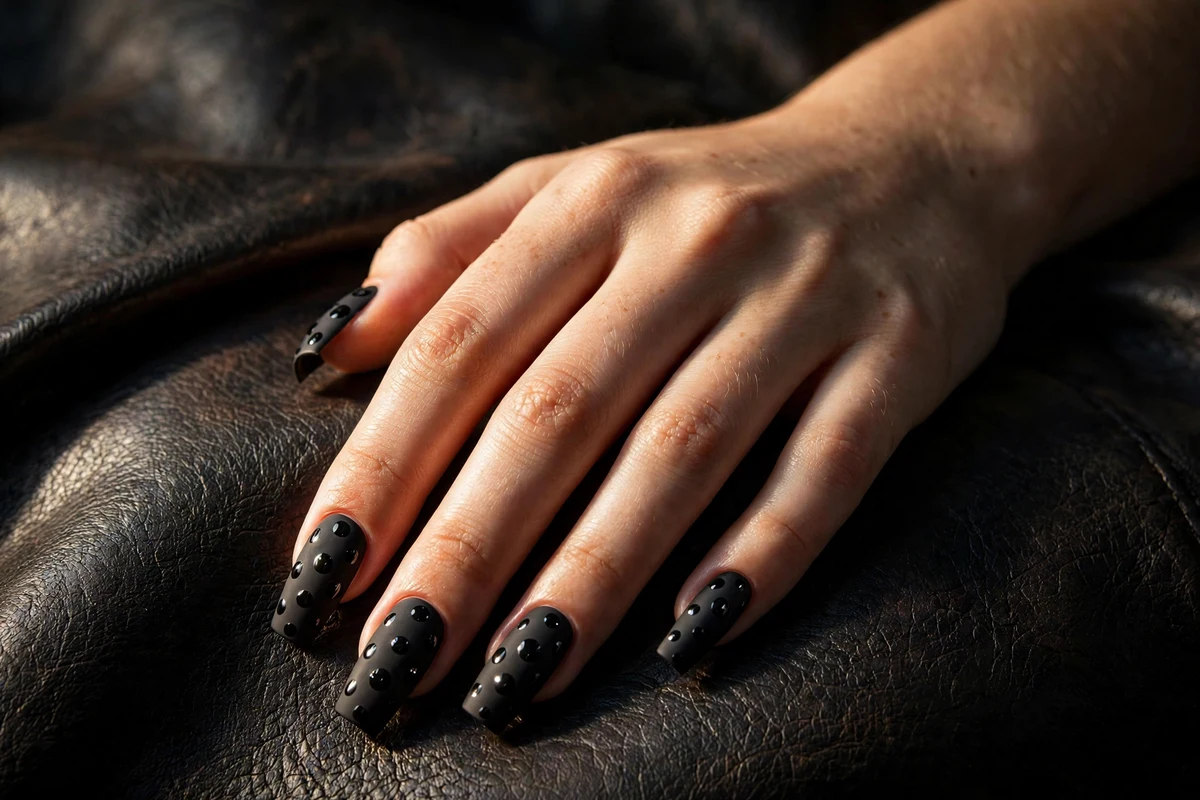
Matte black nails with glossy black polka dots create a pattern you feel more than see: pure texture contrast, no color change at all. Paint the base matte, then dot with the same black in a glossy finish, and the dots appear as light catches them. It is one of the most sophisticated designs on this list, and it works for events where color would feel like too much. More texture play lives in our matte nail designs guide.
Shape and finish: almond or coffin, matte base with gloss dots. Difficulty: beginner. Wearability: medium; matte bases scuff, so carry top coat for touch-ups.
20. Gradient Dots, Cuticle to Tip
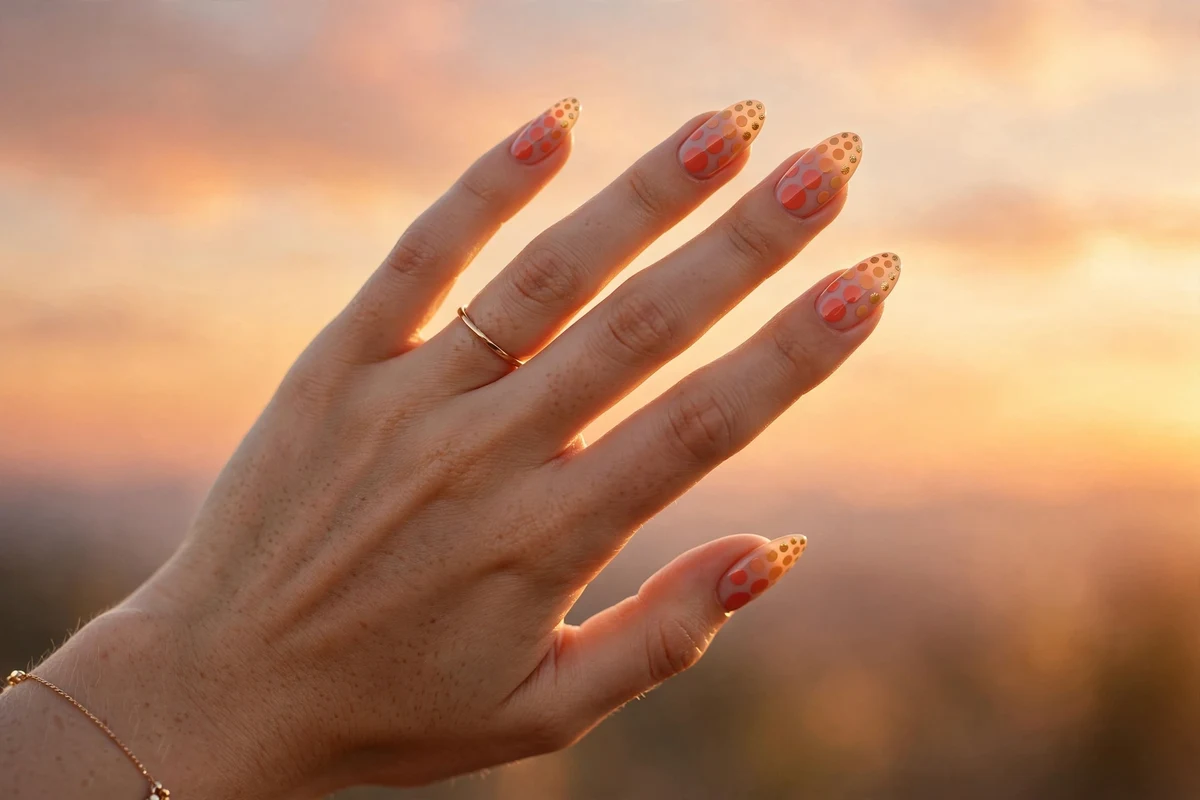
Dots that shrink in size, or fade from one color to another, from cuticle to tip create an ombre effect built entirely from dots. Start large at the cuticle and get progressively smaller toward the tip, or transition dot color across the nail. It is the most artful design on this list and rewards patience, but the technique is still just dots. For color-fade inspiration, our ombre nail designs article pairs well.
Shape and finish: medium to long almond or oval, glossy. Difficulty: intermediate. Wearability: high.
Polka Dots for Every Occasion
The short answer: dots scale up and down in formality purely through size and contrast. Micro dots on sheer bases disappear into professional dress codes; oversized high-contrast dots are the party version of the same technique.
| Occasion | Best designs from this guide | Why they work |
|---|---|---|
| Office and interviews | Navy Dots on Sheer Nude (3), Tiny White Dots on Sheer Pink (6), Nude-on-Nude (10) | Low contrast and tiny scale read as a clean manicure first and nail art second |
| Weddings and formal events | Polka Dot French Tips (18), Micro Gold Dots on Black (7), Tiny White Dots on Sheer Pink (6) | Sheer bases and metallic accents photograph softly and never fight the outfit |
| Nights out and parties | Neon Dots on Jet Black (14), Color-Block Dots (12), Y2K Glossy Bubble Dots (13) | High contrast and oversized scale are built to be noticed in low light |
| Vacation and daytime casual | Butter Yellow with White Dots (15), Pastel Confetti (8), Classic Black on White (1) | Cheerful colors that hide small chips well and suit short, practical nails |
Keeping Polka Dots Looking Fresh
A dotted manicure needs no special products, just a light routine. Reapply a thin layer of top coat every two to three days: dots sit slightly raised on the nail, and their edges are where chipping starts, so refreshing the seal matters more here than on a plain manicure. Massage in cuticle oil daily to keep the polish flexible, and wear gloves for washing up, since hot water and detergent soften regular polish faster than anything else. Matte designs (design 19) scuff sooner than glossy ones; a quick pass with a matte top coat restores the flat finish without repainting the dots. If a single dot chips mid-week, re-dot just that spot with the tip of a toothpick and reseal; the pattern hides the repair completely.
No Time to Paint? Press-Ons, Decals and the Salon Route
Dots are one of the few designs that survive every shortcut. Press-on nails with printed or hand-painted dots give you the look in minutes with zero drying time; choose them when you want a statement set (designs 12 to 14) for one event without committing to the wear. Dot decals and nail stickers go over your own polish and are the fastest fix for shaky hands, though they sit flatter than painted dots and last a few days less. At a salon, ask for your base color by name, then “hand-painted polka dots” with the size you want (classic, micro, or oversized) and show a photo of the design; dots are usually priced as a simple nail-art add-on rather than full custom art, but confirm the price before the set starts, since it varies by salon and by how many nails are dotted.
Frequently Asked Questions
How do I make polka dots without a dotting tool?
A bobby pin works beautifully: use the rounded plastic or metal tip, dip it in polish, and press it straight down. Toothpicks make the smallest dots, the blunt end of a pencil makes large ones, and a ballpoint pen gives precise micro dots. The tool matters far less than the technique, which is why a cheap dotting tool set and a bobby pin produce equally good results for most people.
Should my base color be fully dry before I add dots?
Yes. Dotting onto a tacky base is the single most common cause of smeared dots, because the tool presses the dot color into the soft base and drags it. With regular polish, wait 20 to 30 minutes until the base is completely touch-dry. With gel, cure the base fully under the lamp before dotting.
Why do my dots look like streaks or commas instead of circles?
Either the tool moved sideways during placement or it was overloaded with polish. Place the tool straight down, hold for a second, and lift straight up without brushing. If the dot has a peak in the middle, you picked up too much polish; dip more shallowly and let the blob settle before touching the nail.
How do I keep all my dots the same size?
Re-dip the tool for every single dot, because the polish load shrinks with each placement and the dots shrink with it. Practice on foil first to learn how much polish each tool size picks up, and wipe the tool clean when switching colors. Consistent reloading is the entire secret; there is no shortcut.
Can I do polka dot nails with gel polish?
Yes, and gel dots wear very well. Cure the base color fully, then dot with gel polish and give the dots a flash cure of about 10 seconds before applying top coat, which keeps them from shifting. Work one hand at a time, and remember that uncured gel will level and spread slightly, so make dots a touch smaller than your target size.
Which nail shape shows off polka dots best?
Classic and micro dots suit every shape, including short nails, because they scale to the nail. Oversized and statement dots need longer almond, coffin, or oval nails so each dot has room to sit without touching the edges. On very short nails, keep dots small and toward the center of the nail to avoid a crowded look.
Do polka dot nails last as long as a plain manicure?
They last just as long, and sometimes longer, because the dot layer adds thickness and busy patterns hide small chips. The key is sealing everything with a quality top coat and capping the free edge. Expect 5 to 7 days with regular polish and 2 to 3 weeks with gel, the same as any manicure with equivalent prep.
Are polka dot nails in style in 2026?
Yes. The current version uses smaller, more deliberate dots on sheer or neutral bases, plus the dotted French tip in place of a solid white tip. Classic high-contrast dots have never fully left, but micro dots are the 2026 signature, and they have the practical advantage of working on short nails.
Can I wear polka dot nails to the office or a wedding?
Yes, if you scale the dots down. Micro dots on a sheer nude or pink base (designs 3, 6, and 10 in this guide) read as a clean, polished manicure in professional settings, and dotted French tips (design 18) are a popular wedding choice because they photograph softly and match any dress. Save neon and oversized dots for after hours.
Can I get polka dot nails with press-ons or acrylics?
Yes to both. Press-on sets with dot designs are widely sold and apply in minutes, and decals can add dots over any polish. On acrylic or gel extensions, dots are painted on exactly the same way as on natural nails once the base color is cured or dry, and longer extensions are actually the best canvas for the oversized statement designs.
How do I fix a dot that went wrong without redoing the whole nail?
While the dot is still wet, lift it off with the corner of a brush or cotton swab dipped in polish remover, working only on the dot so the base underneath survives, then re-dot once the spot is dry. If the dot has already dried, cover it with one dot of the base color, let that dry fully, and place a fresh dot on top. On busy patterns nobody can tell a repair happened.