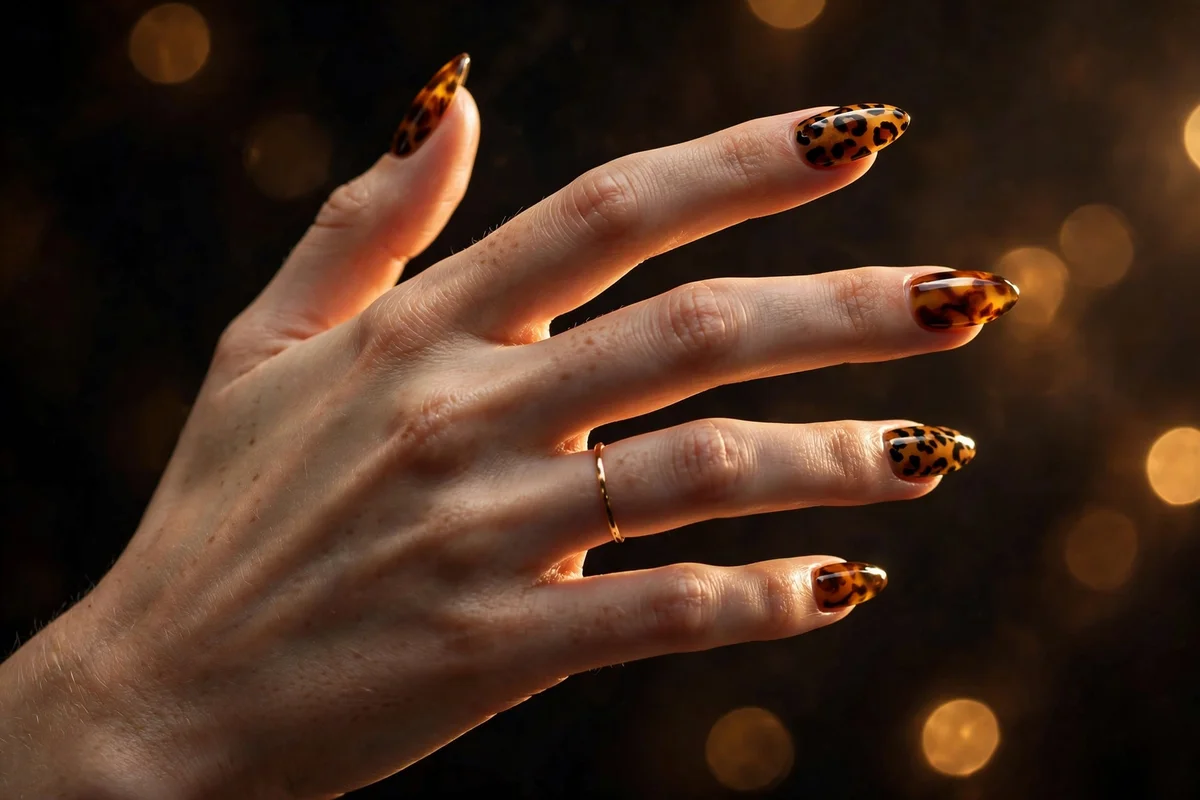
18 Animal Print Nail Designs: Leopard, Tortoise, Cow & More
Animal print nails never really leave the trend cycle. Leopard spots, tortoise shell, cow patches, and snake scales show up on runways and red carpets season after season because they work like a neutral with personality — wild enough to be noticed, versatile enough to wear with anything. This guide covers 18 animal print nail designs, grouped by print family, plus the actual techniques nail artists use to paint each one: the dotting-tool method for leopard spots, the jelly-layer method for tortoise shell, and the freehand method for cow print.
How to Do Animal Print Nails: The 3 Core Techniques
Answer first: nearly every animal print on nails is made with one of three methods — dotting-tool spots with broken outlines (leopard), layered translucent color (tortoise shell), or freehand blobs (cow). A dotting tool, two detail brushes, and regular polish are enough to start.
1. Leopard Spotting (Dotting Tool Method)
Paint two coats of your base color — nude, tan, or any shade you like — and let it dry completely. Dip a dotting tool into a spot color (brown, gold, or rust) and press irregular, lopsided blobs onto the nail. Vary their size and leave space between them; real rosettes are never uniform. Let the blobs set for a minute or two so they don’t smudge. Then, with a fine brush or the small end of the dotting tool dipped in black or dark brown, draw broken C-shapes and U-shapes around some of the blobs, leaving gaps. Outline only some spots — others stay as solid dots. Scatter a few tiny dots in the empty spaces. Seal with top coat.
2. Tortoise Shell (Jelly-Layer Method)
Tortoise shell is a layering trick. Start with a translucent amber or caramel jelly polish as the base — one to two coats. While it is still slightly tacky or fully dry (both work), dab on irregular patches of darker brown and near-black using a small brush or dotting tool. Overlap the patches a little; the dark color sinking into the translucent base is what creates the depth. Add one more thin coat of the amber jelly over everything to melt the layers together, then finish with a high-gloss top coat. Gloss is non-negotiable here — the wet, glassy look is the whole point of tortoise.
3. Cow Print (Freehand Blob Method)
Paint a white or off-white base and let it dry fully. Dip a small brush or dotting tool in black polish and paint irregular patches directly onto the nail — think puzzle-piece shapes with wobbly edges, some large, some small, never touching the cuticle. Real cow patches have organic, uneven borders, so a shaky hand is an advantage. Fill in a few small spots for balance, then top coat. Chocolate brown on a nude base gives the softer “chocolate milk” version.
5 Mistakes Beginners Make (and How to Avoid Them)
- Outlining every spot. Fully ringed spots look like cartoon dalmatians, not leopard. Leave gaps in the outline — broken C-shapes are the signature.
- Painting print on a wet base. Spots drag and bleed into a tacky base coat. Wait until the base is dry to the touch.
- Using a matte top coat on tortoise. Tortoise shell without gloss looks flat and muddy. It needs the wet-look finish.
- Even spacing. Perfectly spaced spots read as polka dots. Cluster some, leave gaps — chaos is the pattern.
- Too much polish on the tool. A loaded dotting tool makes blobs instead of spots. Wipe the excess on a paper towel or foil palette first.
Animal Print Comparison: Difficulty, Time, and Best Finish
| Beginner difficulty | Time per hand | Best base | Best finish | Wearability | |
|---|---|---|---|---|---|
| Leopard | Easy | 20–30 min | Nude or tan | Gloss | High — reads as a neutral |
| Cheetah | Easy | 15–25 min | Tan or gold | Gloss | High — similar to leopard |
| Tortoise shell | Medium | 30–40 min | Amber jelly | High gloss | Very high — elegant, office-safe |
| Cow print | Easy | 15–20 min | White or nude | Gloss | Medium — playful, bold |
| Dalmatian | Very easy | 10–15 min | White or sheer pink | Gloss | Medium — graphic and fun |
| Zebra | Medium | 25–35 min | Nude or white | Gloss or matte | Medium — strong statement |
| Snake / python | Hard | 40+ min | Tan or olive | Gloss | Lower — best as an accent |
| Croc / alligator | Medium | 30–40 min | Brown or black | Gloss | Lower — textured, dramatic |
Leopard & Cheetah Prints
The most wearable animal prints in nail art. Leopard rosettes (blobs with broken black outlines) and cheetah spots (solid dots with a small tail flick) both pair with neutrals, denim, and black, which is why nail techs call them “the neutral that isn’t boring.”
1. Classic Neutral Leopard
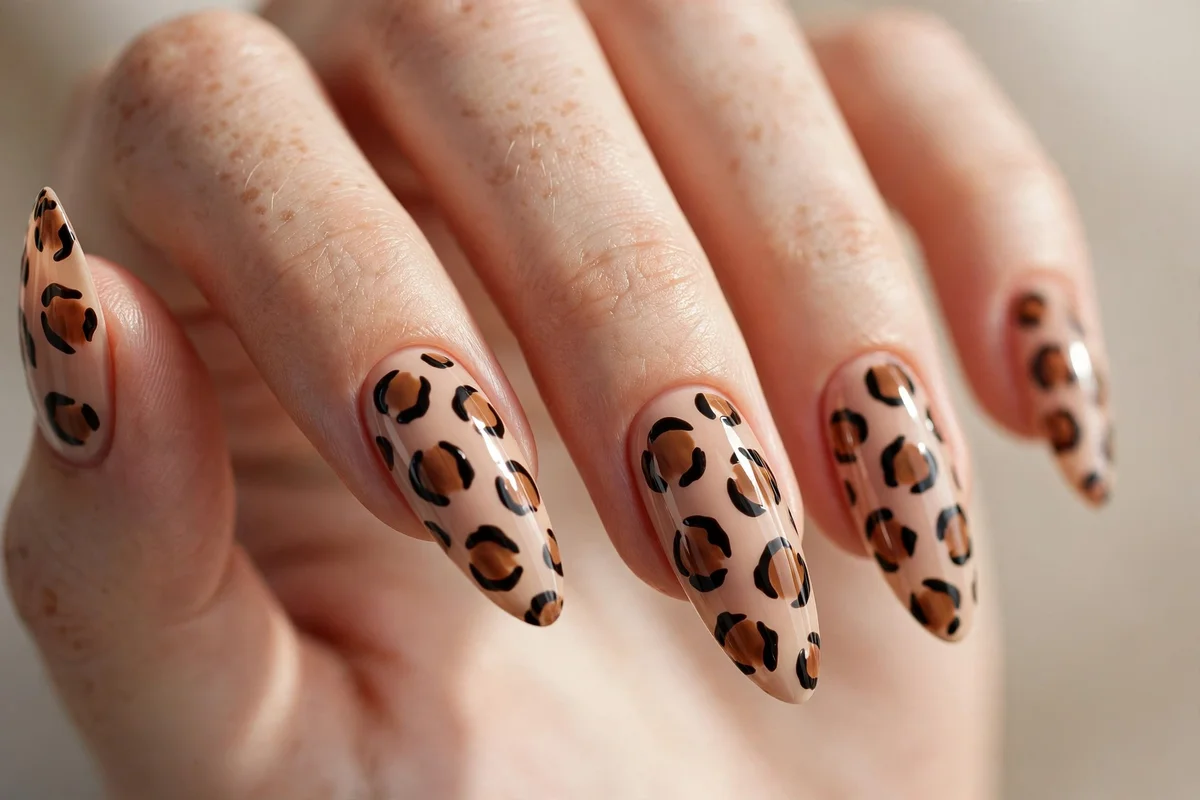
The design that started it all: a nude or warm beige base with caramel-brown blobs ringed in broken black C-shapes. It flatters every skin tone because the nude base can be matched to yours — fair skin suits pinky nudes, deeper skin suits rich tans. Almond or oval shapes show the pattern best since there is more surface to work with. Difficulty is beginner-friendly; the dotting-tool method above is all you need. It wears like a neutral, so it works for the office, weekends, and events alike. Finish with a glossy top coat — leopard spots look best with shine.
2. Leopard French Tips
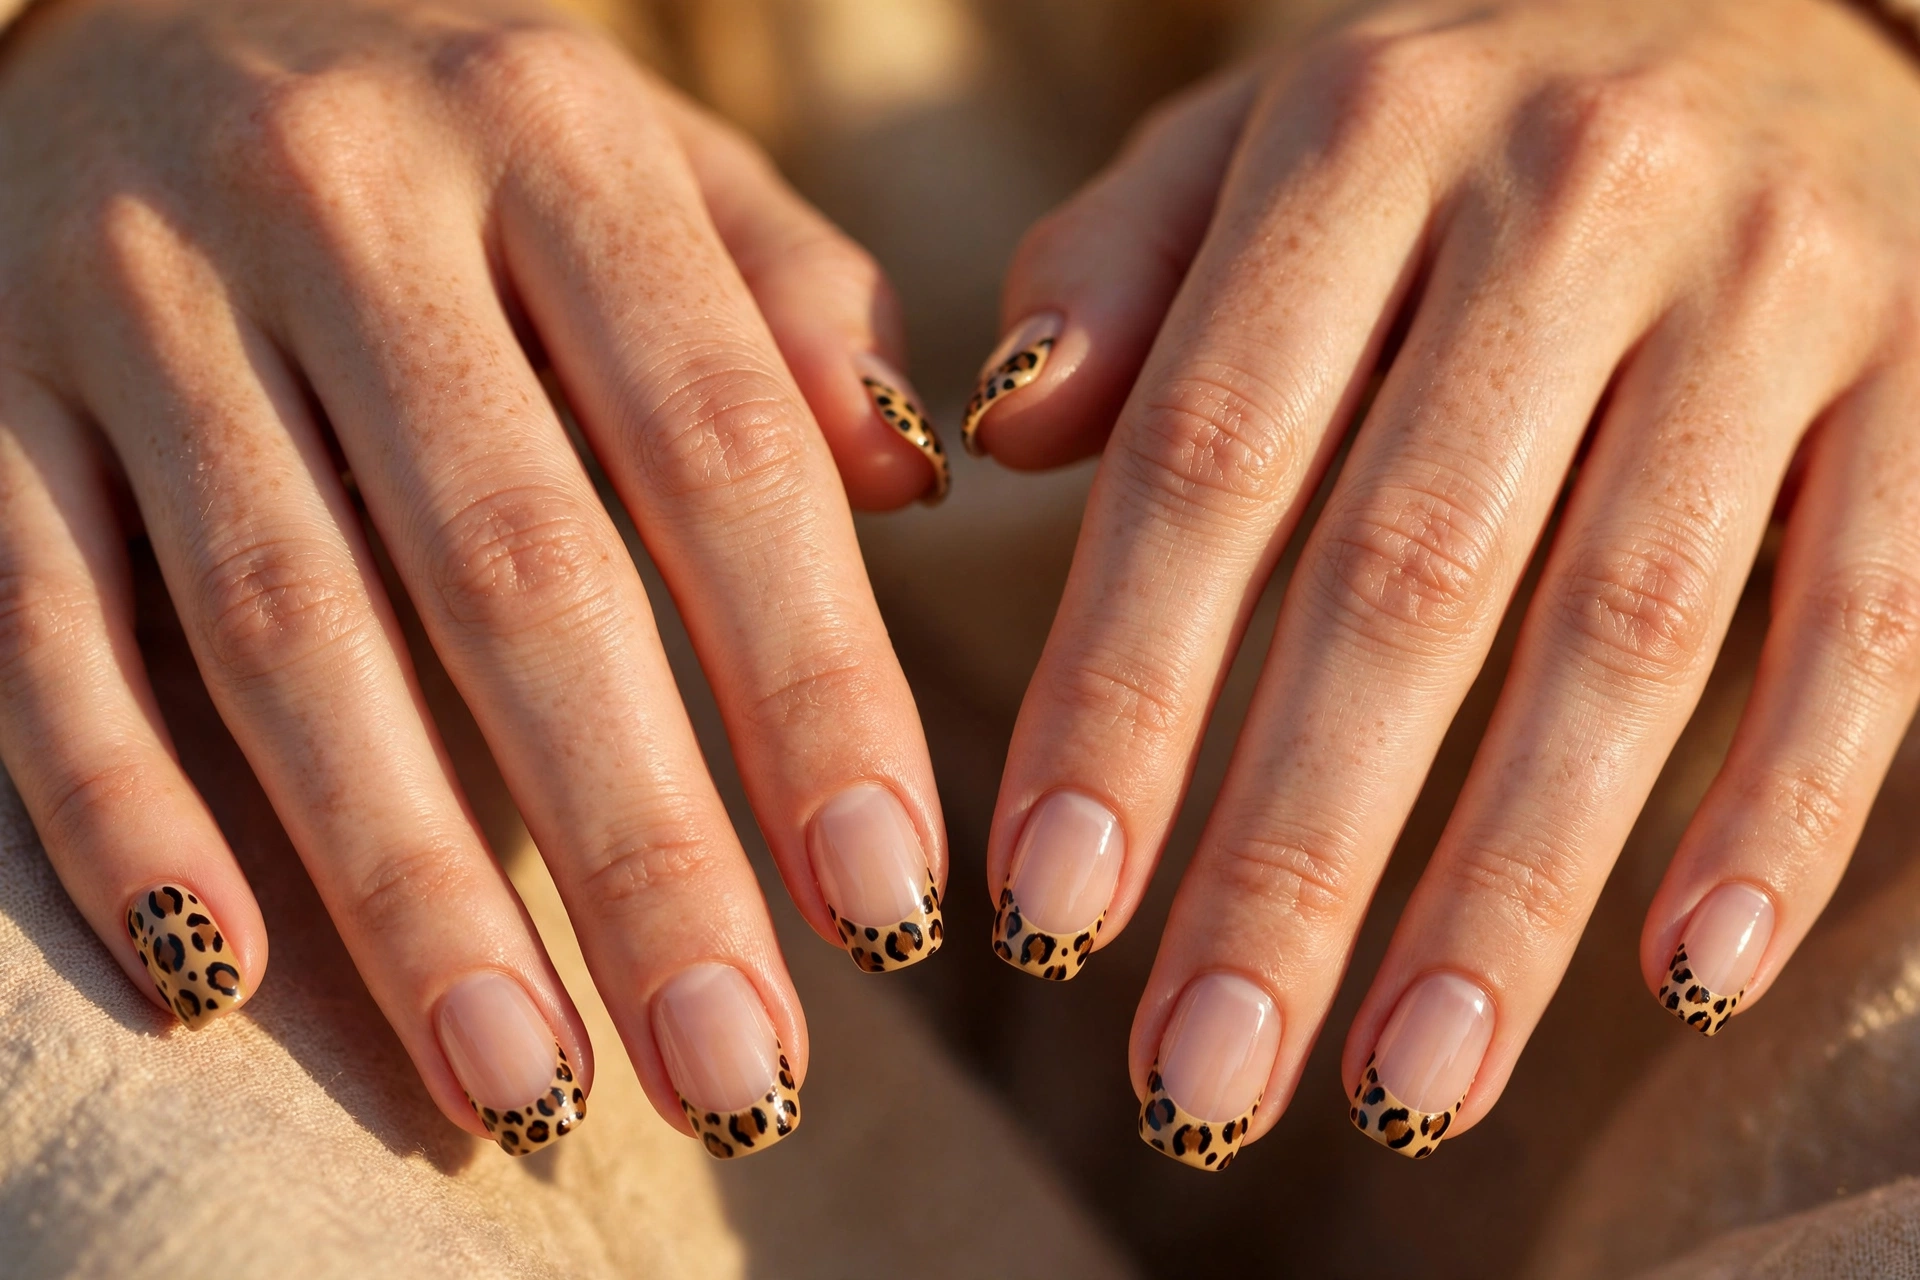
A French manicure with the white tips swapped for leopard print — the sheer pink or milky base keeps it delicate while the spotted tips add the wild edge. This is the easiest way to wear animal print in a conservative setting: from a distance it reads as a French, up close it reveals the spots. Paint the smile line first in nude, then add small leopard rosettes only on the tip area, keeping the spots smaller than you would for a full-nail print. Works on short nails and square shapes especially well. Pair it with our milky nails base shades for the sheerest version.
3. Dark Mocha Leopard
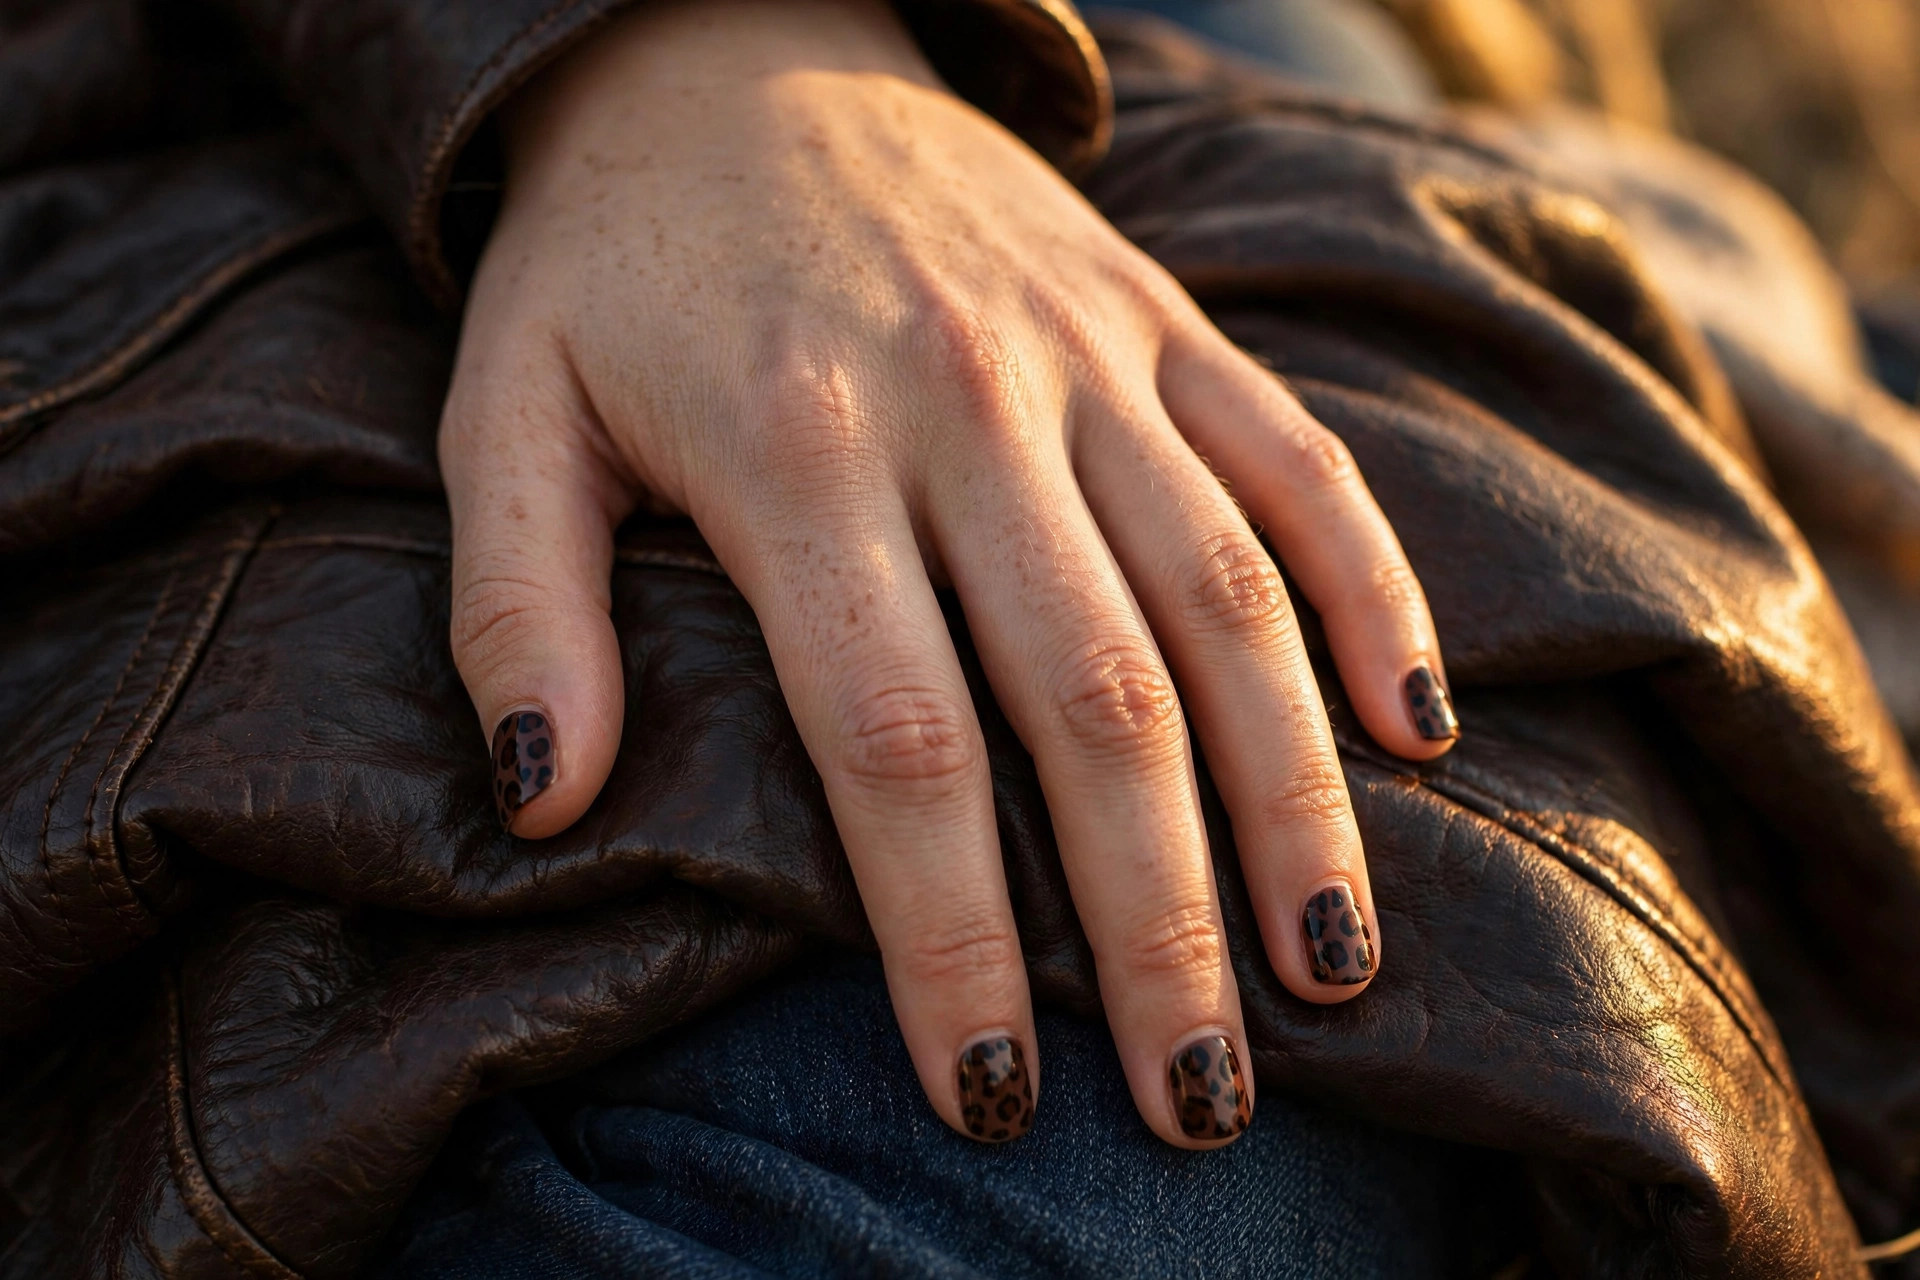
Leopard in reverse: a deep chocolate or espresso base with darker brown and black rosettes on top. The low contrast makes it moody and evening-ready — the print reveals itself in good light instead of shouting. This version suits shorter nails and darker skin tones beautifully, and it hides tip wear better than light bases. Use the same dotting-tool technique, but swap the outline color to a slightly lighter brown so the spots stay visible against the dark base. A matte top coat gives it a suede-like finish; gloss keeps it rich. See more dark-base ideas in our brown nail designs guide.
4. Leopard Accent with Gold Foil
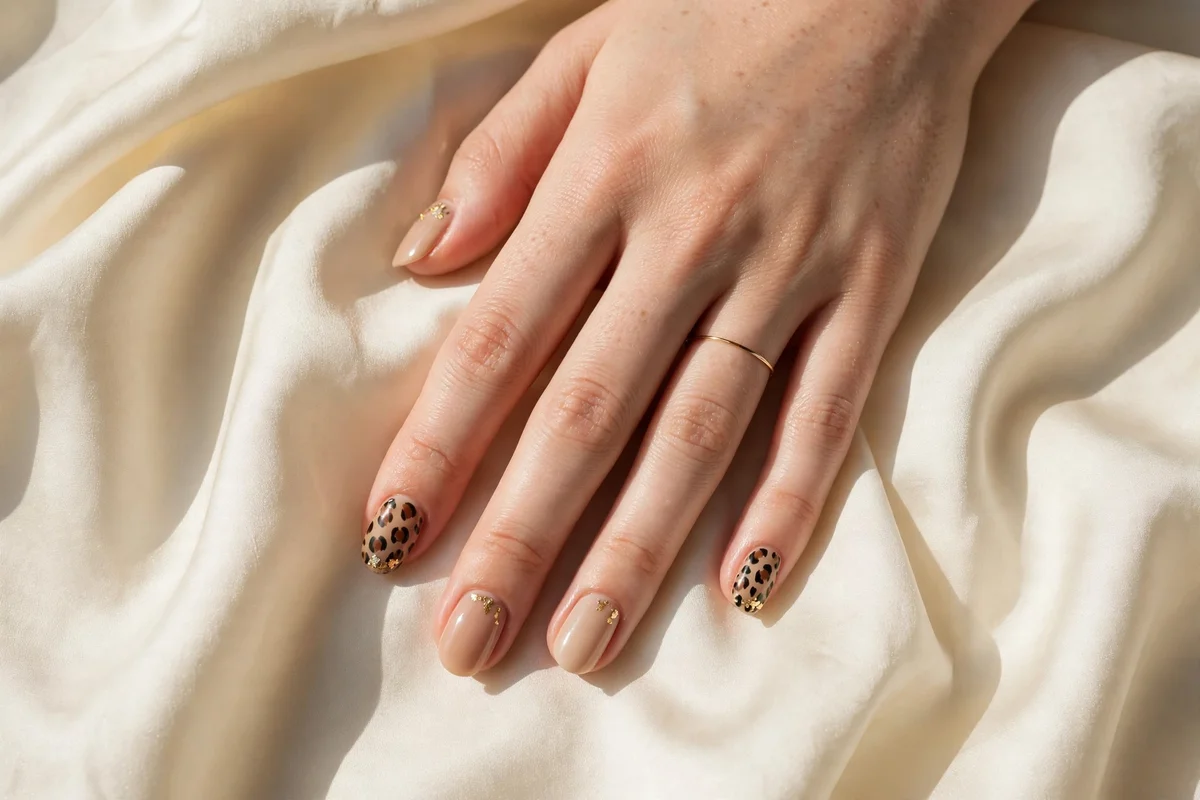
One or two leopard accent nails per hand, with the remaining nails in solid nude and tiny gold foil flakes pressed near the cuticle. The foil bridges the print and the solids so the set feels intentional rather than random. This is a good first animal print to try — you only commit to painting spots on two nails. Press the foil into a tacky top coat layer, then seal everything with a final glossy coat so the foil edges lie flat. The gold also ties into jewelry; a delicate ring makes the whole set look styled. For more metallic pairings, browse our gold nail designs.
5. Sunset Leopard (Pink & Orange)
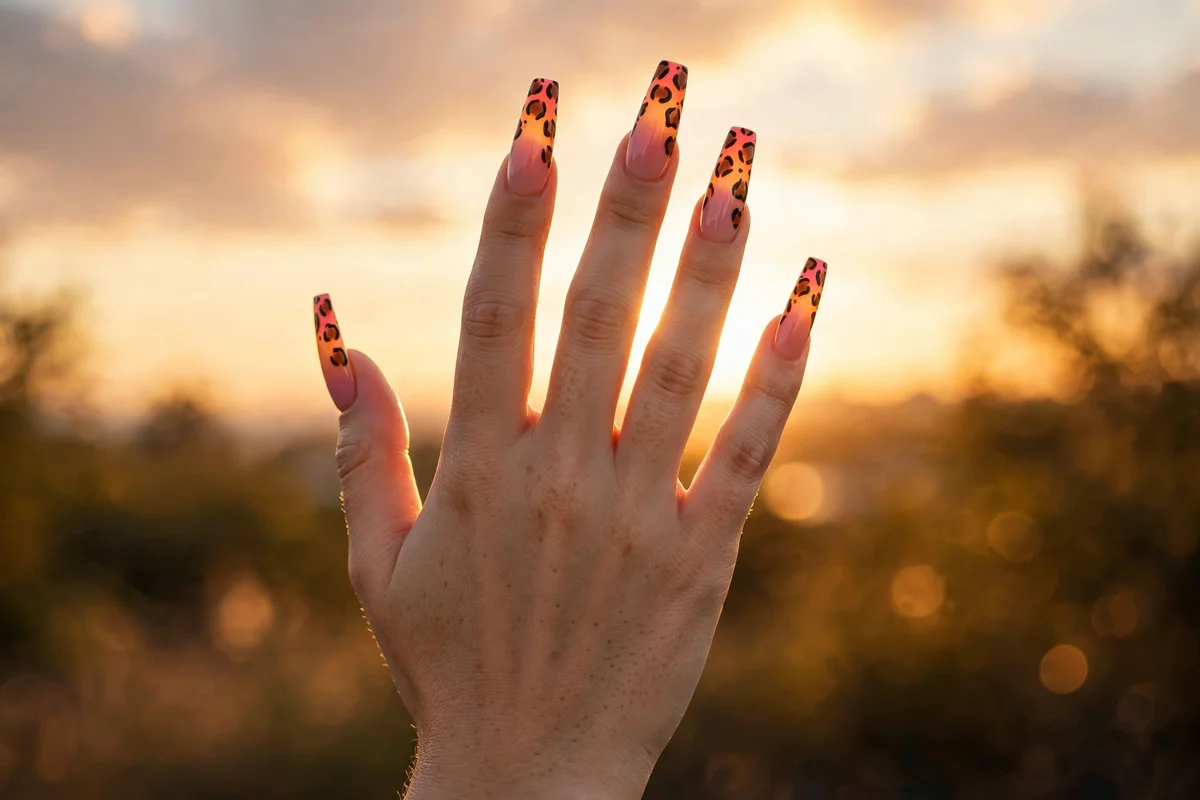
Classic leopard technique on a non-classic base: a pink-to-orange gradient with the usual brown blobs and black broken outlines on top. The warm base turns the print from safari to sunset — bold, summery, and made for longer nail shapes like coffin or stiletto where the gradient has room to blend. Do the gradient first with a makeup sponge, let it dry fully, then spot over it. Black outlines pop hardest against bright bases, so keep them crisp. This is a statement set; wear it when the outfit is simple.
Tortoise Shell
The quiet luxury of animal prints. Tortoise shell nails are built from layered translucent amber, brown, and black — they look expensive, catch light like glass, and suit settings where leopard would feel too loud.
6. Classic Amber Tortoise
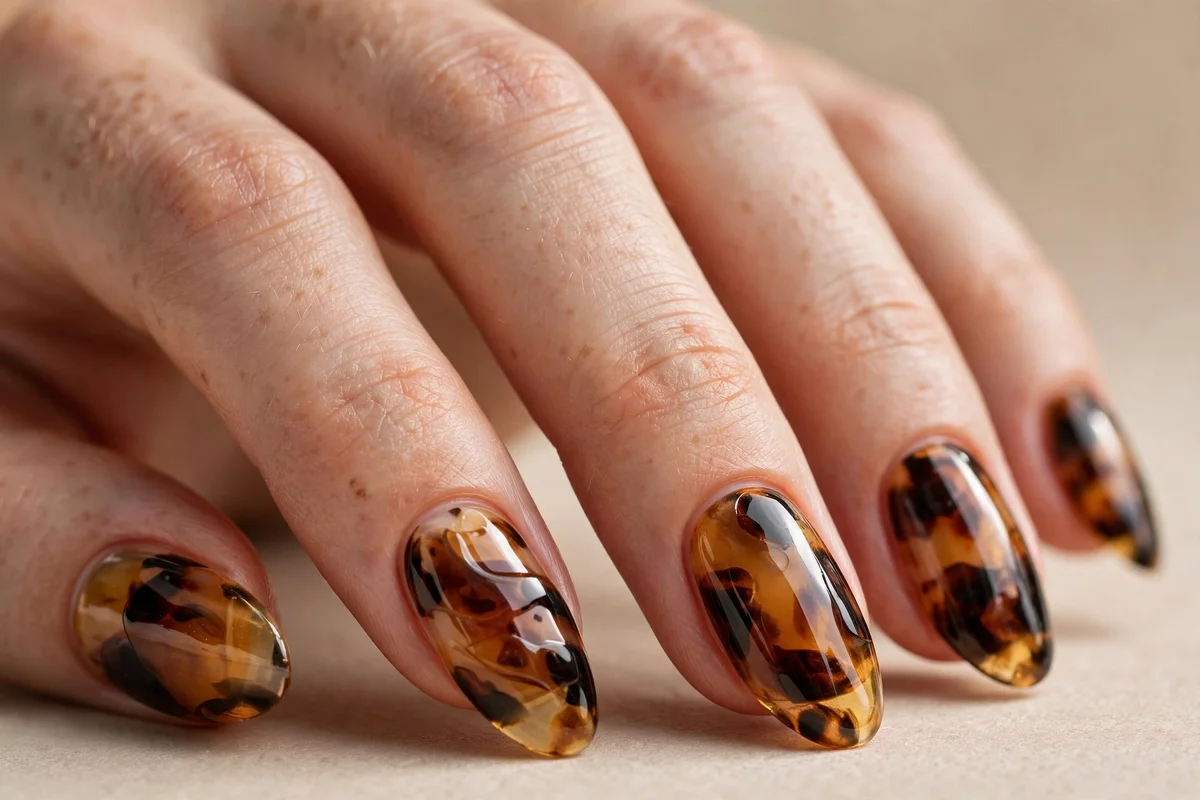
The timeless version: an amber jelly base with irregular patches of caramel, chocolate, and near-black, melted together under a second jelly coat and sealed in high gloss. Short to medium almond nails are the classic canvas — the shape echoes the organic patches. It reads elegant on every skin tone and genuinely passes in formal and office settings. The jelly-layer method above is the whole technique; the most common mistake is skipping the second jelly coat, which is what blends the patches into that deep, glassy look. Our jelly nails guide covers the translucent polishes that make this work.
7. Blonde Tortoise
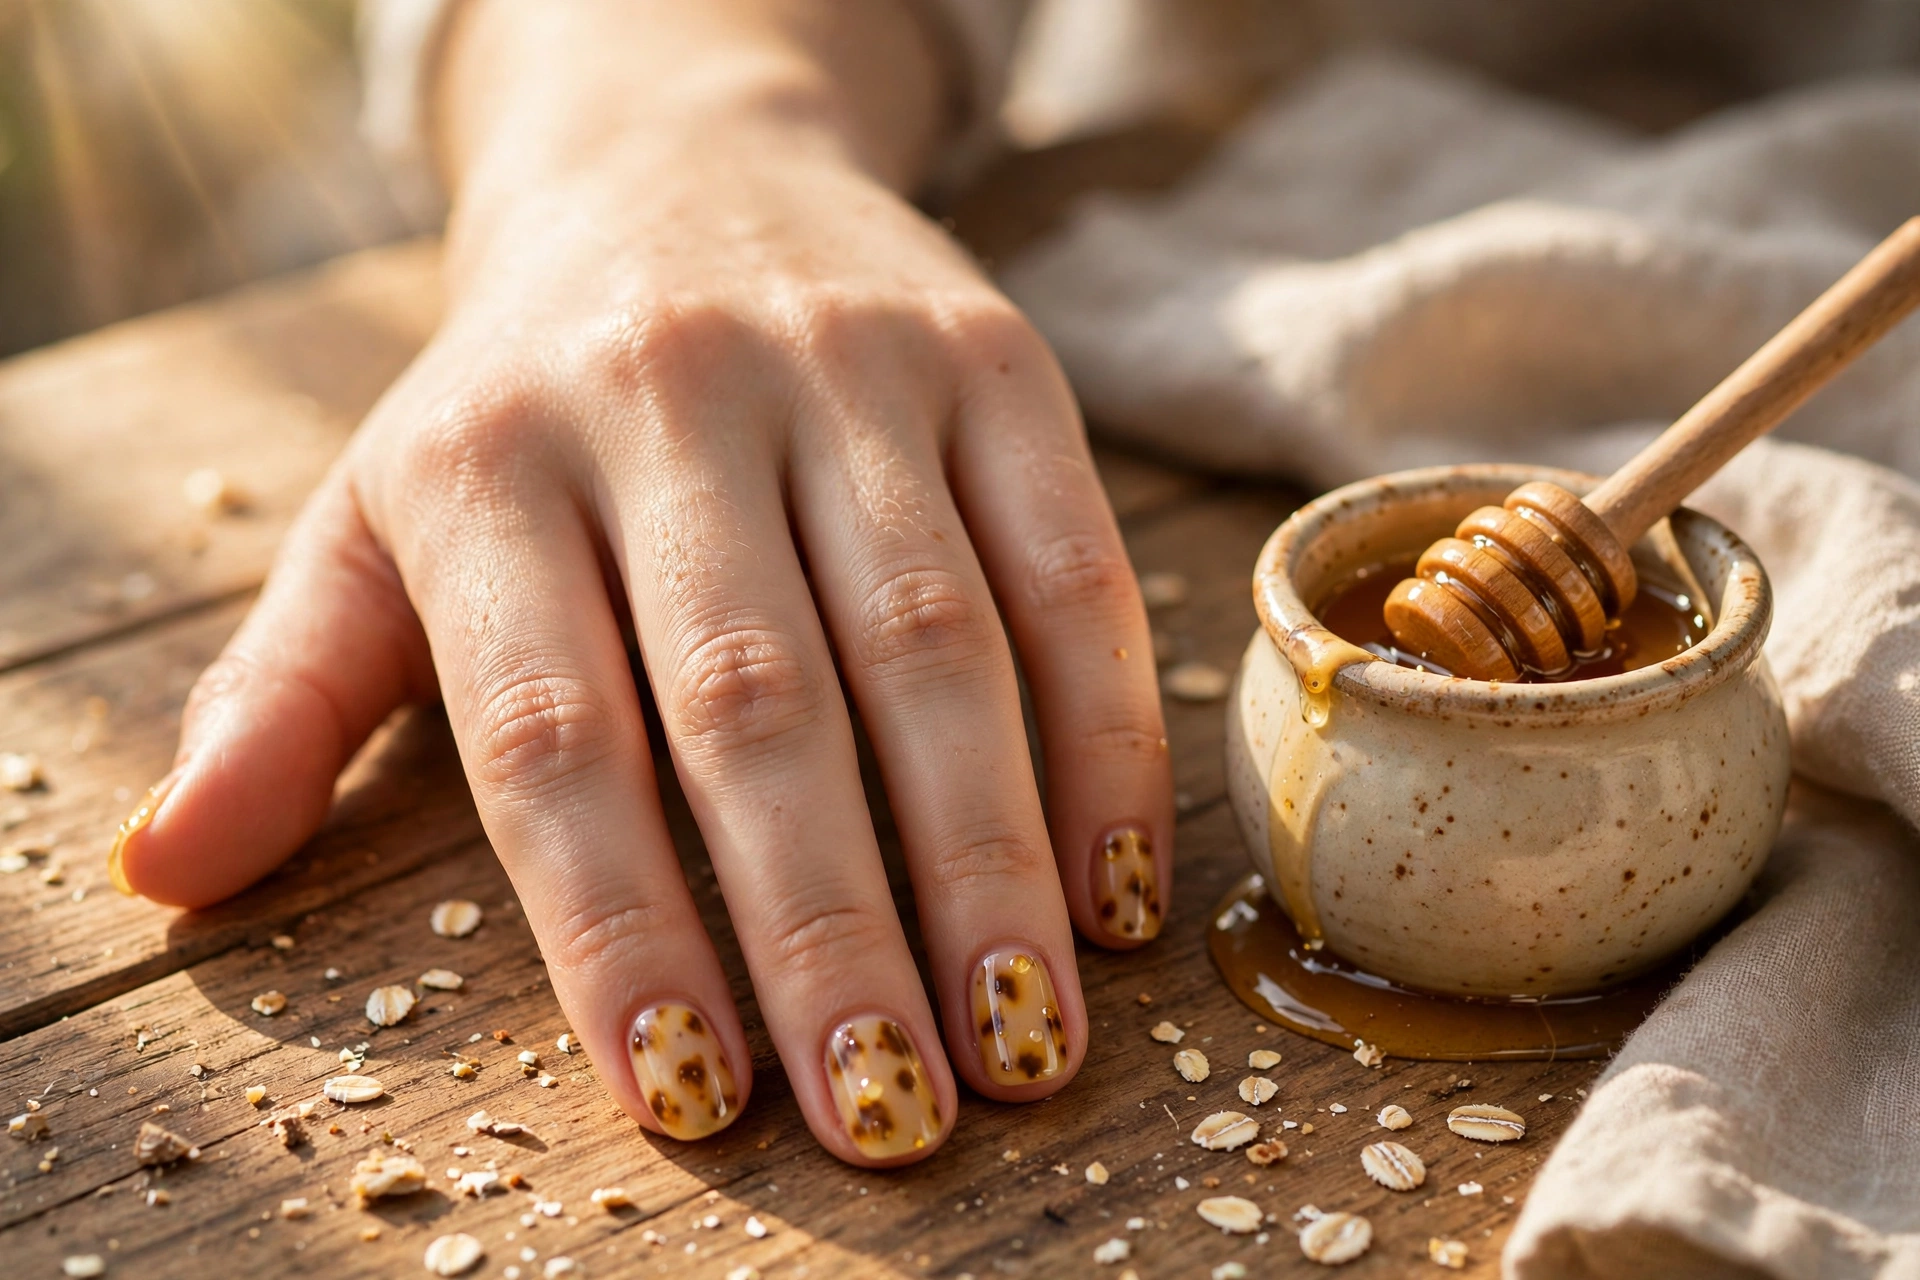
A lighter take using honey, tan, and soft brown instead of the traditional deep amber and black. Blonde tortoise suits fair to light skin tones and spring wardrobes — it has the same glassy depth as classic tortoise but feels airier. The technique is identical, just shift every color one shade lighter and use a sheer nude jelly as the base. Because the contrast is lower, take care to vary the patch sizes; uniform patches on a light base can look muddy. Gloss top coat is still essential.
8. Tortoise French Tips
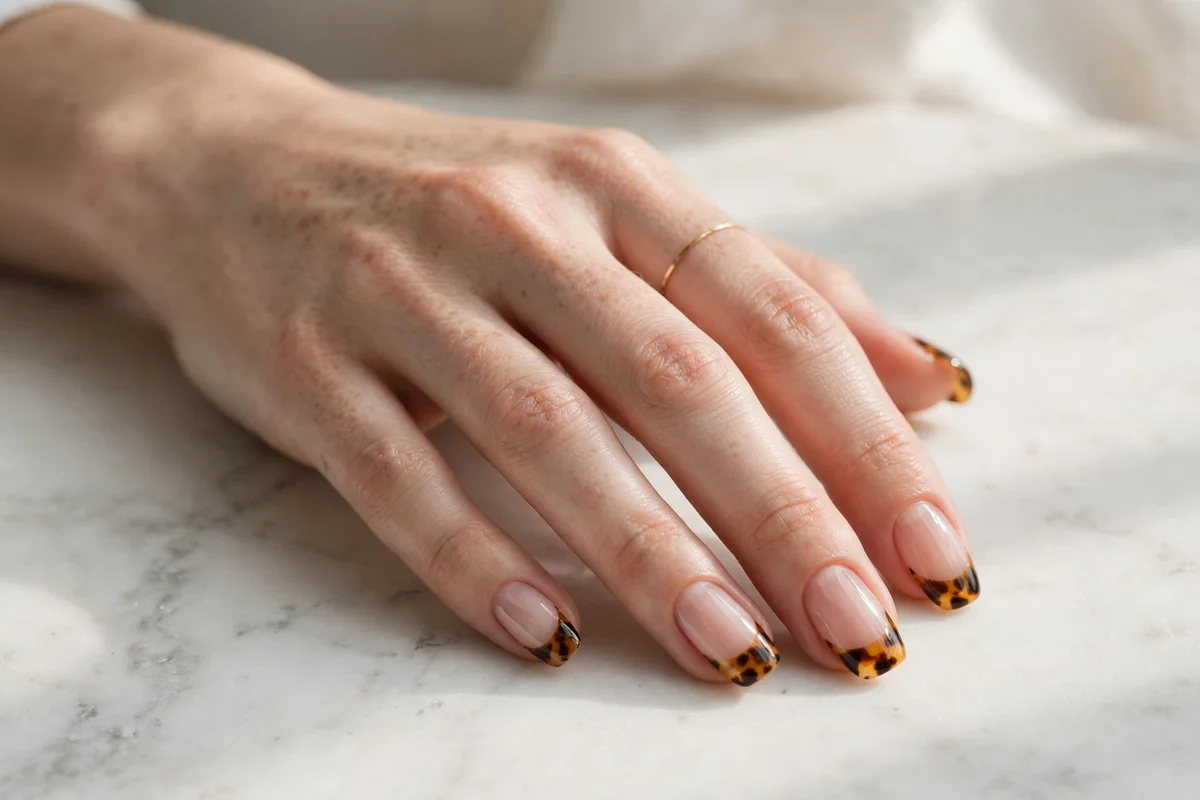
The tortoise pattern confined to the French tip zone over a sheer nude base. It gives the elegance of a French with the richness of tortoise — and it is more forgiving than a full tortoise nail, since you are only layering on the tips. Paint the tip area slightly thicker than usual to give the jelly layers room to build depth. This design elongates short nails visually and pairs well with both casual and formal outfits. It also grows out gracefully, since the base near the cuticle stays sheer.
9. Tortoise with Gold Veining
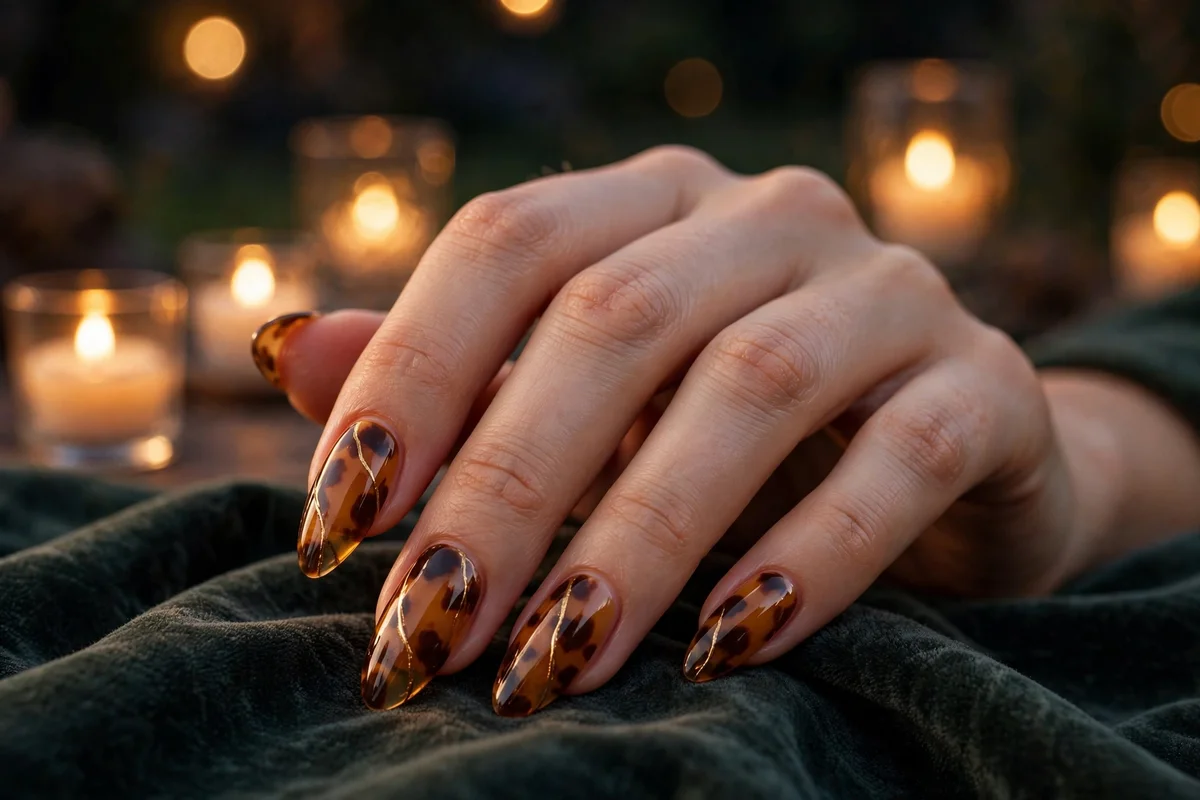
Classic amber tortoise with thin gold metallic lines brushed through the patches before the final jelly coat. The gold reads like the veining in real polished shell and catches light when the hand moves. Apply the gold with a fine striping brush while the dark patches are still slightly tacky, then trap everything under the second jelly layer. Keep the veining sparse — three or four fine lines per nail is enough. This is an evening version of tortoise; it photographs beautifully under warm light.
Cow & Dalmatian Prints
The playful end of the animal print family. Cow patches are large, organic, and irregular; dalmatian is the same idea at a smaller scale with denser speckling. Both are among the easiest prints to paint freehand.
10. Classic Black-and-White Cow
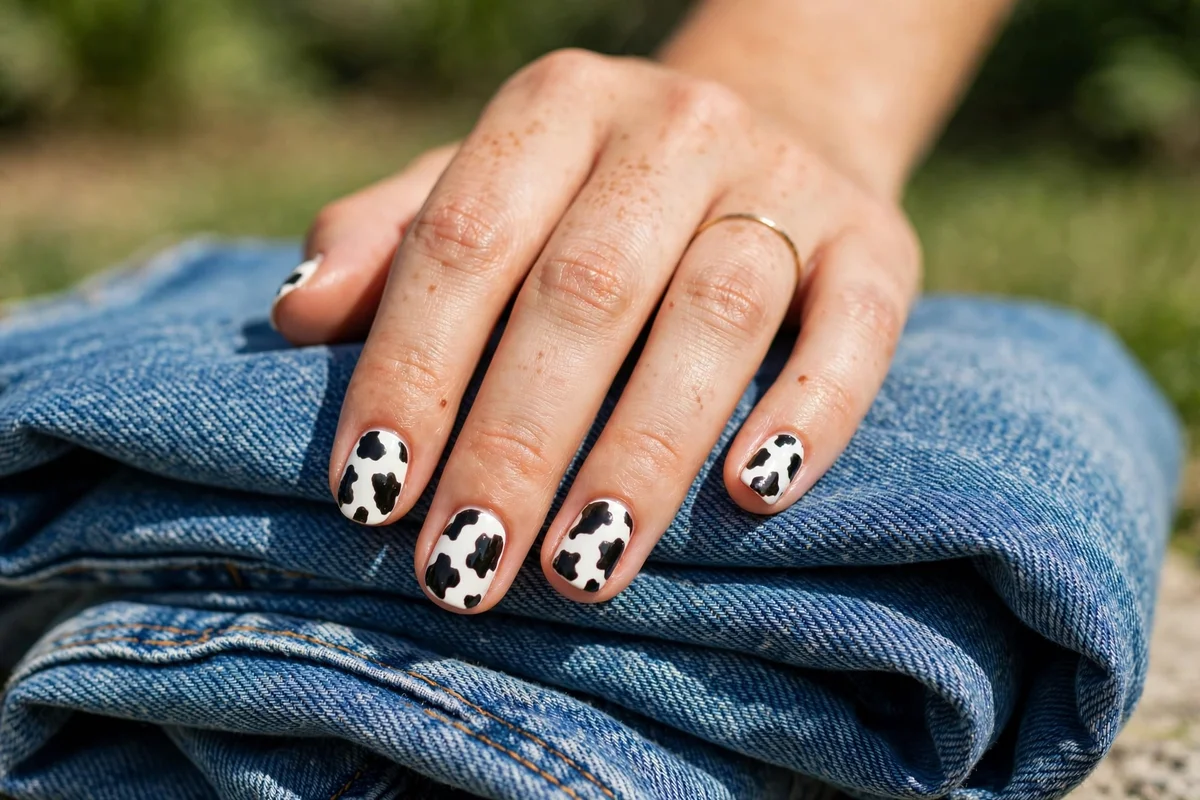
Crisp white base, irregular black patches with wobbly organic edges — the print everyone recognizes instantly. The freehand blob method above is the entire technique, and a slightly shaky hand genuinely helps; perfect edges would look printed, not painted. This is a bold, graphic look that suits medium to long nails and reads playful rather than elegant. It pairs naturally with monochrome outfits and denim. Keep patches off the cuticle line and vary their sizes across nails so no two match.
11. Chocolate Milk Cow
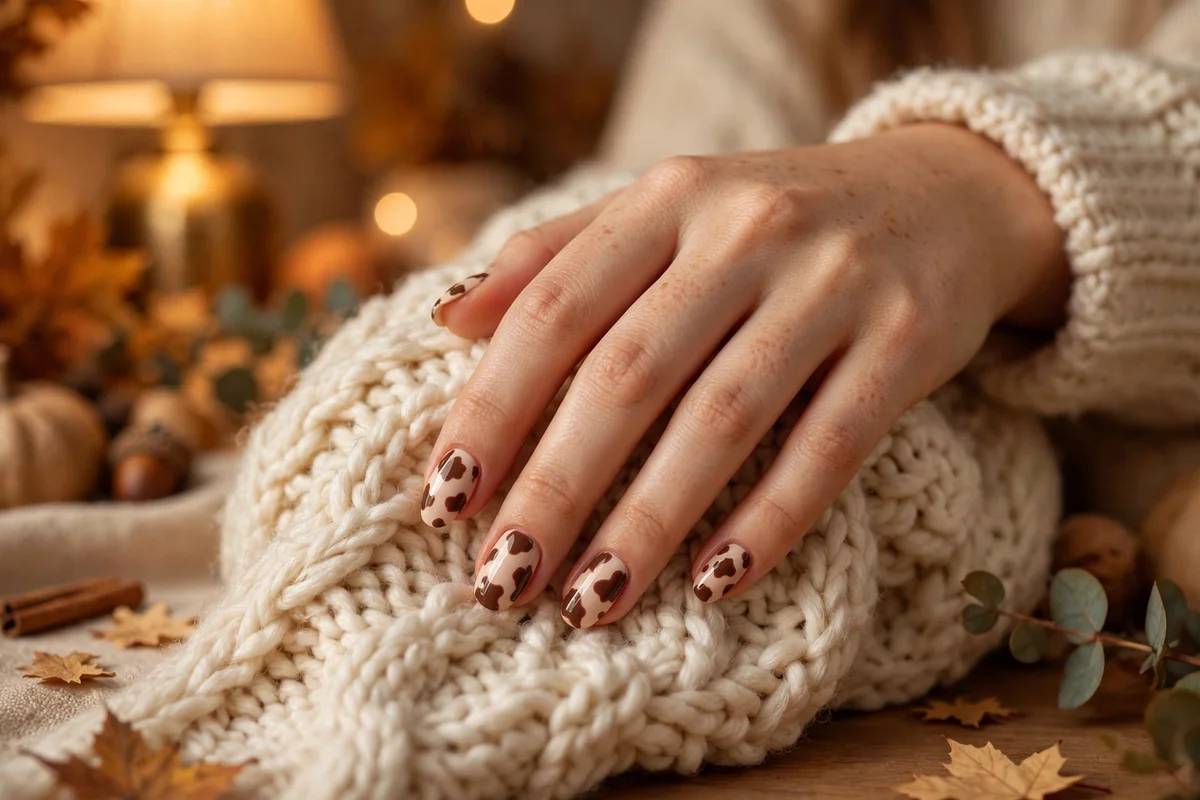
Cow print softened: chocolate-brown patches on a creamy nude base instead of stark black on white. The lower contrast makes it far more wearable day to day — it reads as a warm abstract pattern from a distance. This version flatters warm and neutral skin tones and suits shorter nails, since the softer colors don’t demand as much visual space. Match your base to our brown nail designs palette — caramel and latte shades work best.
12. Pastel Cow Print
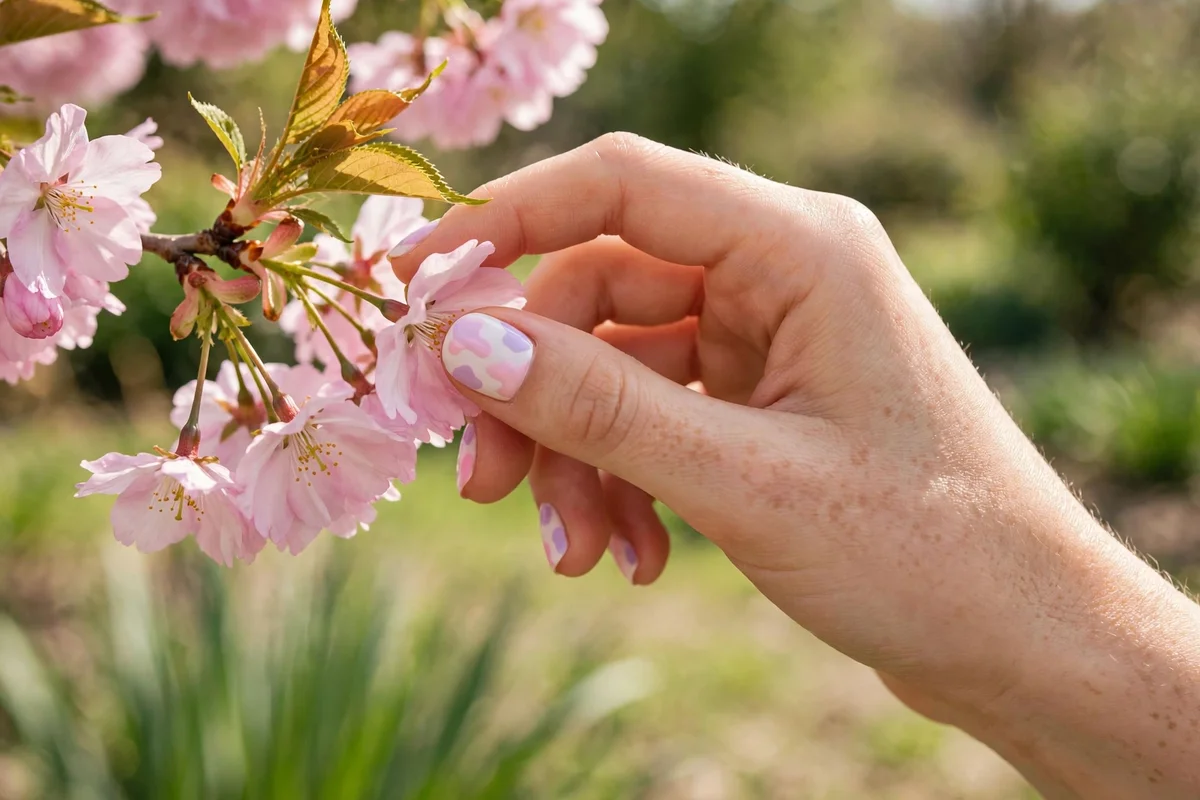
Cow patches in pastel pink, lavender, and baby blue on a milky white base. The technique doesn’t change — only the palette does — but the effect is completely different: sweet and springlike instead of western. Use one pastel per nail or mix two across the set; three or more pastels on one nail gets busy. Short, rounded nails suit this best. It is a good choice for anyone who finds classic cow print too stark but likes the organic shapes.
13. Cow Print French Tips
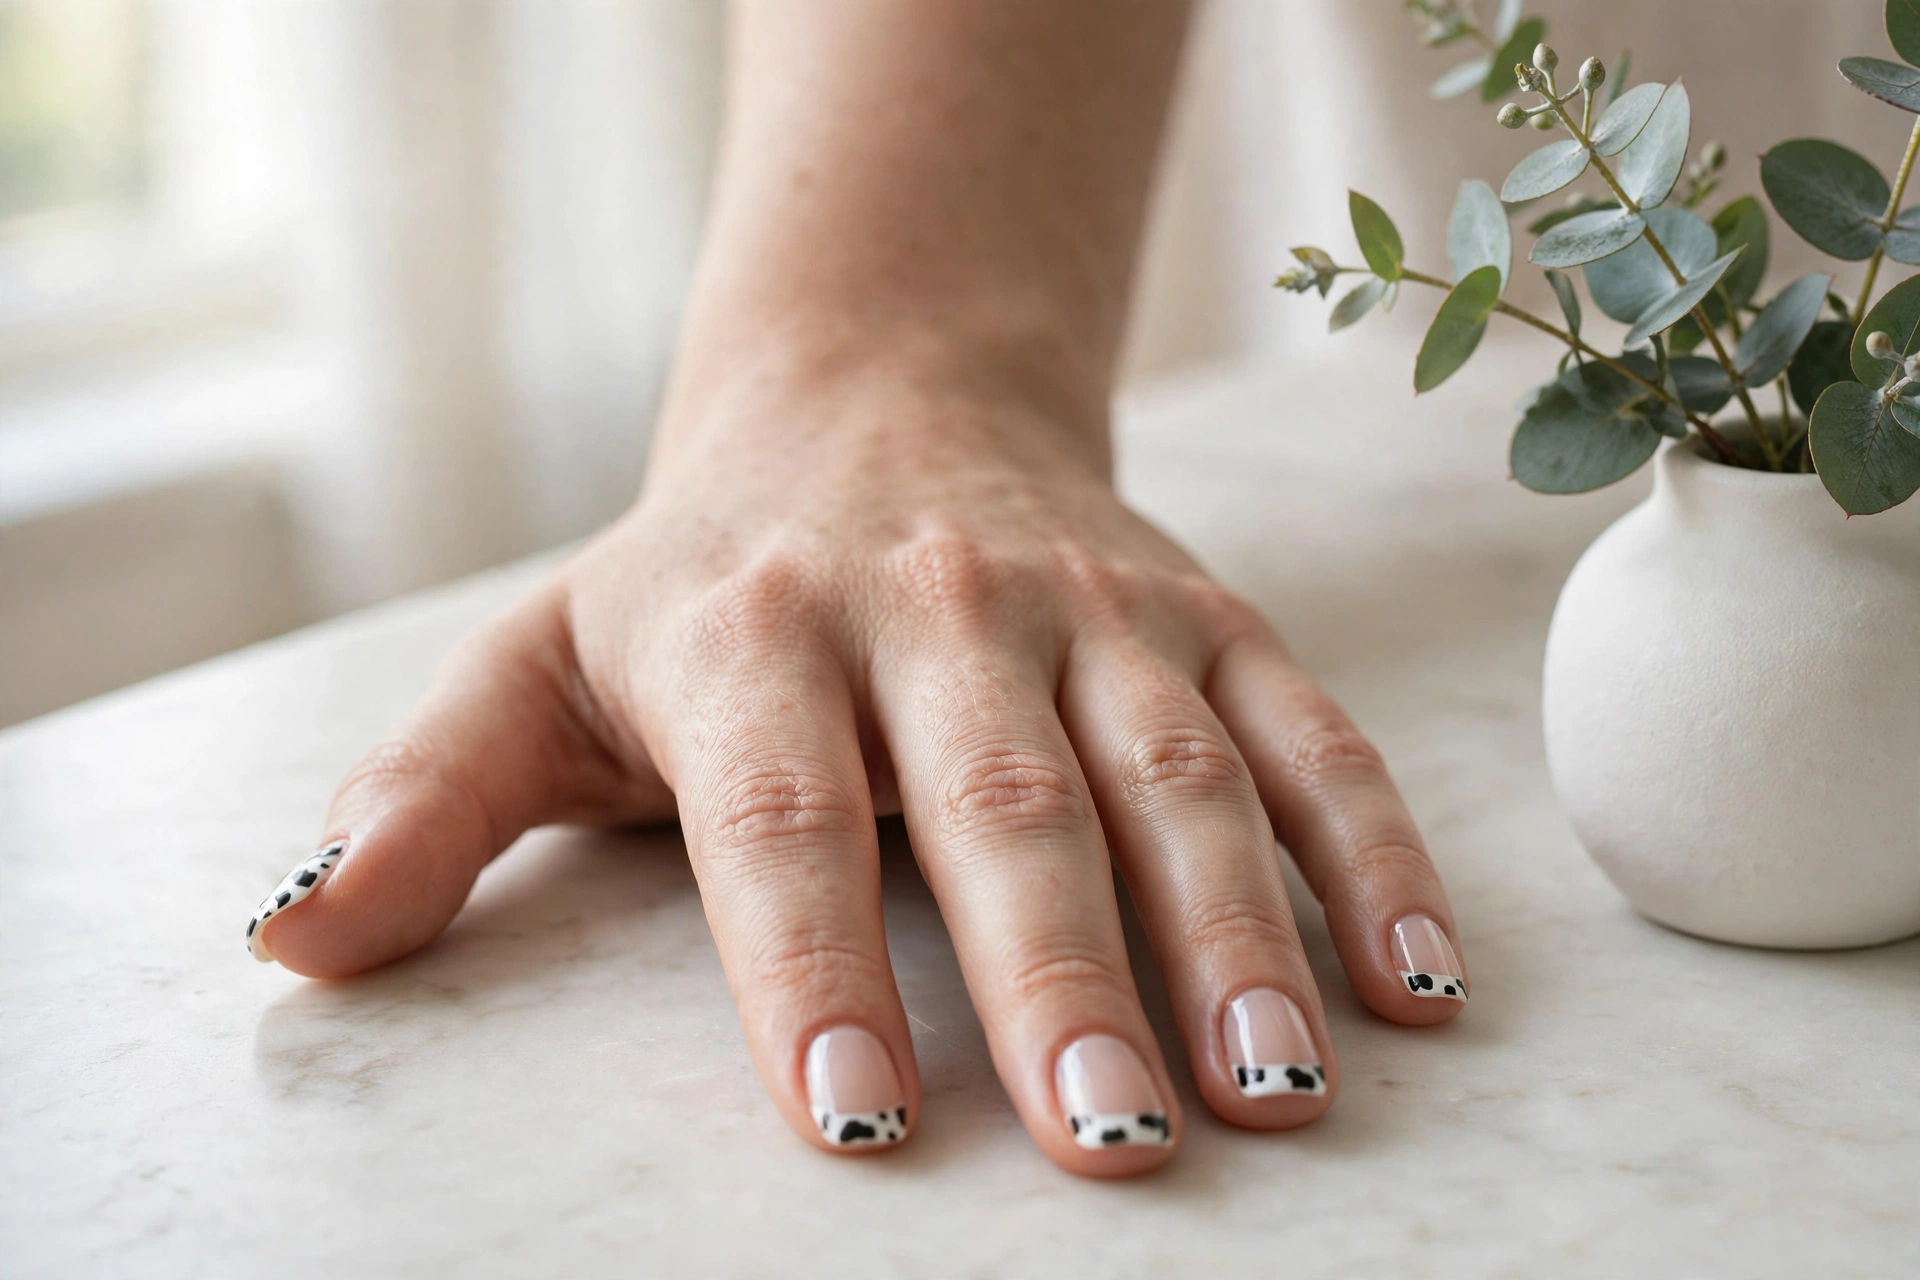
Cow patches confined to the French tip over a sheer or white base. From a distance it reads as a French manicure; the patches reveal themselves up close. Keep the patches small — the tip zone is narrow, and oversized patches overwhelm it. This is the most office-friendly way to wear cow print and a smart pick for short nails, since the print sits at the free edge where there is the most room. Seal with gloss; matte mutes the black-and-white contrast that makes this design pop.
14. Dalmatian Speckles
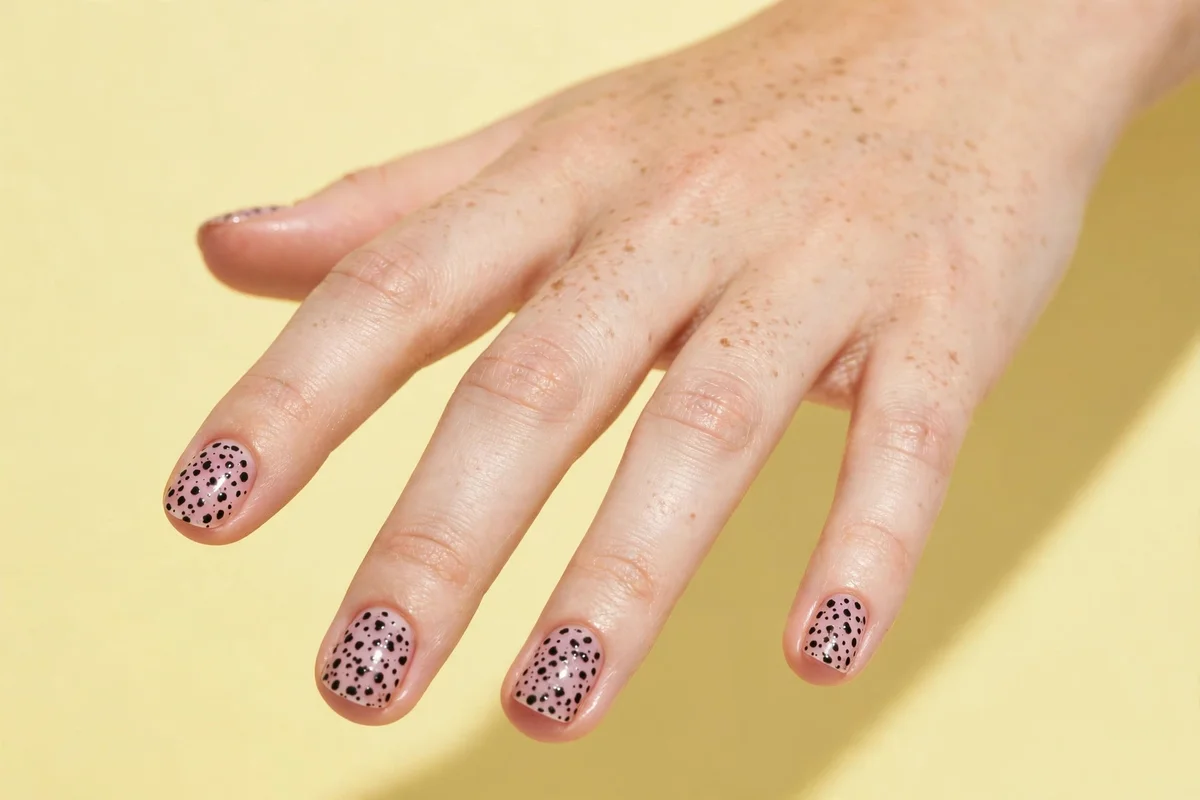
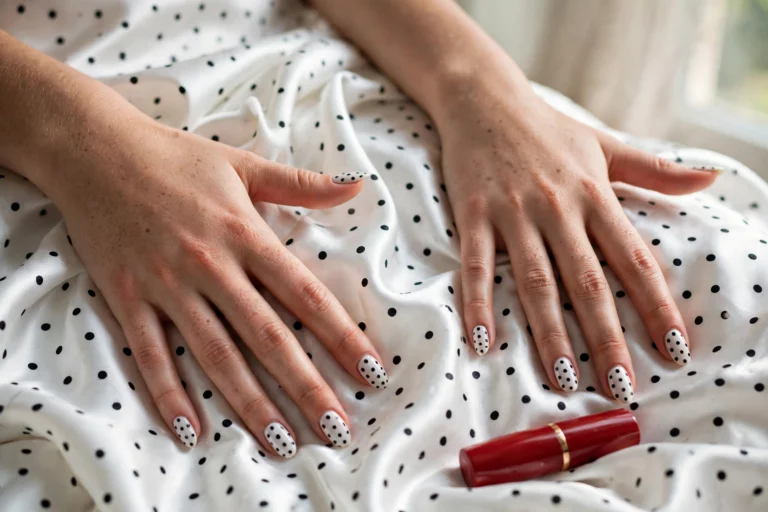
Dalmatian is cow print’s smaller sibling: a sheer pink or white base densely speckled with small black dots of varying sizes — no large patches, no outlines. It is the easiest print on this list; the whole technique is dotting random dots with a dotting tool and walking away. The density is what sells it — sparse dots look like polka dots, so pack them in, especially near the tips. It suits short nails and reads fun and graphic. A good beginner’s first animal print before attempting leopard.
Snake, Zebra & Exotics
The statement prints. Snake scales, zebra stripes, and croc texture demand more precision than spots, so they work best as accent nails or on longer shapes — but they deliver the most drama per nail.
15. Python Scales
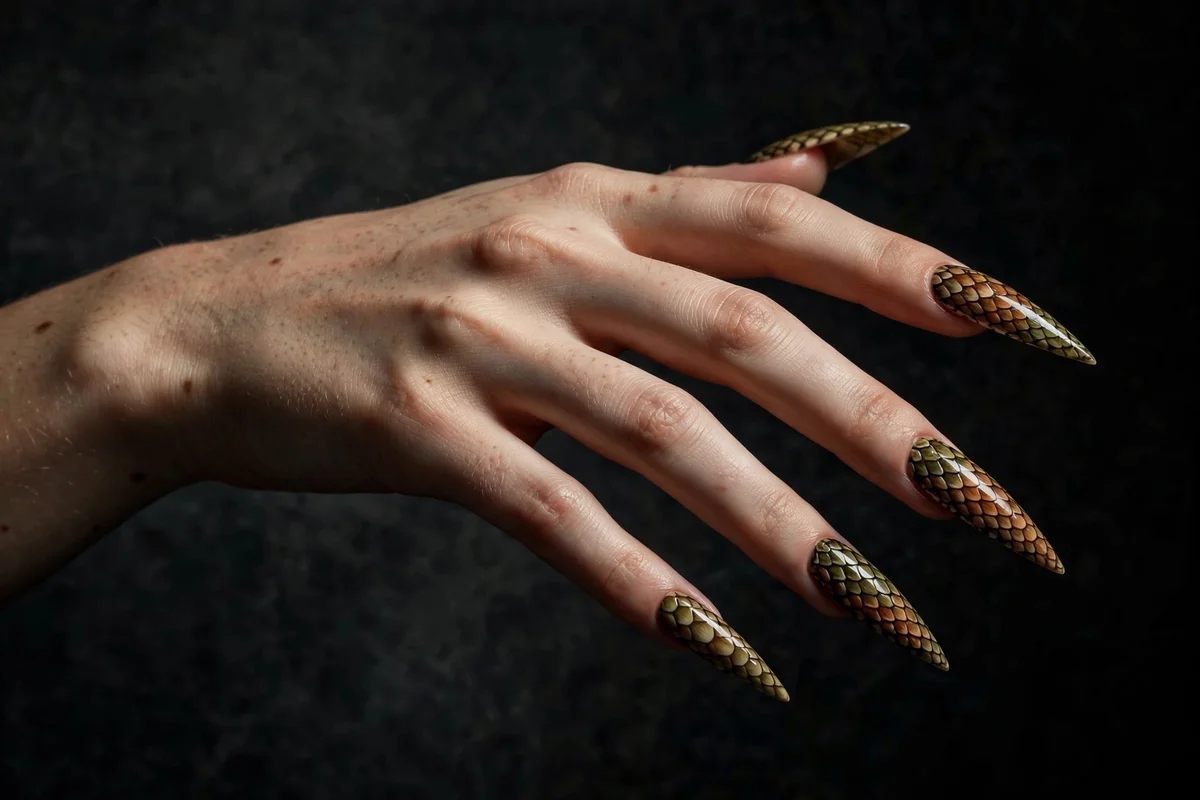
Hand-painted python: overlapping scale shapes in tan, brown, and olive, each scale outlined and shaded to suggest dimension. This is the hardest print in this guide — the scales need to follow the nail’s curve in neat rows, which takes a steady hand and a fine detail brush. It belongs on long shapes (stiletto, coffin, long almond) where the rows have room to develop. As a full set it is a commitment; as one or two accent nails against solid olive or nude, it is striking without being overwhelming. Expect 40 minutes or more per hand.
16. Zebra Stripes
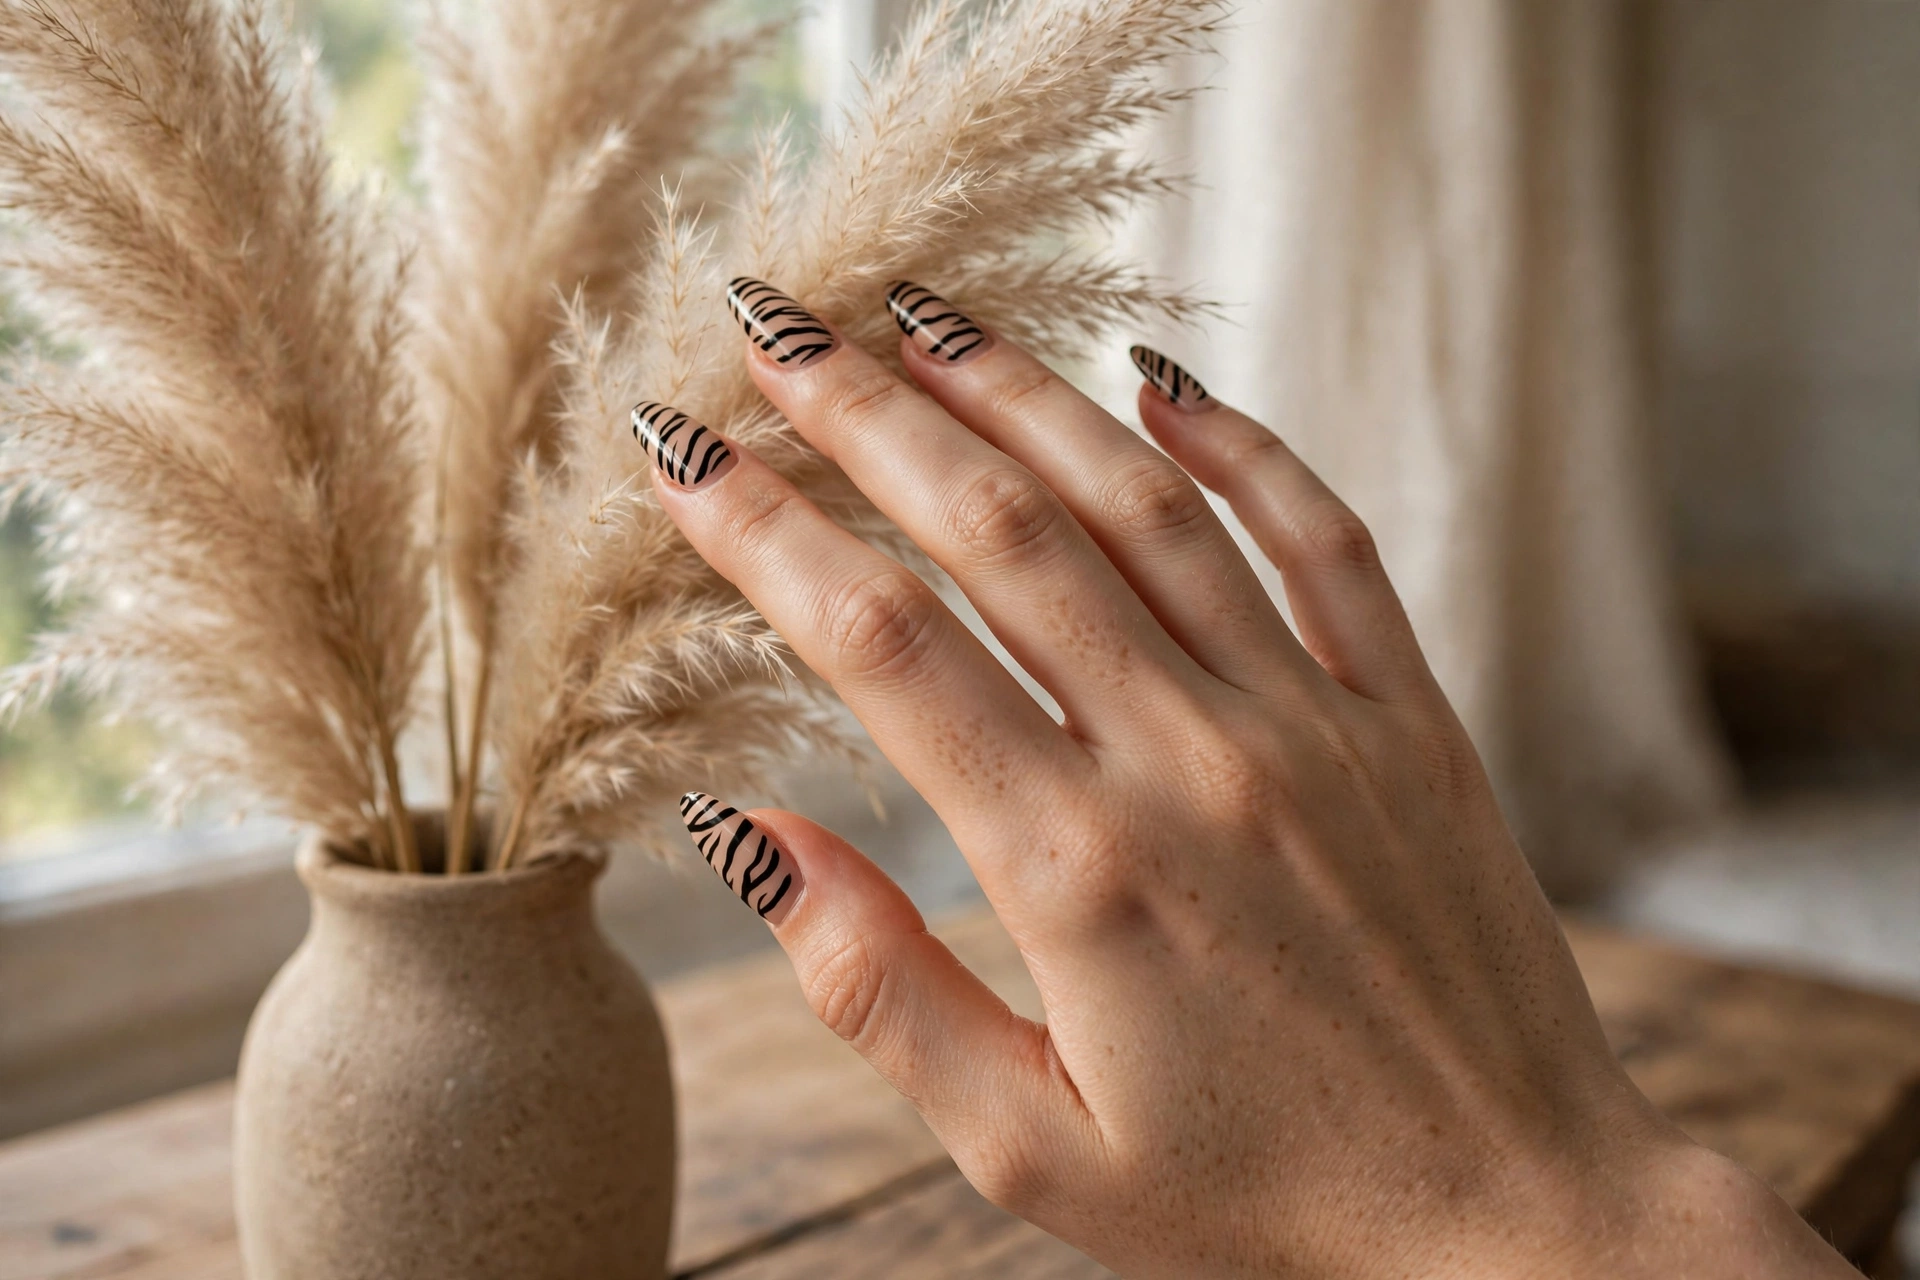
Bold black stripes with tapered, pointed ends over nude or white — zebra is graphic where leopard is organic. The key detail is the taper: real zebra stripes narrow to sharp points, so drag each stripe to a fine tip with a detail brush rather than leaving blunt ends. Stripes should angle across the nail, not run straight down, and vary in width. A nude base keeps it wearable; white makes it high-contrast and bold. Zebra suits medium to long nails and looks sharp on square and coffin shapes. For a softer take, try brown stripes on tan.
17. Croc Texture
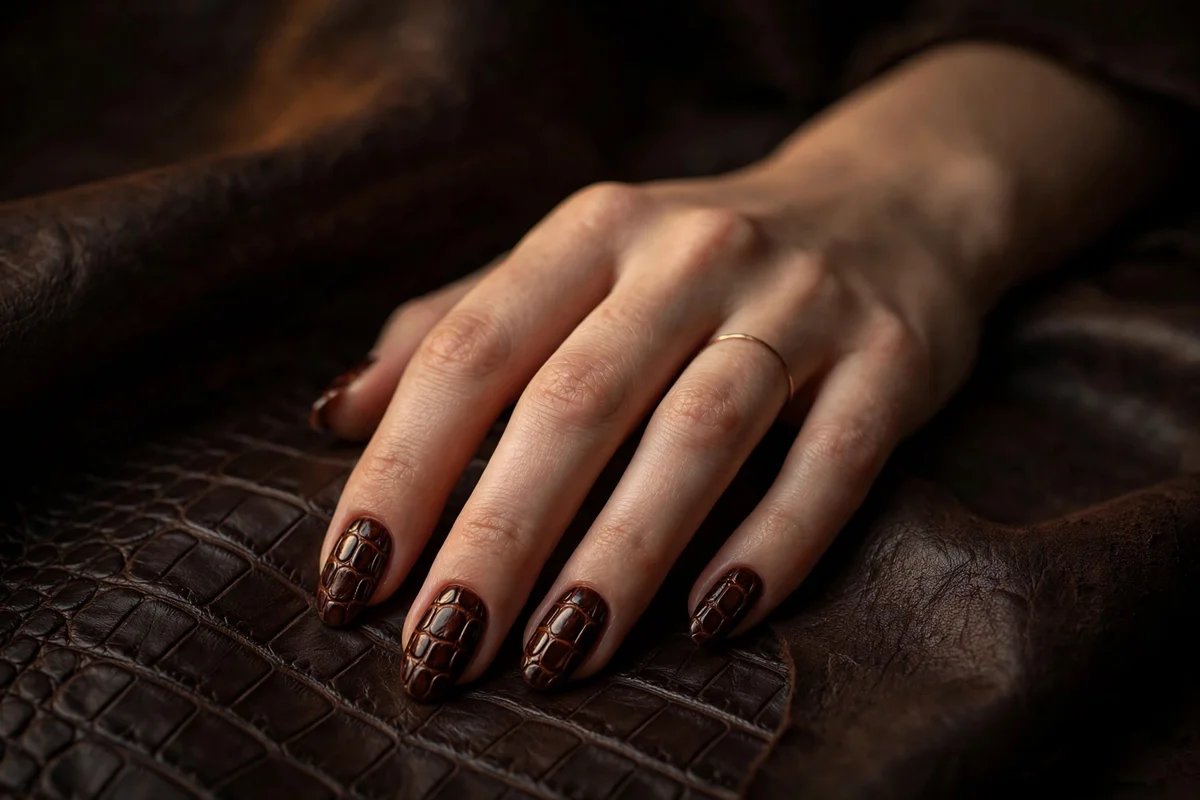
The luxury-leather look: a croc-scale pattern in deep brown or black with a glossy, slightly raised finish that mimics embossed leather. The common DIY method is stamping a croc pattern or painting irregular rounded rectangles, then building a thick glossy top coat — some nail artists add a drop of clear builder gel per scale for real dimension. Keep it to accent nails or a full set in dark tones; bright croc colors veer costume. It pairs with gold jewelry and structured outfits, and it is a natural fit for fall. Matte top coat over dark croc gives a suede-leather alternative.
18. Safari Mix Medley
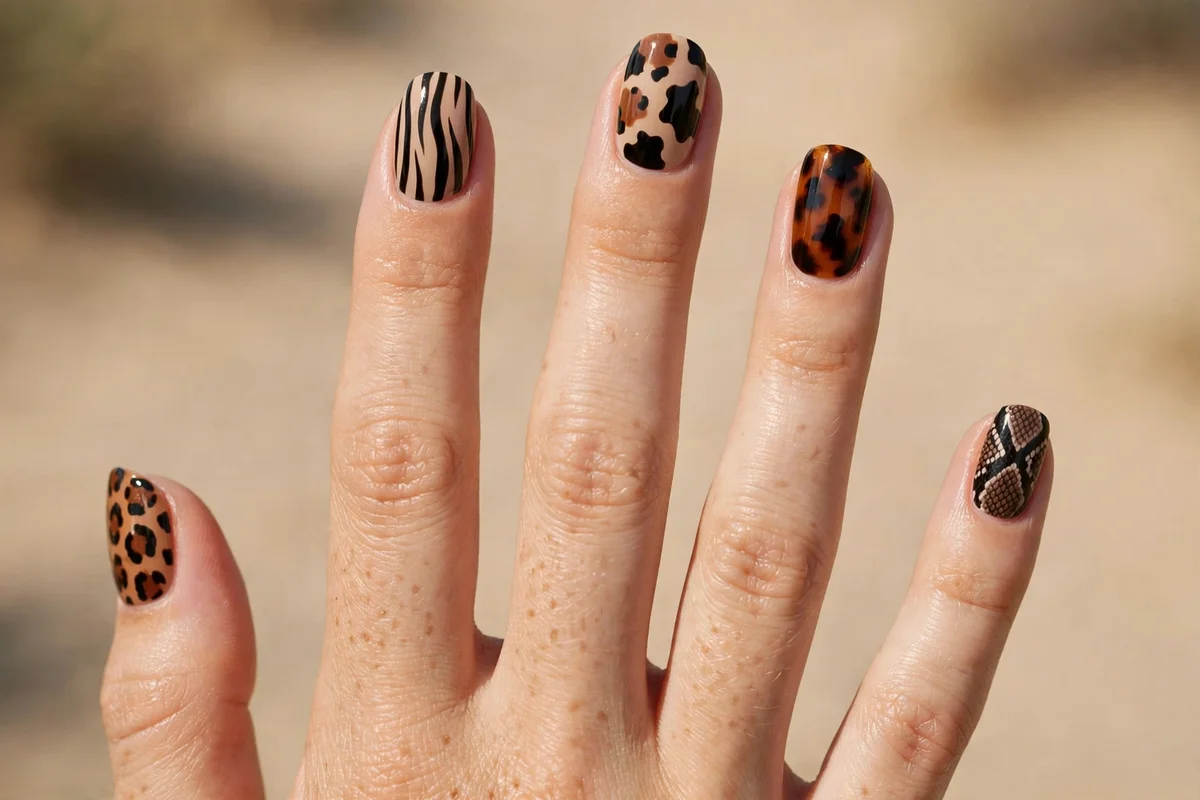
One print per nail — leopard, zebra, cow, tortoise, and snake across the five fingers, tied together with a shared color palette (all warm browns, or all black and white). The mix only works if the palette unifies it; five prints in five unrelated colors looks chaotic rather than curated. This is the maximalist choice and the best use of the techniques in this guide, since each nail is a small canvas. Keep nail length medium or longer so each print is legible, and finish every nail with the same top coat so the set reads as one manicure.
How to Choose the Right Print for You
Answer first: pick tortoise for elegance and offices, leopard for everyday versatility, cow or dalmatian for playful looks, and snake or zebra for statements. Match the base shade to your skin tone and keep bold prints to accent nails if you want subtlety.
Start with your setting: tortoise shell passes anywhere, including conservative workplaces, while cow print and zebra read casual and bold. Then consider your nails — short nails suit smaller-scale prints (dalmatian speckles, mini leopard, tortoise tips), while long nails carry large cow patches and python rows. Beginners should start with dalmatian or cow print, which need only a dotting tool and a steady-enough hand; leopard comes next once you can control the broken outline; tortoise and python reward patience and practice. If you are unsure about shapes, our nail shapes guide breaks down which shape flatters each design. And for a seasonal take on wild prints, our Halloween nail designs include darker, moodier animal print ideas.
Two Prints Readers Keep Asking About: Tiger Stripes and Bambi Speckles
Two prints have joined the animal print rotation in 2026, and the good news is that you already know how to paint both — each one is a close cousin of a print in this guide.
Tiger stripes are zebra’s warmer sibling. Use the same tapered-stripe technique as design 16, but work over a warm base — burnt orange, caramel, or gold — and make the stripes shorter, more widely spaced, and more curved than zebra’s. Tiger marks taper at both ends and rarely cross the whole nail; think brushstrokes, not stripes on a shirt. A glossy finish keeps it rich; a matte top coat over an orange base reads surprisingly modern.
Bambi speckles (also called fawn or deer print) are the softest print in the family: tiny cream and white flecks scattered over a warm caramel or soft brown base, using exactly the dotting method from design 14 — just swap dalmatian’s black-on-pink for cream-on-caramel and keep the speckles smaller and sparser. It is animal print for people who find leopard too loud and cow print too literal, and it suits short nails and sheer, tonal outfits. If leopard is the statement coat, Bambi is the cashmere sweater.
The 2026 Update: Animal Print Over Cat-Eye and Velvet Bases
The newest way to wear every print in this guide is over a magnetic cat-eye or velvet gel base. The shifting magnetic shimmer sits underneath the pattern and moves in the light, so leopard spots seem to float and tortoise shell gains a third layer of depth. If you use gel, the order matters: apply and cure the magnetic layer completely first, then paint your print on top in the usual way, keeping the pattern a little sparser than normal so the magnetic glow shows through the gaps. Leopard and tortoise benefit most; dalmatian and cow print need the lightest hand, since dense speckling hides the base entirely. With regular polish you cannot reproduce the magnetic shift, but a fine shimmer or pearl top coat under your print gives a softer version of the same depth.
Getting Animal Print at the Salon: What to Ask For
Not everyone wants to paint their own rosettes. If you are booking instead of DIY-ing, bring a photo of the exact design — “leopard” means ten different things at ten different salons — and say which finish you want, gloss or matte, since that changes the whole mood of a print. Ask whether the salon hand-paints its animal print or uses stamps and wraps; hand-painted costs more and takes longer, but it is what gives spots their irregular, natural look, while stamps are faster and perfectly uniform. Expect detailed prints to be priced as a nail-art add-on rather than included in a basic manicure, and book the extra time — a full python or tortoise set is not a walk-in job. Prefer no-commitment? Animal print press-ons have improved enormously and are the fastest way to test whether a print suits you before paying for it in gel; apply them over a protective base coat so removal stays gentle.
Animal Print Nails: Frequently Asked Questions
How do you do leopard print nails at home?
Paint a nude base and let it dry. Dab irregular brown or gold blobs with a dotting tool, let them set, then draw broken C-shaped black outlines around some of the blobs, leaving gaps. Add tiny dots in empty spaces and seal with top coat. The whole design takes about 20–30 minutes per hand, and imperfect spots look more realistic than perfect ones.
What tools do I need for animal print nail art?
A dotting tool (both ends), a fine detail brush, base coat, top coat, and two to three polish colors are enough for leopard, cow, and dalmatian prints. Tortoise shell needs a translucent amber jelly polish. A toothpick or bobby pin works in place of a dotting tool, and a piece of foil makes a good disposable palette.
Is tortoise shell nail art hard for beginners?
It is medium difficulty. The technique is simple layering — amber jelly base, dark patches, another jelly coat — but getting the glassy depth takes practice with translucency. The most common beginner mistake is using opaque polish instead of jelly, which kills the effect. Try it on one accent nail first.
What nail shape suits animal print best?
Almond and oval shapes suit most animal prints because their curved surface shows the pattern well. Short square nails work for smaller-scale prints like dalmatian speckles and leopard French tips. Long coffin and stiletto shapes carry bold prints like python scales and large cow patches. Match the print’s scale to your nail length.
How long does animal print nail art last?
About as long as any manicure in the same formula: roughly a week with regular polish, two to three weeks with gel. Detailed prints show tip wear sooner than solids, so cap the free edge with base and top coat, and keep cuticle oil handy — well-moisturized cuticles make any print look fresher longer.
Can I do cow print nails with regular nail polish?
Yes — cow print is one of the easiest designs for regular polish. You need only a white base and black polish applied with a small brush or dotting tool in irregular patches. No special tools or layering required, and it dries fast since each layer is thin. Let the white base dry fully before adding patches to avoid dragging.
Which animal print is easiest for beginners?
Dalmatian speckles: dots of varying sizes on a sheer base, no outlines, no layering, done in about 10–15 minutes per hand. Cow print is the next step up, then leopard once you can paint the broken outline. Save tortoise shell and python scales for after you are comfortable with a dotting tool.
Are animal print nails still in style in 2026?
Yes — animal print is one of the longest-running trends in nail art, and tortoise shell in particular has been a standing salon request for a decade. What changes each year is the styling: 2026 favors tonal, lower-contrast palettes, prints confined to French tips or accent nails, softer newcomers like Bambi speckles, and patterns layered over cat-eye bases. The prints themselves are not going anywhere; only the color stories rotate.
What is the difference between leopard and cheetah print nails?
Leopard print is built from rosettes: irregular blobs of color ringed with broken dark outlines, like the C-shapes in the technique section above. Cheetah print is simpler — smaller, solid dark dots with no filled center and no full ring, sometimes with a tiny tail flick on each spot. If your spots have outlined, two-tone centers, it is leopard; if they are plain solid dots, it is cheetah. Cheetah reads finer and more delicate, leopard bolder.
Can you do animal print nails with gel polish?
Yes — every technique in this guide works with gel, and gel is the better choice for layered prints like tortoise shell because you can cure each layer before adding the next, which stops colors bleeding into each other. Paint and cure one hand at a time, keep each layer thin, and finish with a gel top coat. The designs last two to three weeks in gel versus about a week in regular polish.
Will dark animal print polish stain my nails?
It can, especially deep browns, blacks, and reds worn for weeks at a time — but a proper base coat prevents almost all of it, which is why every technique in this guide starts with one. If you already have staining, it grows out harmlessly; gentle buffing and a whitening soak in diluted lemon juice or denture-cleaning solution can lift light discoloration. To remove detailed print, soak a cotton pad in acetone, rest it on the nail for a few minutes, and wipe — scrubbing at layered art just pushes pigment into the nail’s surface.