

20 Milky Nail Ideas: The Sheer ‘Your Nails But Better’ Look
Milky nails are the sheer, glossy manicure that looks like your natural nails on their very best day: a translucent wash of white or pink that lets the nail show through, blurred and brightened, like skim milk in a glass. The look went mainstream as part of the “clean girl” and “no-makeup nails” movement, and it has stayed because it solves real problems. It suits every dress code, flatters every skin tone, and grows out invisibly, so there is no harsh line at the cuticle after a week.
This guide collects 20 milky nail ideas organized by the role the look plays in your routine: the everyday bare sets you can wear to anything, the polished versions for weddings and events, milky as a base for nail art, and the trending finishes that build on the milky base. Every design includes honest notes on shape, finish, and difficulty, so you can walk into a salon appointment or a DIY session knowing exactly what to ask for. If you are still choosing a silhouette, our nail shapes guide covers all eight shapes with photos.
How to Ask for Milky Nails at the Salon
The short answer: ask for two to three thin coats of a sheer white or sheer pink polish with a glossy top coat, and tell your tech you want the natural nail slightly visible through the color.
Salon miscommunication is the most common reason milky nails go wrong. The fix is simple: describe the technique, not the trend name. Say “sheer white, layered until it looks milky, natural nail showing through,” and bring a reference photo of the exact idea below that you want. Nail techs recommend thin coats over one thick one, because thin layers cure evenly and stay translucent instead of turning chalky. For gel, the same logic applies with a sheer white or milky builder gel.
The Everyday Bare Look
These are the sets that made milky nails famous: minimal, office-safe, and close enough to bare that they never clash with an outfit. They are also the easiest to maintain.
1. The Classic Milky Wash
The short answer: the signature milky nail: two to three thin coats of sheer white over your natural nail, sealed with high-gloss top coat.
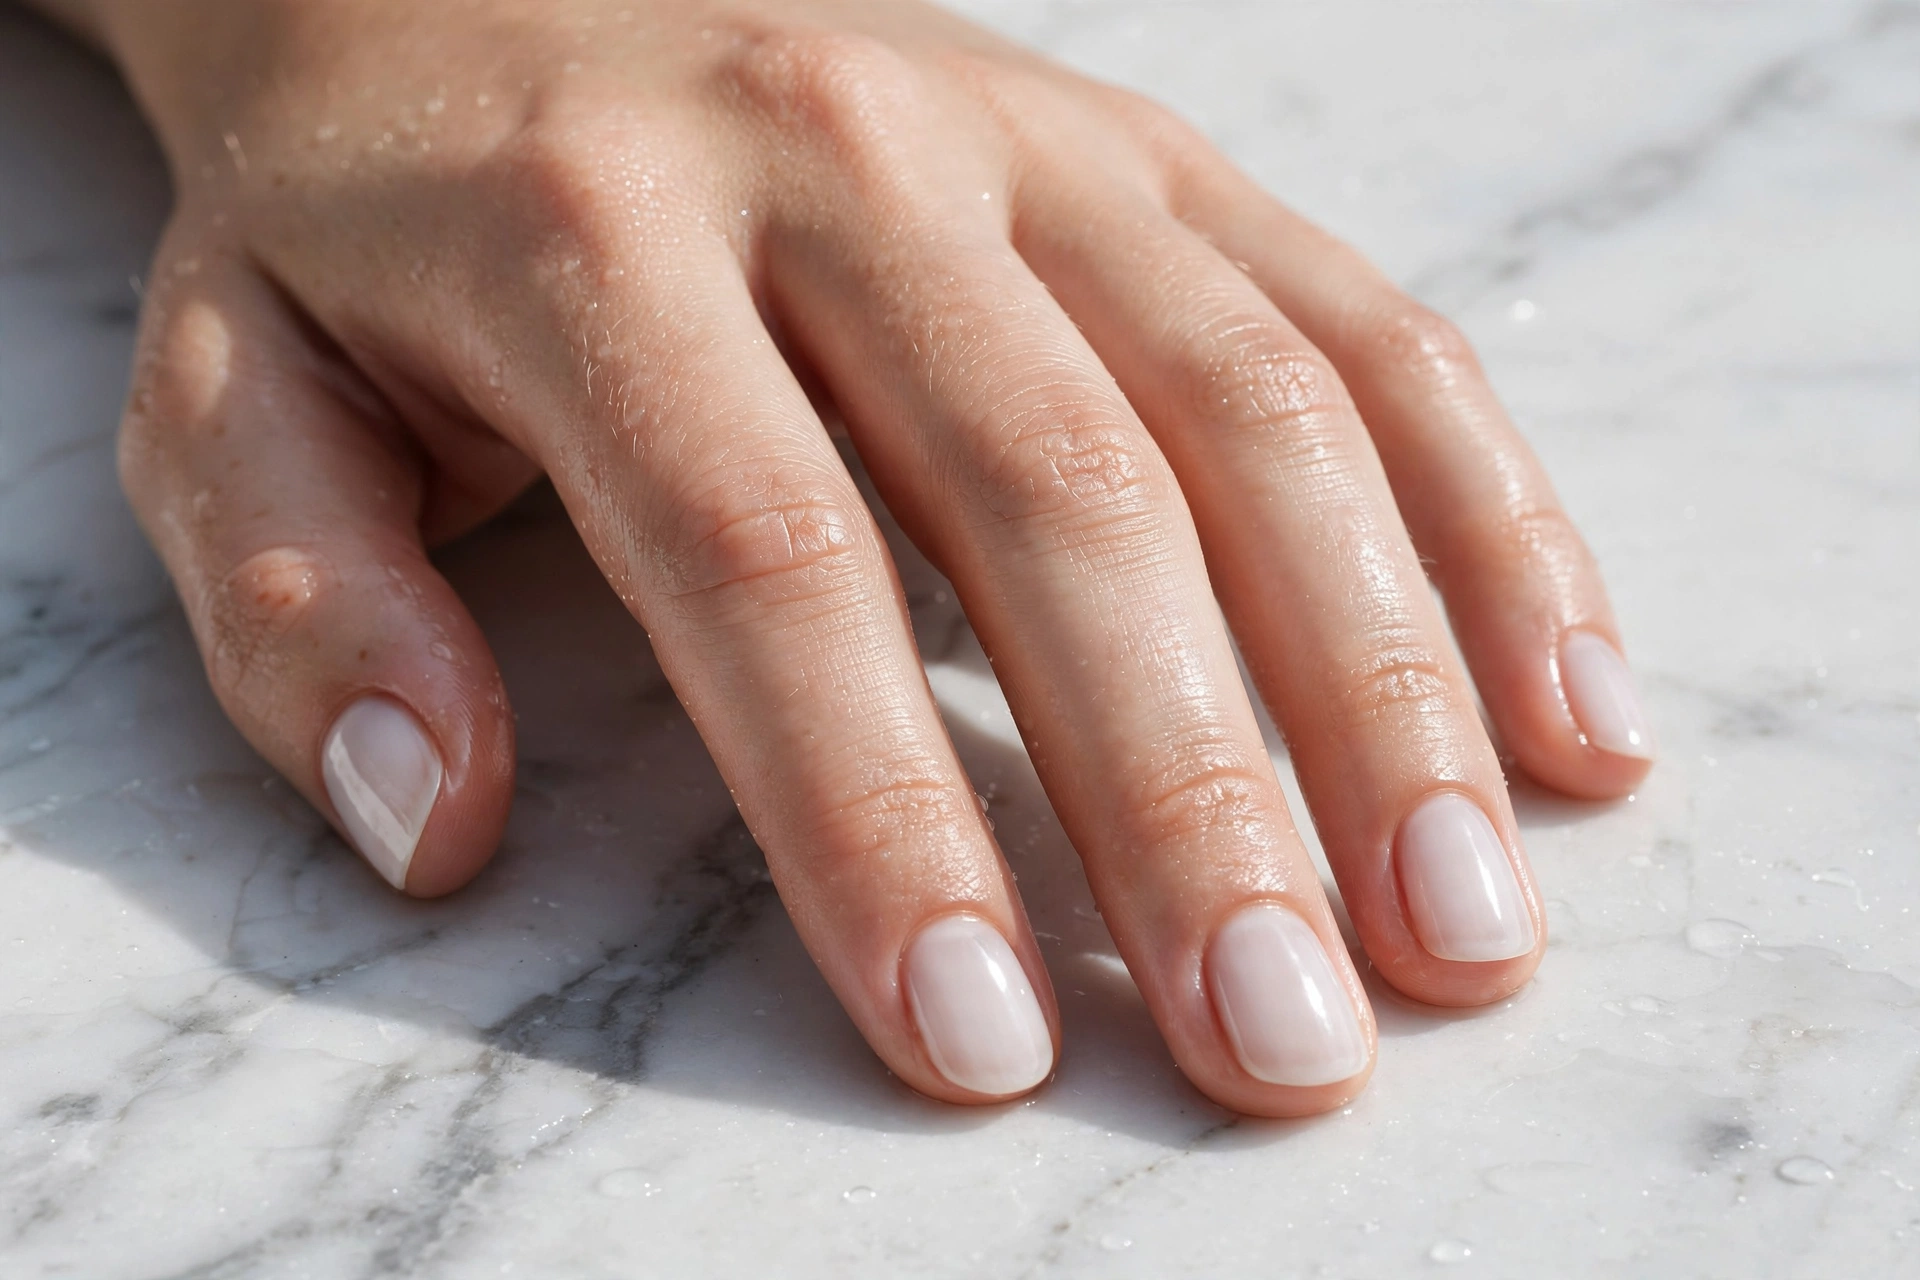
This is the look most people picture when they hear “milky nails.” The sheer white blurs ridges and yellowing the way a tinted moisturizer blurs skin, which is why it flatters real, un-lengthened nails so well. Short oval to medium almond shapes look best; very long nails can make sheer white read as unfinished. Difficulty: easy at home, since sheer polish is forgiving of small application mistakes. Expect 5 to 7 days of wear with regular polish, 2 to 3 weeks in gel.
2. Barely-There Milky Nude
The short answer: a milky nude-pink sheer that matches your skin’s undertone: the truest “your nails but better” option.

If sheer white feels too cool or too bright on you, milky nude is the answer. Nail techs treat it like foundation: swatch a few sheer nudes against your skin before committing, because the right one disappears into your hand while the wrong one looks gray or orange. It is the most conservative choice in this guide and the one most likely to pass any dress code. Short to medium lengths in any shape work; keep the gloss high, since the wet-look shine is what sells the “healthy nail” effect.
3. Milky Blush Pink
The short answer: a sheer pink-tinted milky wash that adds a hint of warmth and color while staying fully neutral.

Milky blush sits between the classic white wash and the nude version: pink enough to feel like a color, sheer enough to stay in the “bare” family. It is especially flattering on fair to medium skin tones and looks lovely on short nails, where the pink keeps the set from reading stark. This is one of the easiest milky shades to find in regular polish, and it layers beautifully if you want to build opacity gradually.
4. Short Square Milky Minimal
The short answer: milky white on short, neatly filed square nails: the cleanest, most modern take on the trend.

Short square nails plus sheer milky polish is the combination all over minimalist nail feeds right now, and it works because the geometry does the talking while the color stays quiet. The honest caveat: on very short nails, sheer polish can look like an unfinished base coat, so ask for enough coats to reach a true milky opacity and keep the free edge perfectly even. See our nail shapes guide if you are deciding between square and squoval.
5. Milky Baby Blue Tint
The short answer: the palest sheer blue wash over a milky base: barely-there color with a cool, fresh feel.
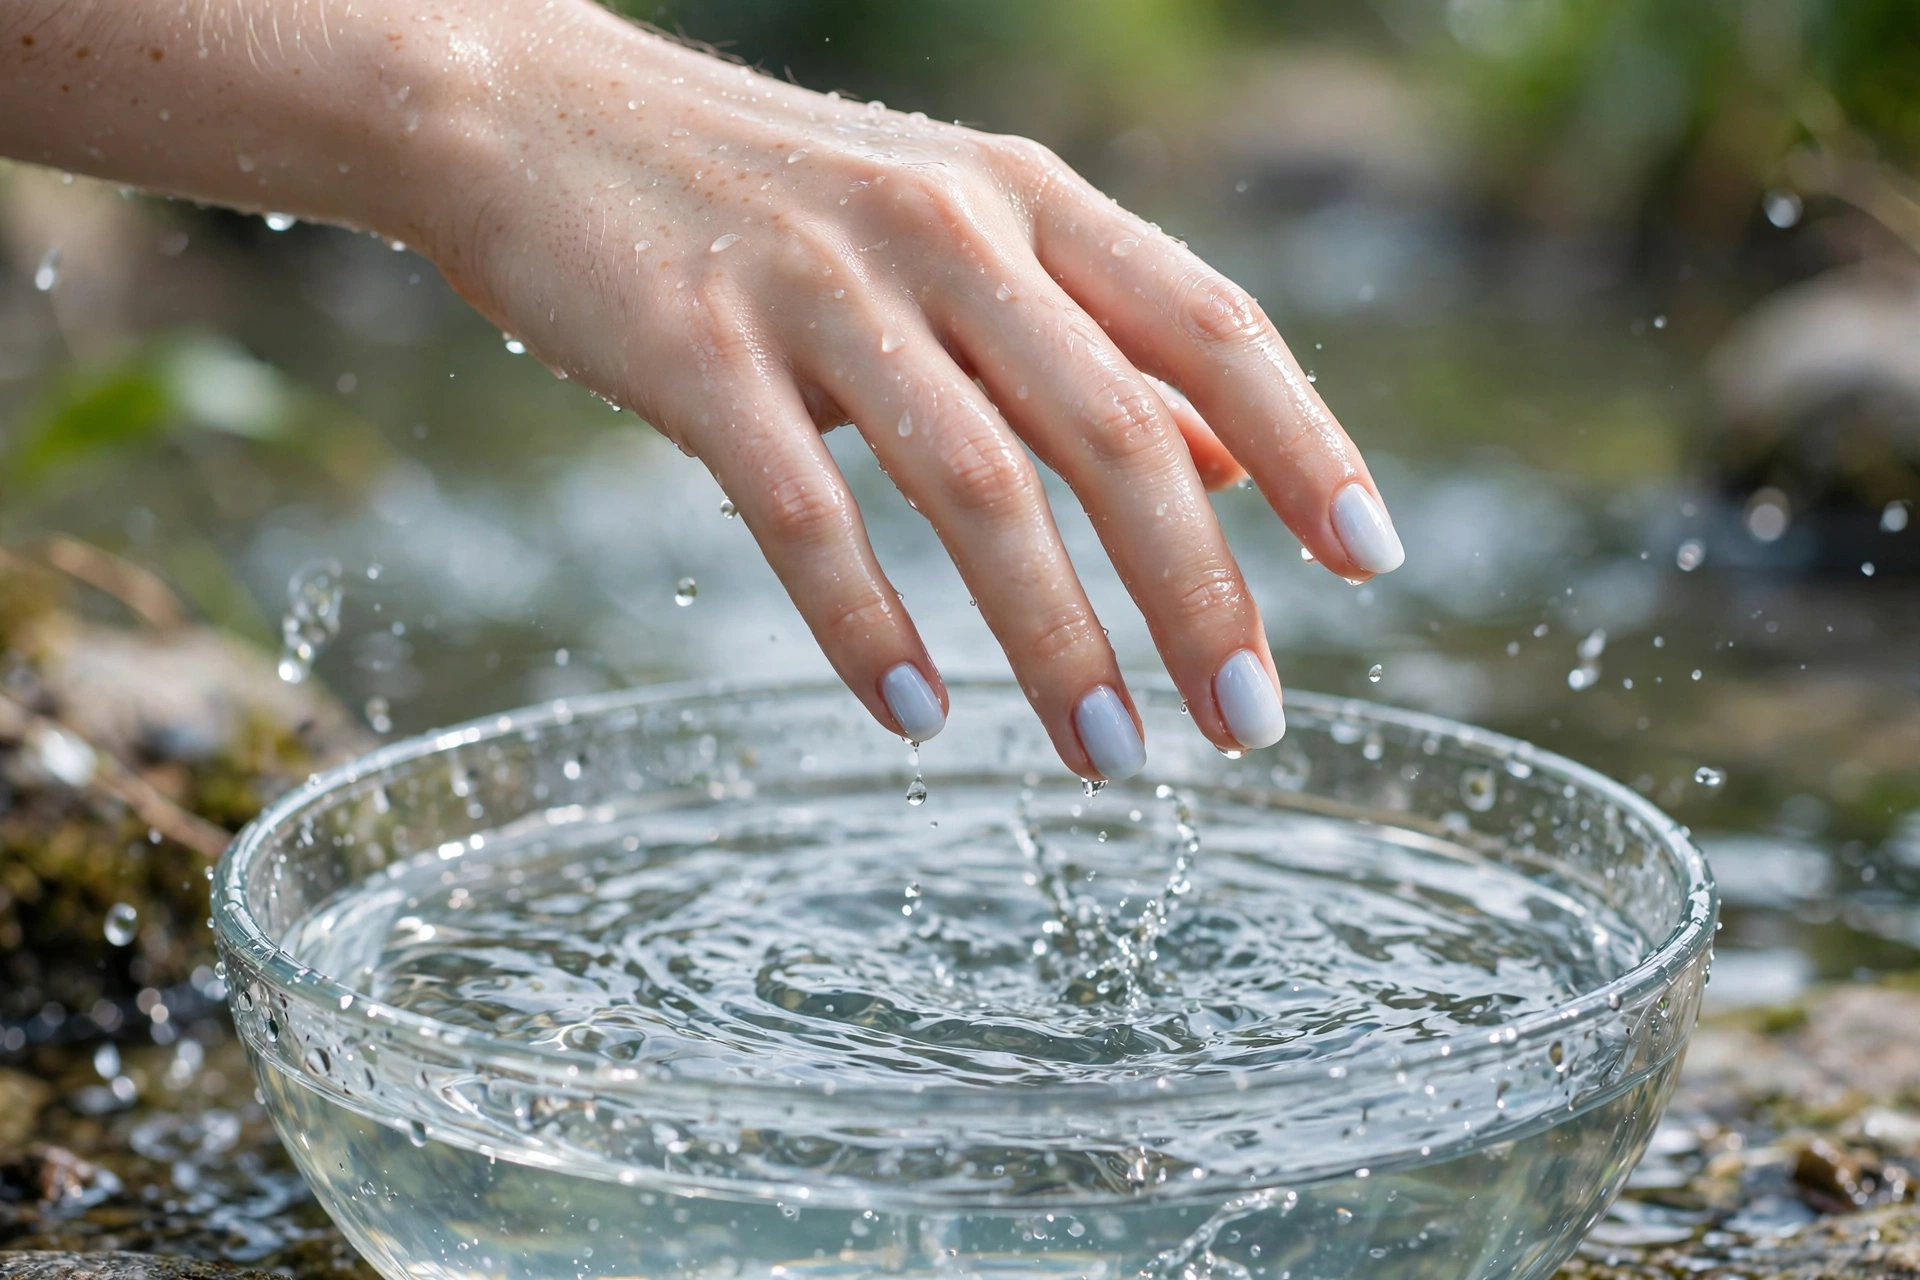
Milky does not have to mean white or pink. A whisper of baby blue keeps the translucency but adds a cool, watery freshness that looks striking against warm skin tones and in summer light. Keep the blue genuinely sheer: one or two coats over a milky white base, or a pre-mixed sheer blue. If you love this direction, our blue nail designs guide goes deeper into cool-toned sets.
Milky for Weddings and Special Events
Milky nails are a bridal favorite for the same reason they dominate everyday wear: they photograph beautifully, match any bouquet or dress, and never look dated in photos years later. These versions dial up the polish for occasions.
6. Milky French Manicure
The short answer: crisp white tips over a sheer milky base: the French, softened.

A milky base under a French tip is more forgiving than the classic pink-and-white version: the sheer base blurs the smile line, so the tip looks blended rather than painted on. Ask for a medium-opacity milky base (two to three coats) with a soft white tip, not a stark one. Medium almond or long square shapes show off the tip best. Difficulty: medium at home; the tip line takes a steady hand, or use French tip guides.
7. Micro French on Milky
The short answer: an ultra-thin, barely-two-millimeter tip in off-white on a sheer milky base: the most delicate French there
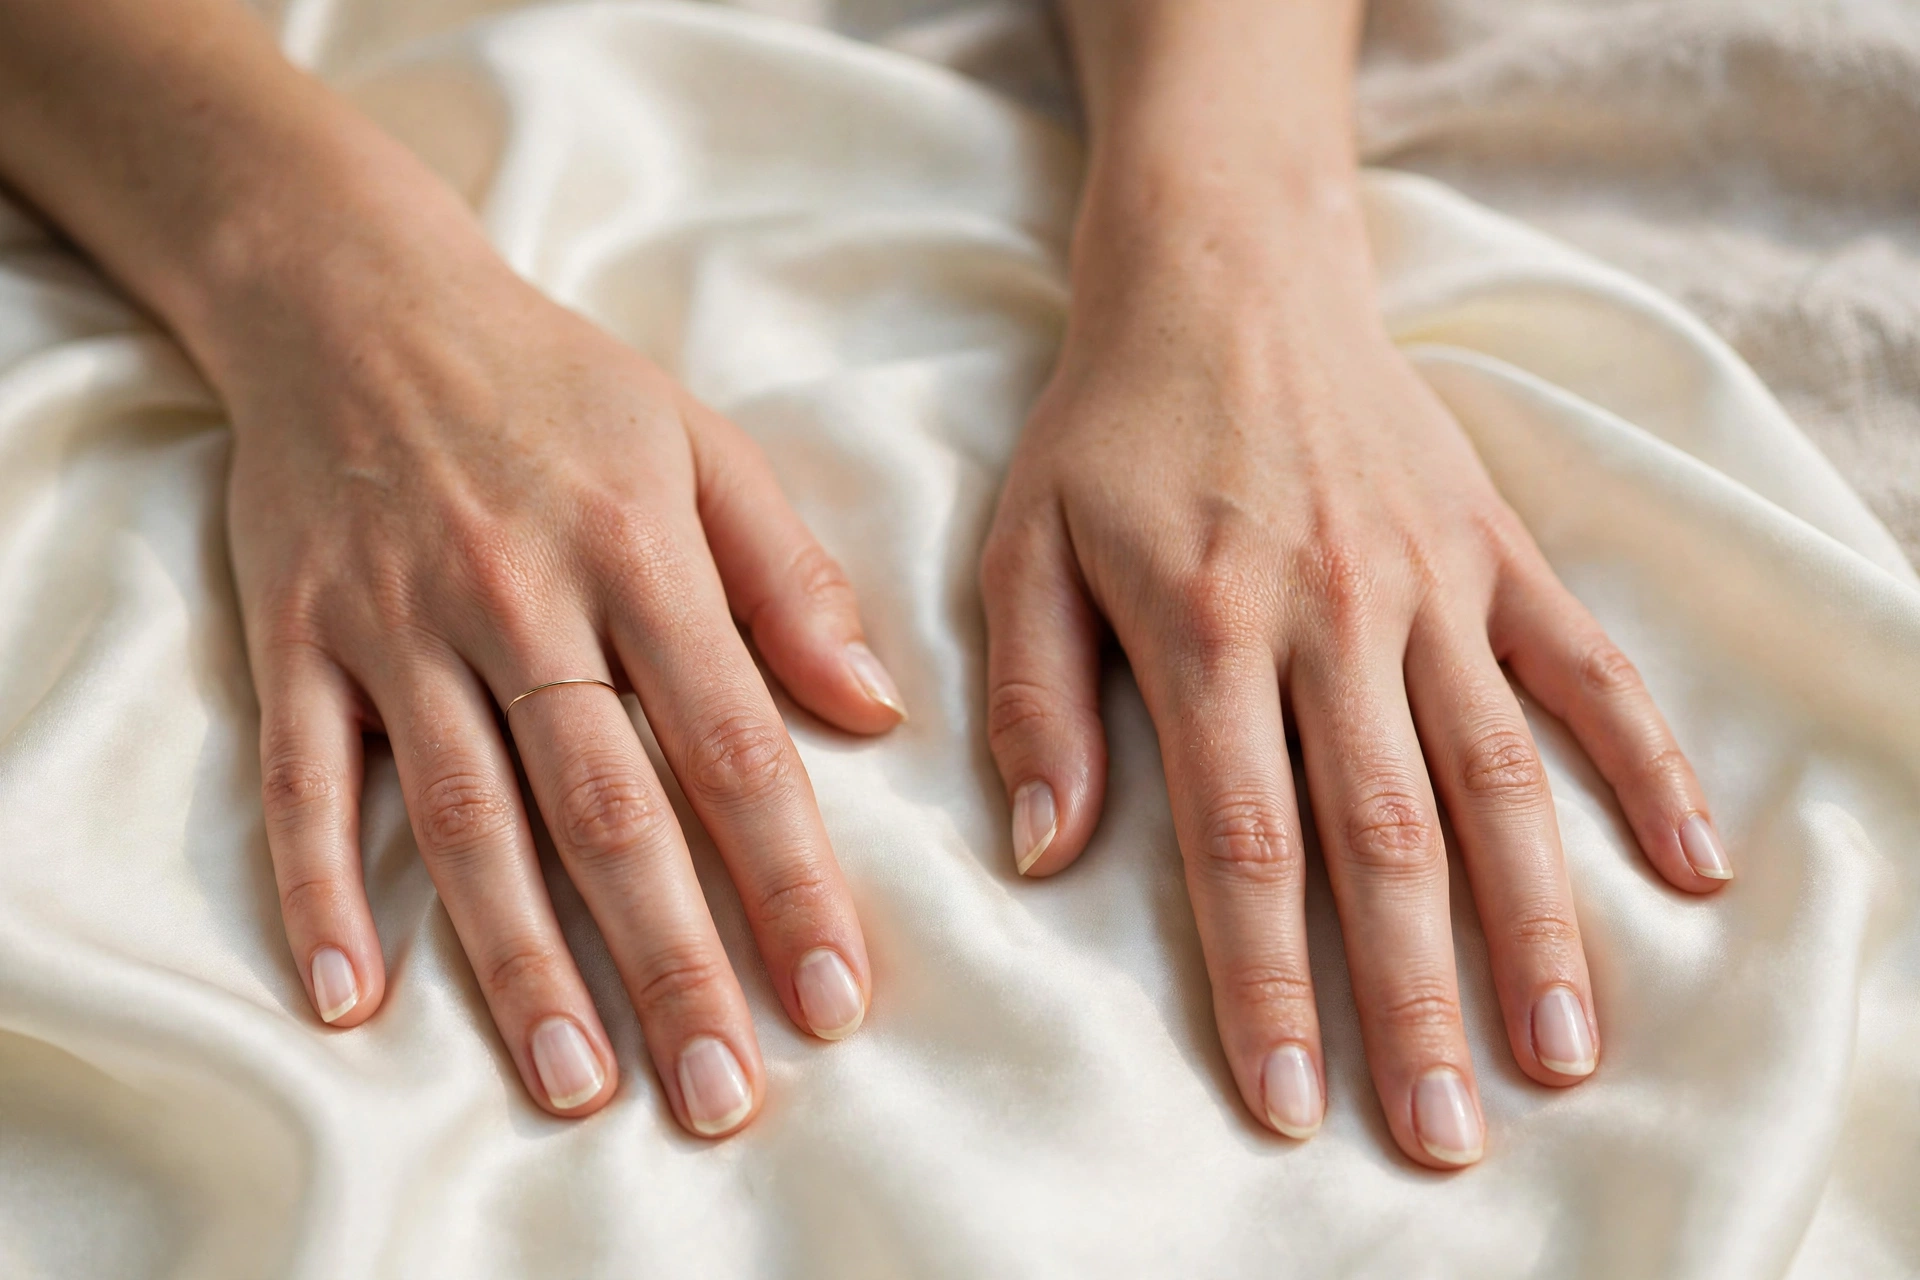 is.
The micro French is the event manicure for people who find a full French too bold. The tip should be whisper-thin with a slightly softened edge, which reads modern rather than retro. It suits short to medium nails in oval or almond shapes and pairs beautifully with fine jewelry. Bring a photo: “micro French” means different thicknesses to different techs, and the photo removes the guesswork.
8. Lace-Detailed Milky Nails
The short answer: delicate white lace patterns hand-painted or stamped over a sheer milky base: the bridal showpiece.
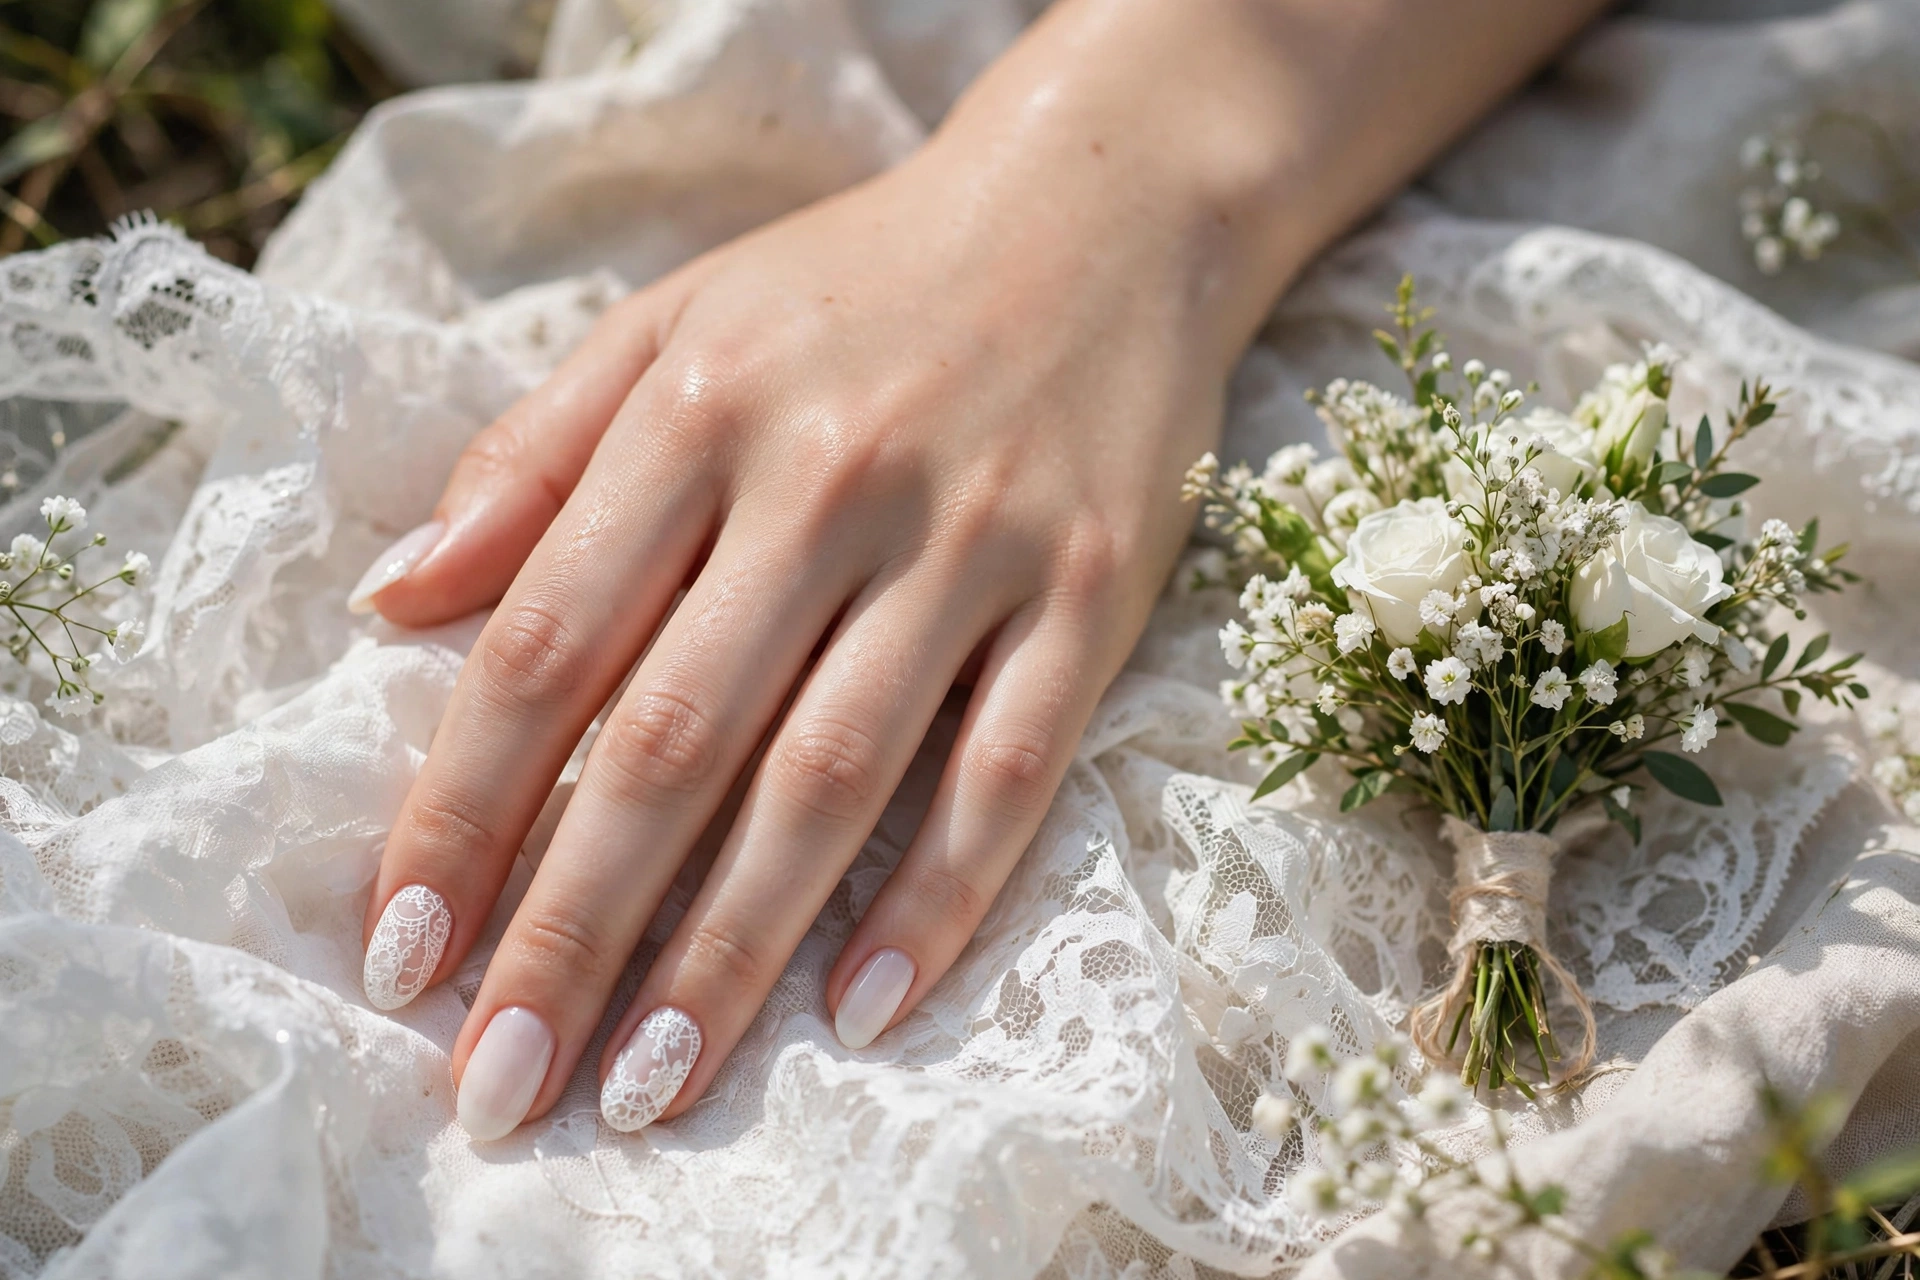
Lace over milky white is the most requested bridal nail art for good reason: the sheer base lets the lace pattern sit softly instead of shouting. Keep the lace to one or two accent nails (usually the ring finger) and leave the rest in the plain milky wash, or the set tips from elegant to busy. Stamping plates make this achievable at home; hand-painted lace is a salon job. Seal with two layers of top coat so the fine lines do not catch or lift.
9. Pearls on Milky
The short answer: tiny flat-back pearls placed on a milky base: subtle dimension that catches the light.
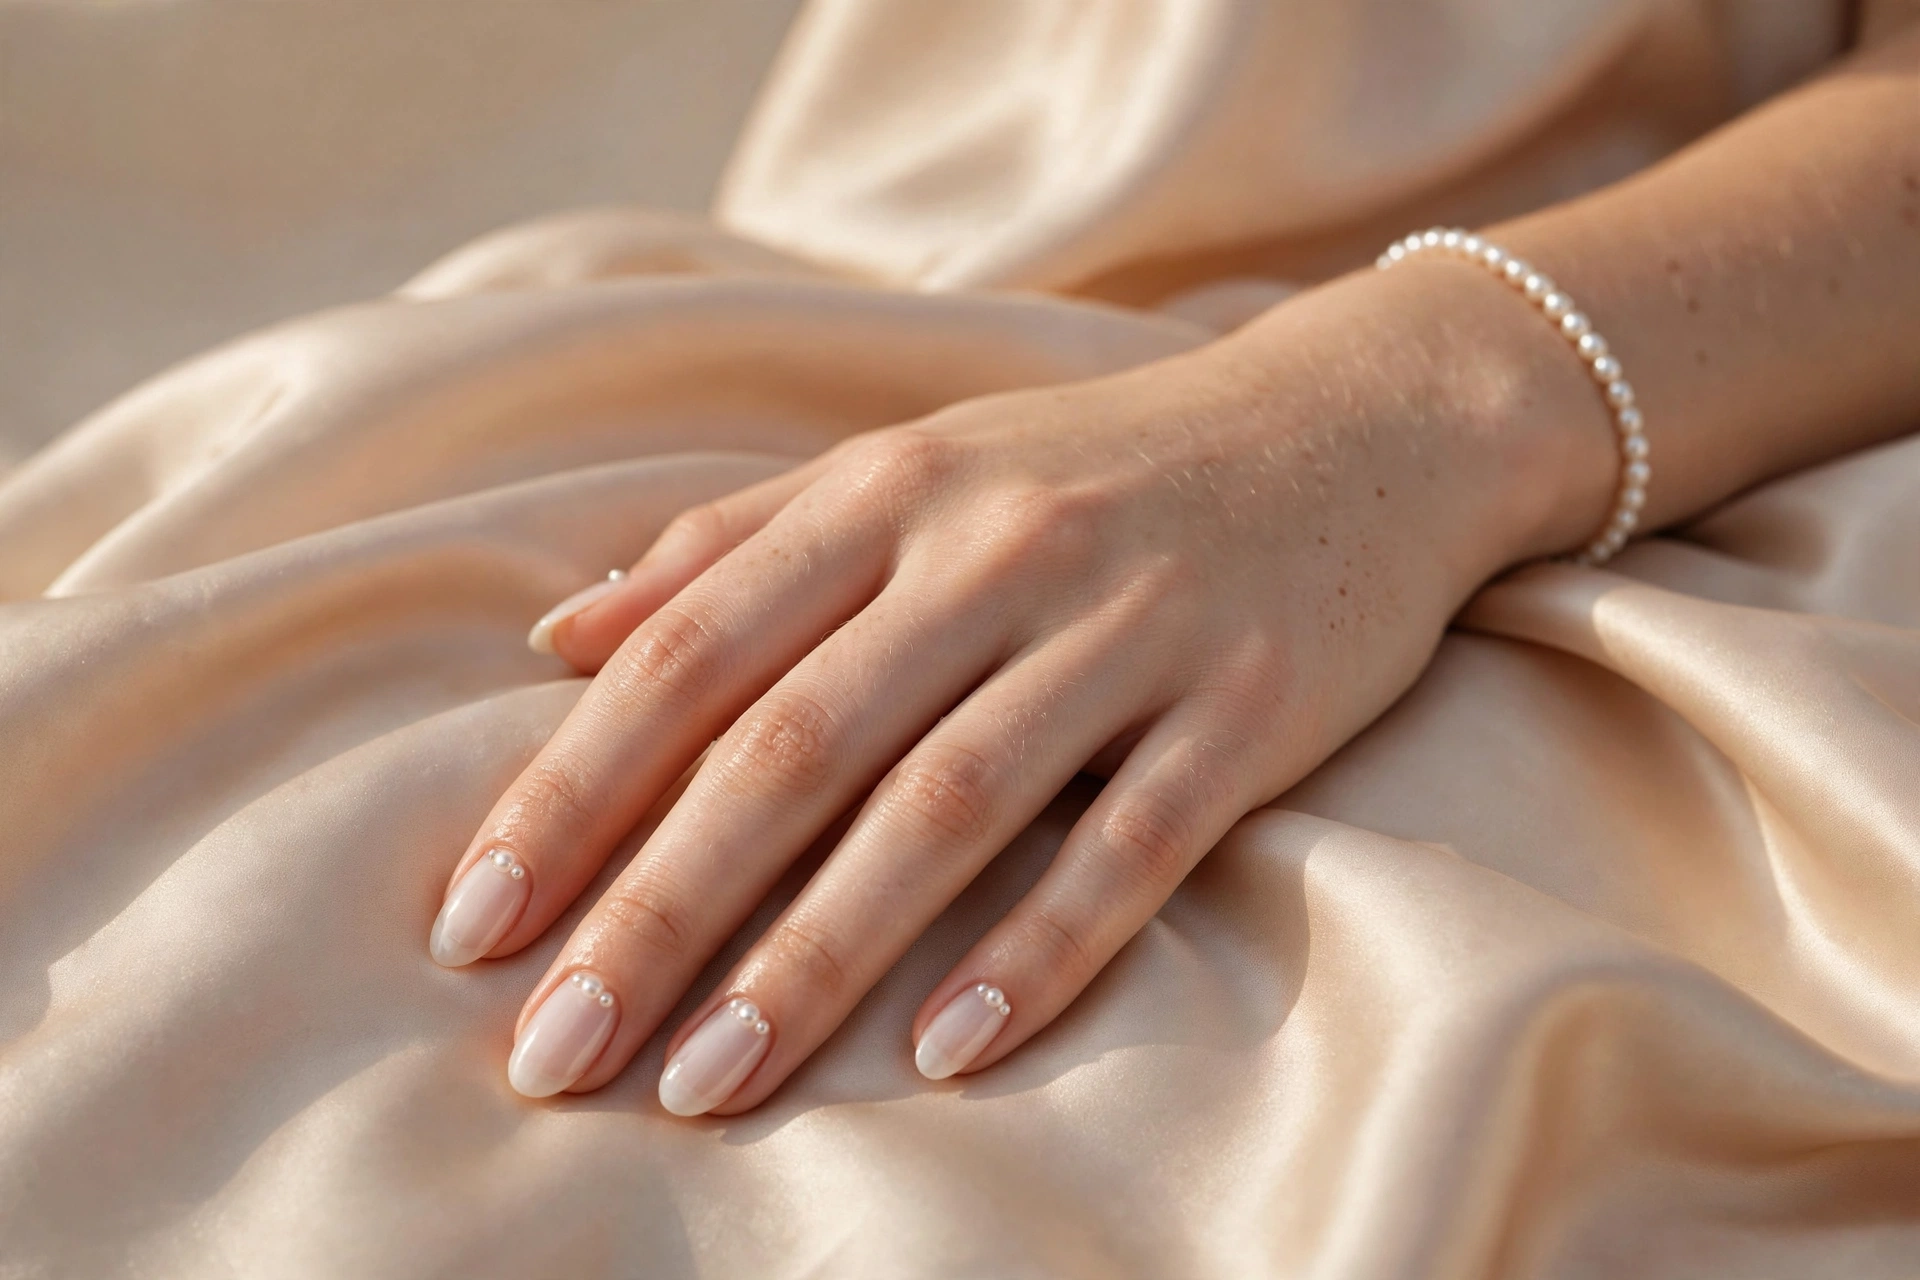
A few micro pearls at the cuticle or along one accent nail turn a simple milky set into an event manicure without any color. Use the smallest pearls you can find and keep them flat to the nail; raised pearls snag on hair and fabric. Press them into a wet top coat or gel layer, then cap with another layer of top coat to lock them in. Expect to lose one occasionally with regular polish; gel holds them far better.
10. Glass-Finish Bridal Milky
The short answer: extra layers of milky polish under the glossiest top coat you own: maximum shine, maximum “expensive” feel.
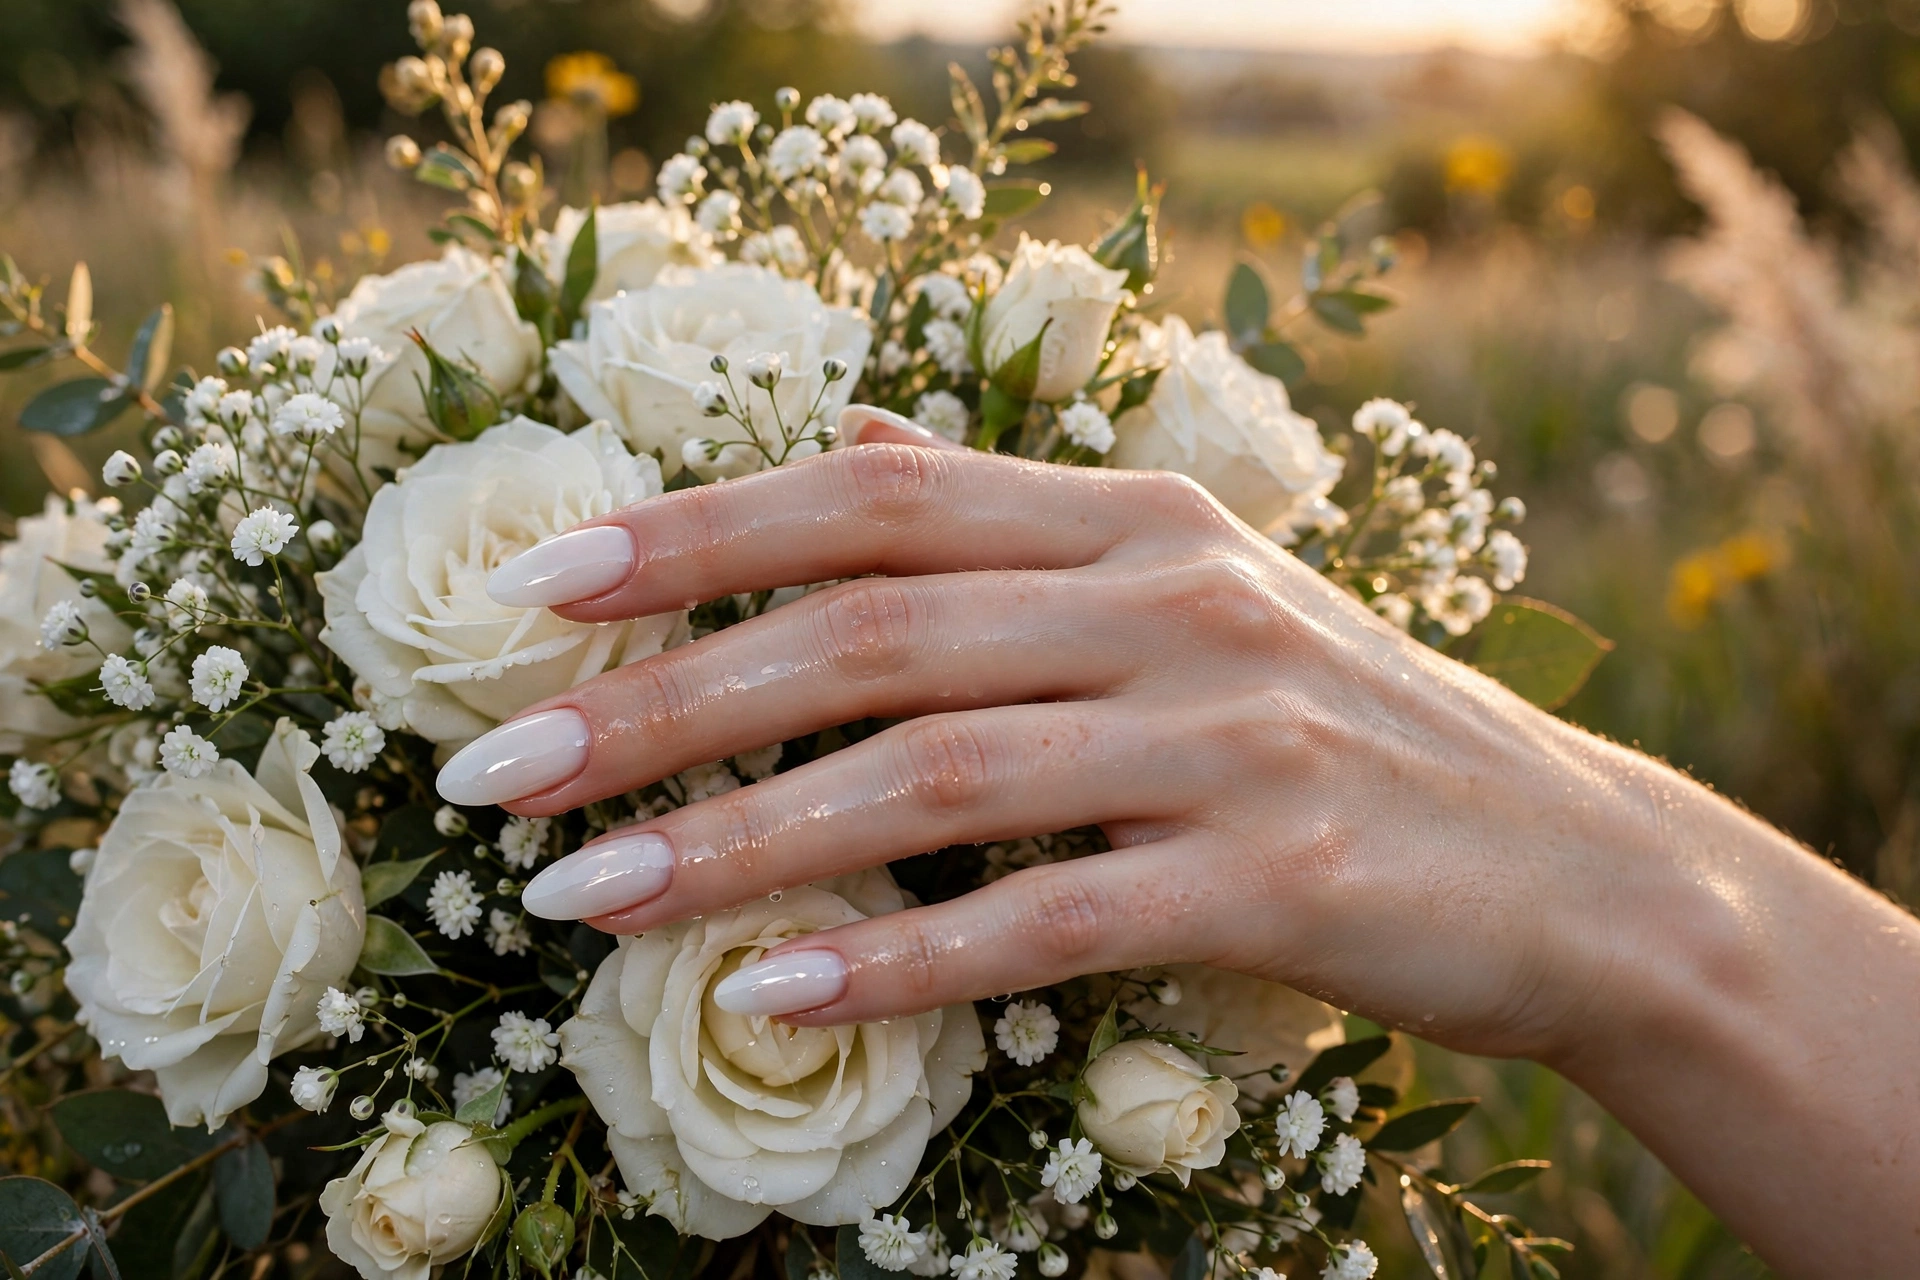
This is the plain milky wash taken to its most polished extreme: three thin milky coats, a ridge-filling base underneath, and a glass-like gel top coat on top. The result looks wet and almost reflective in photos, which is why brides choose it. It demands perfect prep, since gloss magnifies every ridge and dry cuticle, so budget time for cuticle care and a light buff before color goes on.
Milky as a Nail-Art Canvas
A sheer milky base is one of the best canvases in nail art: neutral enough to let any design breathe, opaque enough to make colors and metallics pop. If you love art but hate busy backgrounds, start here.
11. Marble Swirls on Milky
The short answer: soft white and gray marble veining over a milky base: stone-like, elegant, and endlessly wearable.
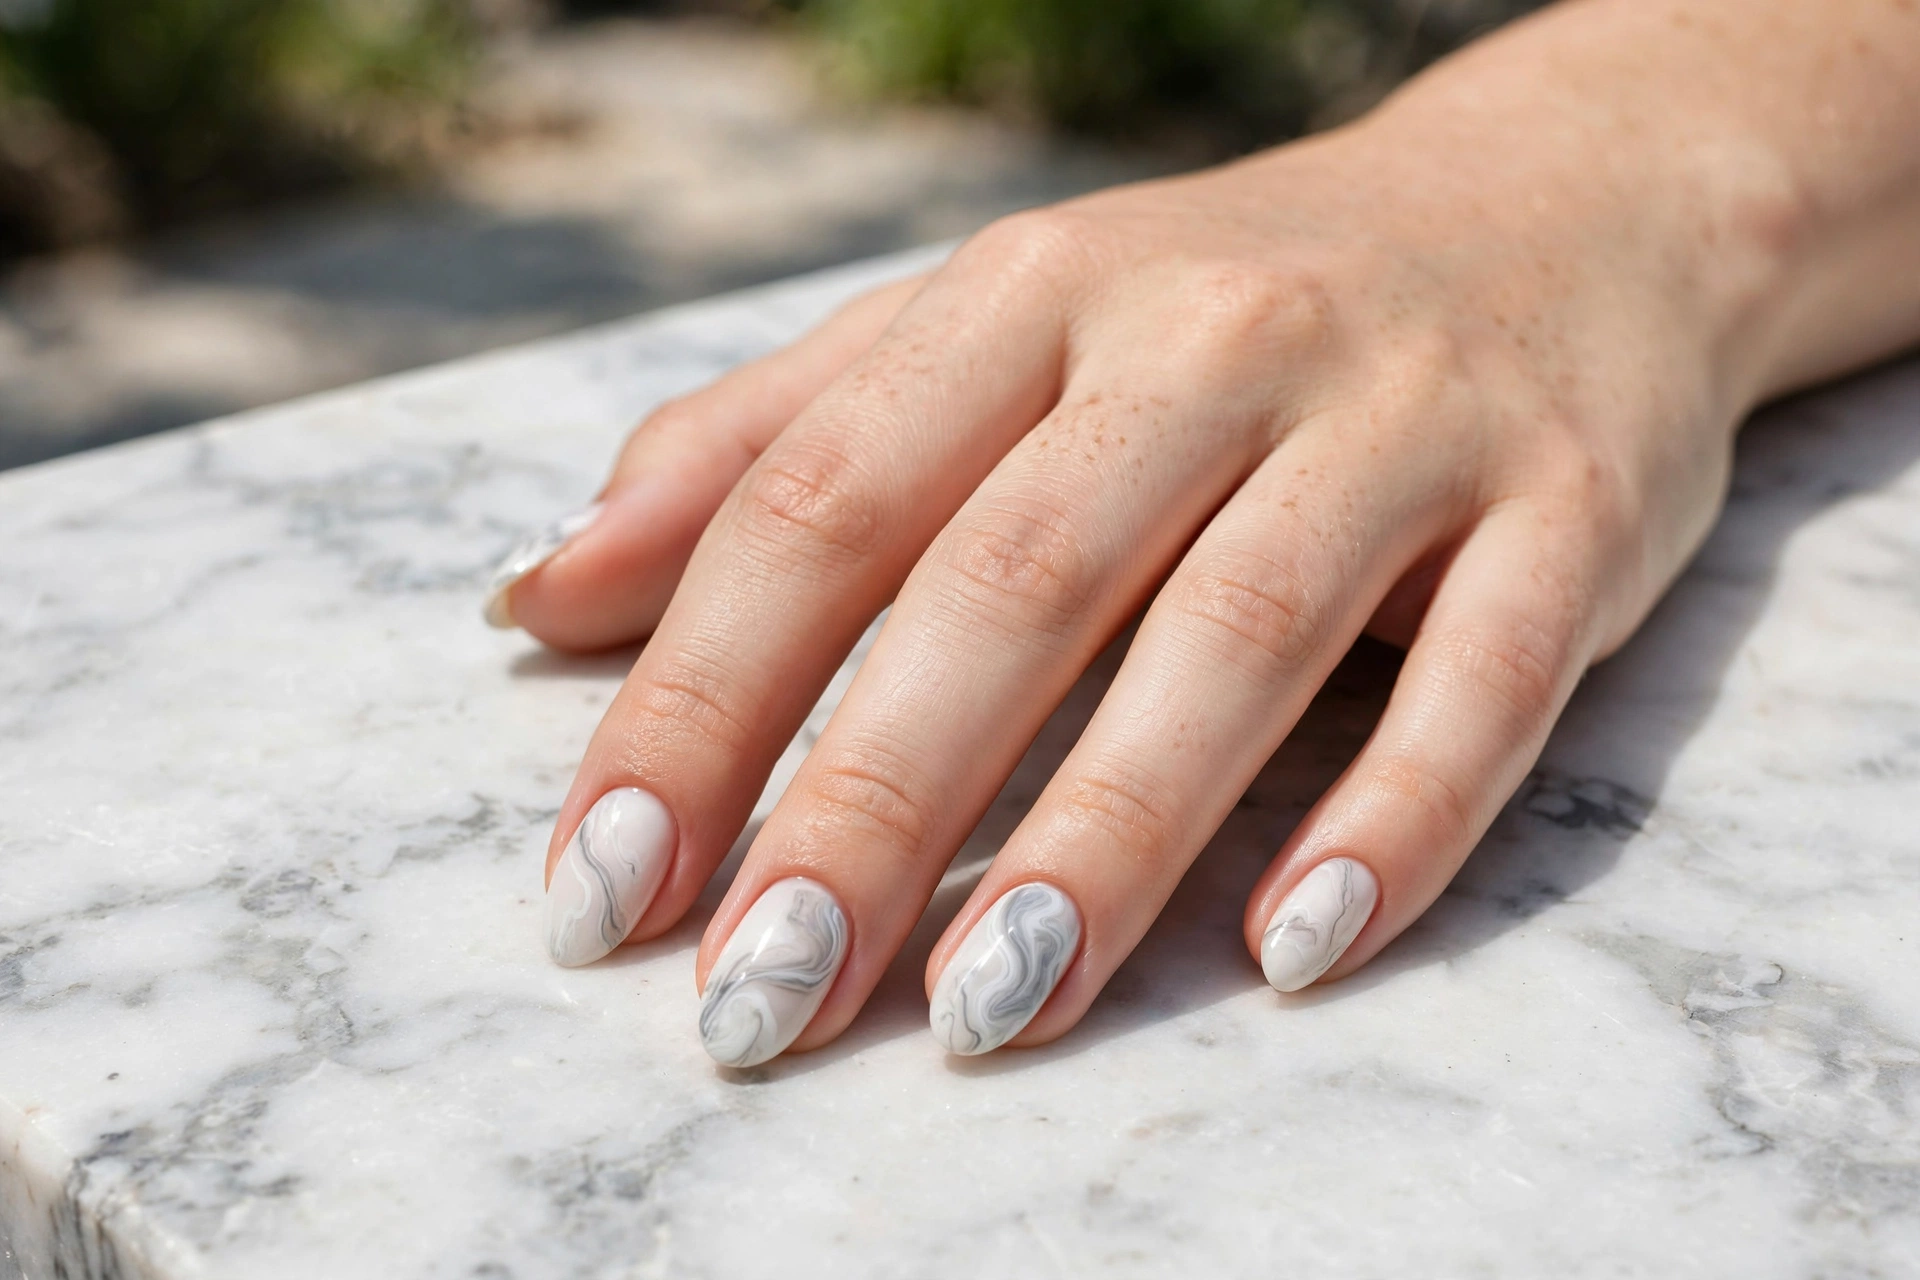
Marble looks most expensive on milky because the sheer base mimics the translucency of real stone. The technique is simple: while the milky base is still tacky, drag a fine brush with white and gray polish in thin, irregular veins, then blur with a clean brush dipped in acetone. No two nails match, which is the point. Medium to long nails in almond or coffin shapes give the veining room to flow.
12. Dainty Floral Milky Nails
The short answer: tiny hand-painted daisies or baby’s breath over sheer milky white: the softest floral manicure.

Small-scale florals on milky read fresh rather than fussy, because the sheer base keeps the whole set light. Keep flowers tiny and leave plenty of bare milky space around them; a single daisy per nail beats a crowded garden. White and soft yellow petals with thin green stems are the classic combination. Short to medium nails work best: large florals need length, but dainty ones do not.
13. Fine Line Art on Milky
The short answer: minimalist thin lines and tiny geometric shapes in black or white on a milky base: graphic and modern.
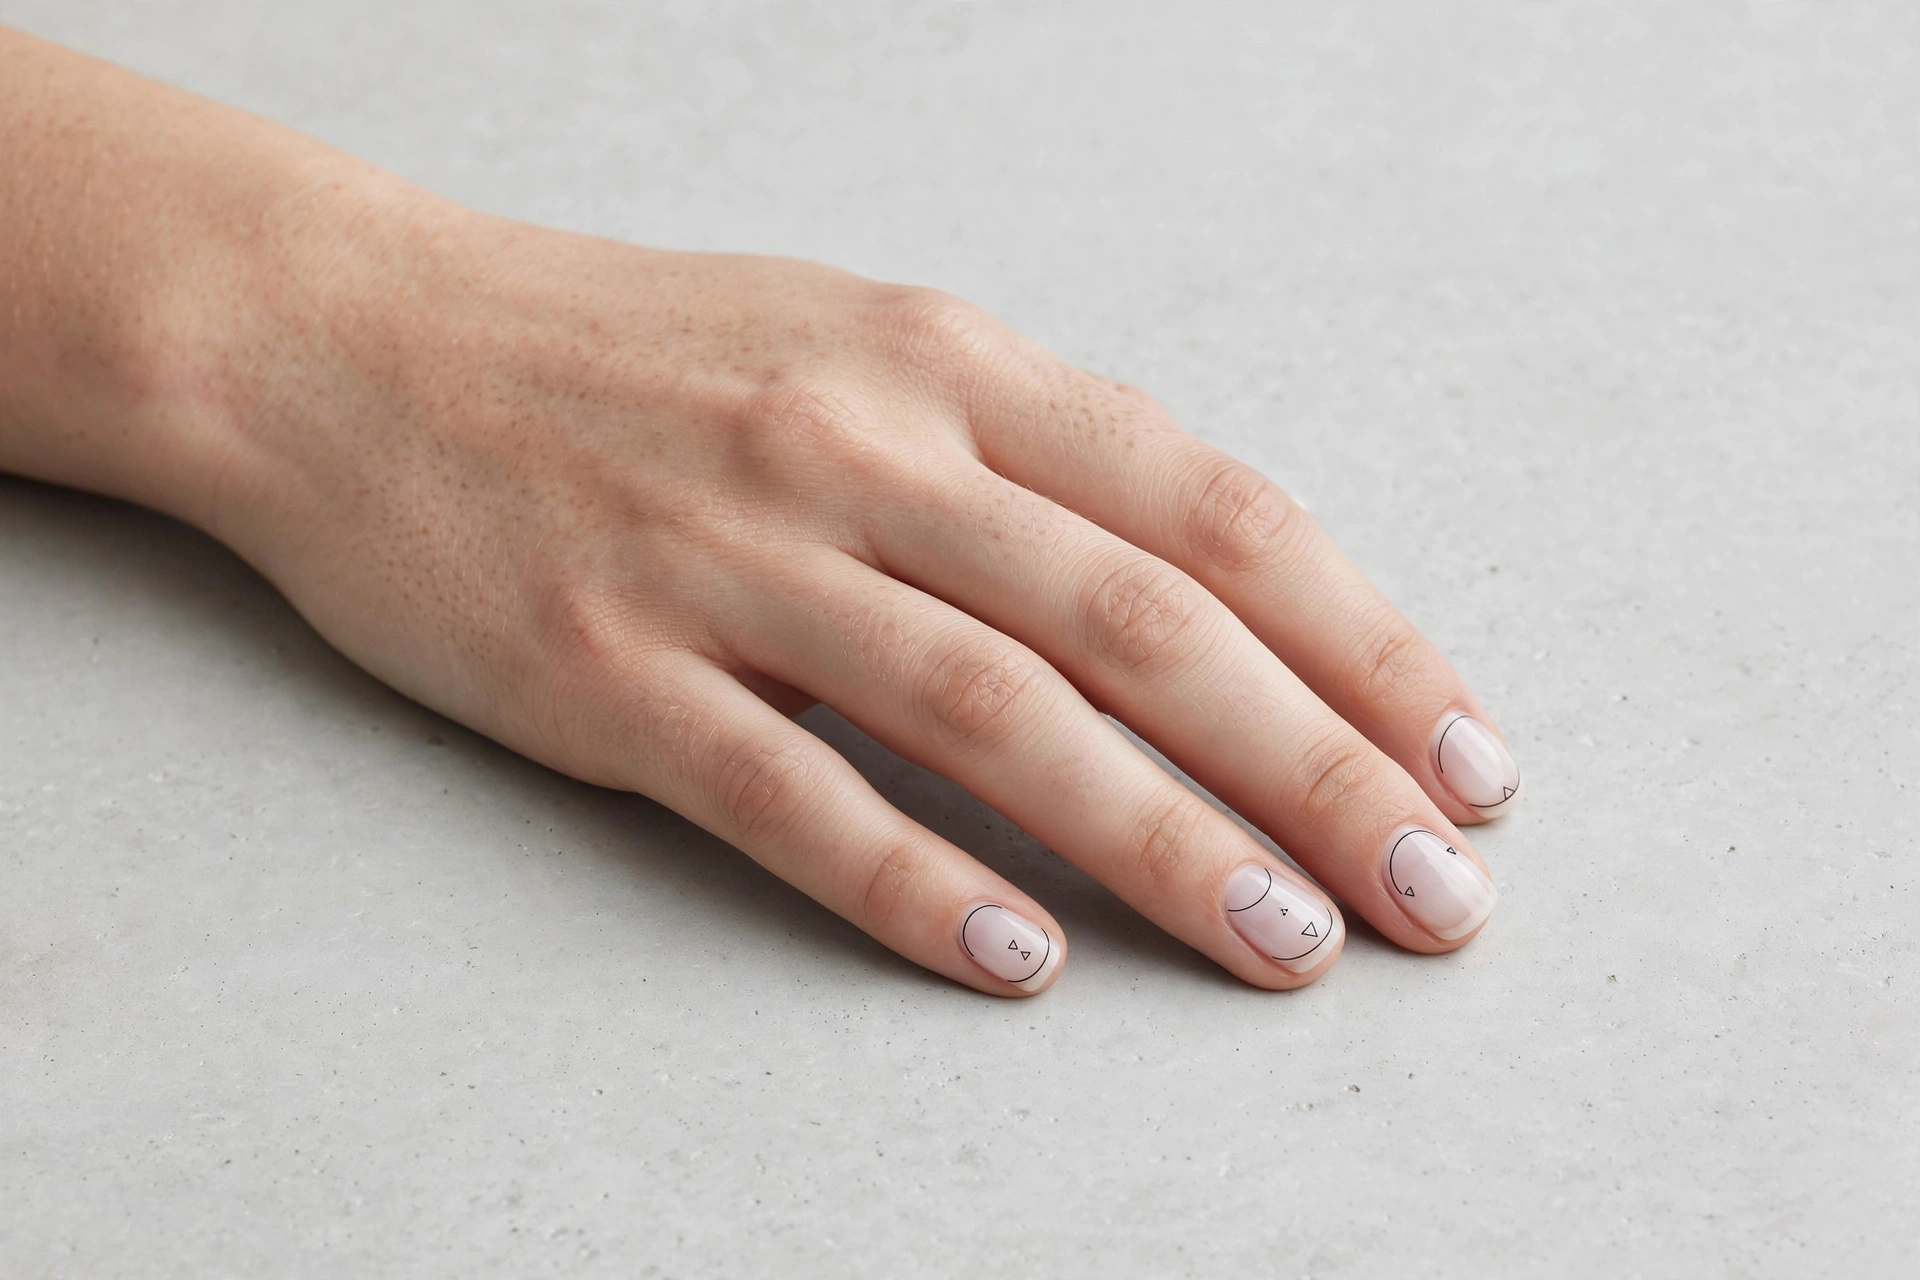
Fine line art is where milky’s neutrality earns its keep: a single thin black arc or a tiny triangle looks intentional and chic against the soft base instead of stark. Use a striping brush or a nail art pen, and keep the design to one element per nail for the true minimalist effect. This is a genuinely easy DIY (straight lines forgive more than curves), and it suits short nails particularly well.
14. Gold Foil Flecks on Milky
The short answer: scattered gold foil pieces pressed into a milky base: warm metallic contrast on the cool sheer.
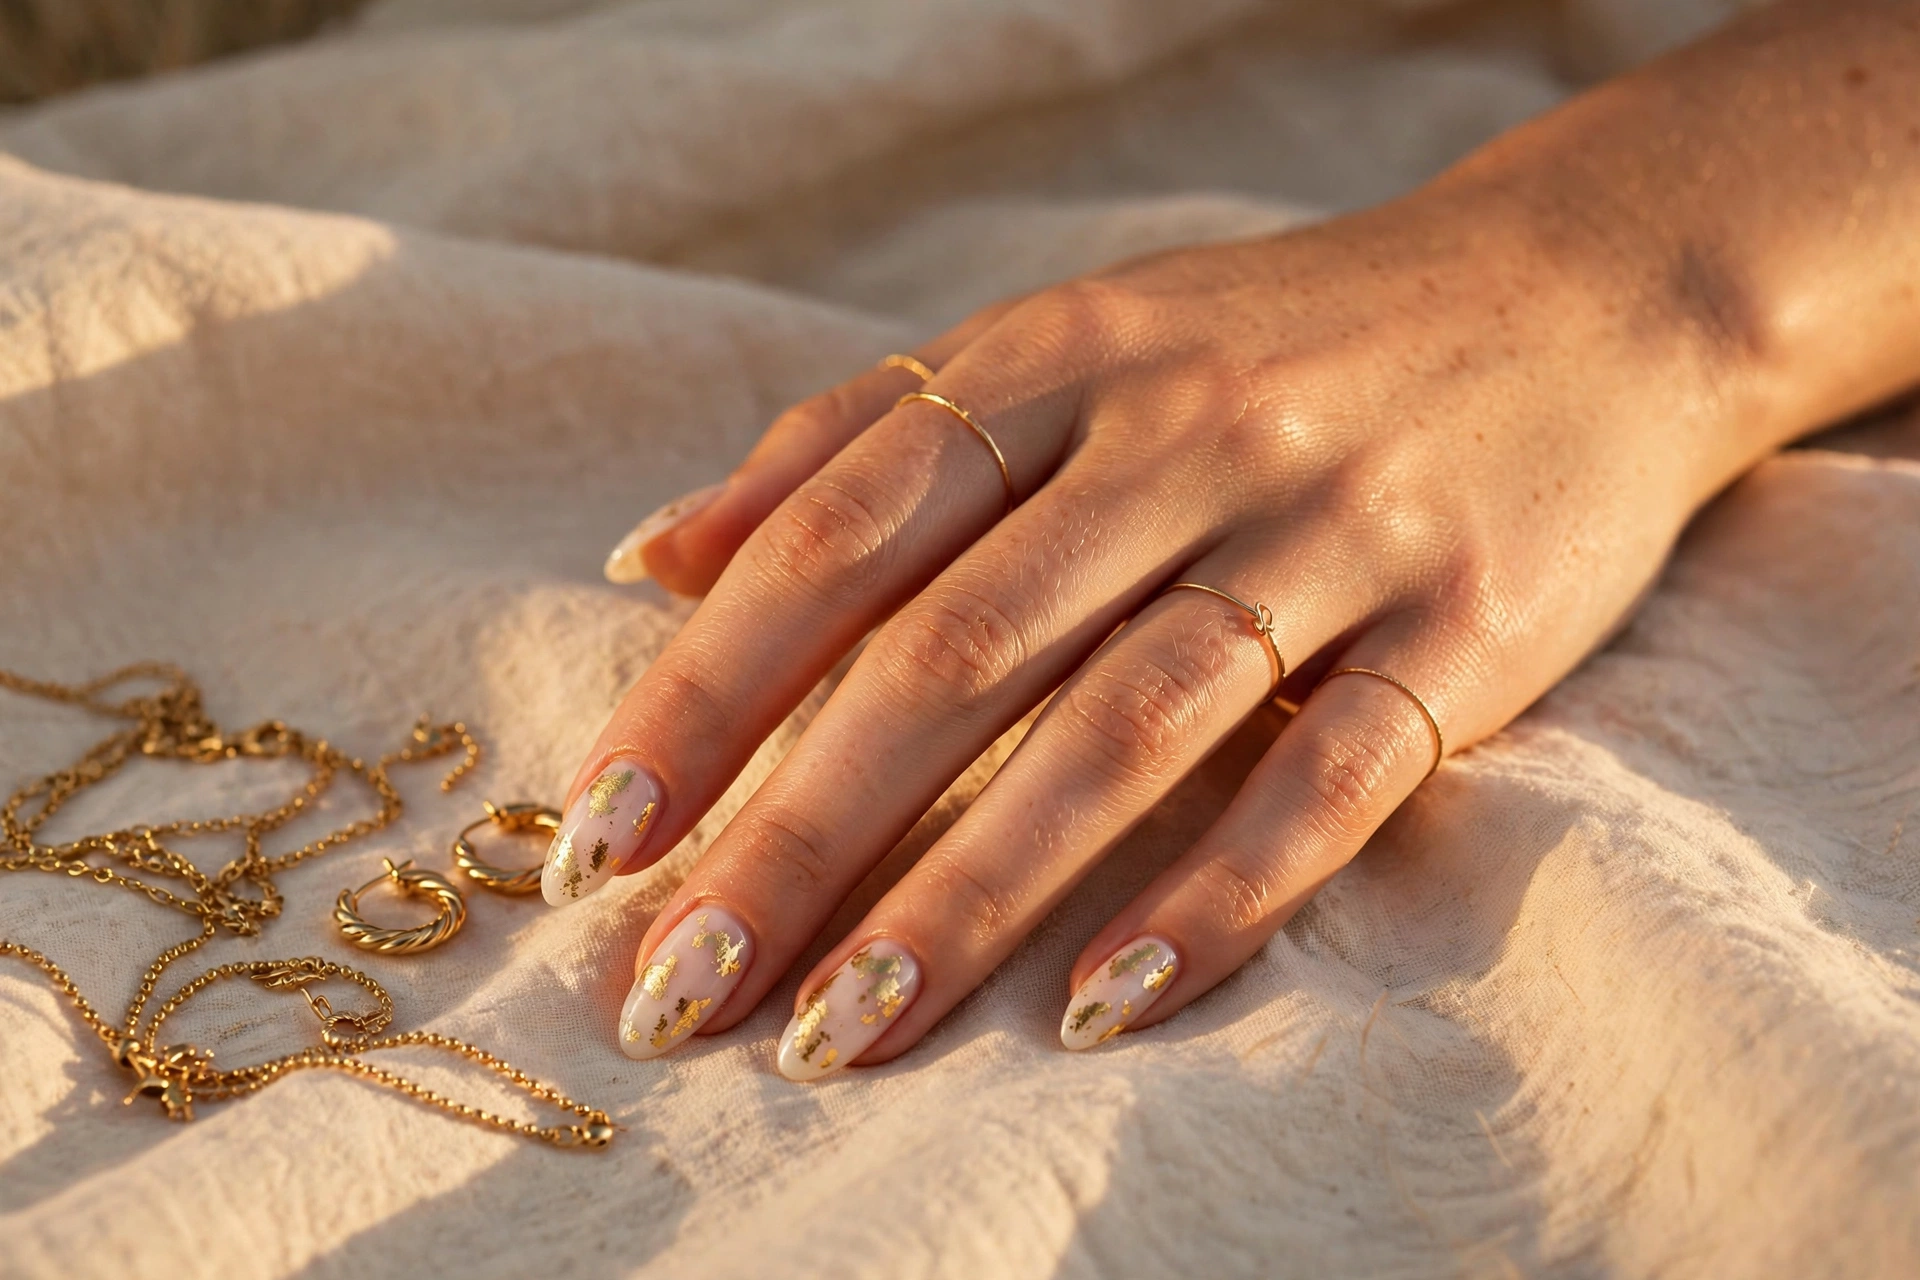
Gold foil on milky is the warm-meets-cool combination that photographs like jewelry. Tear foil into small irregular pieces, press them onto the tacky milky layer with tweezers, and seal with two coats of top coat so the edges lie flat. Concentrate the foil near the cuticle or scatter it randomly; avoid symmetrical placement, which looks manufactured. This pairs beautifully with gold rings and bracelets.
15. Milky Polka Dots
The short answer: tiny brown or white polka dots (and the occasional heart) on milky white: playful without being childish.
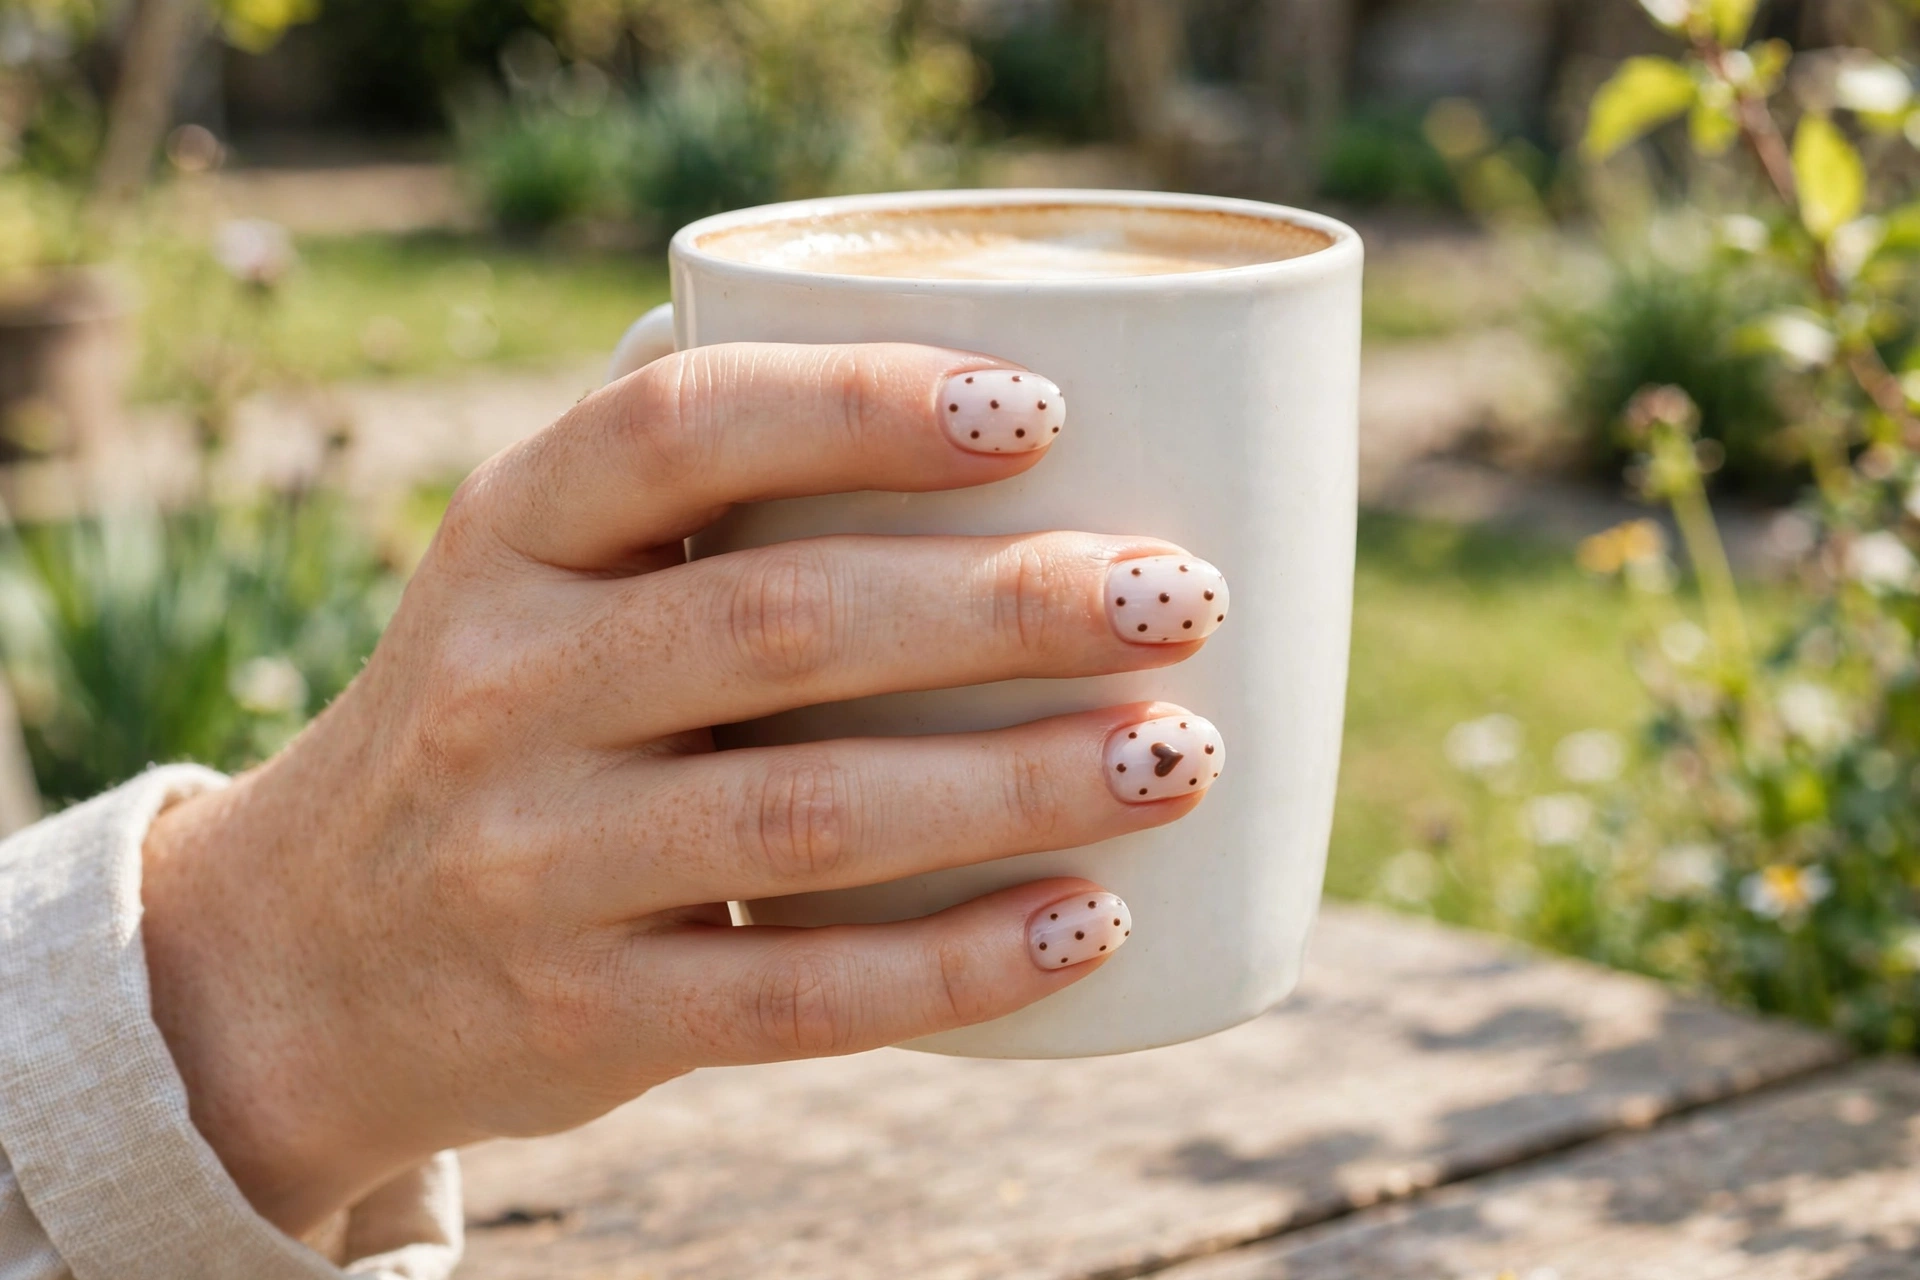
Polka dots on a milky base are the rare playful design that still looks grown-up, because the sheer background keeps it soft. Use a dotting tool for uniform dots and keep them small; chocolate brown dots on milky white are the most-loved combination, with tiny hearts on the ring finger as an accent. This is one of the easiest designs to DIY well and one of the most forgiving to wear as it grows out.
Milky Trend Finishes
Milky is also a base layer for some of the biggest nail trends of the last few years. These finishes change the surface of the milky look without changing its sheer, soft character.
16. Milky Glazed Donut
The short answer: white chrome powder buffed over a milky base: the glazed donut trend built on milky instead of nude.
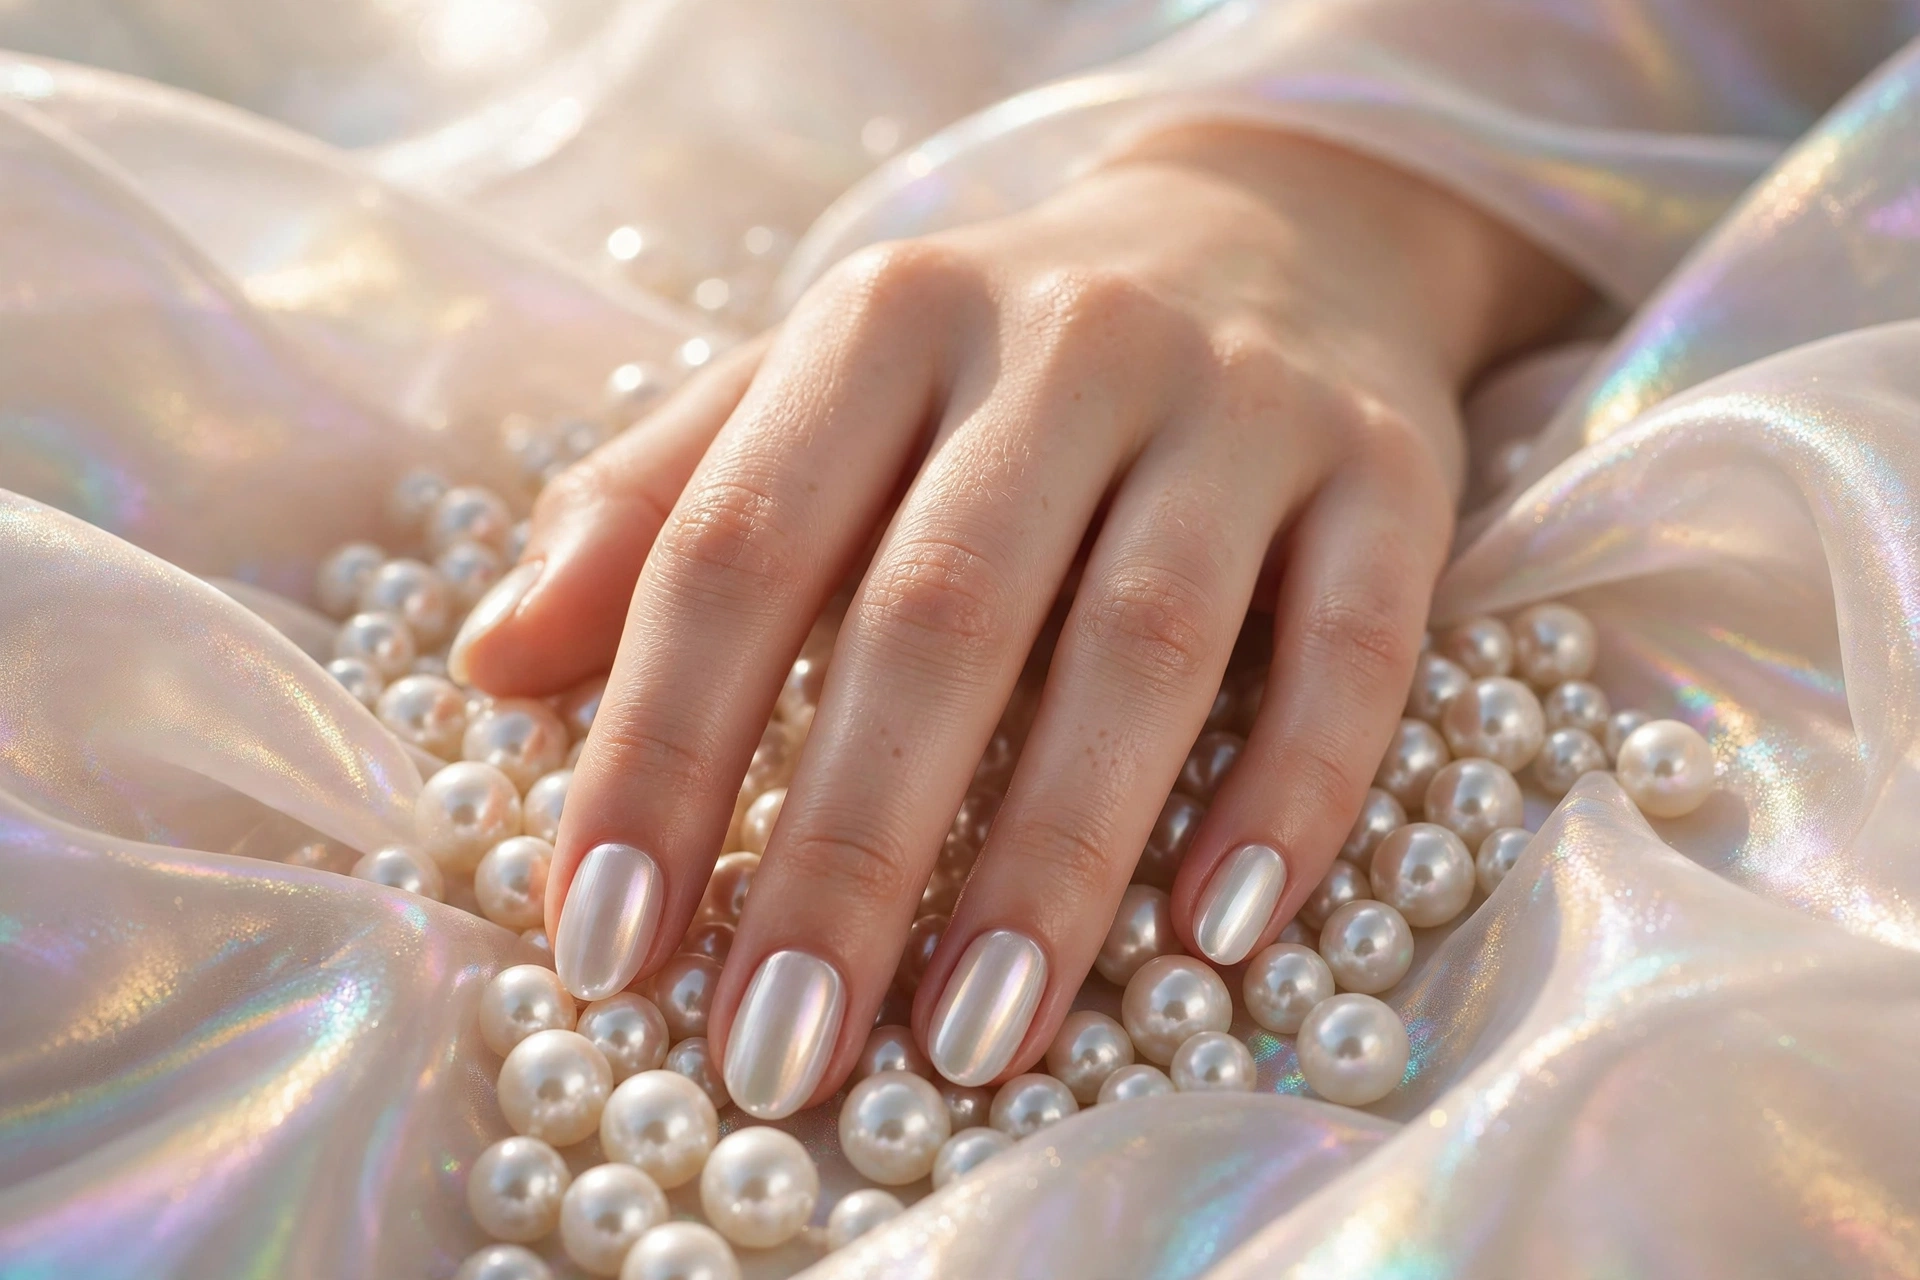
Glazed donut nails are chrome powder over a base color, and milky white is one of the best bases for it: the result is a pearly, lit-from-within shimmer rather than a mirror. Ask for chrome powder over two coats of milky white, sealed with a no-wipe top coat. Note the distinction: glazed adds visible shimmer, while plain milky stays matte-clear. Gel is the reliable route for this one, since chrome powder needs a tacky gel layer to grip.
17. Soap Nails
The short answer: the sheerest, most watery version of milky: near-clear gloss that just looks like extremely healthy nails.

Soap nails sit one step sheerer than classic milky: think one thin coat of sheer white or pink, or even just a glossy clear, over perfectly prepped nails. The look only works if the nail underneath is genuinely healthy, because there is nowhere to hide, so this is the finish that rewards good cuticle care most. It is the best milky option for strict dress codes and for anyone who wants the trend with zero color commitment.
18. Milky Cat-Eye
The short answer: magnetic shimmer polish in a milky base, pulled into a glowing light band with a magnet.
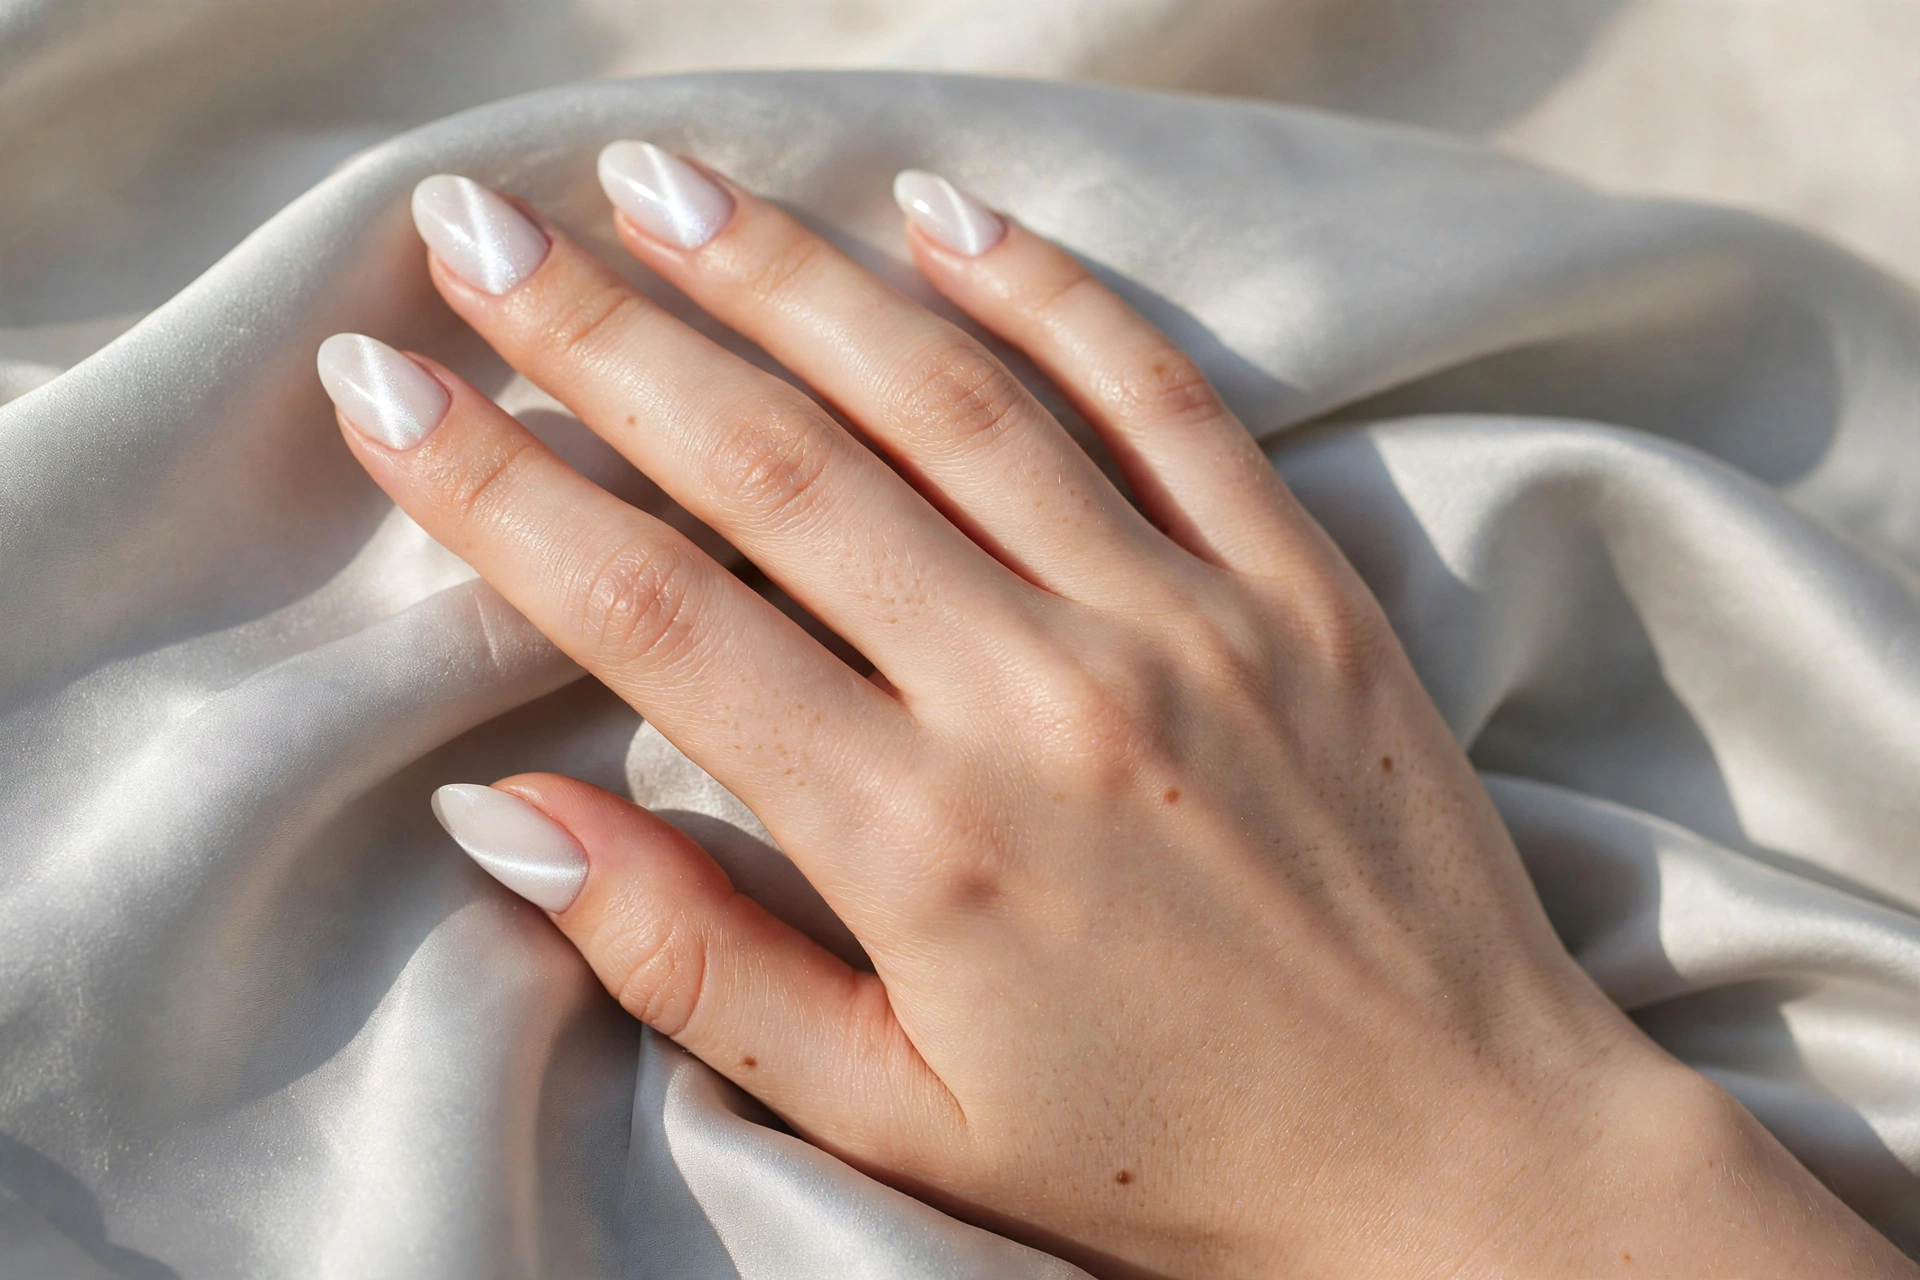
Cat-eye magnetic polish over milky gives you dimension without color: a soft band of light that moves as you tilt your hand. Choose a white or silver magnetic polish rather than a colored one to stay in the milky family. The magnet work takes practice at home (hold the magnet close without touching, count to ten), so a salon visit is worth it for your first set. Medium to long nails show the light band best.
19. Matte Milky
The short answer: a velvety matte top coat over milky white: the same sheer color with a soft, powdery surface.
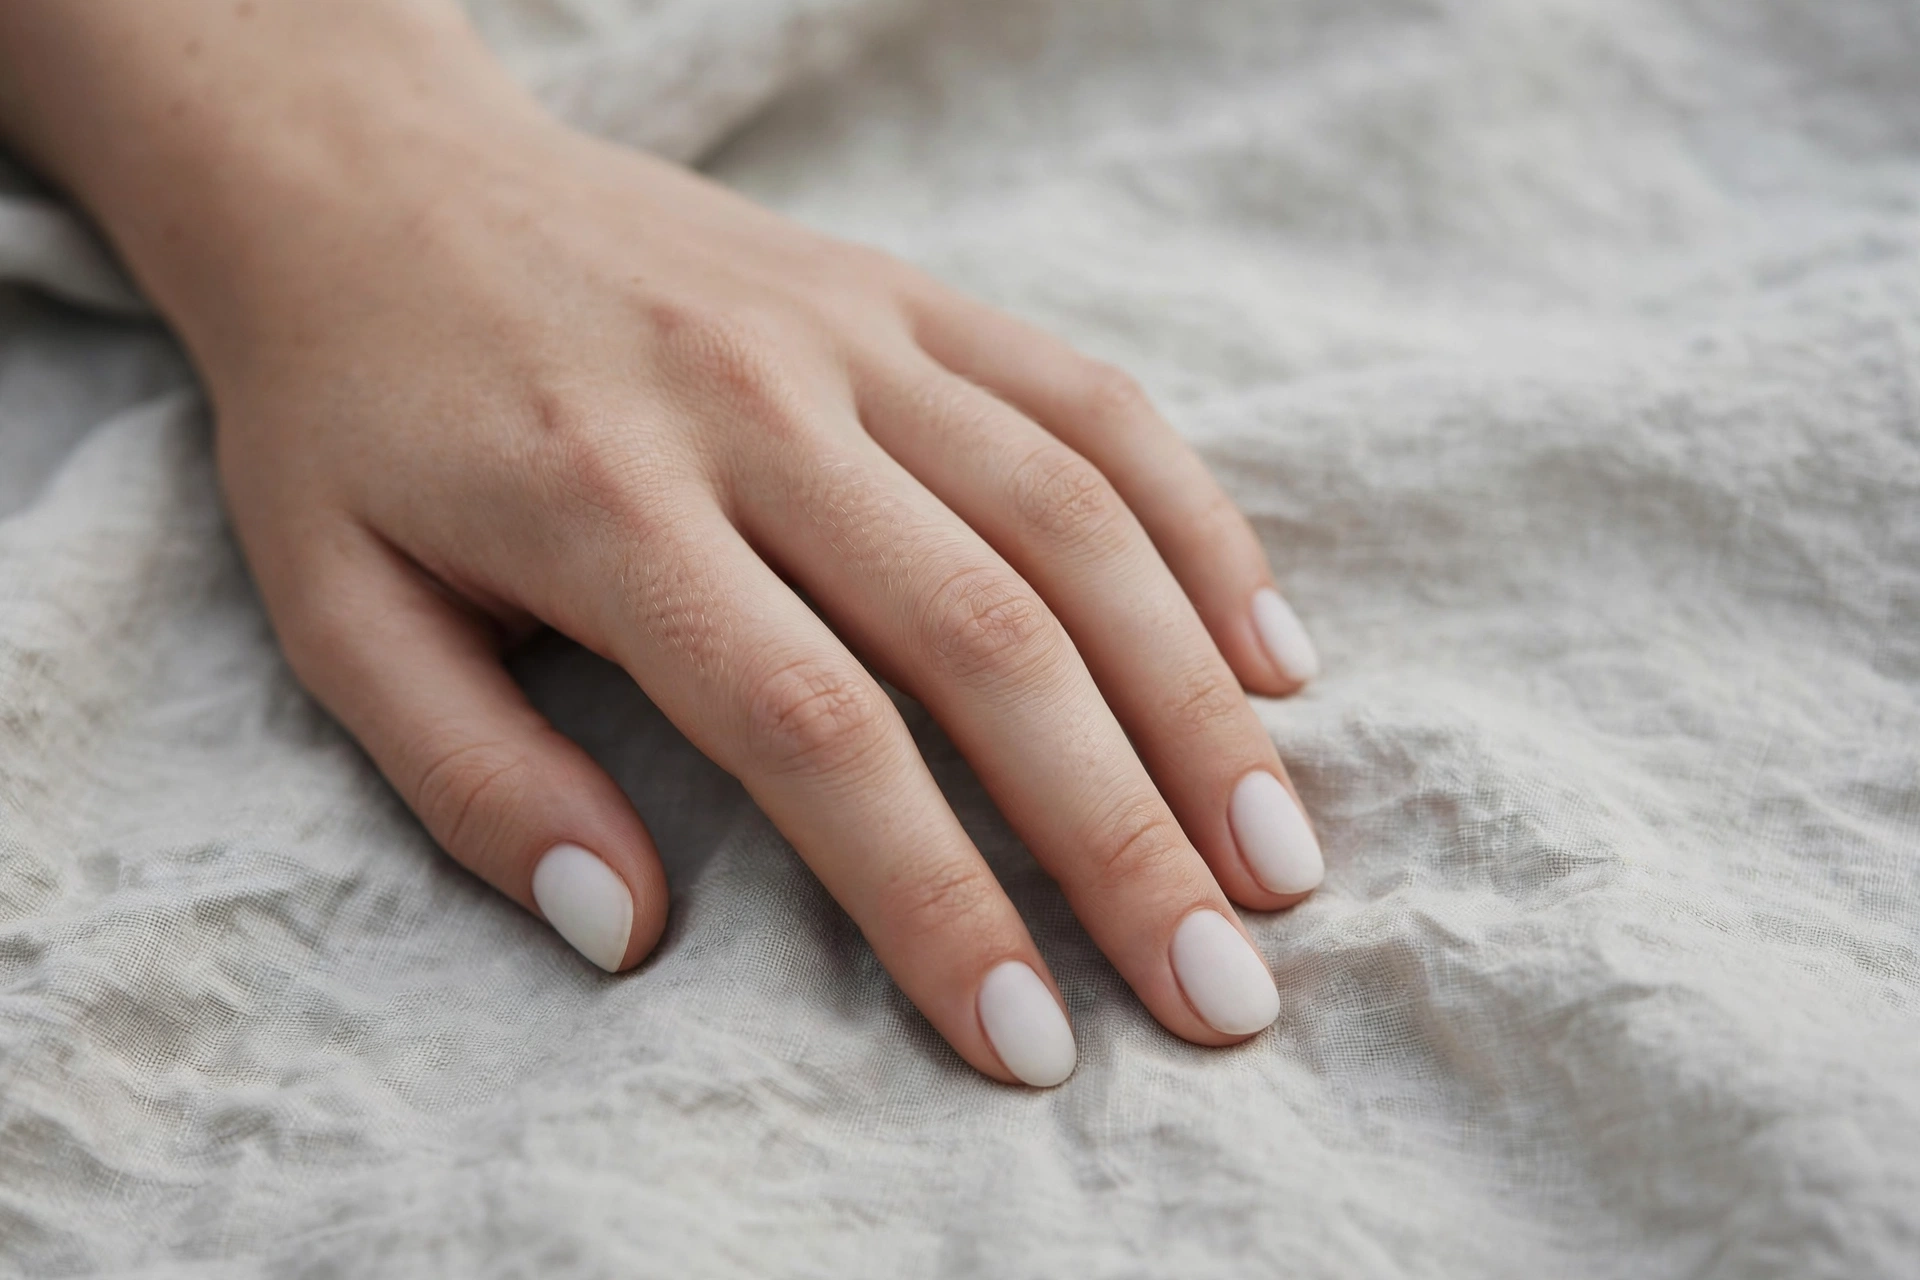
Matte transforms milky from dewy to velvety, and the effect is strikingly modern. The honest trade-off: matte top coats show oils, wear, and small chips faster than gloss, and they can make sheer white look slightly chalky if the milky layers underneath are thin. Build to full milky opacity before matting, and keep a matte top coat at home for touch-ups. Best on short to medium nails where the soft finish reads intentional.
20. Glitter-Dusted Milky Tips
The short answer: fine white or champagne glitter fading from the tips over a milky base: the event-ready milky.
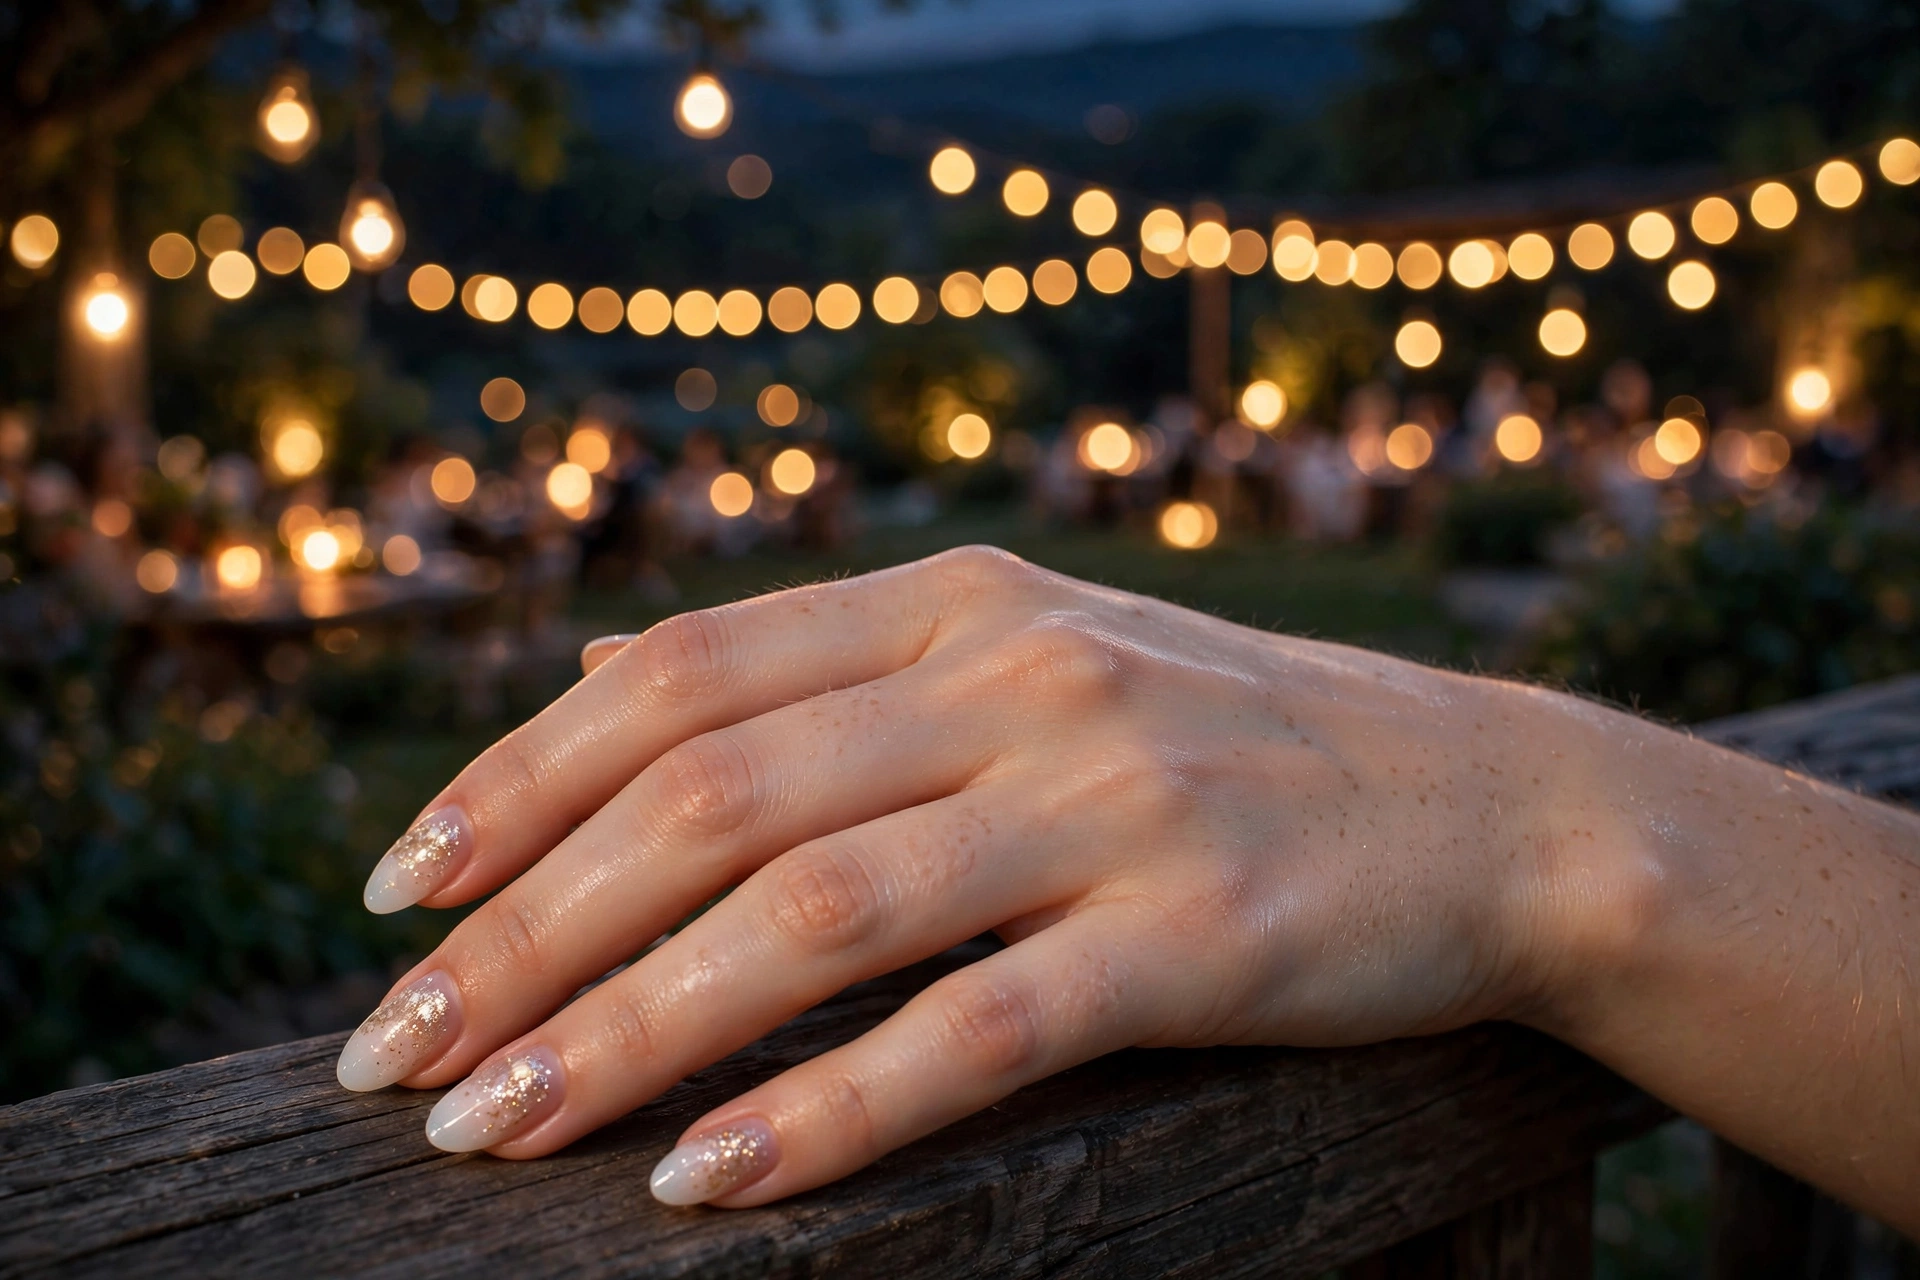
A whisper of fine glitter over milky is the easiest way to dress the look up for evenings and parties. Use the finest glitter you can find and fade it from the tip downward so it melts into the milky base rather than sitting on top of it. This is also the longest-wearing milky in the guide: glitter texture hides tip wear and small chips better than any plain finish. Seal well so the glitter feels smooth.
Milky Nails vs. Similar Trends
Sheer nail trends have overlapping names, and salons use them loosely. This table sorts out what each one actually means, so you can ask for the right thing.
| Trend | How it looks | Opacity | Best for | What to ask for |
|---|---|---|---|---|
| Milky nails | Translucent white or pink wash, natural nail visible but blurred | Sheer to medium, layered | Everyday wear, offices, weddings | 2–3 thin coats of sheer white, glossy top coat |
| Glazed donut | Pearly chrome shimmer over a base color | Sheer base + visible shimmer | Trend lovers, evenings | Chrome powder over a milky or nude base |
| Soap nails | Near-clear, watery gloss; looks like bare healthy nails | Minimal | Strict dress codes, minimalists | One sheer coat or glossy clear, perfect prep |
| Milk bath | Milky base with flowers or foil suspended in it, like petals in milk | Medium milky | Romantic occasions, nail art lovers | Milky base with encapsulated dried flowers or foil |
| Sheer French | Defined white tip on a sheer base | Sheer base, opaque tip | Classic events, brides | Sheer nude base with a soft white smile line |
How to DIY Milky Nails at Home
The short answer: prep well, apply two to three thin coats of sheer white polish, and seal with a glossy top coat: thin layers are the whole secret.
Milky nails are one of the most DIY-friendly trends because sheer polish forgives uneven application. Start with clean, lightly buffed nails and pushed-back cuticles, then a base coat. Apply the sheer white in thin coats, letting each dry fully; the milkiness builds with each layer, so stop when it looks right to you (usually two or three). Finish with the glossiest top coat you own. If your sheer white goes on streaky, try the salon trick: one thin coat of opaque white, then a sheer nude or jelly topcoat over it for the milky blur. If you love sheer color more broadly, our green nail designs and purple nail designs guides include sheer and jelly finishes in those color families.
Keeping Milky Nails Looking Fresh
Sheer polish wears gracefully, with no harsh grow-out line, but it has its own maintenance quirks. Reapply top coat every two to three days to keep the gloss alive and prevent tip wear. Moisturize cuticles daily; dry cuticles are more visible against a sheer manicure than an opaque one. Avoid harsh cleaning chemicals without gloves, since sheer white can pick up slight discoloration. And when winter dryness hits, a milky set pairs beautifully with the soft, muted palettes in our winter nail designs guide.
Frequently Asked Questions
What exactly are milky nails?
Milky nails are a manicure built from sheer white or sheer pink polish, layered until the nail looks like frosted glass or skim milk: translucent, soft, and glossy, with the natural nail faintly visible underneath. The defining trait is the “your nails but better” effect rather than full coverage.
What should I ask for at the salon to get milky nails?
Ask for two to three thin coats of a sheer white or sheer pink polish with a glossy top coat, and specify that you want the natural nail slightly visible. Naming the technique beats naming the trend: “sheer white, layered to a milky finish” is clearer to a tech than just saying “milky nails.” Bring a reference photo of the exact look you want.
What is the difference between milky nails and glazed donut nails?
Milky nails are a sheer color finish; glazed donut nails are a chrome-powder shimmer applied over a base color. They overlap because milky white is a popular base for the glazed look, but plain milky has no shimmer while glazed always does. You can combine them: chrome powder over milky white gives a pearly, lit-from-within effect.
What is the difference between milky nails and soap nails?
Soap nails are the sheerest step beyond milky: near-clear, watery gloss that looks like extremely healthy bare nails, while milky has visible white or pink color built up in layers. Think of soap nails as milky with the opacity turned almost all the way down.
Do milky nails suit short nails?
Yes. Short nails are one of the best canvases for milky, especially in oval, squoval, or short square shapes. The one caveat is that on very short nails, ultra-sheer milky can look like an unfinished base coat, so build to a true milky opacity and keep the free edge perfectly even.
Which nail shape looks best with milky nails?
Almond and oval are the most flattering because their curved silhouette matches the soft, blurred character of the finish. Short square and squoval give a cleaner, more modern take. Very long stiletto or coffin nails can work, but the sheer finish reads more dramatic at length, so it suits the look less naturally.
How many coats do milky nails need?
Usually two to three thin coats of sheer white or pink polish. The milkiness builds with each layer: one coat looks like a tint, two look milky, three look creamy but still translucent. Stop when it looks right to you rather than chasing a fixed number, and always let each coat dry fully before the next.
Do milky nails chip faster than opaque polish?
No. Wear time depends on your base coat, top coat, and how you treat your hands, not on the color’s opacity. In fact, milky nails show chips and grow-out less obviously than opaque colors because there is no harsh line where polish meets nail. Expect 5 to 7 days with regular polish and 2 to 3 weeks with gel, same as any well-applied manicure.




13 Comments