16 Floral Nail Designs You’ll Want to Copy
Floral nails never really leave the trend cycle. They spike every spring, stay strong through summer wedding season, and work year-round as accent art. Below are 16 flower nail designs grouped by bloom family, so you can skip straight to the flowers you actually like, plus a beginner painting tutorial for the designs you want to try yourself.
Every design below comes with its own original photo and honest notes on difficulty, shape, and wearability, because a design you cannot recreate is just a pretty picture. If you are new to nail art, read the tutorial first; if you are here for ideas, jump to your favorite flower family.
How to Paint Flowers on Your Nails at Home
Two beginner-friendly methods cover almost every floral nail design: dotting-tool flowers for simple blooms like daisies, and one-stroke brush petals for layered flowers like roses and peonies. Both work with regular polish or gel; gel gives you the advantage of curing between layers so colors never bleed.
The dotting-tool daisy
Paint your base color and let it dry fully. Dip the large end of a dotting tool in your petal color and place five or six dots in a circle, leaving the center empty. Clean the tool, then dot the center in a contrasting color. Work one nail at a time so the petals stay crisp, and cure between layers if you are using gel. This one method produces daisies, plumeria, simple wildflowers, and baby’s breath, just by changing colors and dot size.
The one-stroke petal
Load a small flat brush with two colors at once: the darker shade on one corner, the lighter on the other. Press the brush flat on the nail, then pull and lift in one motion. The result is a petal that shades from dark at the base to light at the tip. Layer five or six petals in a circle and you have a rose or peony. The brush does the blending for you, which is why this technique looks advanced while staying learnable. An almond or oval shape gives petals the most natural canvas.
Five mistakes that ruin floral nail art
First, polish that is too thick: it makes blobby petals, so wipe the brush and use thin coats. Second, dragging the tool through wet polish smears the base, so let the base dry or cure completely before adding art. Third, flowers painted too large for the nail look crowded; one medium bloom beats three cramped ones. Fourth, skipping base coat invites staining, especially under reds and oranges. Fifth, forgetting top coat: always seal the art, painting carefully over the free edge so the design does not lift at the tips.
The 2026 Techniques: Blooming Gel, Sculpted Petals, and Gem Flowers
The two methods above cover classic floral art, but three newer techniques are driving most of the floral sets you are seeing now. They create very different finishes, so choose based on whether you want soft edges, real texture, or sparkle rather than trying to combine all three on one set.
Blooming gel for watercolor-soft petals
Blooming gel is a clear gel layer that makes color spread outward before you cure it. Paint and cure your base first, then apply a thin, even layer of blooming gel and leave it uncured. Touch small dots or short strokes of colored gel into that layer and wait while the pigment feathers into petals. Add a darker center once the shape looks right, then cure immediately to freeze it. Use less color than you think you need: one overloaded dot can spread across the whole nail. The effect suits daisies, peonies, poppies, and loose wildflowers, but it will not give you crisp outlines. If a bloom spreads too far, wipe the uncured layer off and start that nail again.
Sculpted petals and gem flowers
For texture you can feel, roll a tiny ball of builder gel or acrylic, place it on the nail, and press it into a petal with a silicone tool or the side of a brush. Build four or five petals around a center, curing or letting each small section set as your medium requires. Keep the profile low and limit sculpture to one or two nails so the flowers do not catch on clothing or hair. For a quicker jewel effect, arrange five small rhinestones around one center stone to form a gem flower, then secure every edge with top coat. Both finishes photograph beautifully, but they need more upkeep than flat painted art, especially if you type, garden, or open cans with your nails.
Daisies & Wildflowers
The easiest flowers to paint and the freshest to wear. Daisies, lavender, and meadow mixes suit everyday life because they stay small, simple, and readable at a glance.
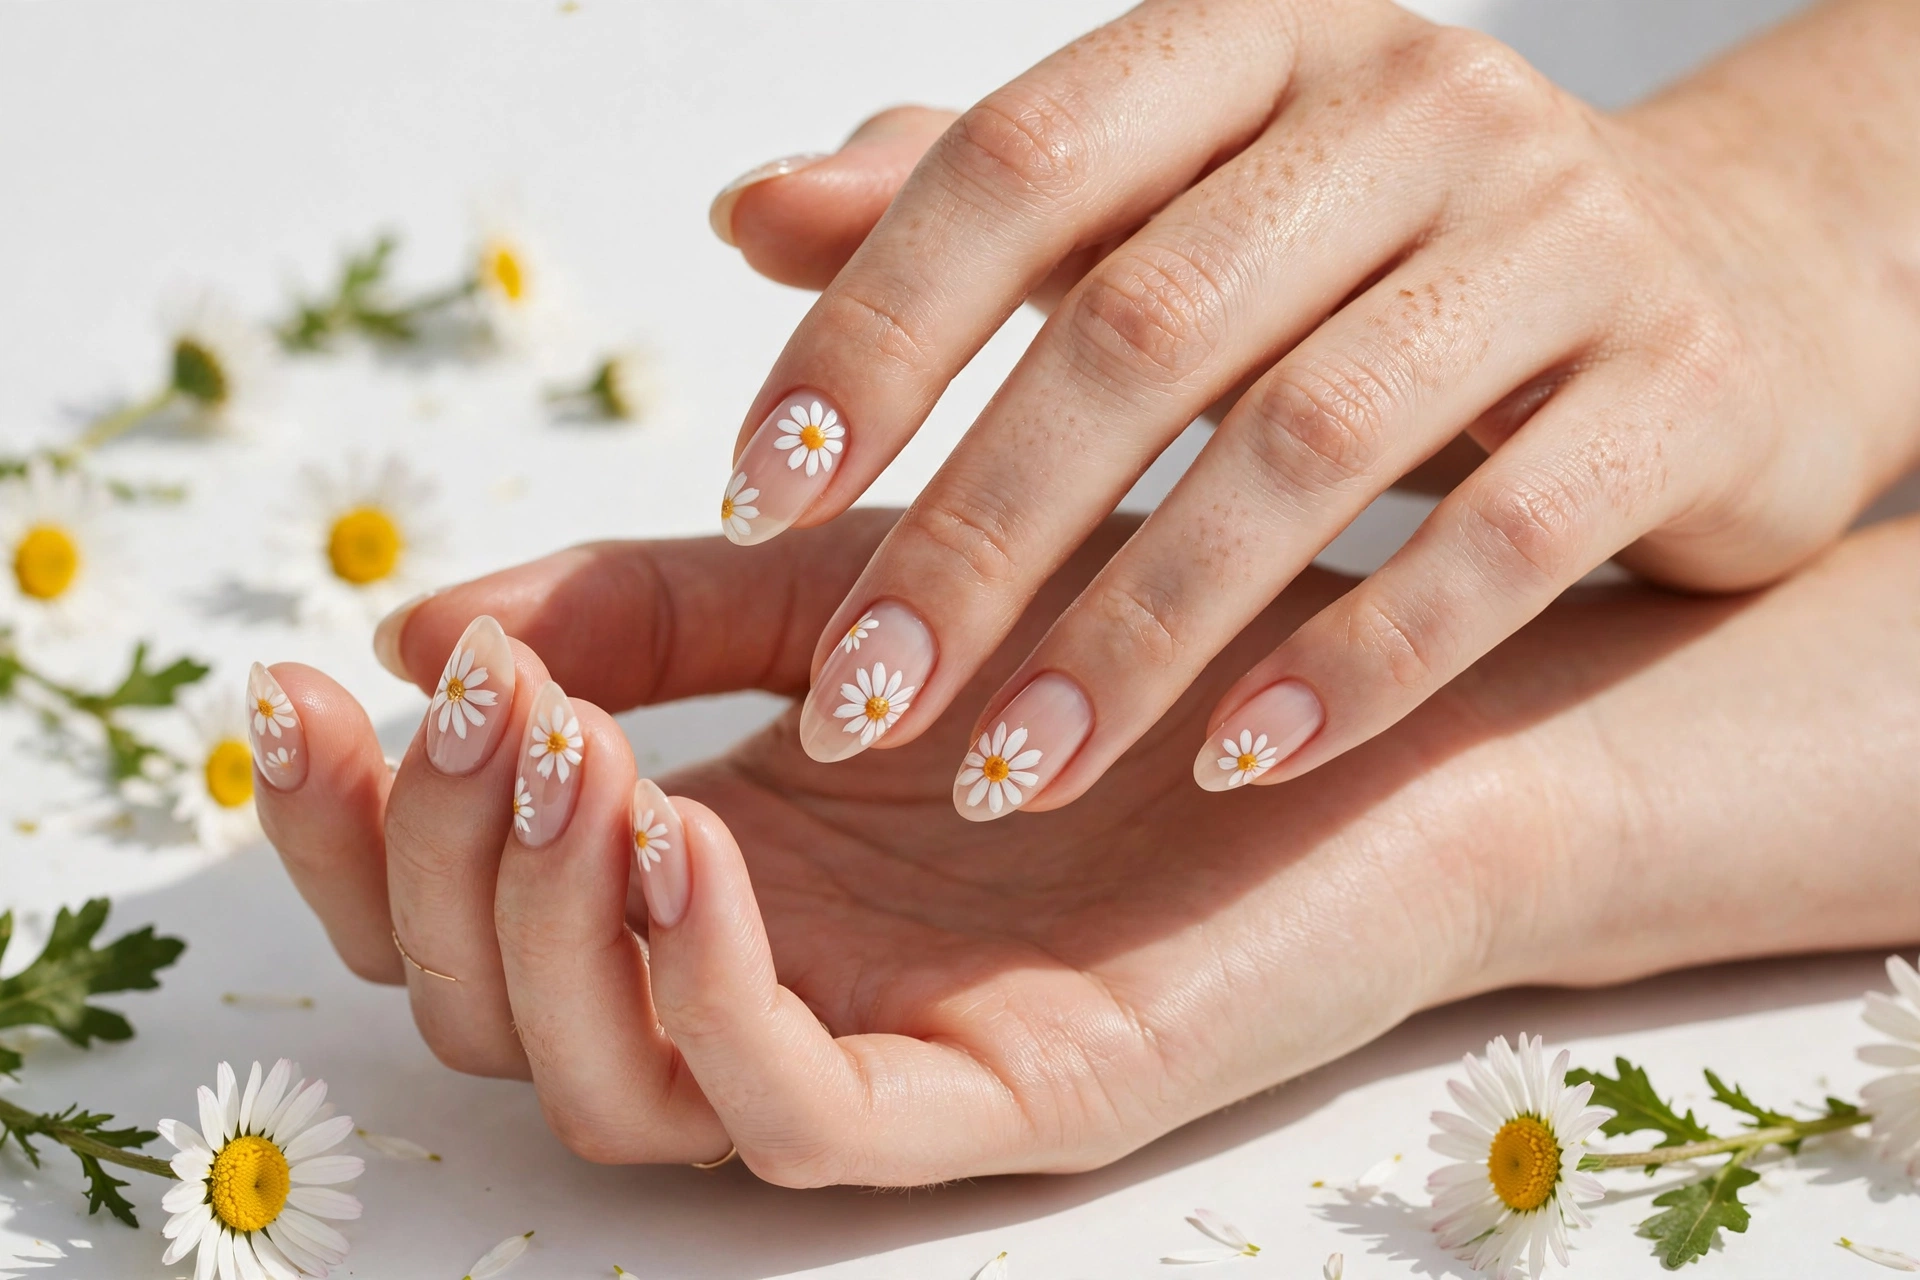
1. Classic White Daisies on Nude
Five white dots around a yellow center is the simplest flower in nail art, and on a sheer nude base it reads fresh and clean rather than childish. The dotting-tool method below makes this genuinely beginner friendly, and because the design is mostly negative space, it stays office-safe. Almond or oval shapes suit it best; keep the daisies small so each petal stays visible on shorter nails.
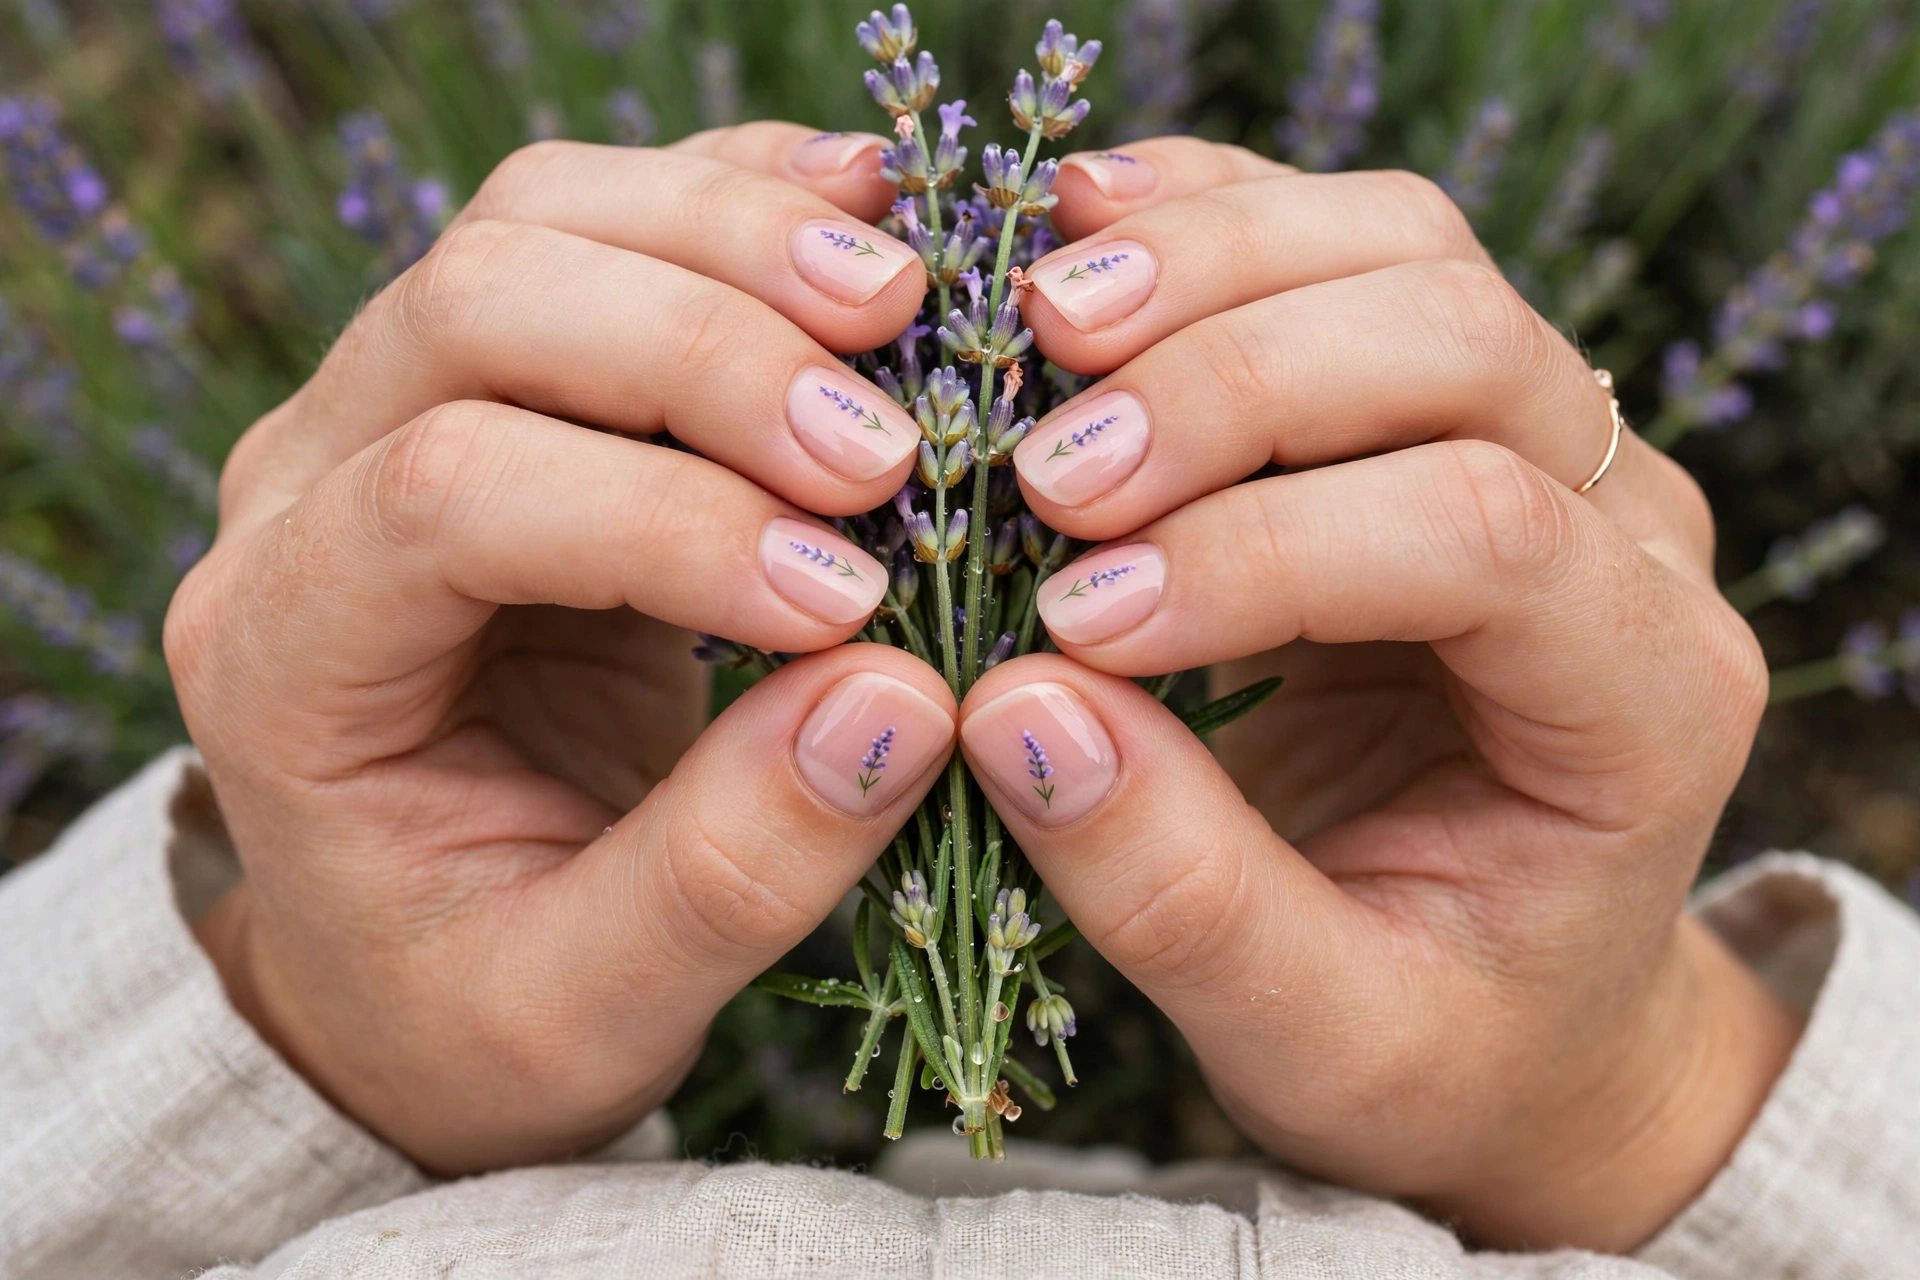
2. Lavender Sprig Field
Tiny lavender sprigs suit anyone who finds big blooms too sweet. Paint thin green stems with a fine brush, then dot three or four tiny purple dots along each stem for the buds. The trick is restraint: two or three sprigs per nail on a pale lilac or sage base looks calm and botanical. If you love green bases, our green nail designs give you plenty of background colors to try.
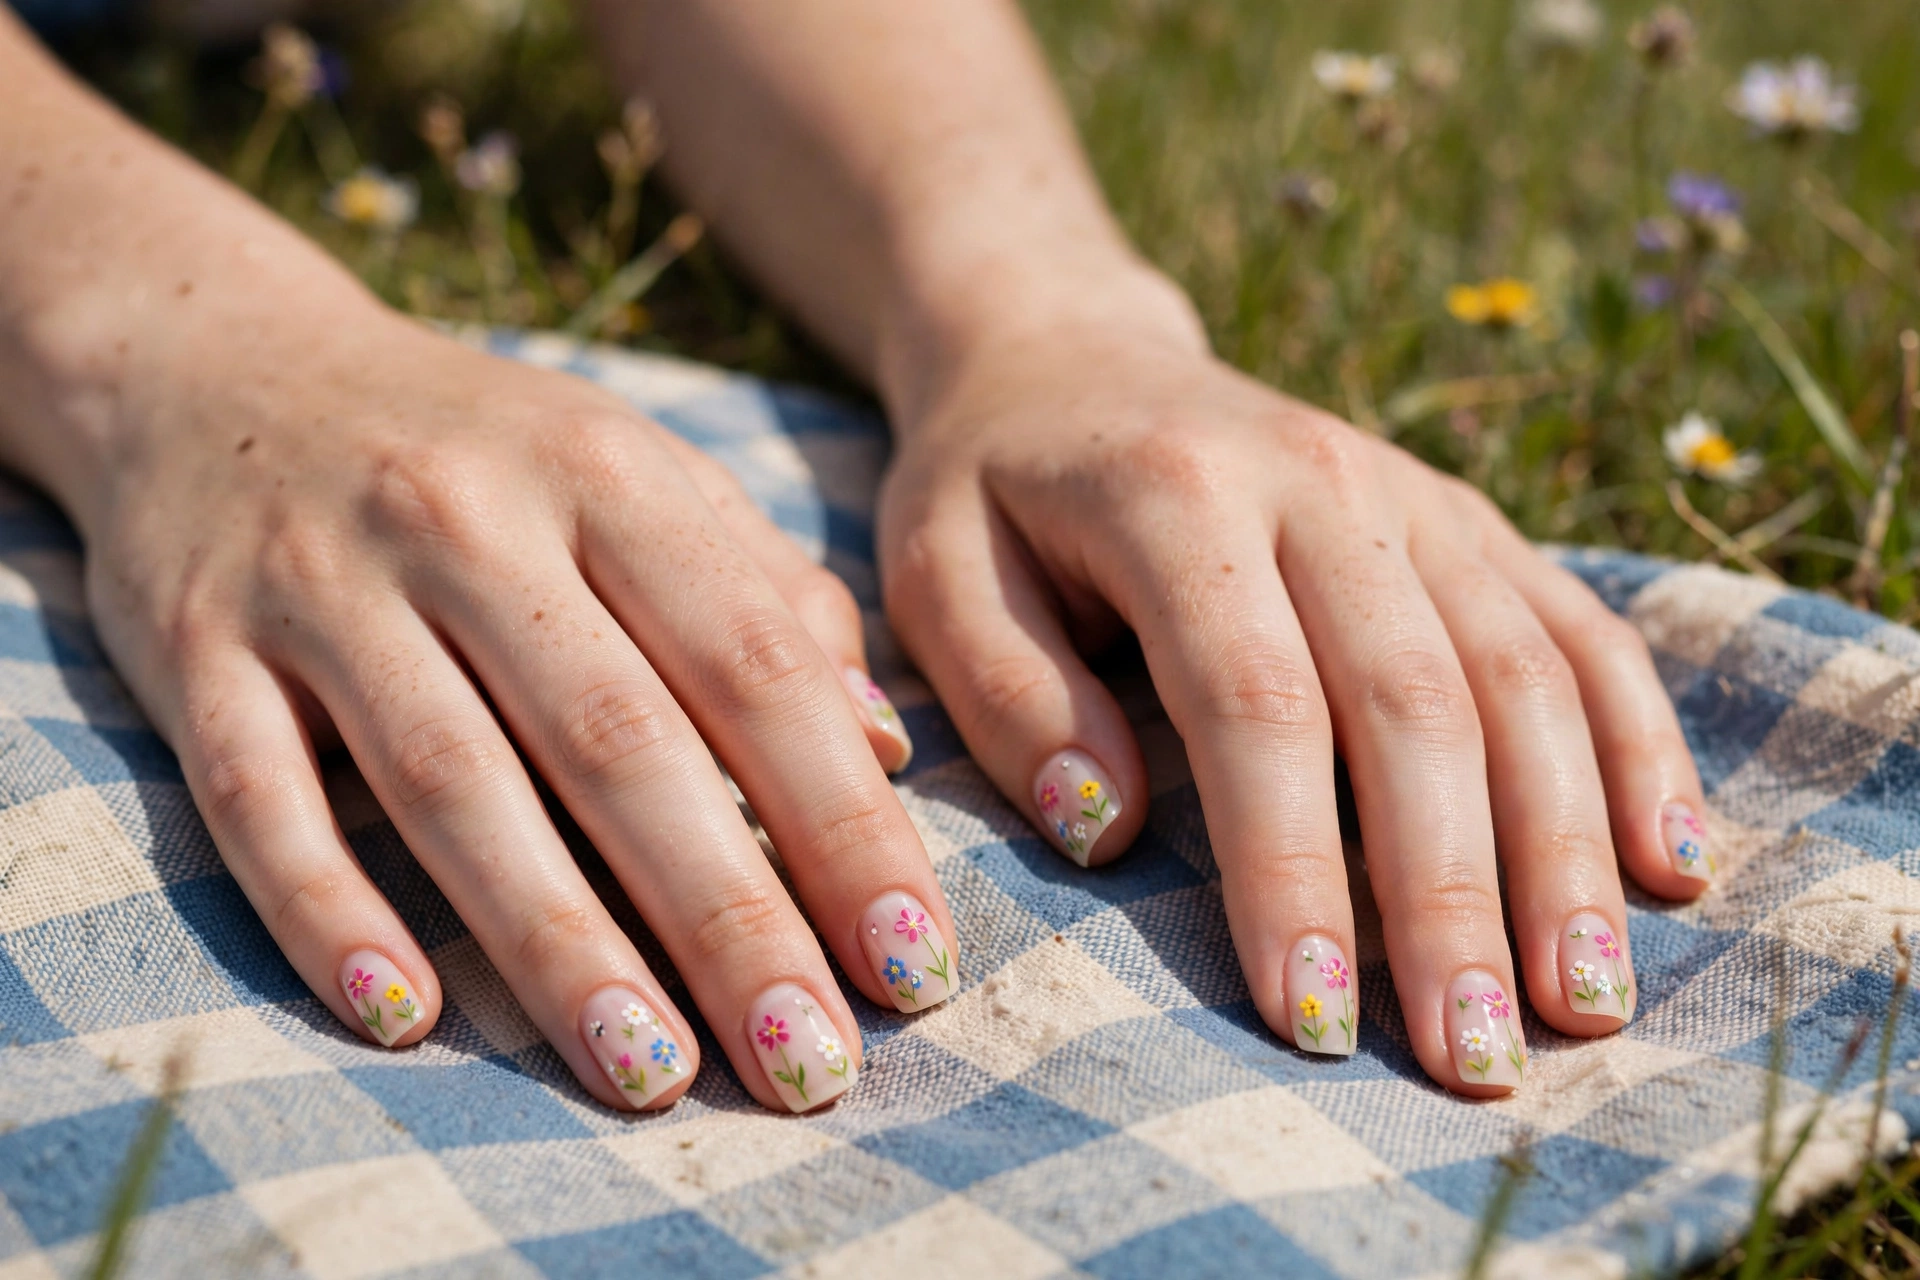
3. Wildflower Meadow Mix
The meadow approach lets every nail carry a different tiny flower, so no two fingers match and the set feels playful instead of fussy. Keep a consistent color story (pastels, for instance) and a consistent flower size, and the randomness looks intentional. Medium to long nails give each bloom room to breathe. Pair this with the palettes in our pastel nail designs guide for base colors that keep the mix soft.
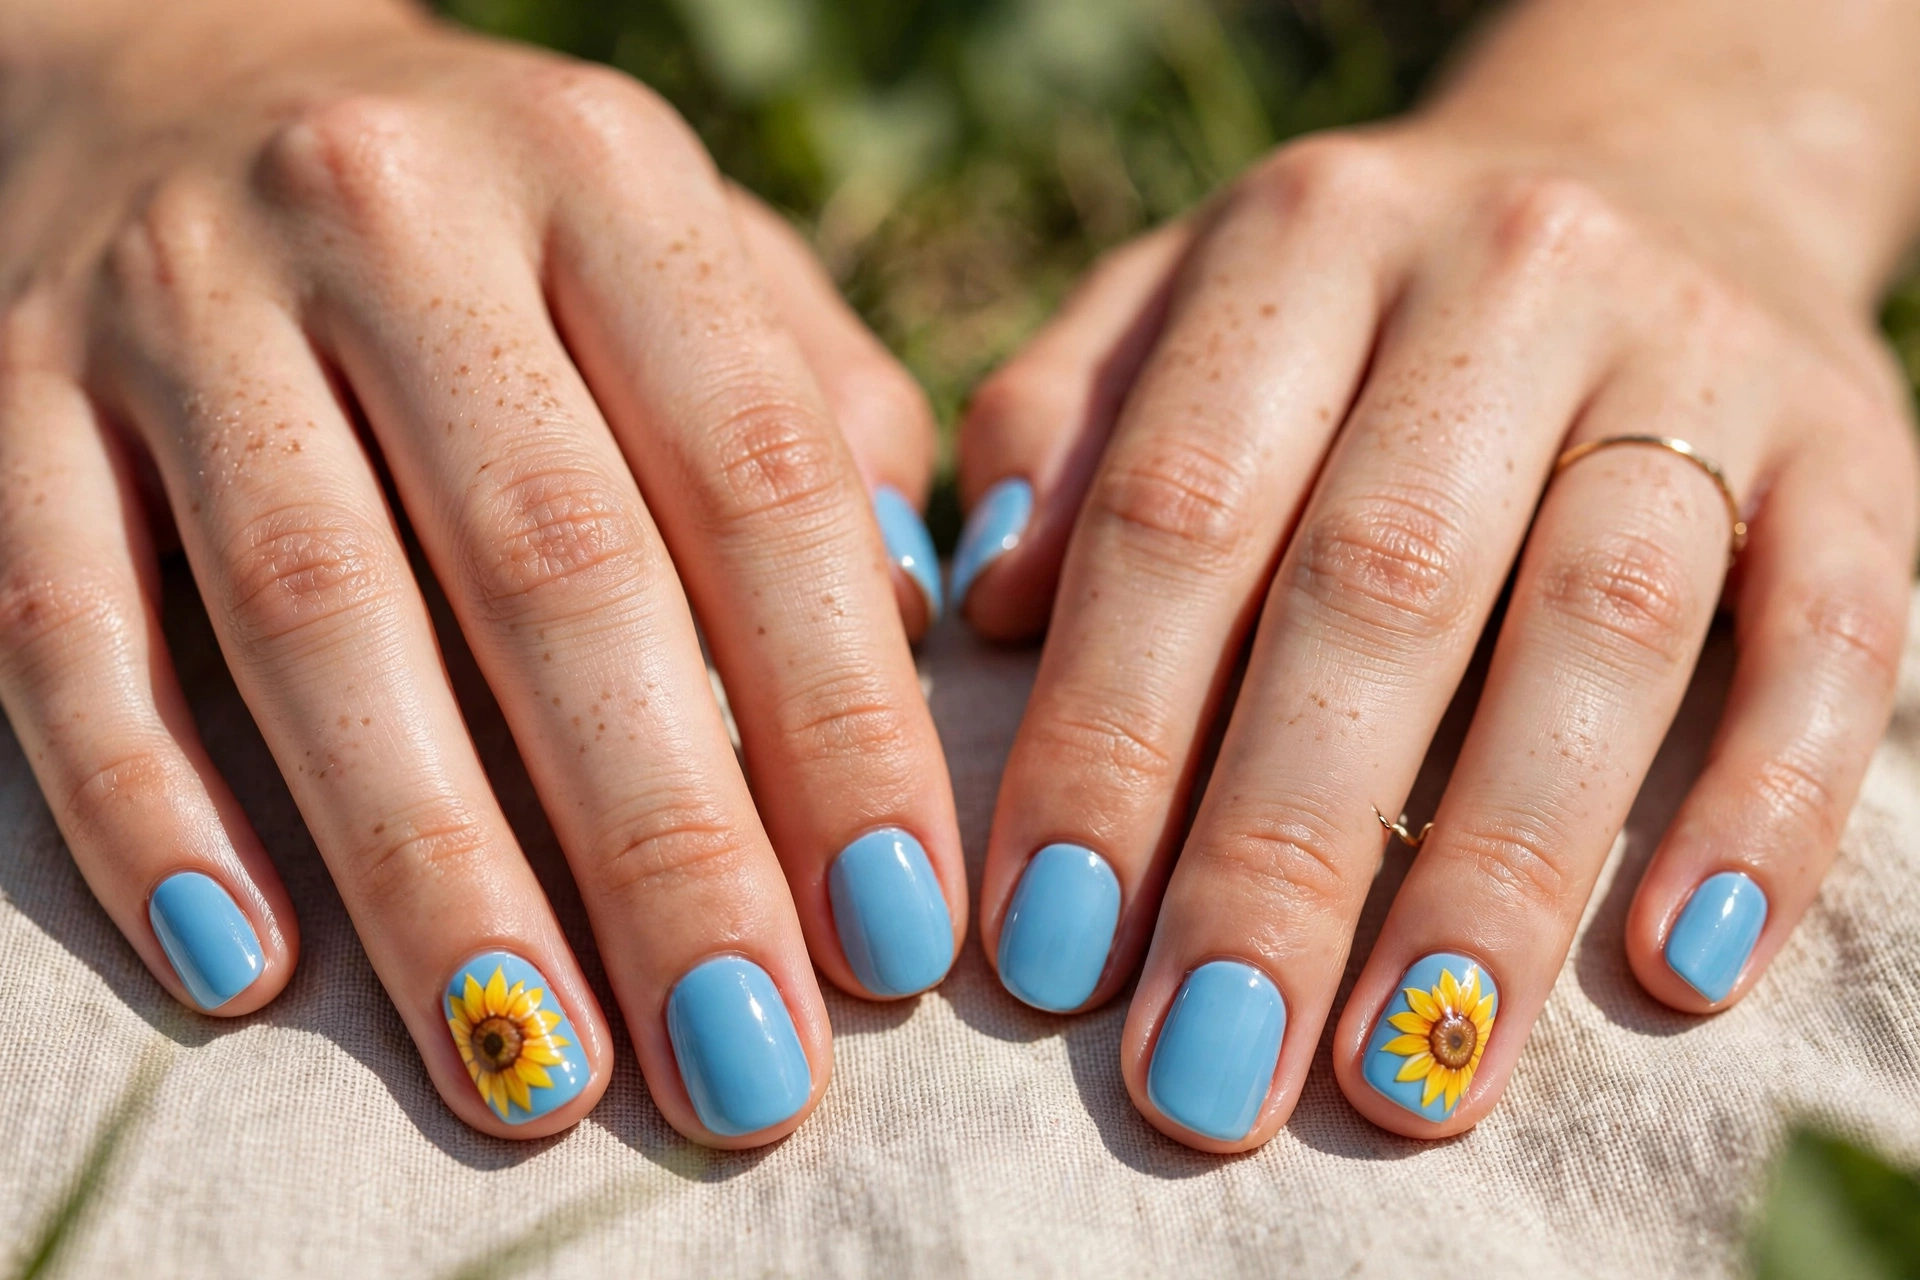
4. Sunflower Statement
Sunflowers are big and bold, so one per nail is enough, usually on two accent nails while the rest stay solid. A sky-blue base makes the yellow pop the way a real summer field does. Paint the brown center first, then drag thin yellow petals outward with a fine brush, slightly uneven on purpose. Butter yellow is the go-to shade here; our butter yellow nail designs cover bases that pair with it.
Roses & Peonies
Layered, romantic blooms with real depth. These take a steadier hand than daisies, but the petal techniques above make them achievable, and they photograph like salon work.
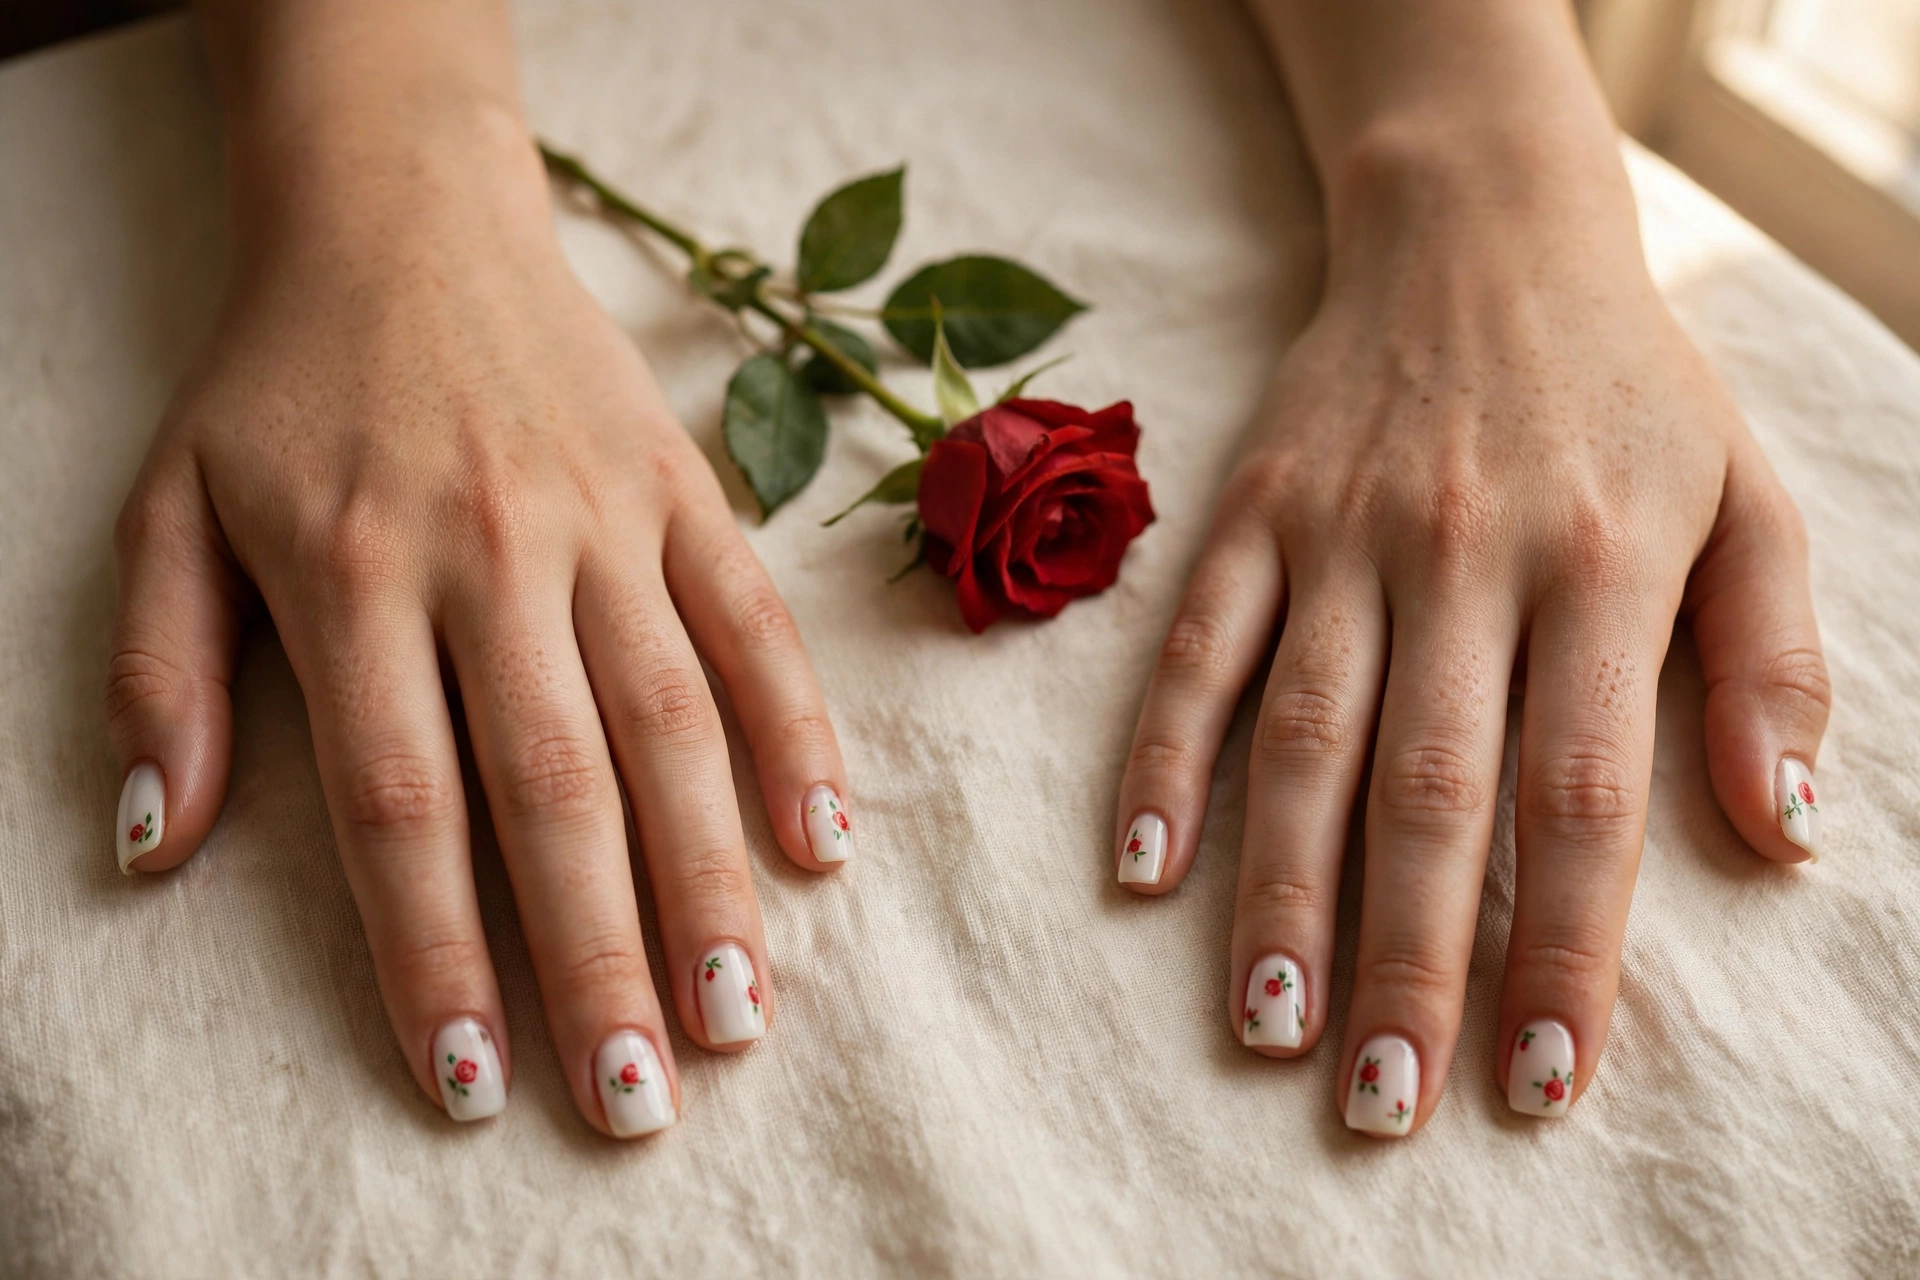
5. Hand-Painted Red Roses
Roses are built from a dark spiral center with lighter petals layered outward, which means even a slightly imperfect version reads as a rose. Use a small flat brush, deep red at the center, and pull each petal outward with less pressure at the edges. Milky white underneath makes the red look richer; see our milky nail designs for the sheer base formula. Intermediate difficulty, but very forgiving.
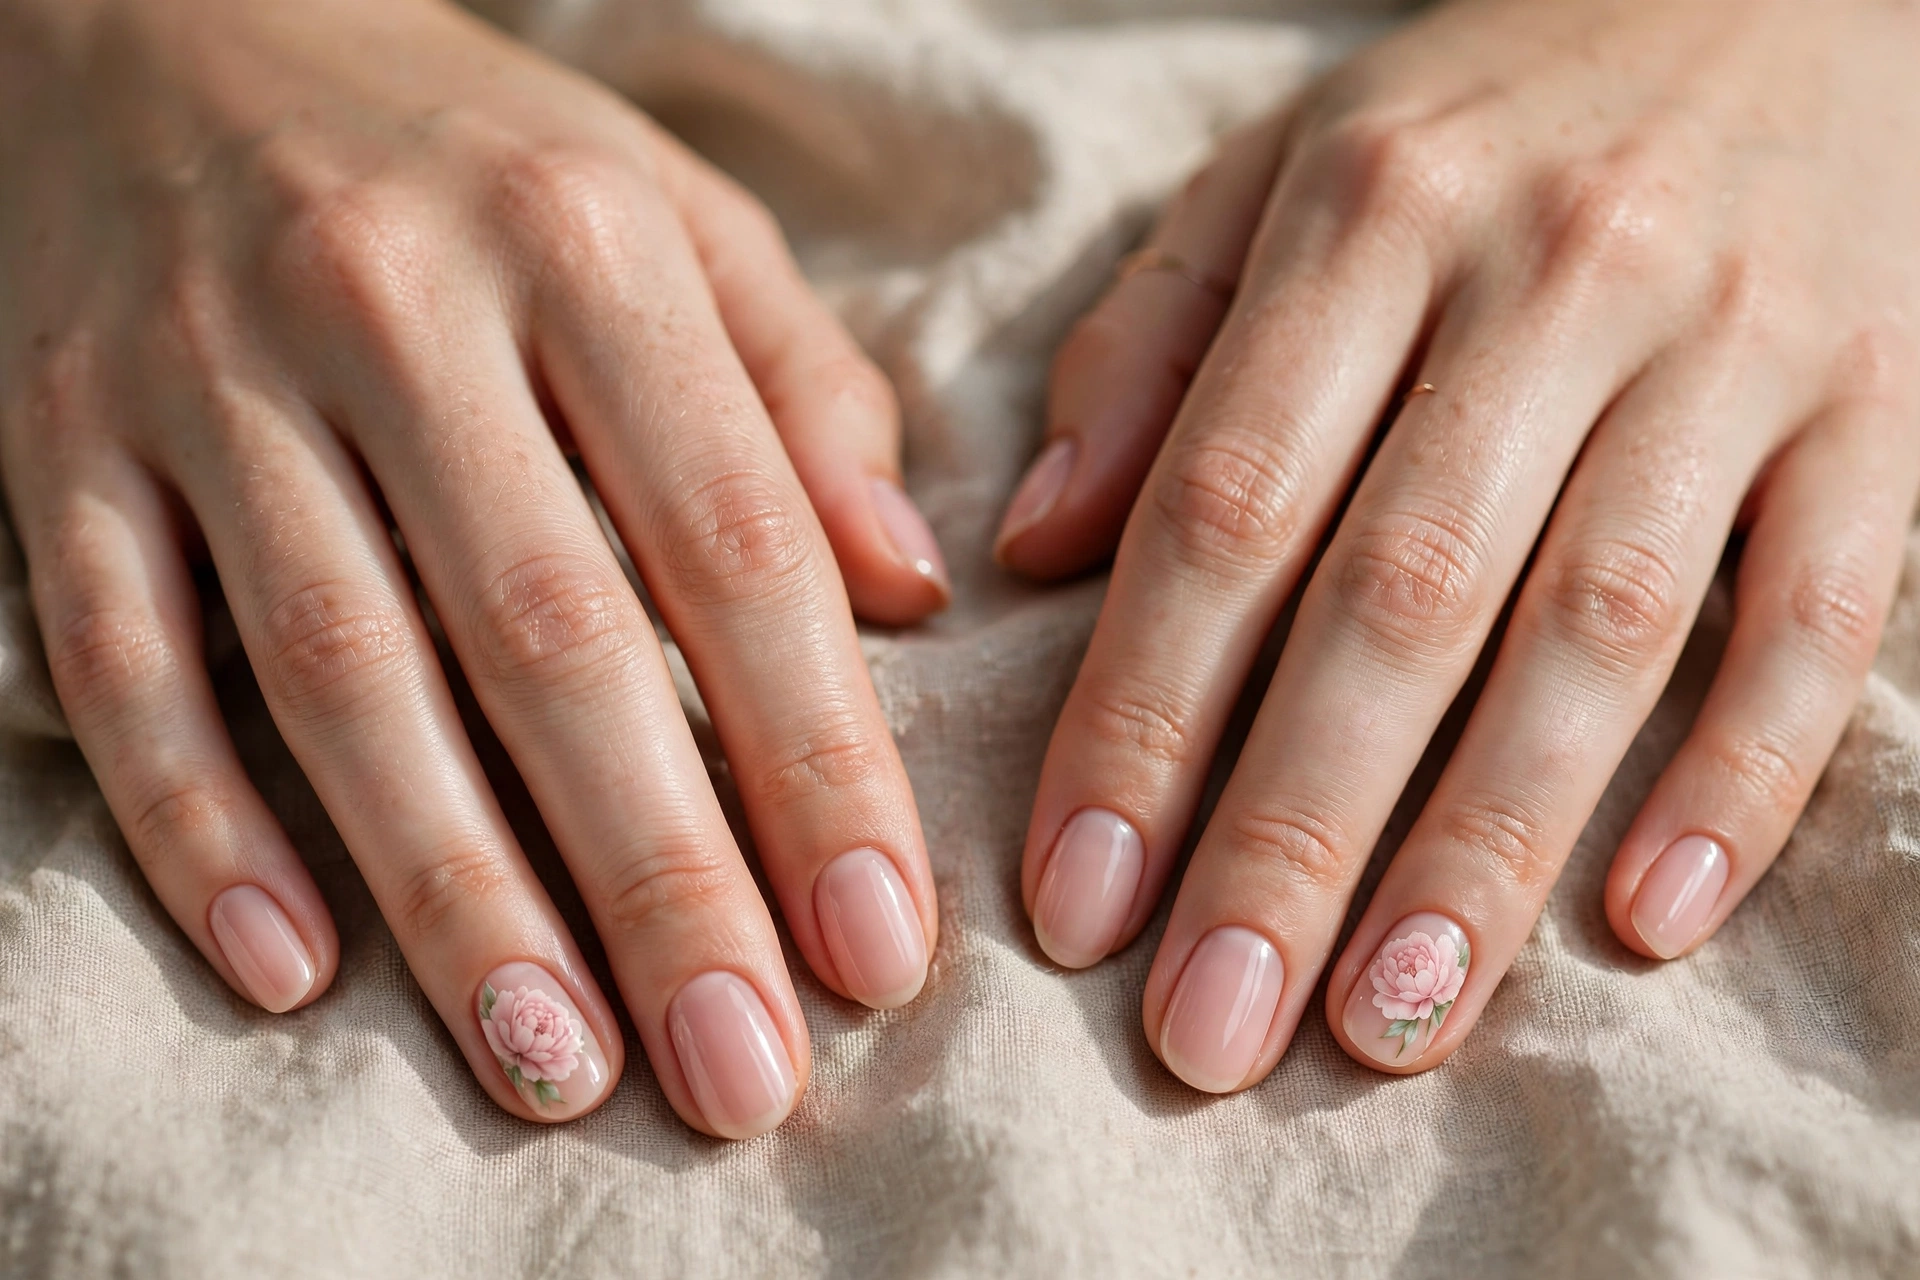
6. Blush Peony Blooms
Peonies are all about ruffled layers, which the one-stroke brush technique creates almost by accident. Load a flat brush with light pink on one edge and white on the other, then press and wiggle to lay down crinkled petals. Two blooms across a five-nail set is plenty; let nude base show between them. This is the floral to show a nail tech as a reference, since it photographs like salon work.
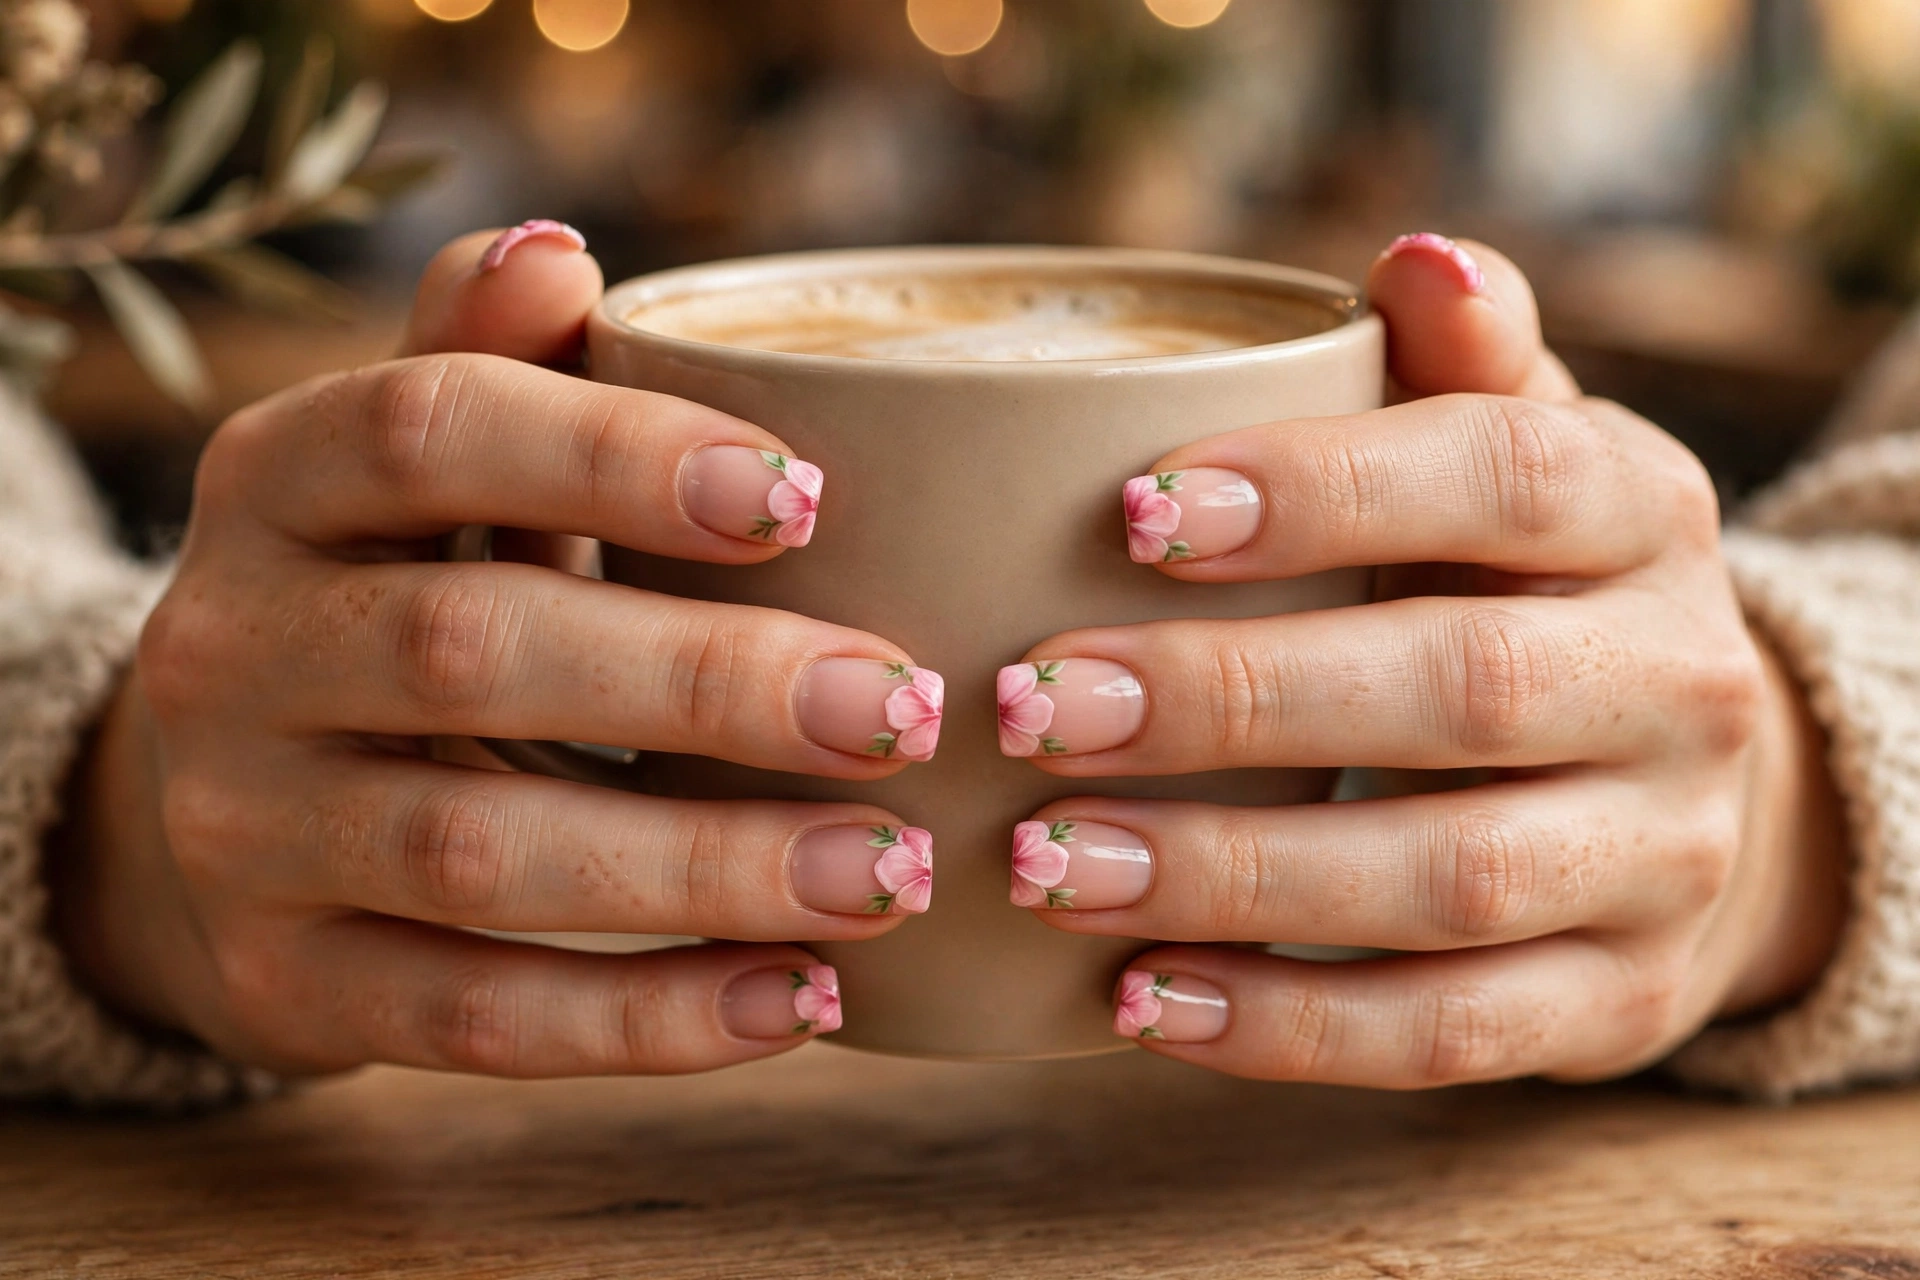
7. Rose-Petal French Tips
Instead of a white tip, paint a row of tiny pink petals along the free edge so the smile line becomes a blooming border. It keeps the French silhouette everyone recognizes while feeling completely fresh. Best on square or squoval nails where the straight edge gives petals a clean row to follow. Seal the free edge carefully with top coat, since tips take the most wear.
8. Vintage Tea-Rose Cluster
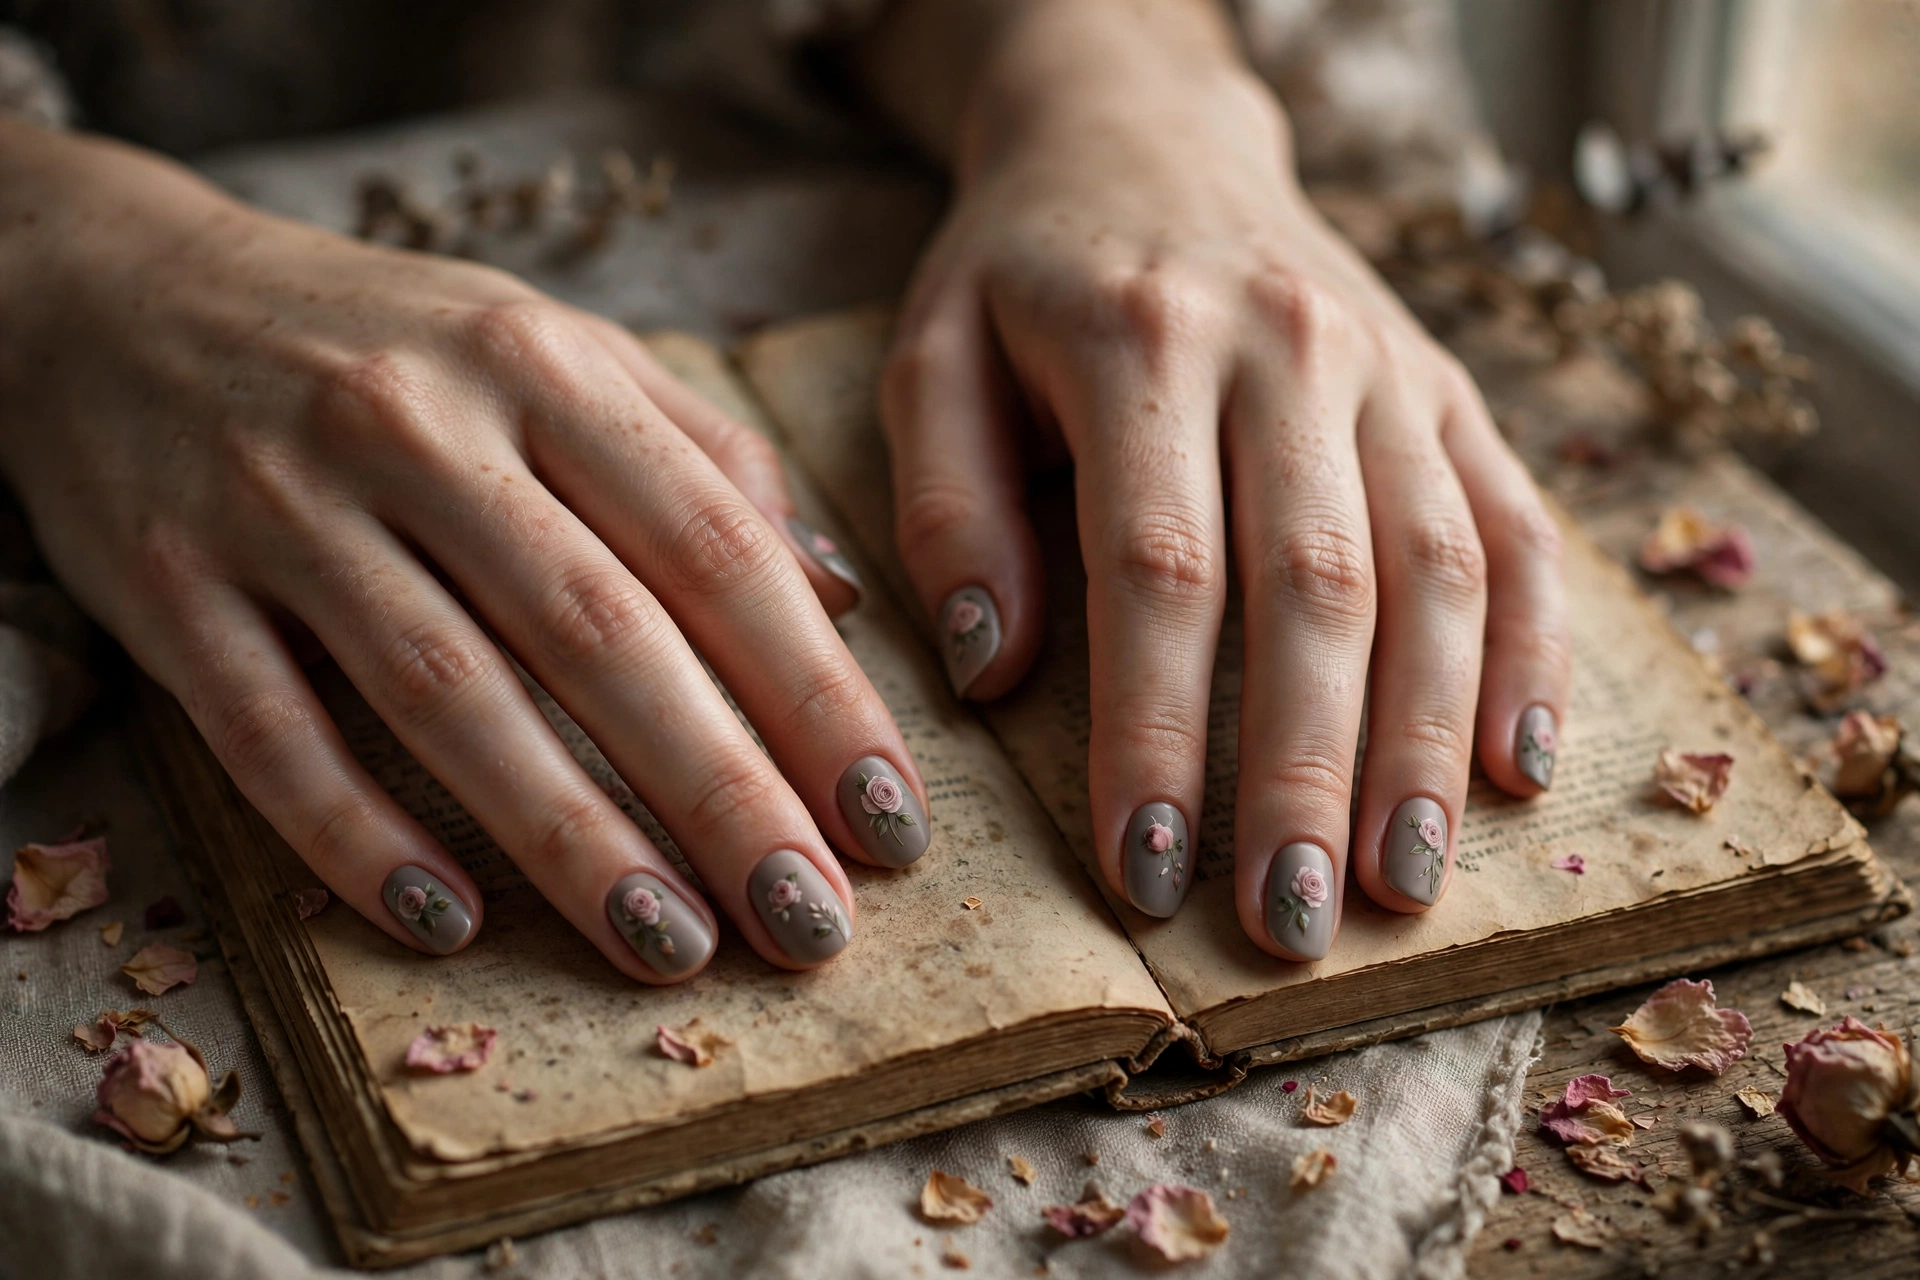
Dusty, desaturated rose tones on a taupe-gray base give florals a grown-up, vintage feel instead of a springy one. Cluster two or three small roses near the cuticle and let them trail off toward the tip. A matte top coat deepens the aged look; if you prefer the matte route generally, our matte nail designs guide has base-color ideas that flatter muted art.
Tropical Blooms
Bold, vacation-ready flowers in saturated color. Tropical blooms are statement art by nature, so they work best as accent nails or on longer lengths.
9. Hibiscus Sunset
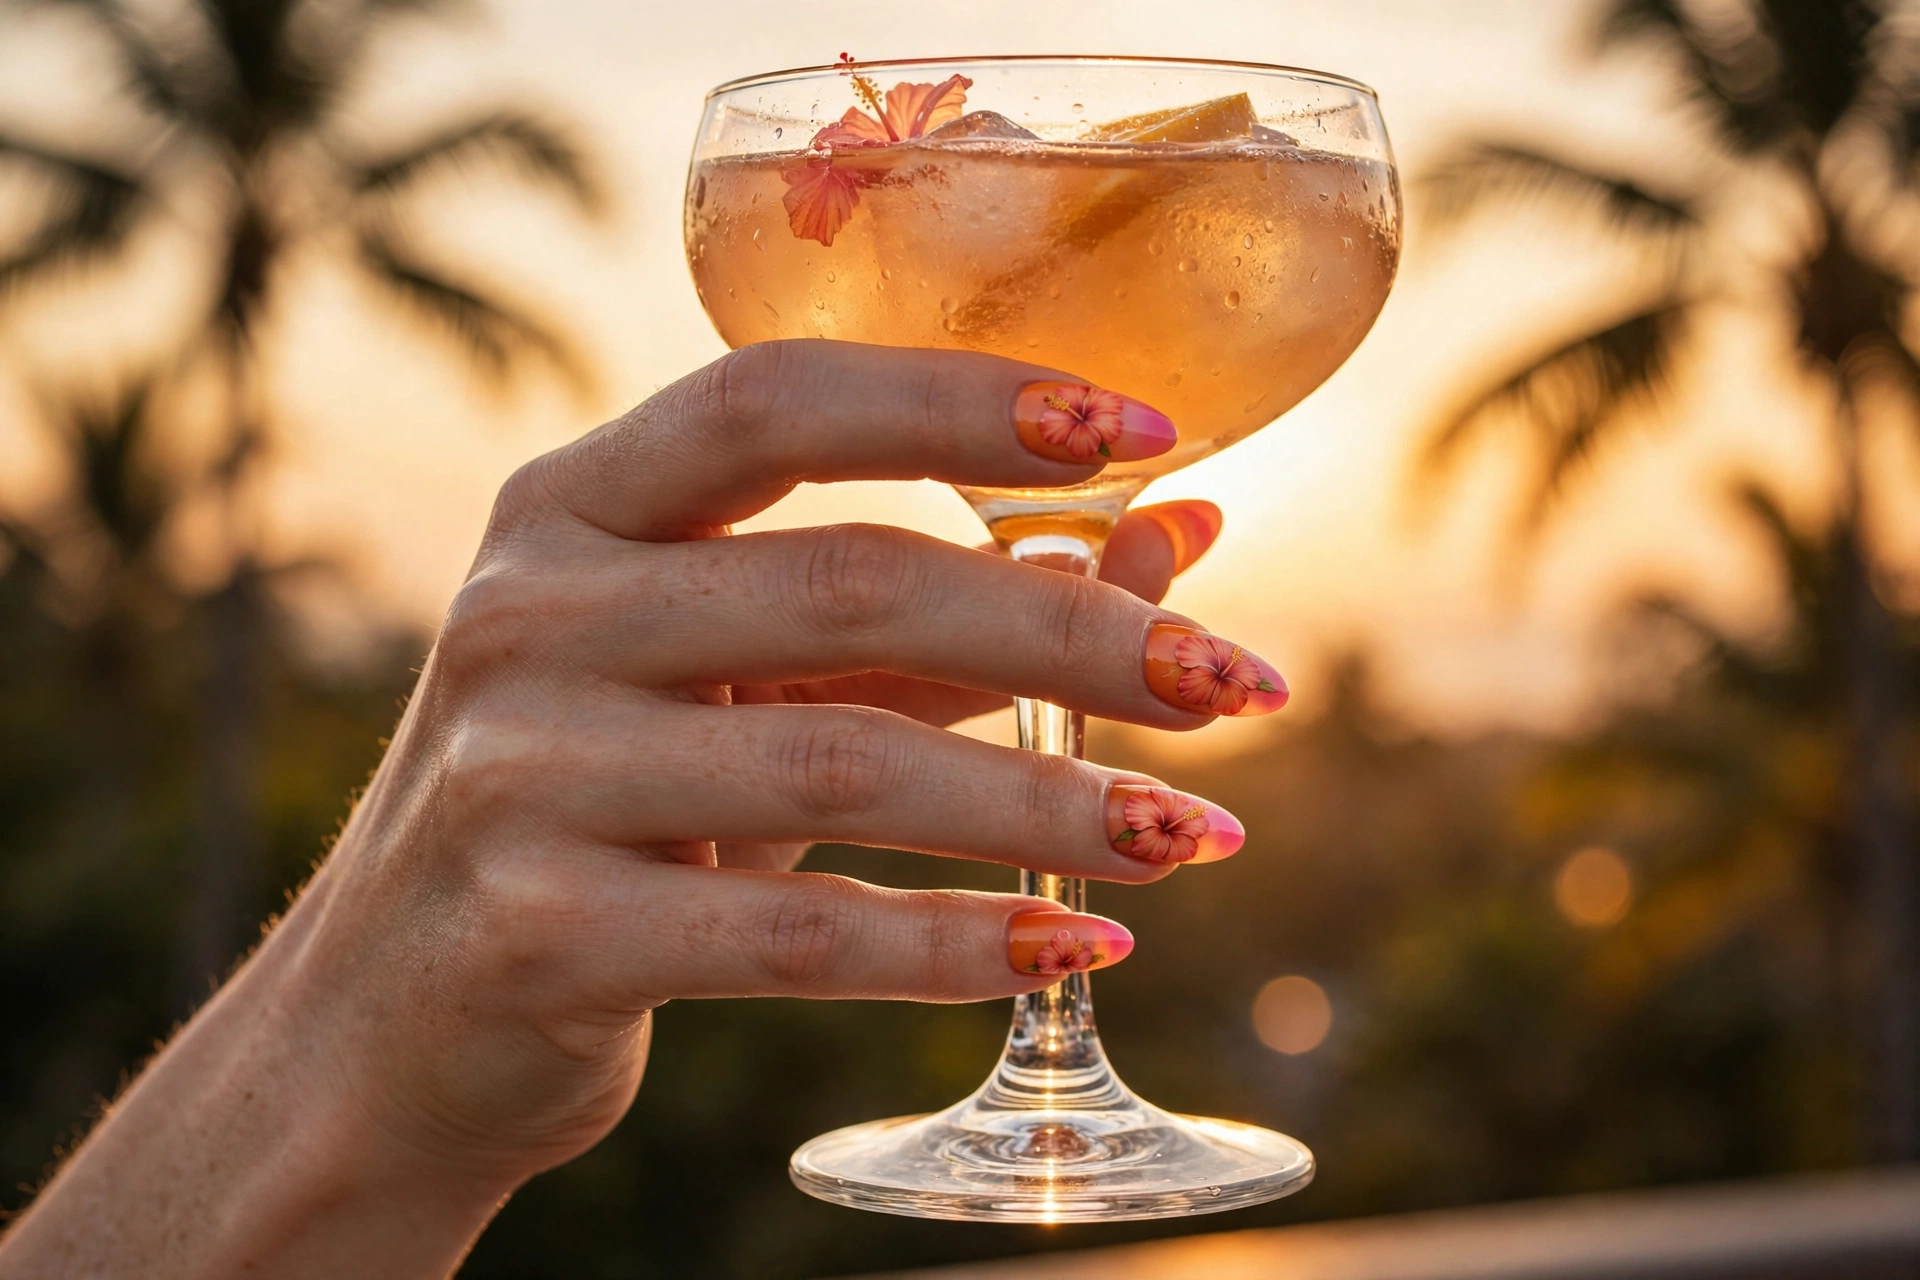
A sunset gradient base does half the work: sponge orange into pink, then paint one coral hibiscus per nail with a long stamen dot in the center. Hibiscus petals are wide and trumpet-shaped, so use broad, confident brush strokes rather than fiddly ones. Long almond nails give the petals room; this is a vacation manicure that reads instantly in photos.
10. White Plumeria on Turquoise
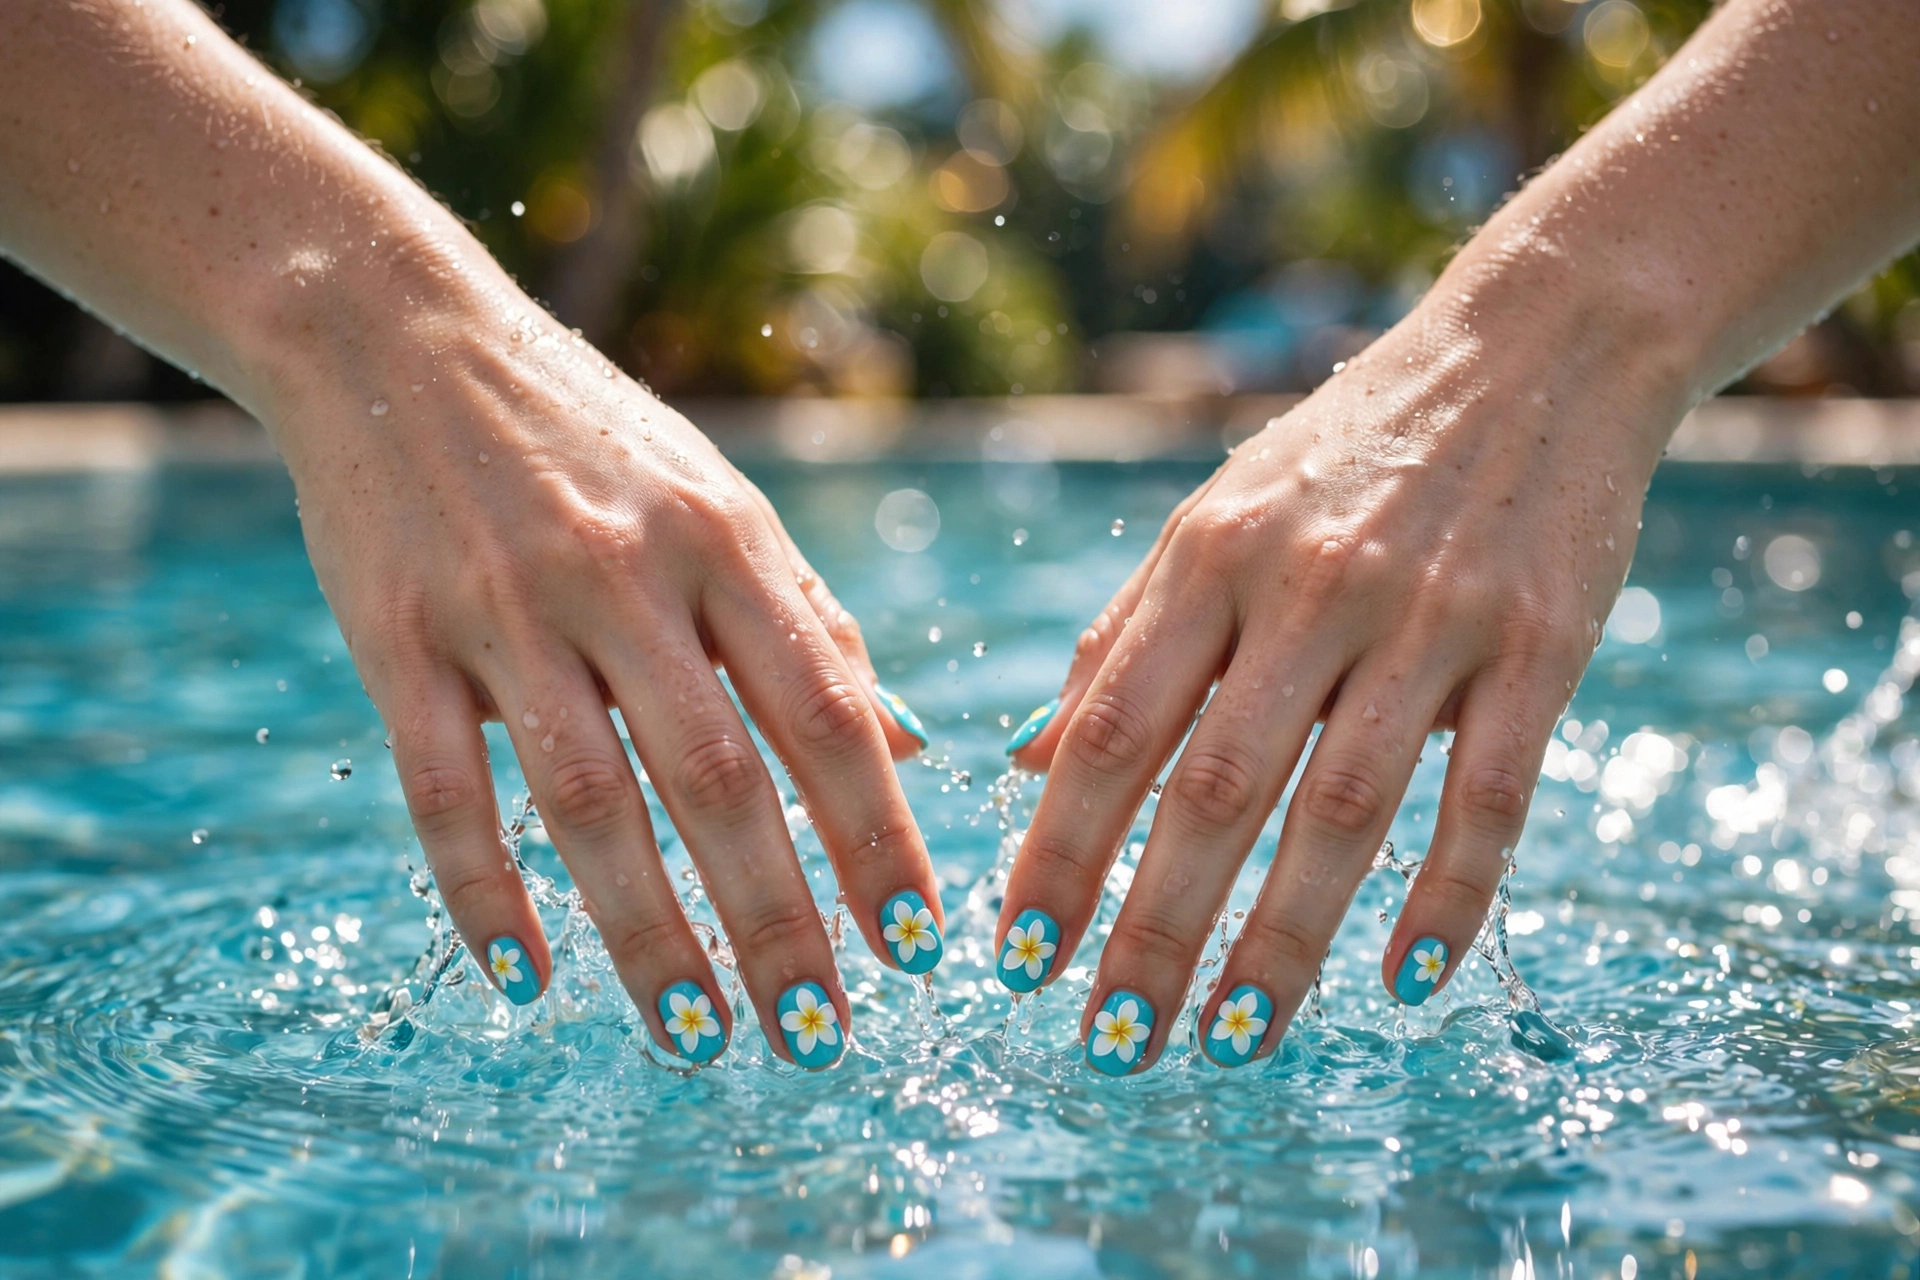
Plumeria has five rounded petals with a yellow heart, making it nearly as easy as a daisy but far more exotic looking. White blooms against turquoise is the classic resort pairing. Paint the whole flower in white first, let it dry, then add the yellow center and a thin darker outline to each petal for definition. One flower per nail keeps it crisp on short nails too.
11. Orchid Accent
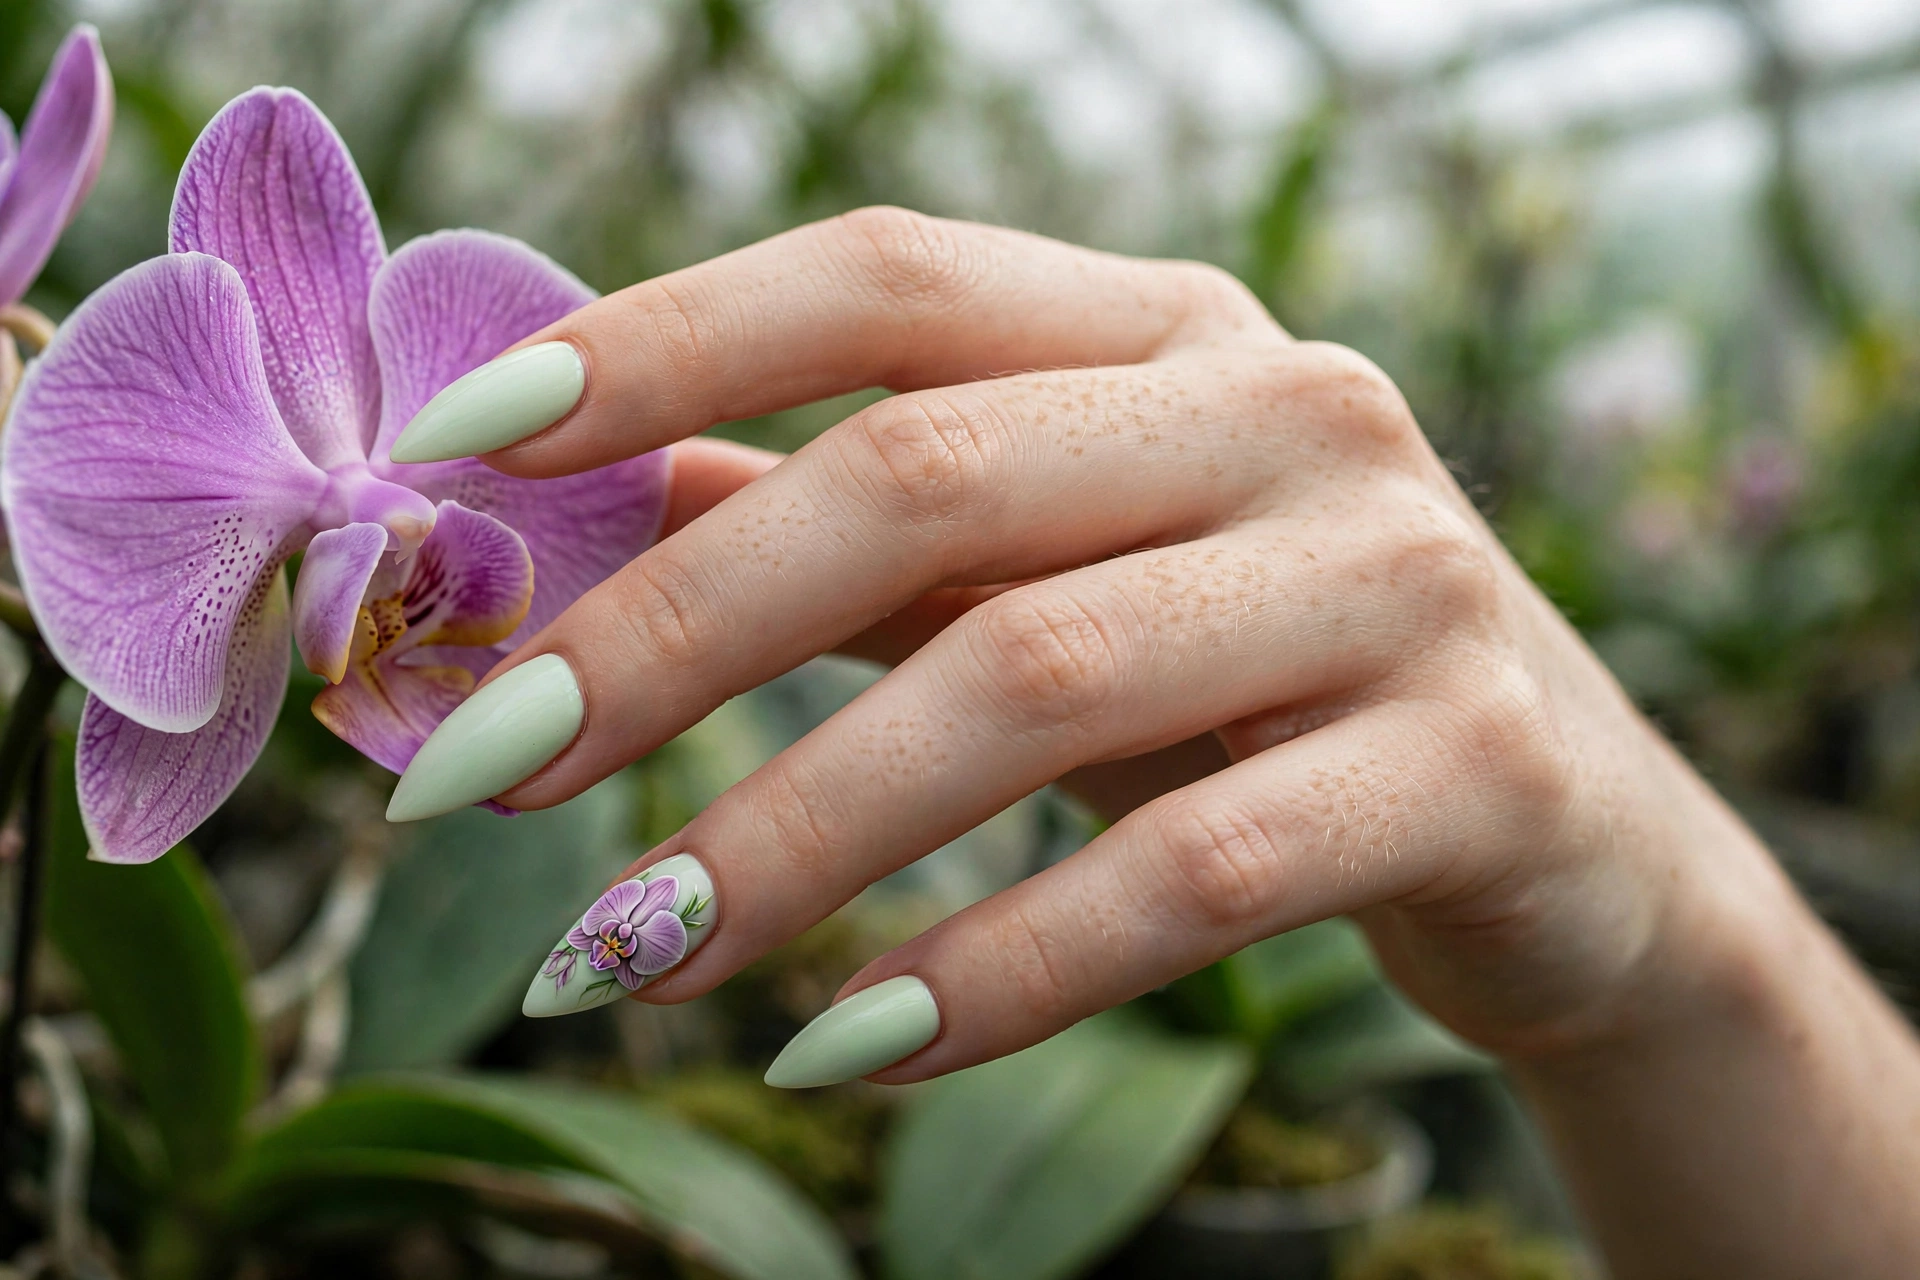
Orchids look complex, but the trick is putting one detailed bloom on a single accent nail and keeping the rest solid. Paint the pale base first, then build the orchid from a dark center with three petals fanning out, adding tiny dots for the speckled lip. Because only one nail carries the art, you can spend twenty minutes on it and the set still looks salon-clean.
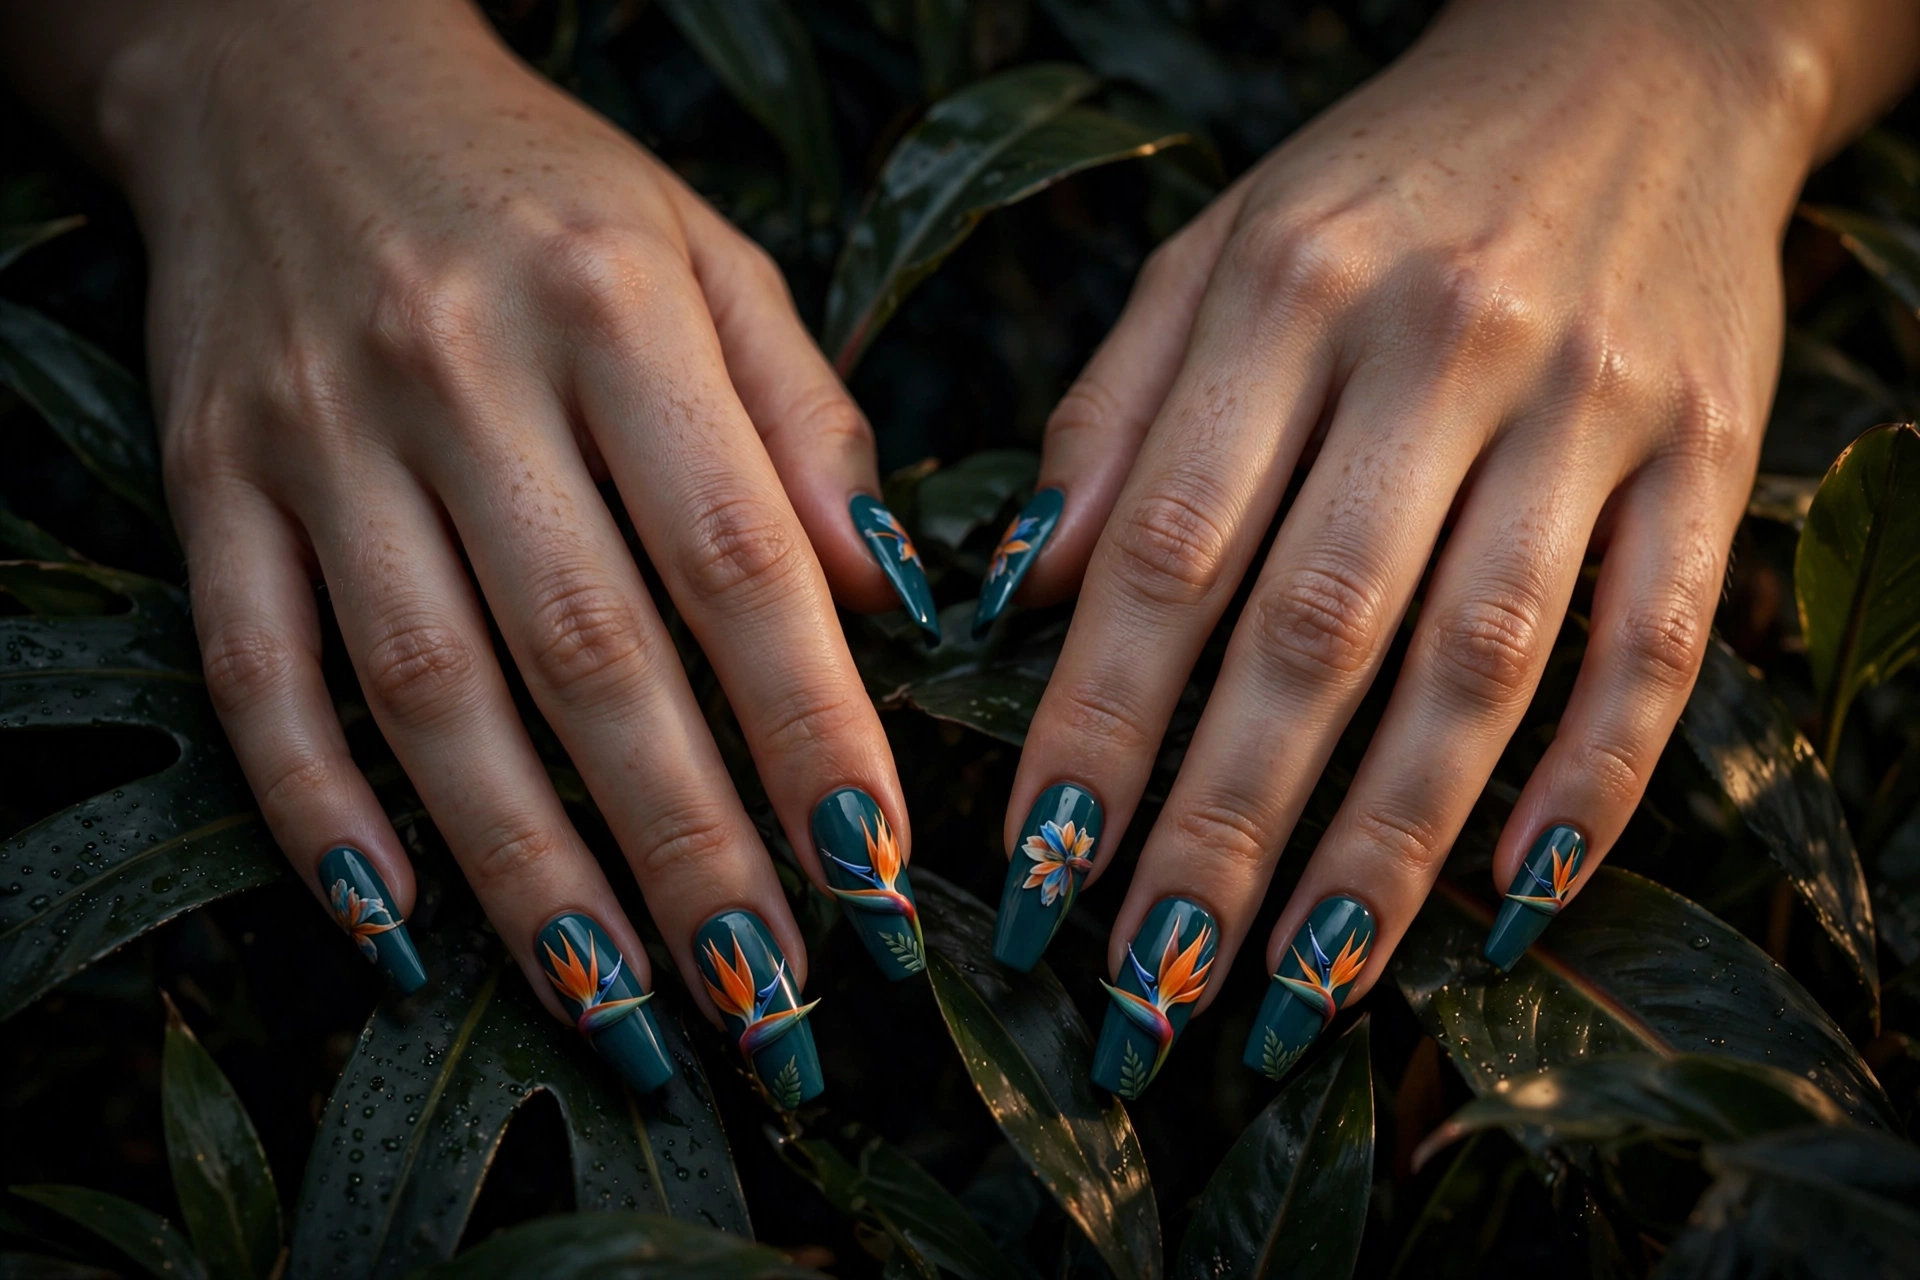
12. Bird-of-Paradise Bold
Bird-of-paradise flowers are spiky and architectural, which makes them the edgiest floral on this list. Orange petals with blue accents on deep teal reads dramatic and modern. Keep the shapes geometric rather than rounded: sharp strokes for the petals, one strong bloom per nail. Long coffin nails carry the bold scale; on short nails, shrink it to a single accent.
Pressed & Delicate Florals
Botanical looks that lean minimal: real pressed flowers, whisper-light clusters, and watercolor washes. Ideal for brides, offices, and anyone who wants florals without the fuss.
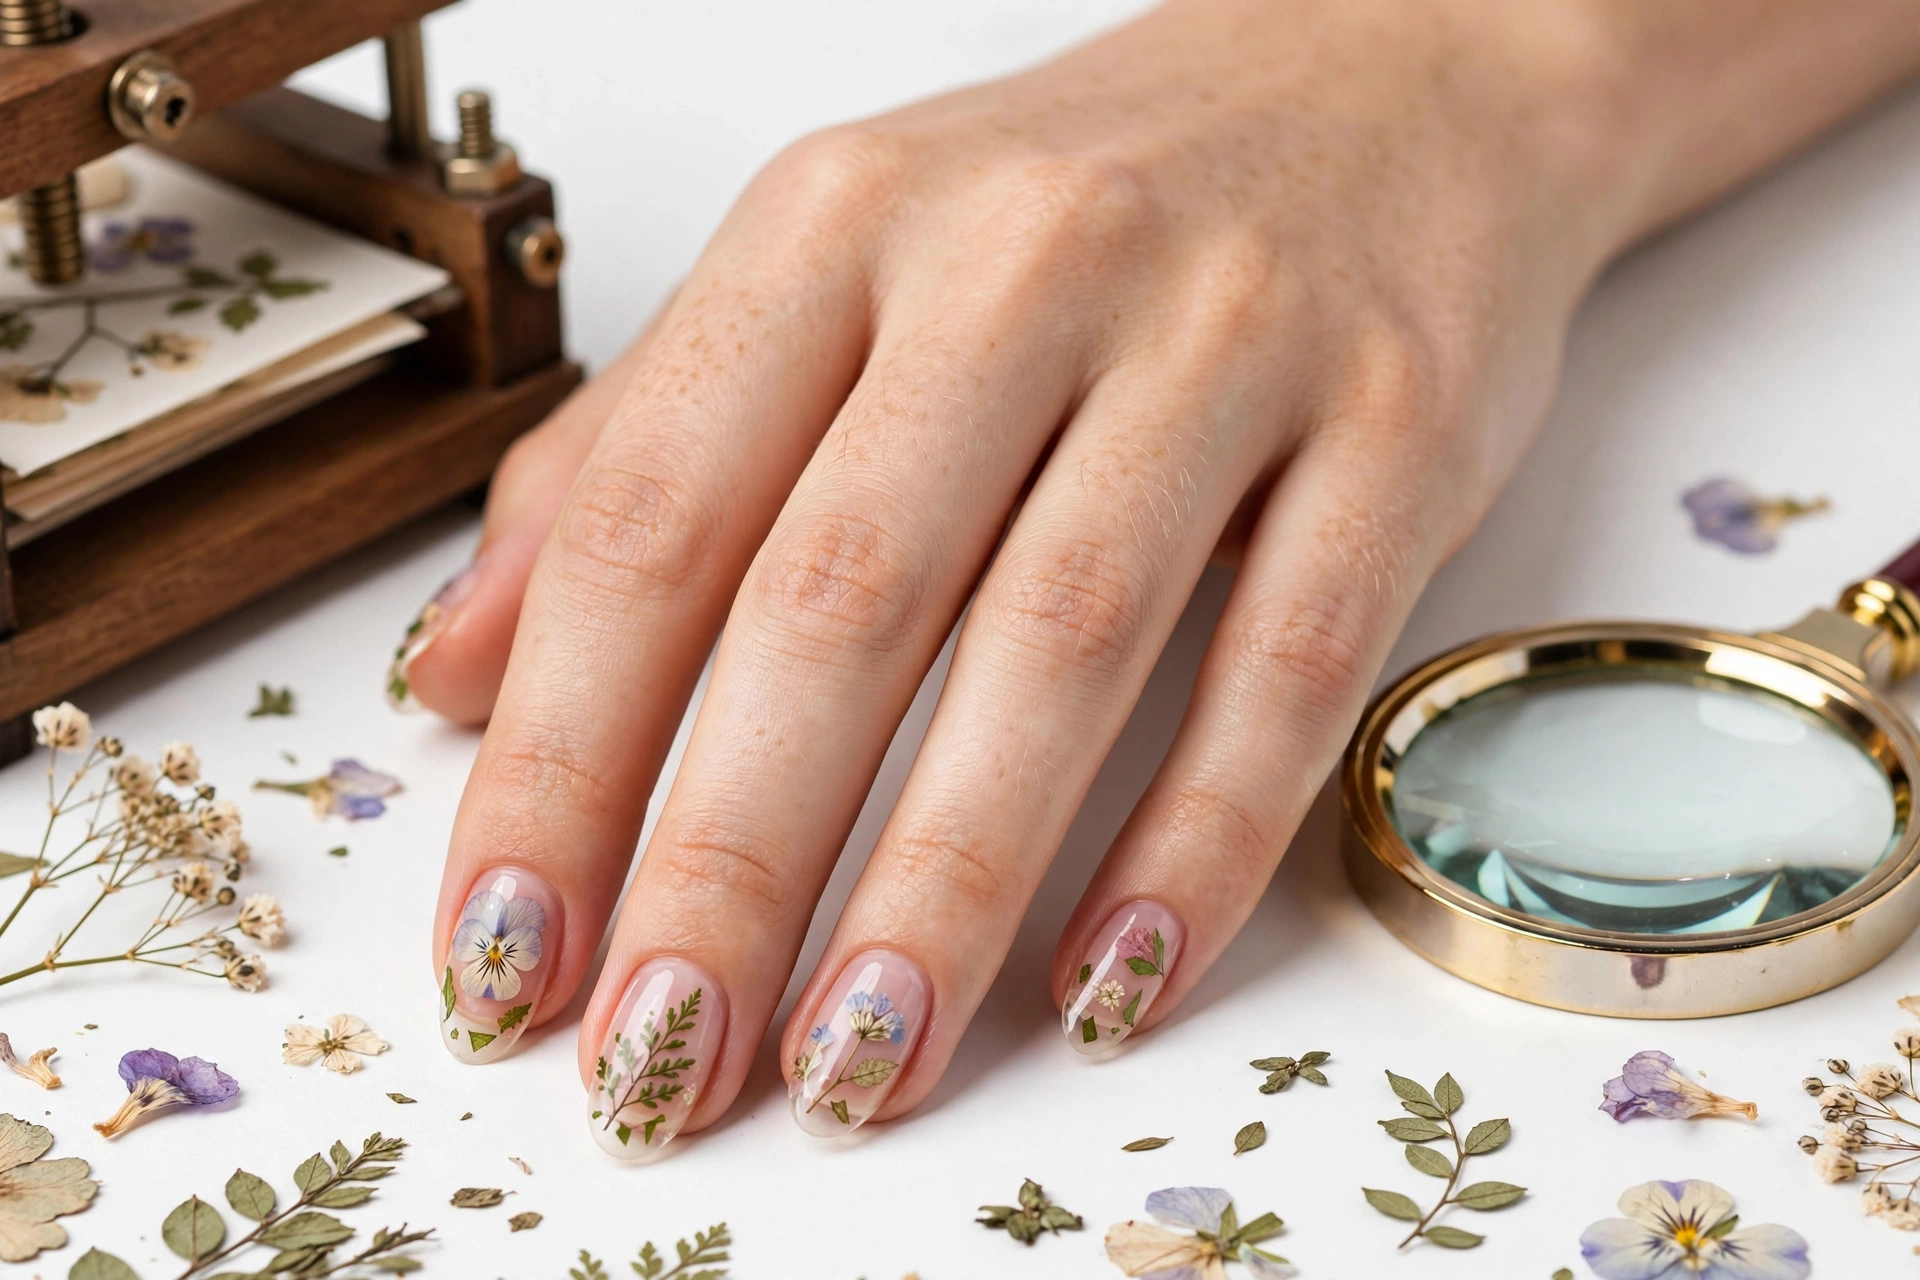
13. Real Pressed Flower Gel
Instead of painting, embed real dried flowers in clear builder gel and you get actual botanical detail no brush can match. Choose flat, fully dried blooms; thicker ones trap air. Lay the flower on a thin gel layer, cure, then cap with two more layers and file smooth. It needs a lamp and builder gel, so it sits at intermediate level, but the result lasts as long as any gel set.
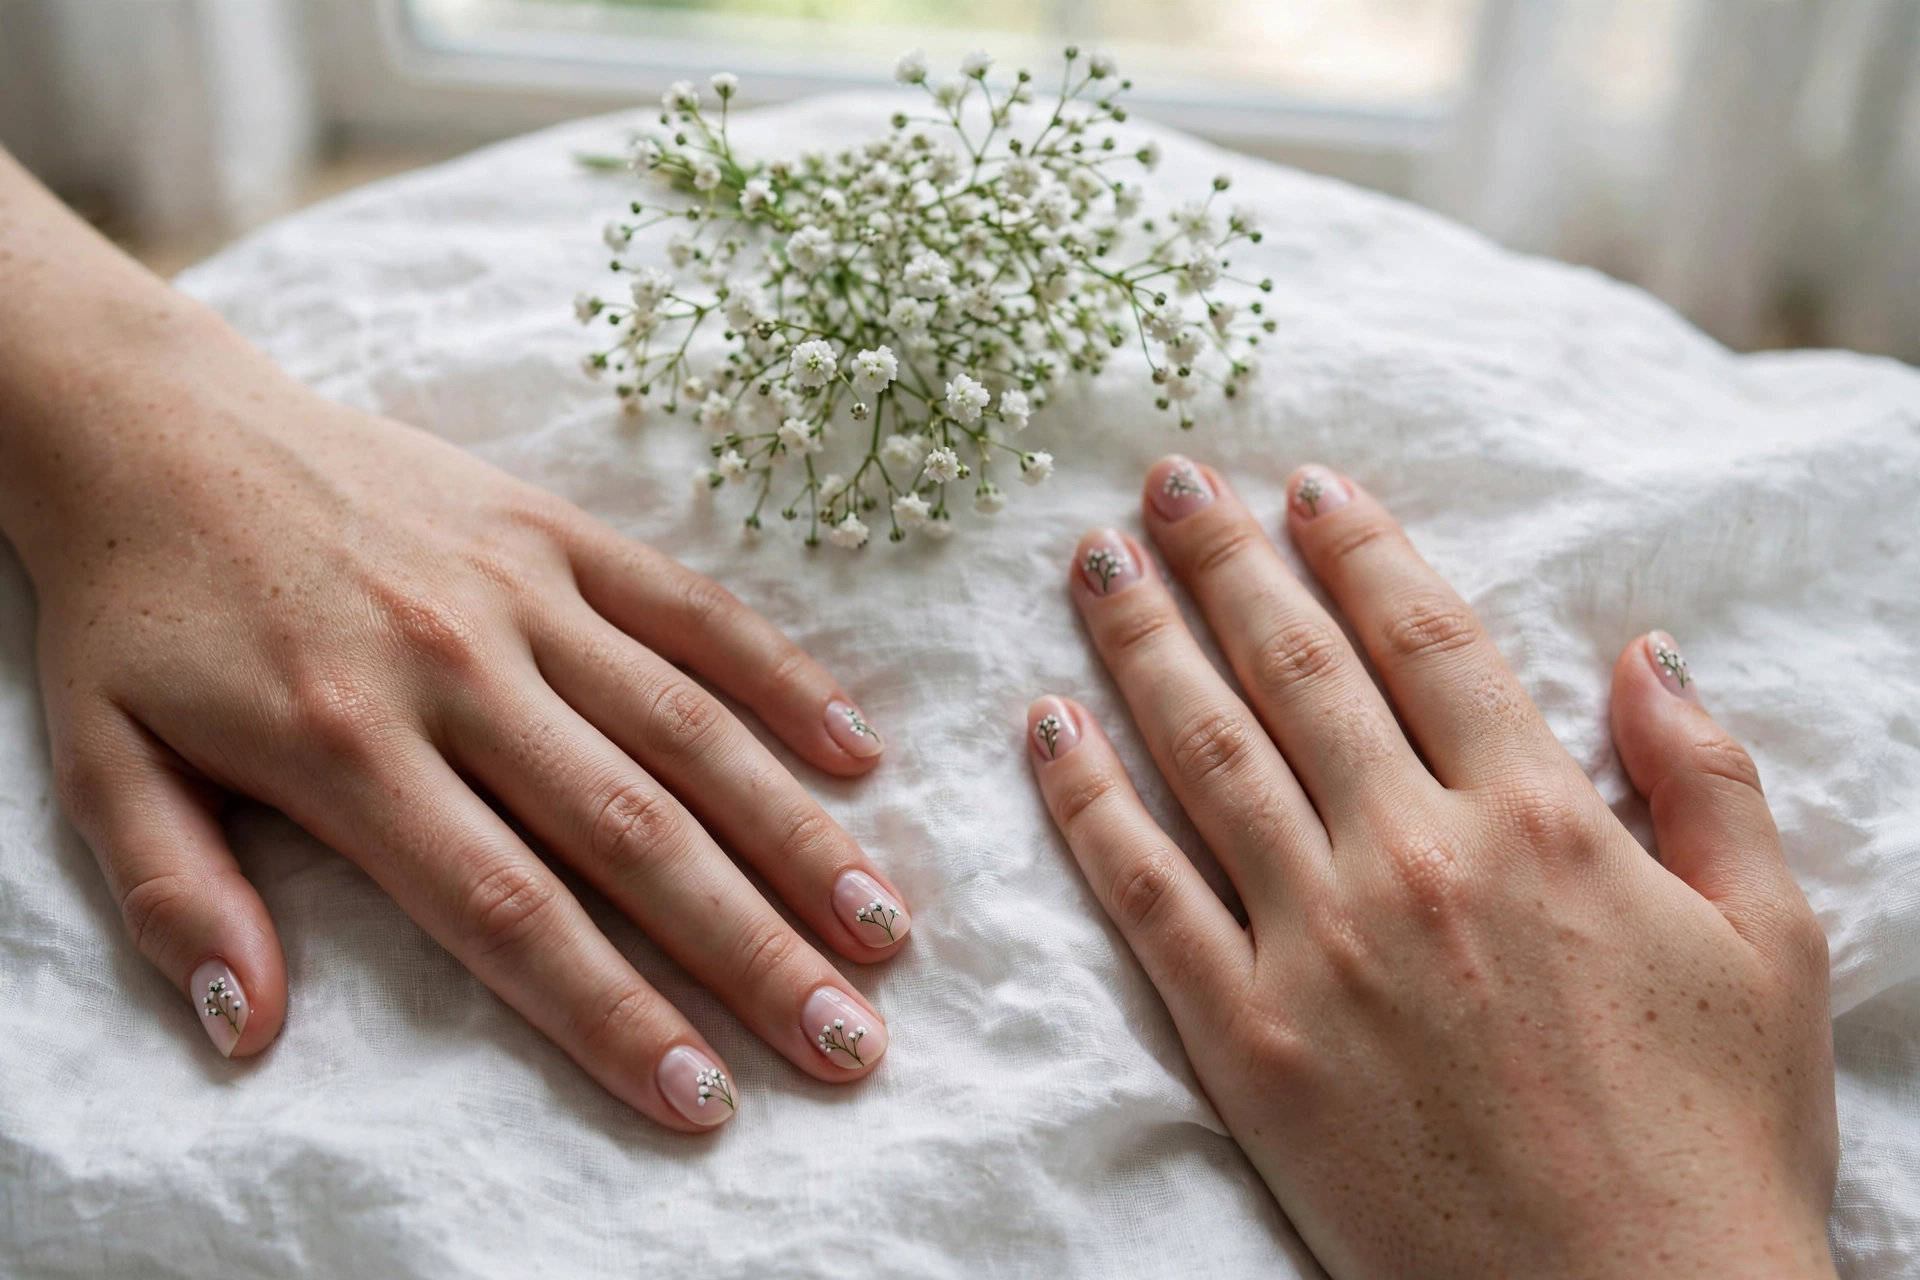
14. Baby’s Breath Whisper
Clusters of pinhead-size white dots on thin stems near the cuticle give a bridal, barely-there floral. The secret is scale: the dots should be tiny, and the sheer pink base should do most of the talking. Use the small end of a dotting tool and barely touch the polish. Flattering on short nails and very forgiving to paint, since irregularity looks natural at this size.
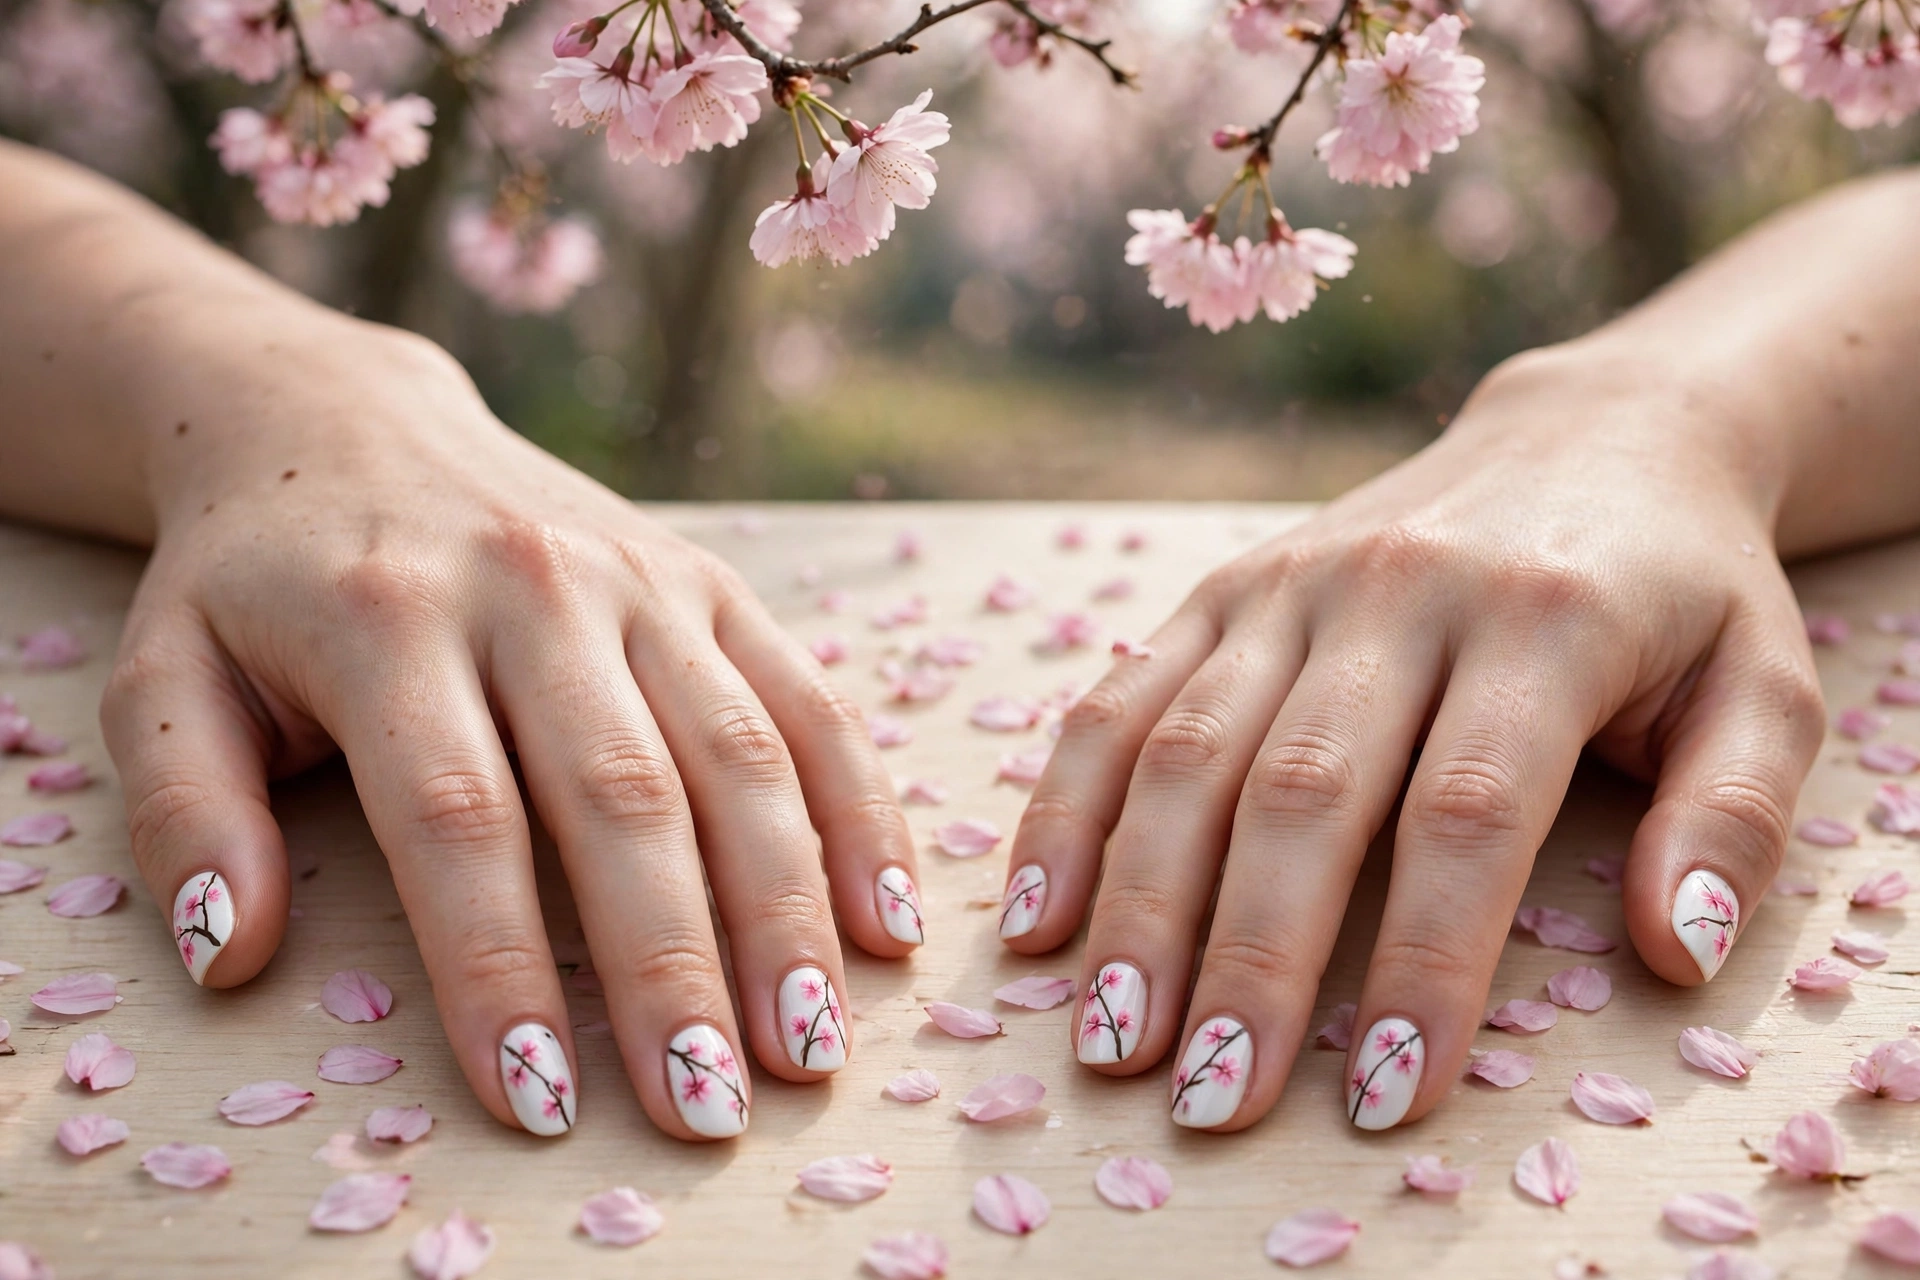
15. Cherry Blossom Branches
Paint a thin dark branch diagonally across the nail first, then cluster pink blossoms along it with darker pink centers. The diagonal branch gives the design movement and makes it look planned rather than scattered. White or very pale pink bases work best; the branch needs contrast. Two blossoms open and one bud per branch keeps the composition balanced.
16. Watercolor Bloom Wash
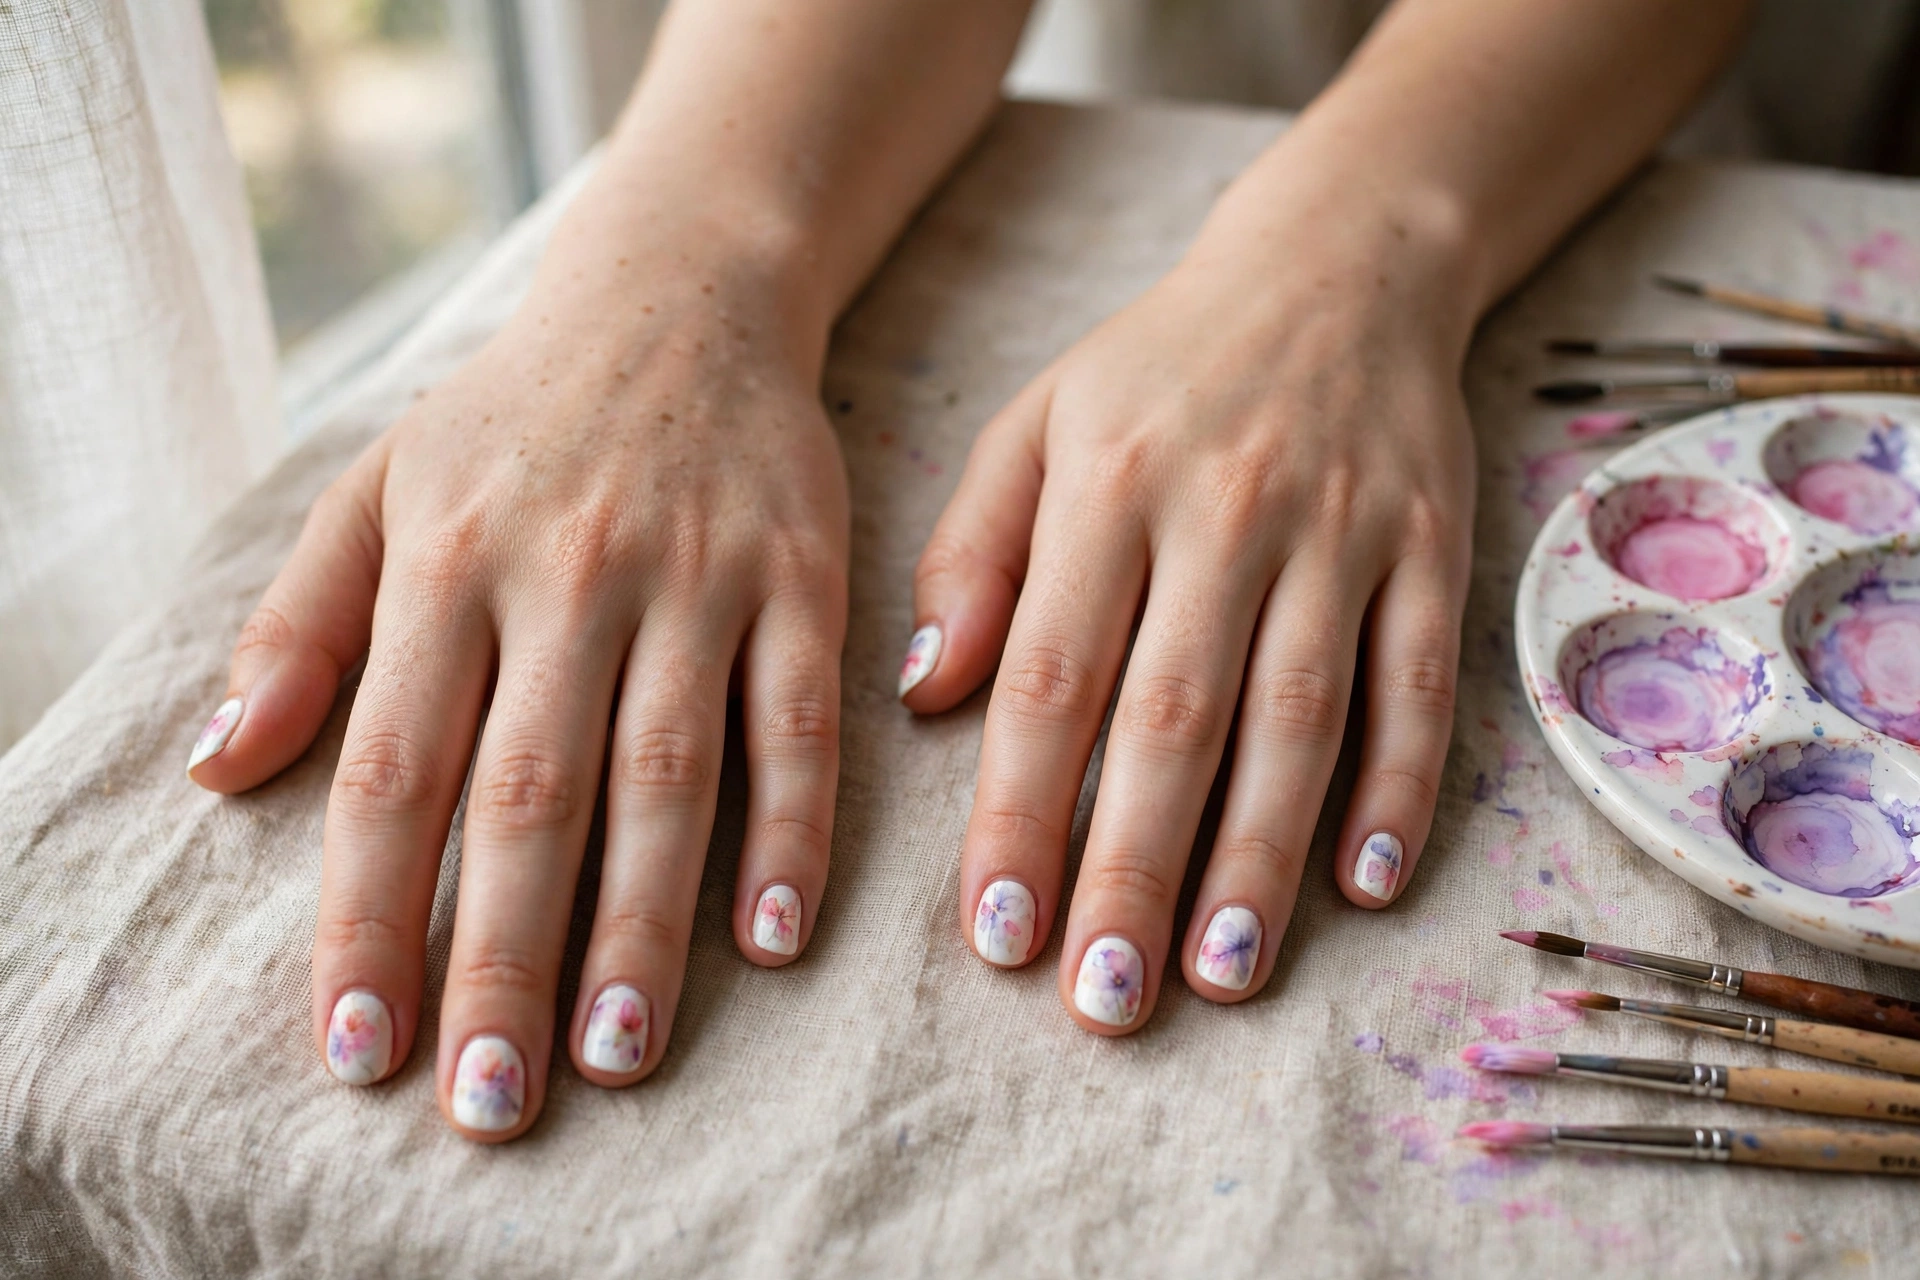
Dilute polish or gel color with a drop of thinner (or use water-based nail inks) and paint blooms in loose, transparent washes. Let colors bleed into each other slightly; the softness is the point. No two nails need to match, which removes the pressure of symmetry. Finish with a glossy top coat to mimic the sheen of wet watercolor paper. A glazed chrome layer underneath adds an extra glow if you want it.
Floral Nails by Season
The same flower can feel completely different when you change its base, finish, and surrounding colors. Use the sixteen designs above as templates, then season them like this.
Spring
Choose classic white daisies, cherry blossom branches, lavender sprigs, or a pastel wildflower mix over milky pink, pale lilac, and soft green. Spring florals look best small and bright, with glossy top coat and plenty of clean base showing.
Summer
Go bigger and warmer with sunflower accents, hibiscus, plumeria, or bird-of-paradise art. Sky blue, turquoise, coral, and warm white keep the flowers vivid without making every nail compete. This is also the easiest season for a full tropical set because the colors are meant to be saturated.
Autumn
Keep the vintage tea-rose layout, but trade spring pastels for burgundy, rust, mustard, plum, and dusty rose on taupe, chocolate, or deep nude bases. Tiny dotted blooms in those shades read like chrysanthemums, while a matte finish makes the set feel cozy rather than faded. If you want the base to carry most of the mood, start with the shades in our burgundy nail designs and add flowers only to the ring and middle nails.
Winter
Pressed flowers under clear or milky gel and baby’s-breath clusters are the most natural winter choices because they stay delicate against heavier clothing colors. For a festive version, use the one-stroke petal method in deep red with tiny green leaves and a gold center on two accent nails. Keep the remaining nails ivory, burgundy, or soft gray so the motif stays elegant rather than costume-like.
Floral Nail Techniques Compared
Hand painting is not the only route to floral nails. This table compares the main methods so you can pick the one that matches your skill, budget, and patience.
| Technique | Skill level | Time per hand | Best for |
|---|---|---|---|
| Dotting-tool hand painting | Beginner | 15 to 20 minutes | Daisies, wildflowers, baby’s breath |
| One-stroke brush painting | Intermediate | 20 to 30 minutes | Roses, peonies, layered blooms |
| Nail stamping | Beginner | About 10 minutes | Crisp, repeatable patterns |
| Water decals and stickers | Beginner | About 5 minutes | Detailed art with zero painting skill |
| Real pressed flowers in gel | Intermediate | 30 minutes or more | Genuine botanical detail |
| 3D sculpted gel flowers | Advanced | 45 minutes or more | Statement texture and dimension |
At the Salon: What to Ask For, What It Costs, and How Long It Takes
Bring two references: a clear photo of the finished nail design and, if the flower matters to you, a photo of the real flower. Then describe the job in practical terms: the base and medium, the exact flower, whether you want it hand-painted or a decal, how many nails carry art, the flower’s size, and the finish. “Hand-painted daisies on the ring and middle nails over a milky gel base, kept small, with a glossy finish” gives a technician far more to work with than “something floral.” Ask whether detailed art needs a longer appointment or a specific artist before you book.
Prices vary sharply by city and technician, but plan separately for art instead of assuming it is included in the manicure. As a budgeting guide, simple dots or decals may add about $5–$15 to a set, two hand-painted accent nails about $10–$25, and detailed flowers on all ten nails about $30–$75 or more. Simple accents often add 10–15 minutes; blooming gel, roses, or a full detailed set can add 30–60 minutes. Confirm whether the quote is per nail or for the full set before work starts. If the price or time is too high, reduce the art to two matching accent nails rather than asking for every flower to be made smaller and rushed.
Frequently Asked Questions
How do you paint flowers on nails for beginners?
Start with the dotting-tool daisy: five dots in a circle plus a center dot. It needs no brush control, works on any base color, and teaches you spacing and polish thickness. Once daisies feel easy, move on to the one-stroke petal for roses and peonies.
What tools do I need for floral nail art?
A dotting tool with two ends, one small flat brush, and one fine detail brush cover nearly everything. Add a cleanup brush and acetone for edges. Stamping plates, decals, and pressed flowers are optional shortcuts, not requirements.
Do hand-painted flowers look better than stickers?
Hand-painted art has softer edges and a one-of-a-kind feel that stickers rarely match, but modern water decals can look surprisingly good for intricate designs like cherry blossoms. Many nail techs mix both: painted blooms on accent nails, decals where detail would take too long.
How long do floral nail designs last?
The same as any manicure in the same medium: about a week for regular polish, two to three weeks for gel. Floral art itself does not chip faster, but always seal it with top coat over the free edge, since raised paint layers can catch and lift.
Do floral nails work on short nails?
Yes, with scale adjusted. Daisies, baby’s breath, and single plumeria blooms suit short nails well. Skip multi-flower compositions and large tropical blooms on short lengths; they need room to read as flowers rather than blobs.
What base colors make flowers stand out?
White and milky sheer bases make any flower color pop and are the safest choice. Nude keeps the look soft and wearable. For drama, paint blooms over dark bases like deep teal or burgundy; just add a white underpaint first so the petal colors stay true.
Why do my hand-painted flowers look blobby?
Almost always too much polish on the tool. Wipe the dotting tool so only a thin film remains, and place dots rather than pressing them. Also check that your base is fully dry or cured; painting over tacky polish drags everything into a smear.
How do I fix a flower I smudged while painting it?
Fix it before the layer dries or cures. With gel, wipe the mistake away with a clean, lint-free pad or brush lightly dampened with gel cleanser, then repaint that area. With regular polish, lift the smudge using the corner of an orange stick or a detail brush barely touched with remover; flooding the nail will melt the base. If only one petal is misshapen, you can often disguise it by turning it into a leaf or adding a dot beside it, then sealing the correction under top coat.
Can I repair a chipped flower without redoing the whole nail?
Usually, yes. Clean the nail, lightly buff only the chipped edge so the repair has something to grip, and remove the dust. Rebuild just the missing petal or center, cure it if you are using gel, then apply top coat across the entire nail to level the surface and seal the patch. If a pressed flower or sculpted petal is lifting and catching, do not glue it down and ignore it; have the raised section capped with builder gel or removed so moisture does not get trapped underneath.
Can I do floral nail art with regular polish?
Absolutely. Every design in this article works in regular polish. The main difference is working time: regular polish stays wet, so work one nail at a time and wait between layers. Gel’s cure-between-layers makes multi-step flowers easier, but it is not required.
Ready for your next set? Browse the white nail designs collection for bases that make florals pop, or see how blue pairs with yellow blooms in our blue nail designs guide.