
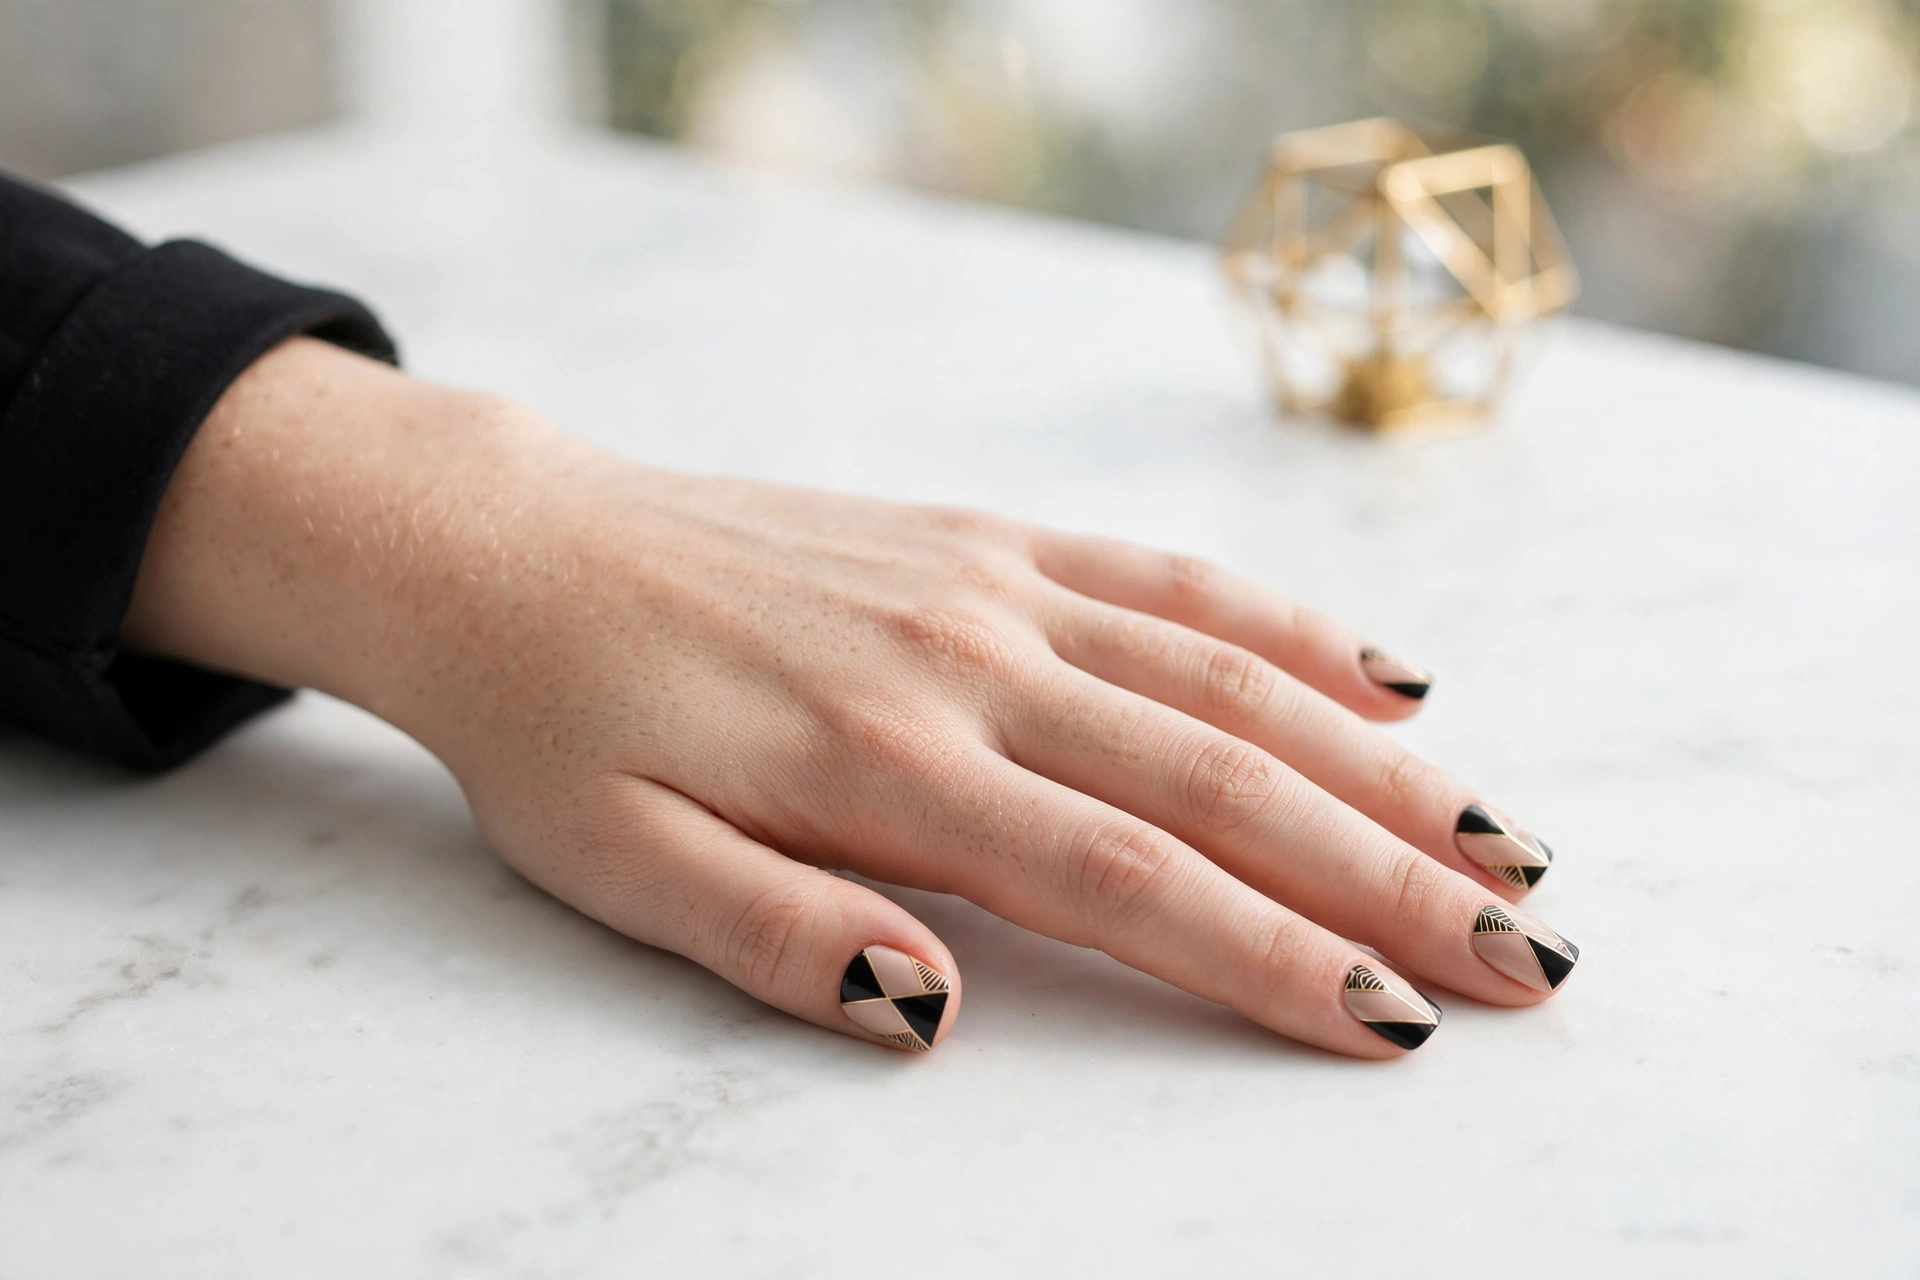
18 Geometric Nail Designs: Lines, Shapes & Negative Space
Geometric nails are nail art built from straight lines, angles, and simple shapes rather than freeform designs. They suit anyone who wants nail art that looks sharp and intentional, and many of the cleanest designs need nothing more than striping tape and two polish colors. Below you will find 18 distinct geometric nail ideas organized by geometry language, plus real how-to instructions for striping tape and brush linework, a tool comparison, and answers to the questions readers ask most.
How to Do Geometric Nail Art at Home
The two techniques behind almost every geometric design are striping tape and brush linework. Tape gives you machine-sharp edges with zero drawing skill; a brush gives you freedom for lines tape cannot make. Here is how each one works, which tools to choose, and how to fix the mistakes beginners make most.
Method 1: Striping Tape (Sharpest Lines, Easiest)
What you need: base coat, two polish colors, nail striping tape (the thin adhesive kind), tweezers, top coat, and a cleanup brush or cotton swab dipped in polish remover.
- Apply your base color in two thin coats and let it dry completely. Tape pulls wet polish off, so this step cannot be rushed.
- With tweezers, press strips of striping tape onto the dry nail to map out your shapes. Leave a small tail of tape hanging off the free edge so you can grab it later.
- Paint your second color over the taped areas using thin, even strokes. Use less polish than feels natural so it cannot seep under the tape edges.
- Peel the tape off while the second color is still wet, pulling at roughly a 45-degree angle. Wet removal is what keeps the line razor-sharp.
- Clean any slight bleeding with a cleanup brush, then seal everything with top coat once fully dry.
Method 2: Brush Linework (Freehand Freedom)
What you need: a long, thin striping brush (also called a liner brush), highly pigmented polish or nail art paint, a steady surface for your elbow, and your cleanup brush.
- Wipe most of the polish off the brush so only a thin load of color remains. A heavy load causes wobbles and blobs.
- Rest your painting hand’s pinky on the table or on the hand you are painting for support. Never draw a line with a floating hand.
- Draw the line in one confident motion, pulling the brush rather than pushing it. Most wobbly lines come from slow, hesitant strokes.
- Let the first line dry before adding lines that cross it, or the brush will drag wet polish along.
- Seal with top coat.
Geometric Nail Tools Compared
| Tool | Difficulty | Line Sharpness | Best For |
|---|---|---|---|
| Striping tape (adhesive) | Easy | Very sharp | Straight lines, triangles, color blocks, grids |
| Striping brush / liner brush | Medium | Sharp with practice | Freehand lines, curves, outlines, details tape cannot reach |
| Nail vinyls / stencils | Easy | Sharp | Chevron, half-moon, and repeated patterns without measuring |
| Dotting tools | Easy | N/A (dots) | Dot clusters, polka geometry, circle motifs |
No Striping Tape? Household Substitutes That Work
Striping tape is cheap, but you do not need to wait for a delivery to start. Three tapes from around the house cover most of the designs in this guide. Scotch tape is the best all-rounder: stick it to the back of your hand once or twice first to remove some tack, or it can lift your base color when you peel. It suits wide shapes — diagonal splits, color blocks, and line breaks — but it is too wide for fine lines unless you cut it into thin strips with small scissors. Painter’s tape is the gentlest option and the safest over a base you are worried about lifting; its weaker grip means edges can bleed slightly, so paint thinner coats. Washi tape sits in between and cuts cleanly into triangles and arches with scissors, which makes it ideal for stencils. What does not work: duct tape (far too strong, it will take the polish with it) and ordinary sticky notes (no real seal, polish seeps straight under). Whichever tape you use, the rules from the methods above still apply — fully dry base, edges pressed down, peel while the second color is wet.
Common Mistakes and How to Fix Them
Paint bleeds under the tape. You used too much polish or pressed the tape down loosely. Fix it by painting thinner coats and burnishing the tape edges with an orangewood stick before painting.
The line tears when you peel the tape. You waited too long. Peel while the polish is still wet; dried polish cracks along the tape edge instead of releasing cleanly.
Wobbly freehand lines. Your hand was unsupported and your stroke was too slow. Anchor your pinky, load less polish, and commit to one smooth pull of the brush.
Design looks lopsided. Geometric art is symmetrical art. Tape both hands’ accent patterns with a ruler mindset, and check the angles in good light before sealing.
Every Design Mapped: Method, Tool, and Time
Readers ask two questions about almost every design: which technique makes it, and how long it takes. This map answers both for all 18 ideas in this guide. Times are hands-on minutes for both hands and do not count base-coat drying time — add roughly 20 to 30 minutes of drying across a full manicure, or use a quick-dry top coat between stages. If you are short on time, the 10-to-15-minute designs (1, 2, 3, 5, 6, 12) deliver the full geometric look on a weeknight.
| Design | Method | Key Tool | Time (Both Hands) | Difficulty |
|---|---|---|---|---|
| 1. The Single Pinstripe | Brush or tape | Liner brush | ~10 min | Beginner |
| 2. Parallel Micro-Lines | Tape | Striping tape | ~15 min | Beginner |
| 3. The Diagonal Split | Tape | Striping tape | ~15 min | Beginner |
| 4. Chevron Stripes | Vinyls | Chevron vinyls | ~20 min | Easy to medium |
| 5. Metallic Stripe Lines | Tape as decoration | Metallic striping tape | ~10 min | Beginner |
| 6. Triangle Color-Block Tips | Tape | Striping tape | ~15 min | Beginner |
| 7. Half-Moon Color Blocks | Vinyls or tape | Half-moon guides | ~20 min | Easy to medium |
| 8. Mondrian Squares | Brush + tape | Liner brush | ~35 min | Medium |
| 9. Dot-Matrix Clusters | Dotting | Dotting tool, 3 sizes | ~15 min | Beginner |
| 10. Hollow Outline Shapes | Brush | Liner brush | ~30 min | Medium |
| 11. The Negative-Space Triangle | Tape | Striping tape | ~15 min | Easy to medium |
| 12. The Line Break | Tape | Striping tape | ~10 min | Beginner |
| 13. The Grid | Tape | Striping tape | ~25 min | Medium |
| 14. The Cut-Out Arch | Stencil | Curved vinyl or paper stencil | ~25 min | Medium |
| 15. Asymmetric Mixed Lines | Brush | Liner brush | ~25 min | Medium |
| 16. The Optical-Illusion Cube | Brush | Liner brush | ~45 min | Advanced |
| 17. Stained-Glass Mosaic | Brush | Liner brush | ~40 min | Medium to advanced |
| 18. One Shape Per Nail | Tape + dotting | Striping tape, dotting tool | ~20 min | Beginner |
The pattern to notice: tape designs cluster at 10 to 25 minutes because the tape does the precision work for you, while freehand brush designs (8, 10, 15, 16, 17) cost more time but need no supplies beyond a liner brush. Beginners get the fastest wins from tape; confident hands save money with a brush.
Lines & Stripes
Lines are the simplest geometry language in nail art, and also the most forgiving. A single straight line on a clean base can look more expensive than an intricate hand-painted scene.
1. The Single Pinstripe
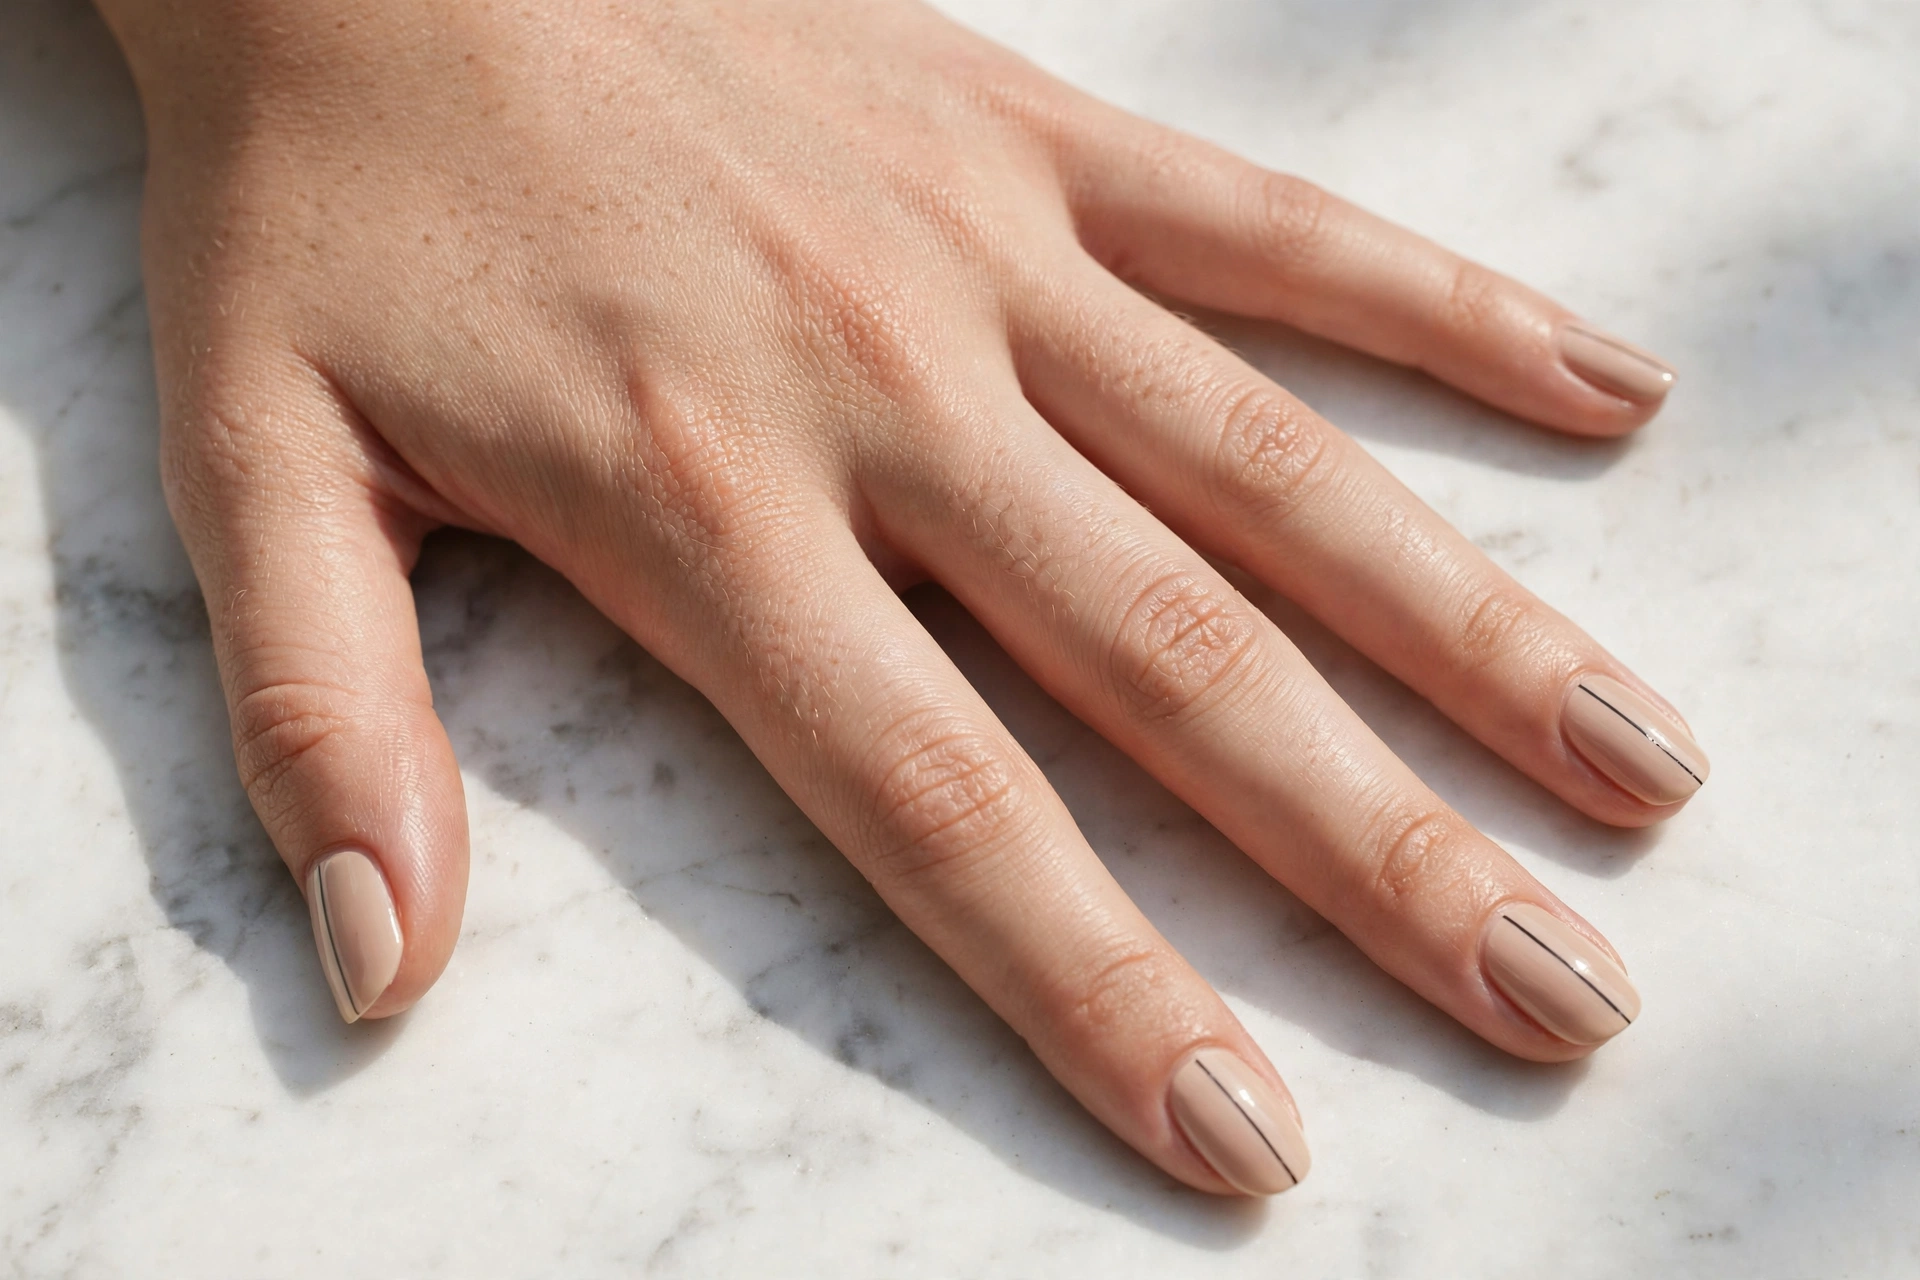
One thin vertical stripe down the center of each nail on a nude base. This is the easiest entry point into geometric nails and flatters every nail shape, since the vertical line visually lengthens short nails. Difficulty: beginner.
2. Parallel Micro-Lines
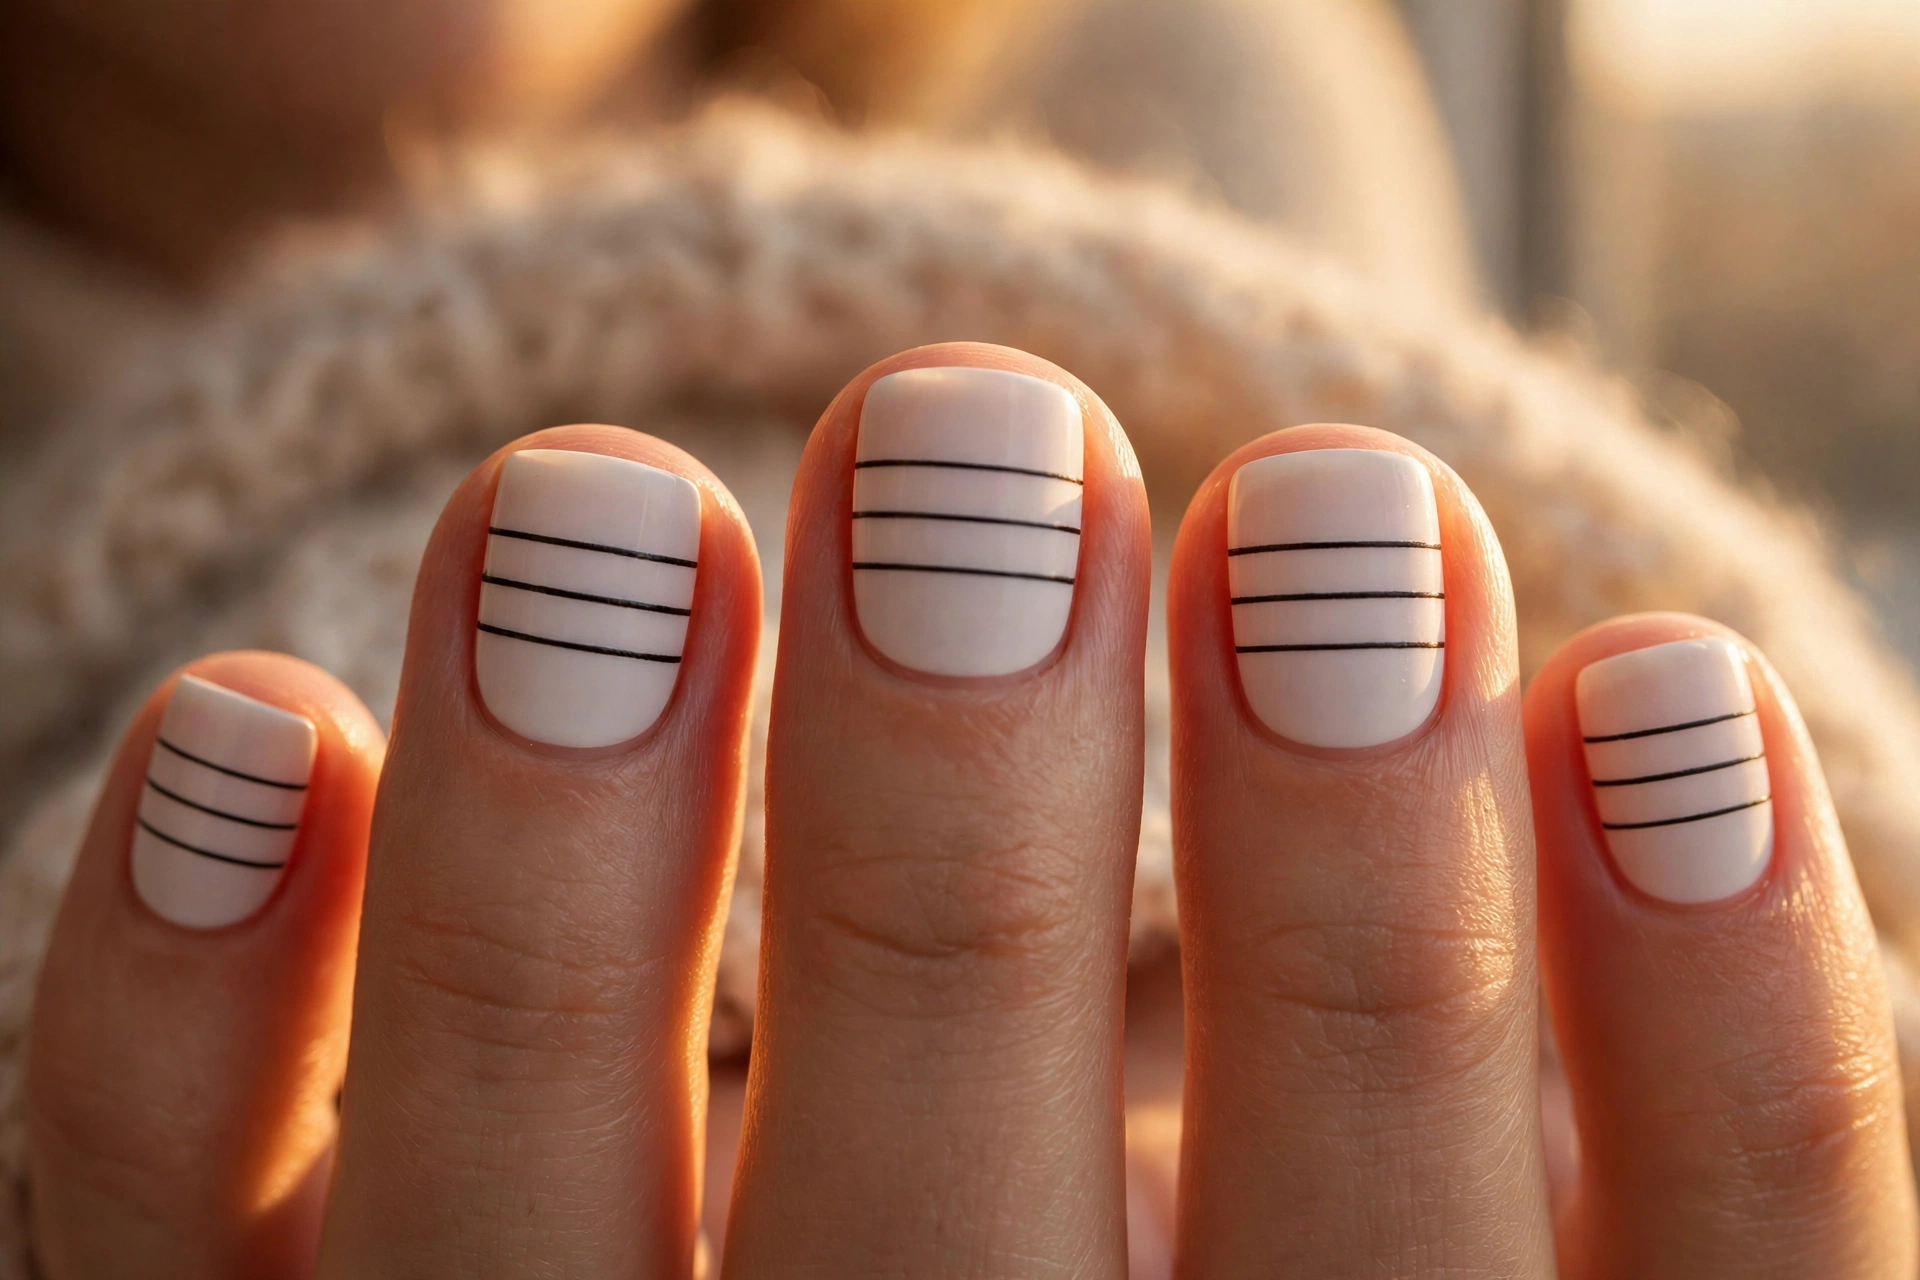
Three or four ultra-thin parallel lines across each nail on a white base. Keep the spacing even using the width of your striping tape as a guide. A chic, modern look that works especially well on short, square nails. Difficulty: beginner.
3. The Diagonal Split

The nail is divided diagonally into two halves in contrasting colors, with a razor-sharp dividing line. The mixed matte-and-gloss finish adds depth without adding clutter. Tape one diagonal, paint, peel while wet, then matte top coat on one side only if you want the two-tone texture. Difficulty: beginner.
4. Chevron Stripes
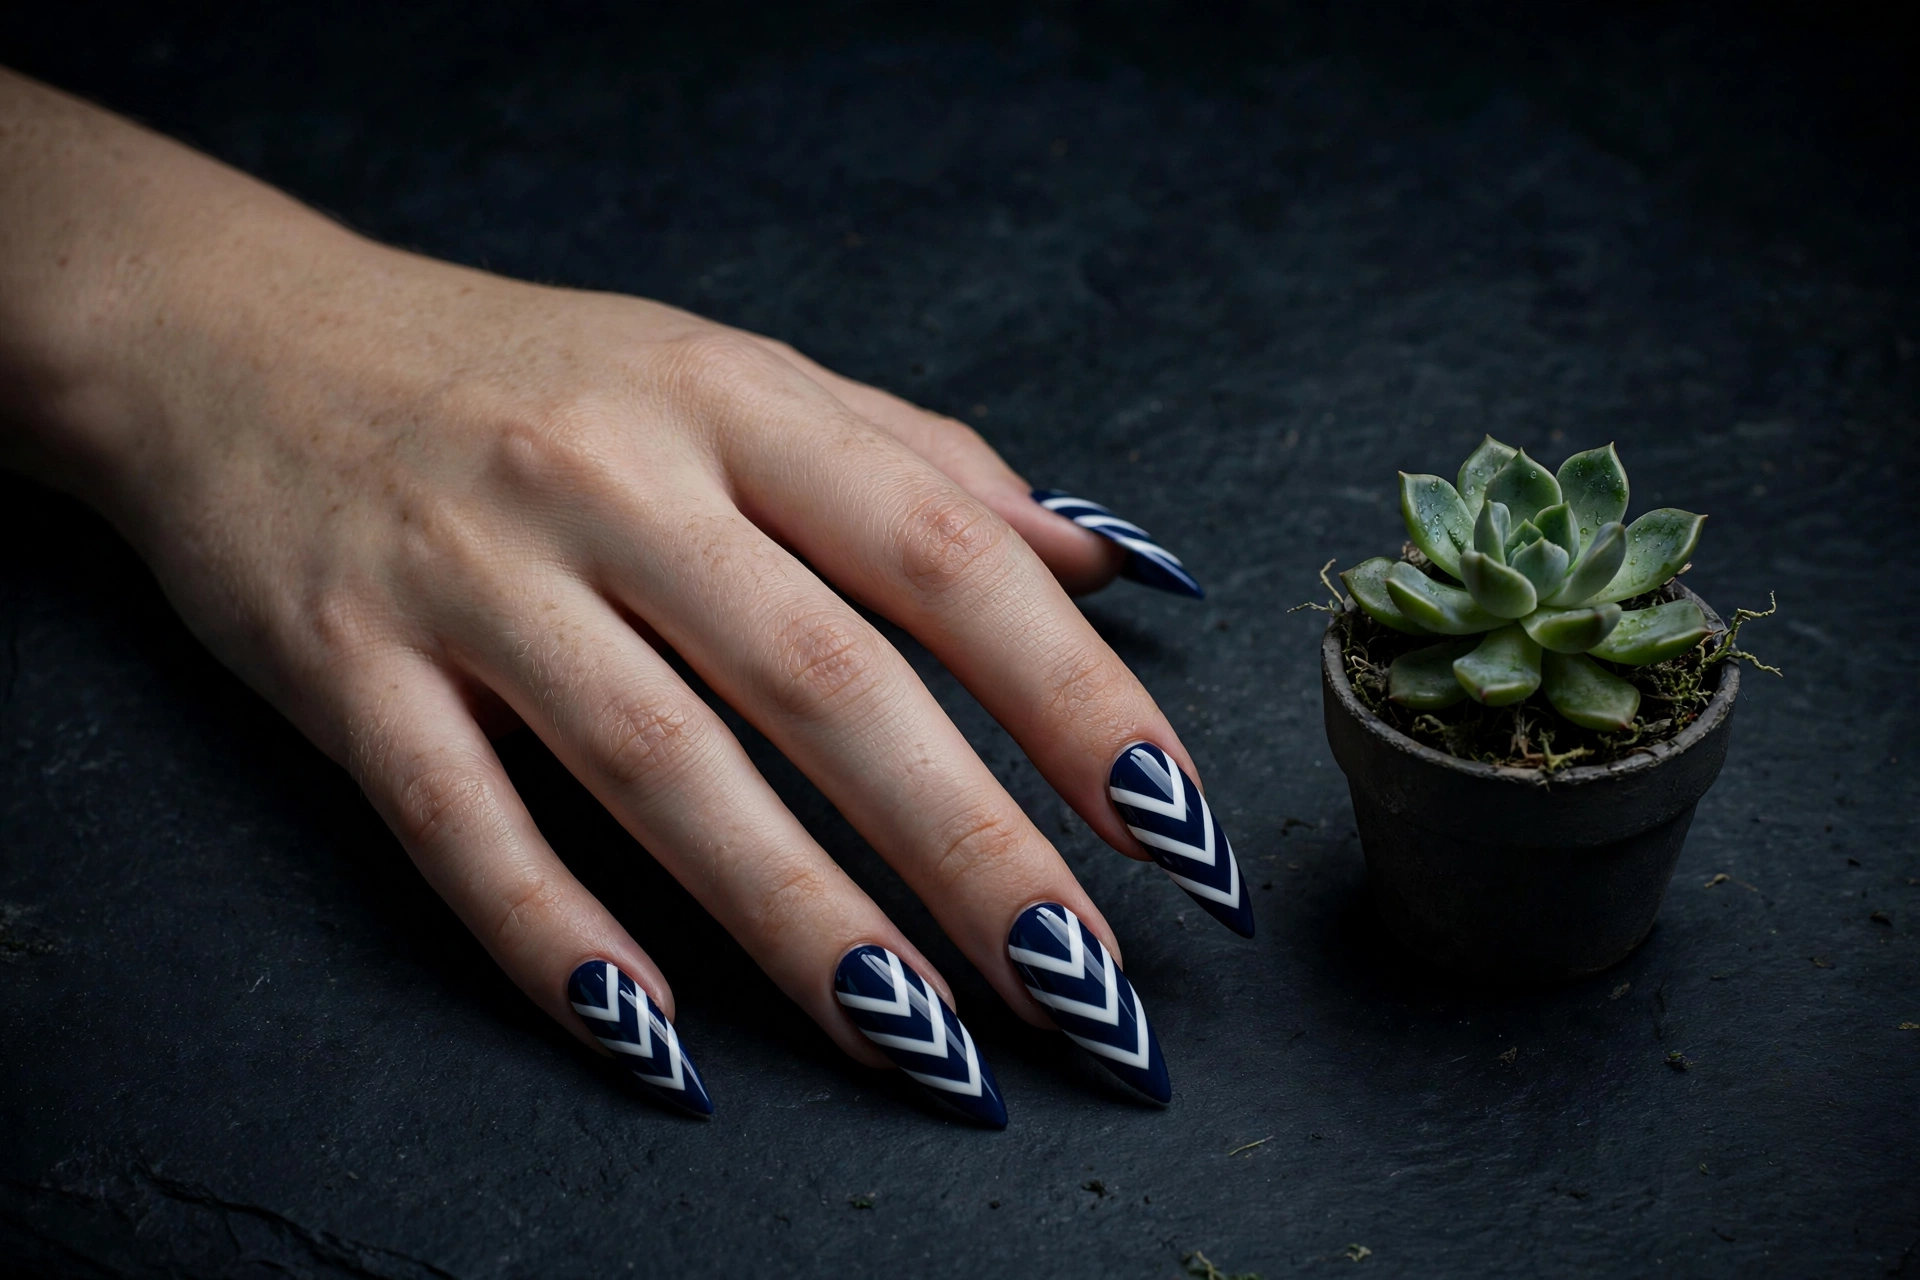
Stacked V-shaped stripes in white over a navy base. Chevron nail vinyls make this achievable without measuring angles by hand. The pointed shapes draw the eye toward the tip, which suits almond and stiletto shapes beautifully. Difficulty: easy to medium.
5. Metallic Stripe Lines

Thin gold striping tape sealed permanently over a matte black base. This is the only design here where the tape stays on the nail as the decoration itself, sealed under top coat. Metallic lines catch light with every hand movement, so the manicure changes character through the day. Difficulty: beginner.
Shapes & Color Blocks
This geometry language trades lines for filled shapes: triangles, half-moons, squares, and dots placed like color blocks. Bold blocks read as confident and modern; soft blocks read as playful and calm.
6. Triangle Color-Block Tips
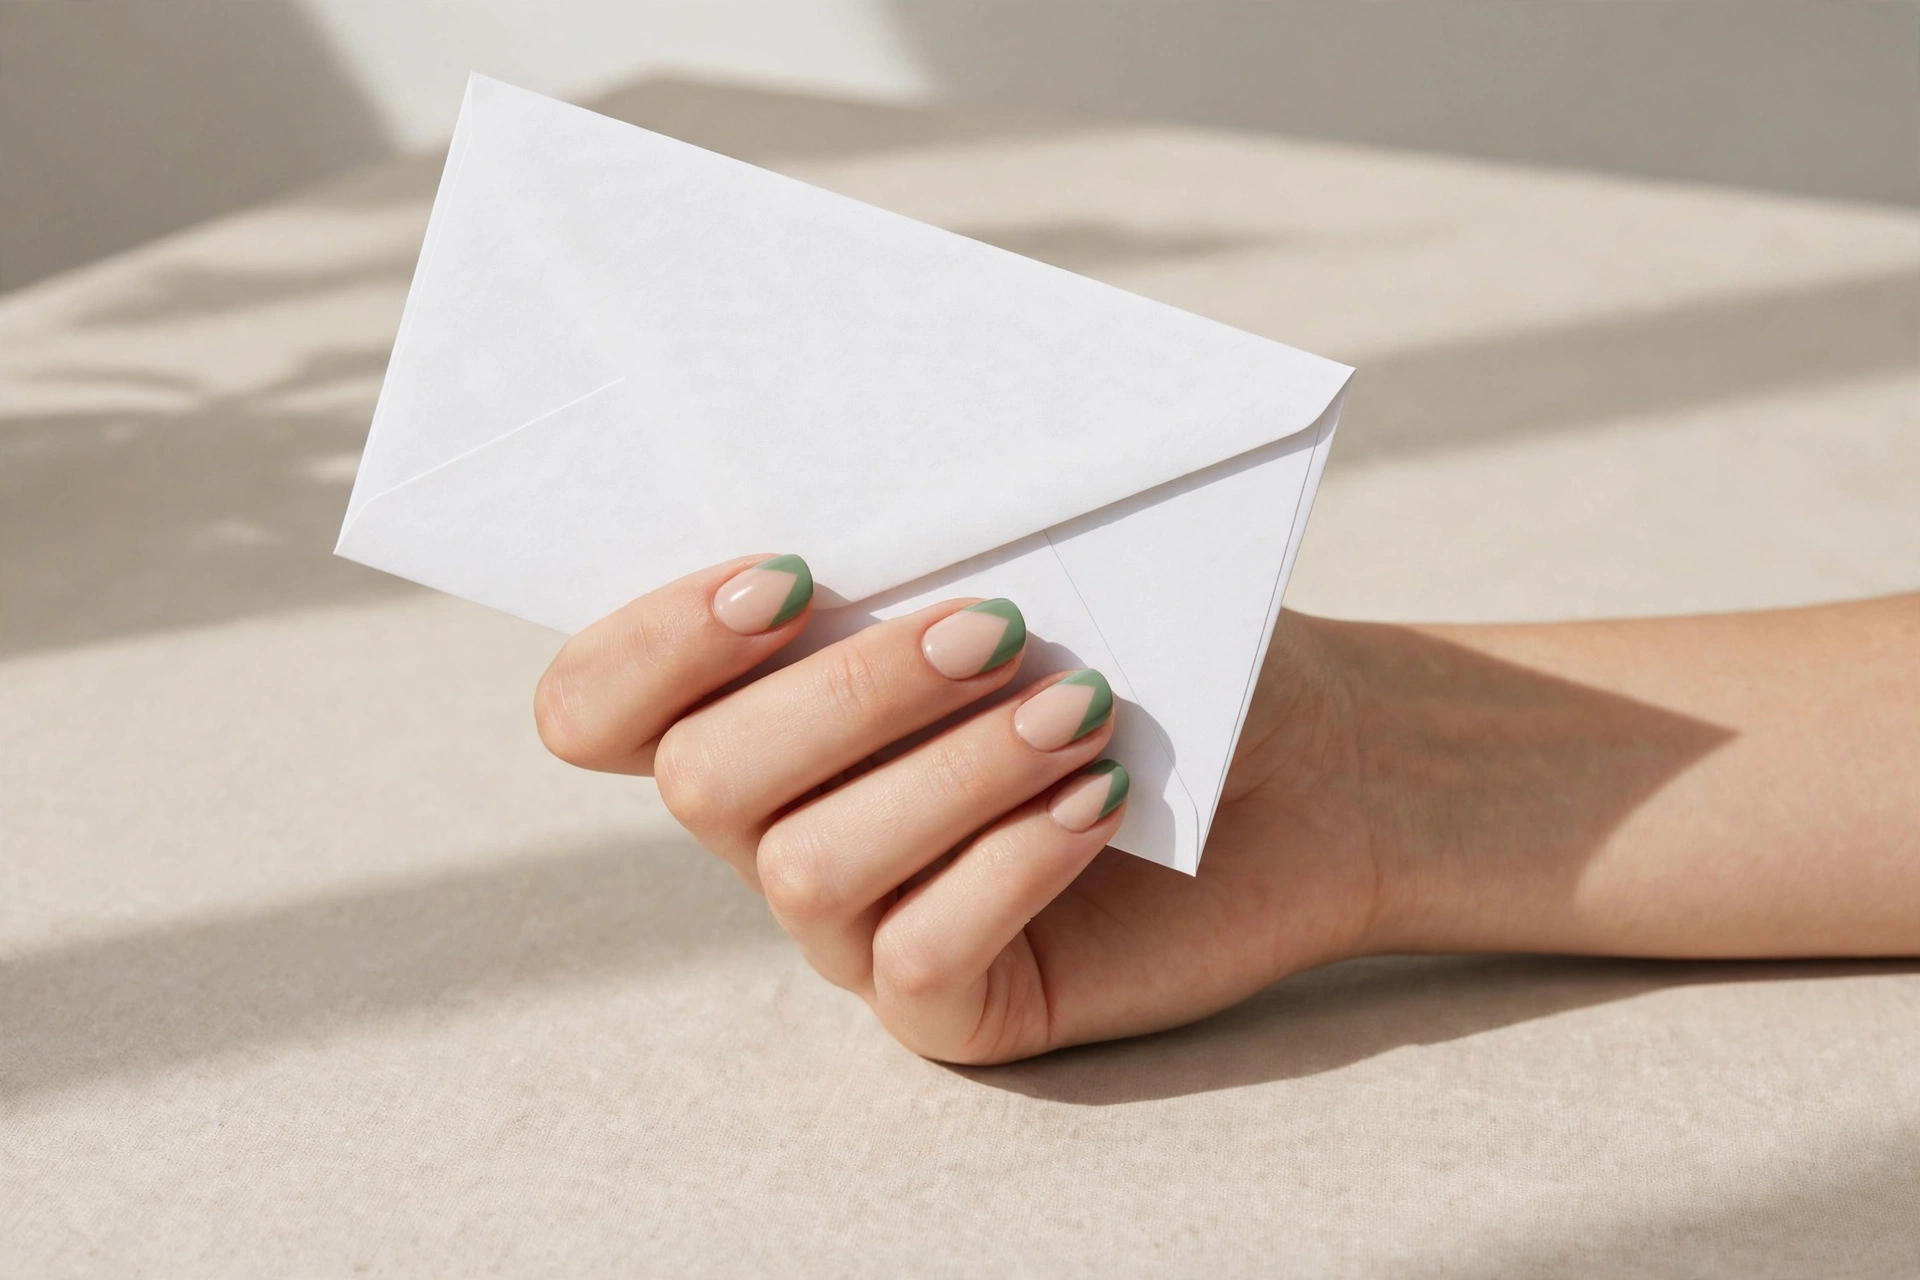
A sharp triangular tip in sage green over a nude base, like a French manicure redrawn with a ruler. Two strips of tape form the triangle; paint inside, peel while wet. The angular tip flatters oval and almond shapes. Difficulty: beginner.
7. Half-Moon Color Blocks
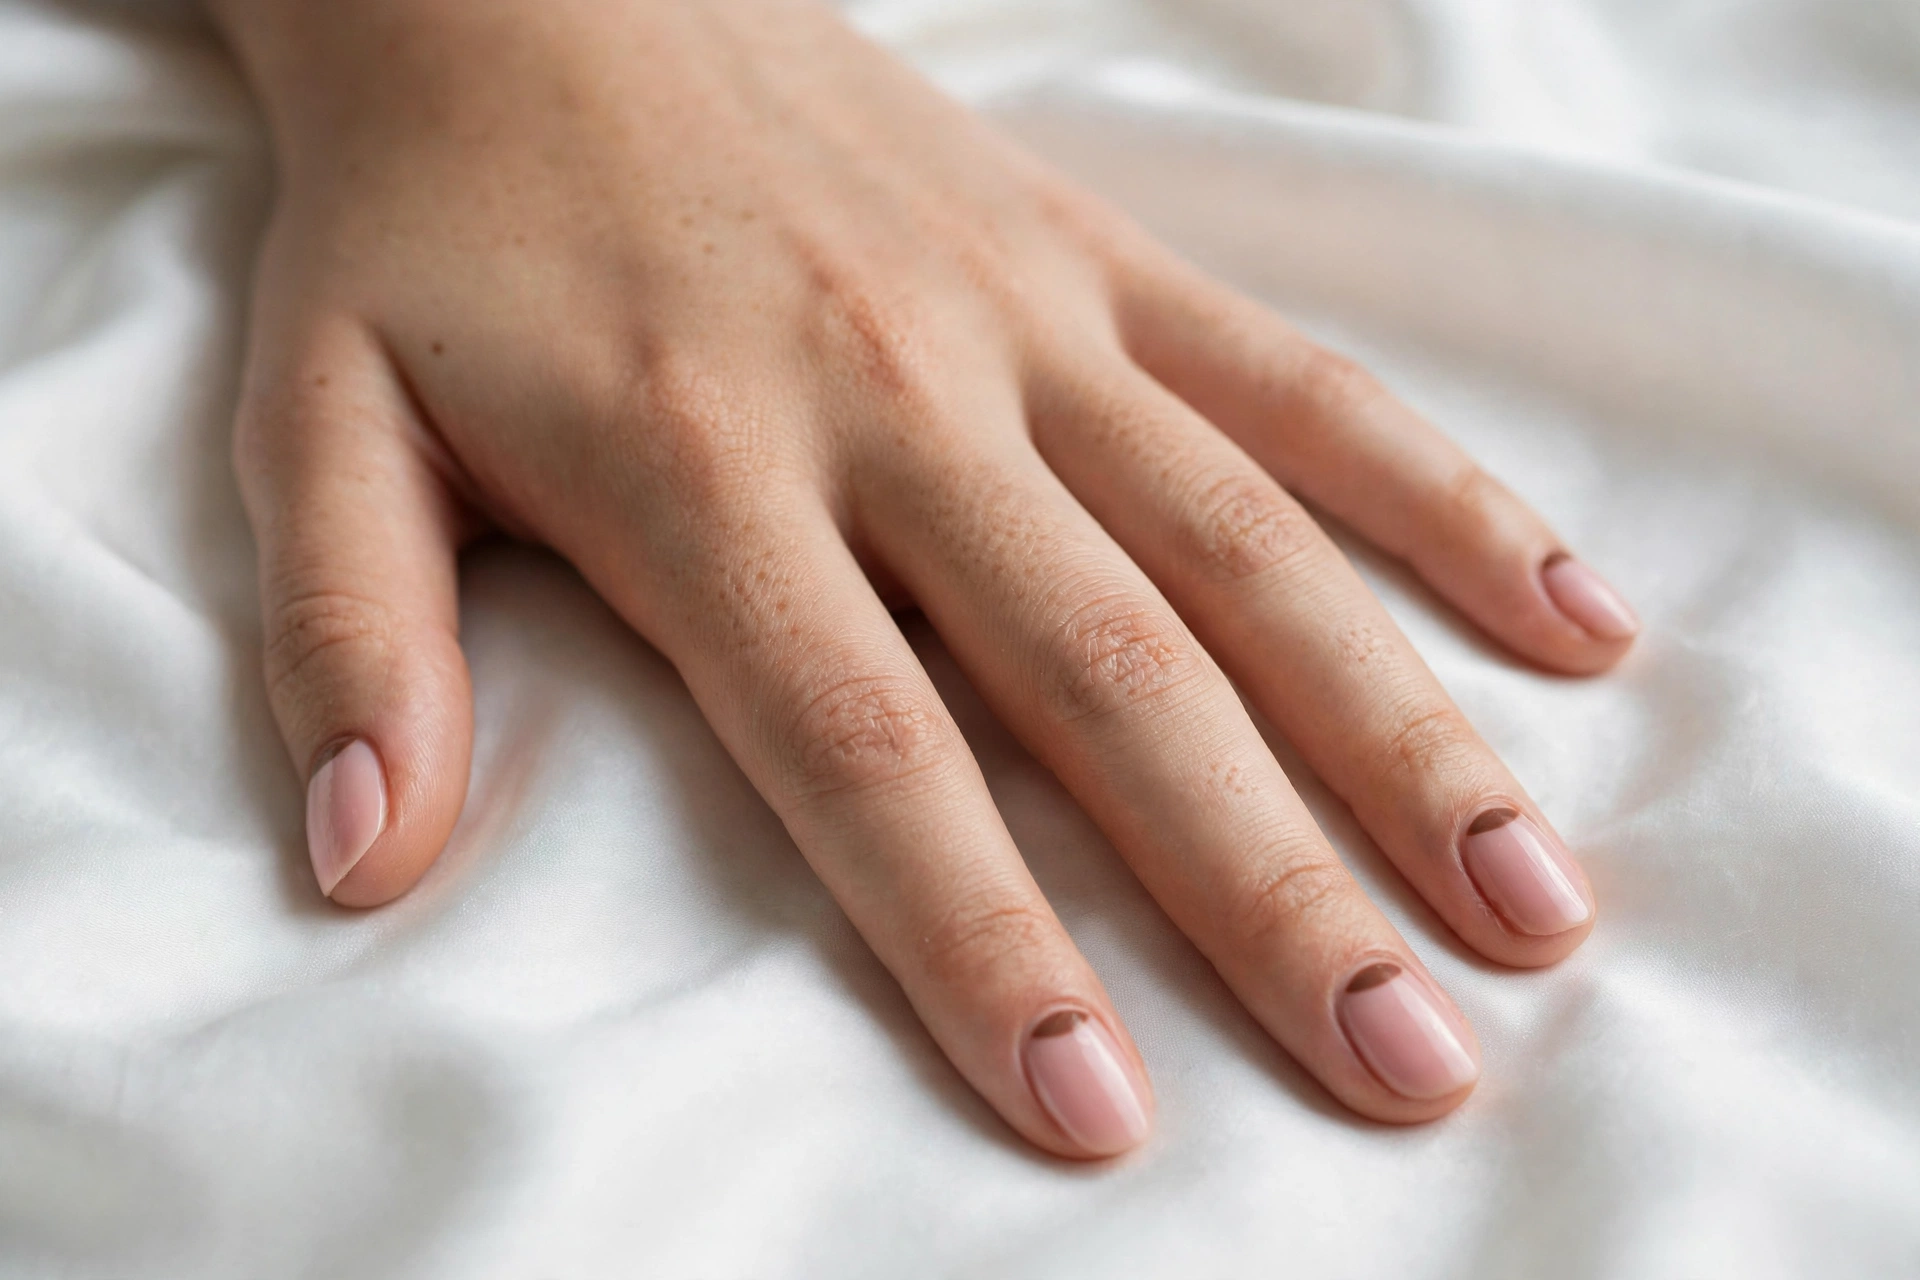
A cocoa-brown half-moon at the cuticle end of a blush-pink nail. Half-moon guides or a curved tape placement keep the arc clean. Because the design sits near the base, grow-out shows less noticeably than tip art. Difficulty: easy to medium.
8. Mondrian Squares
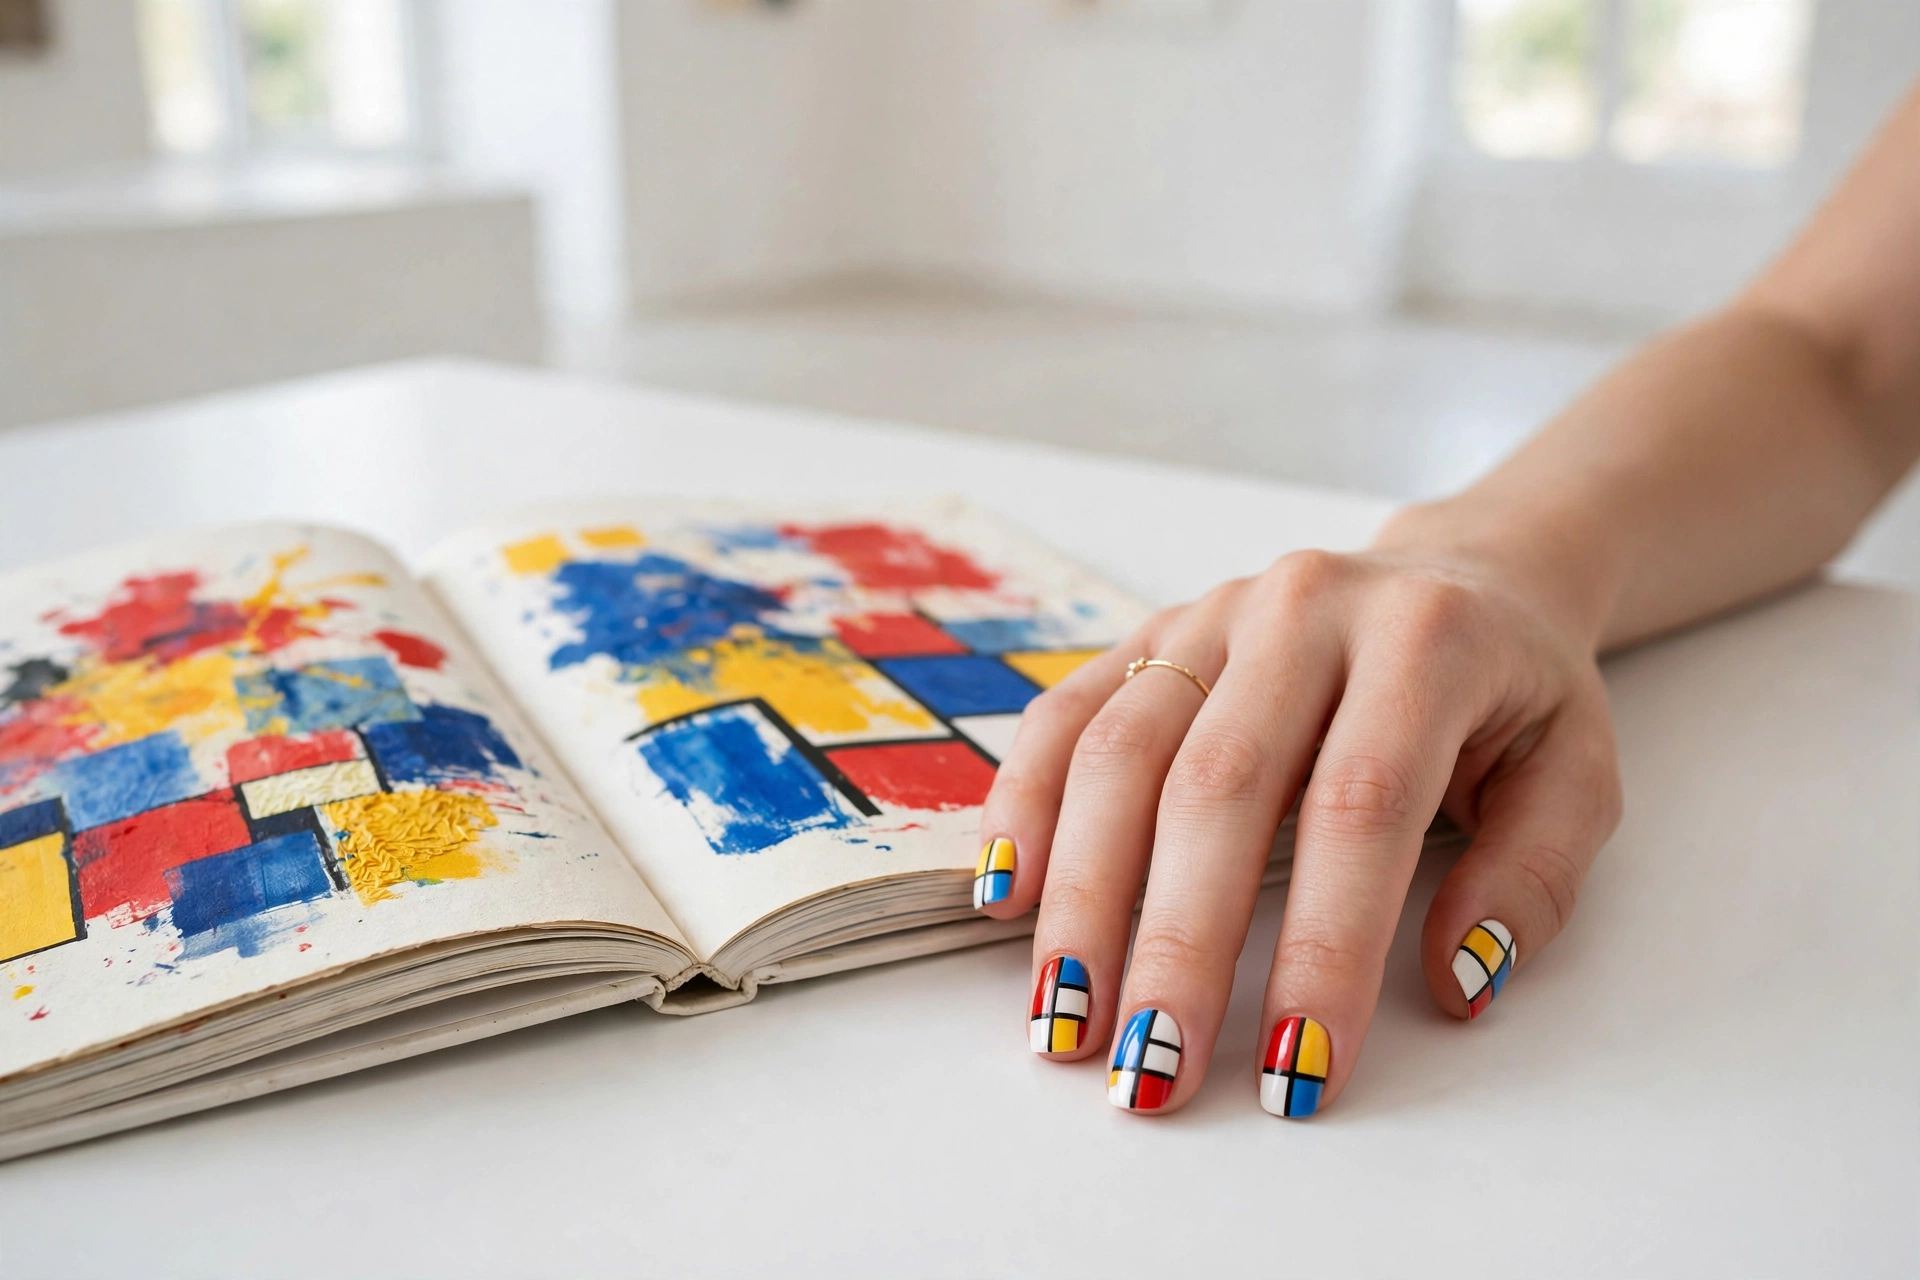
Each nail becomes a tiny Mondrian painting: a white base, bold black grid lines, and rectangles filled in primary red, blue, and yellow. Vary the rectangle placement per nail so the hand looks like a gallery wall rather than a repeated stamp. Difficulty: medium.
9. Dot-Matrix Clusters
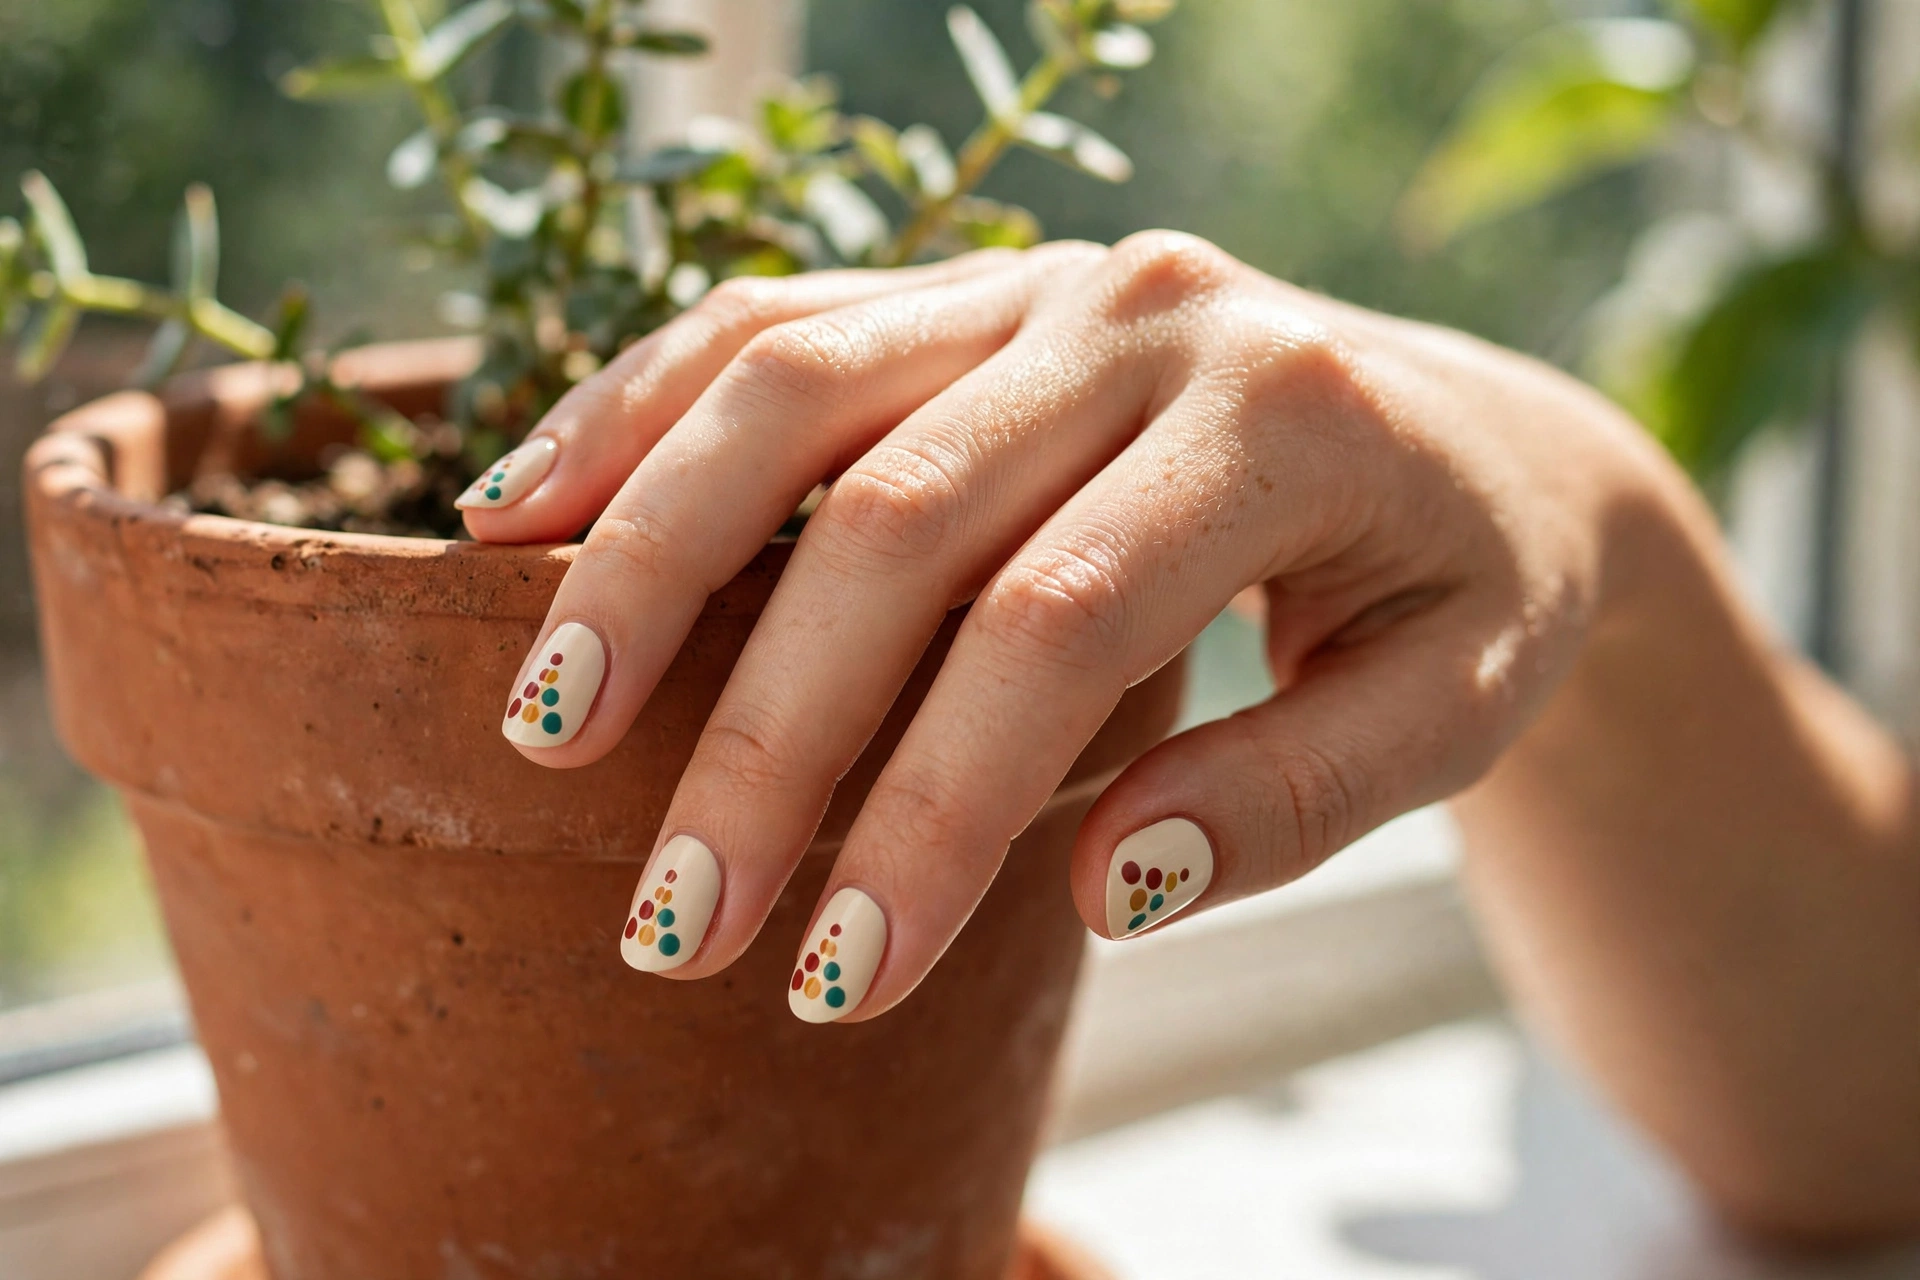
Clusters of dots in decreasing sizes arranged in triangular formations, like a pointillist study. A dotting tool makes perfectly round dots at three sizes with no drawing skill required. Use three colors that share a warm undertone for harmony. Difficulty: beginner.
10. Hollow Outline Shapes
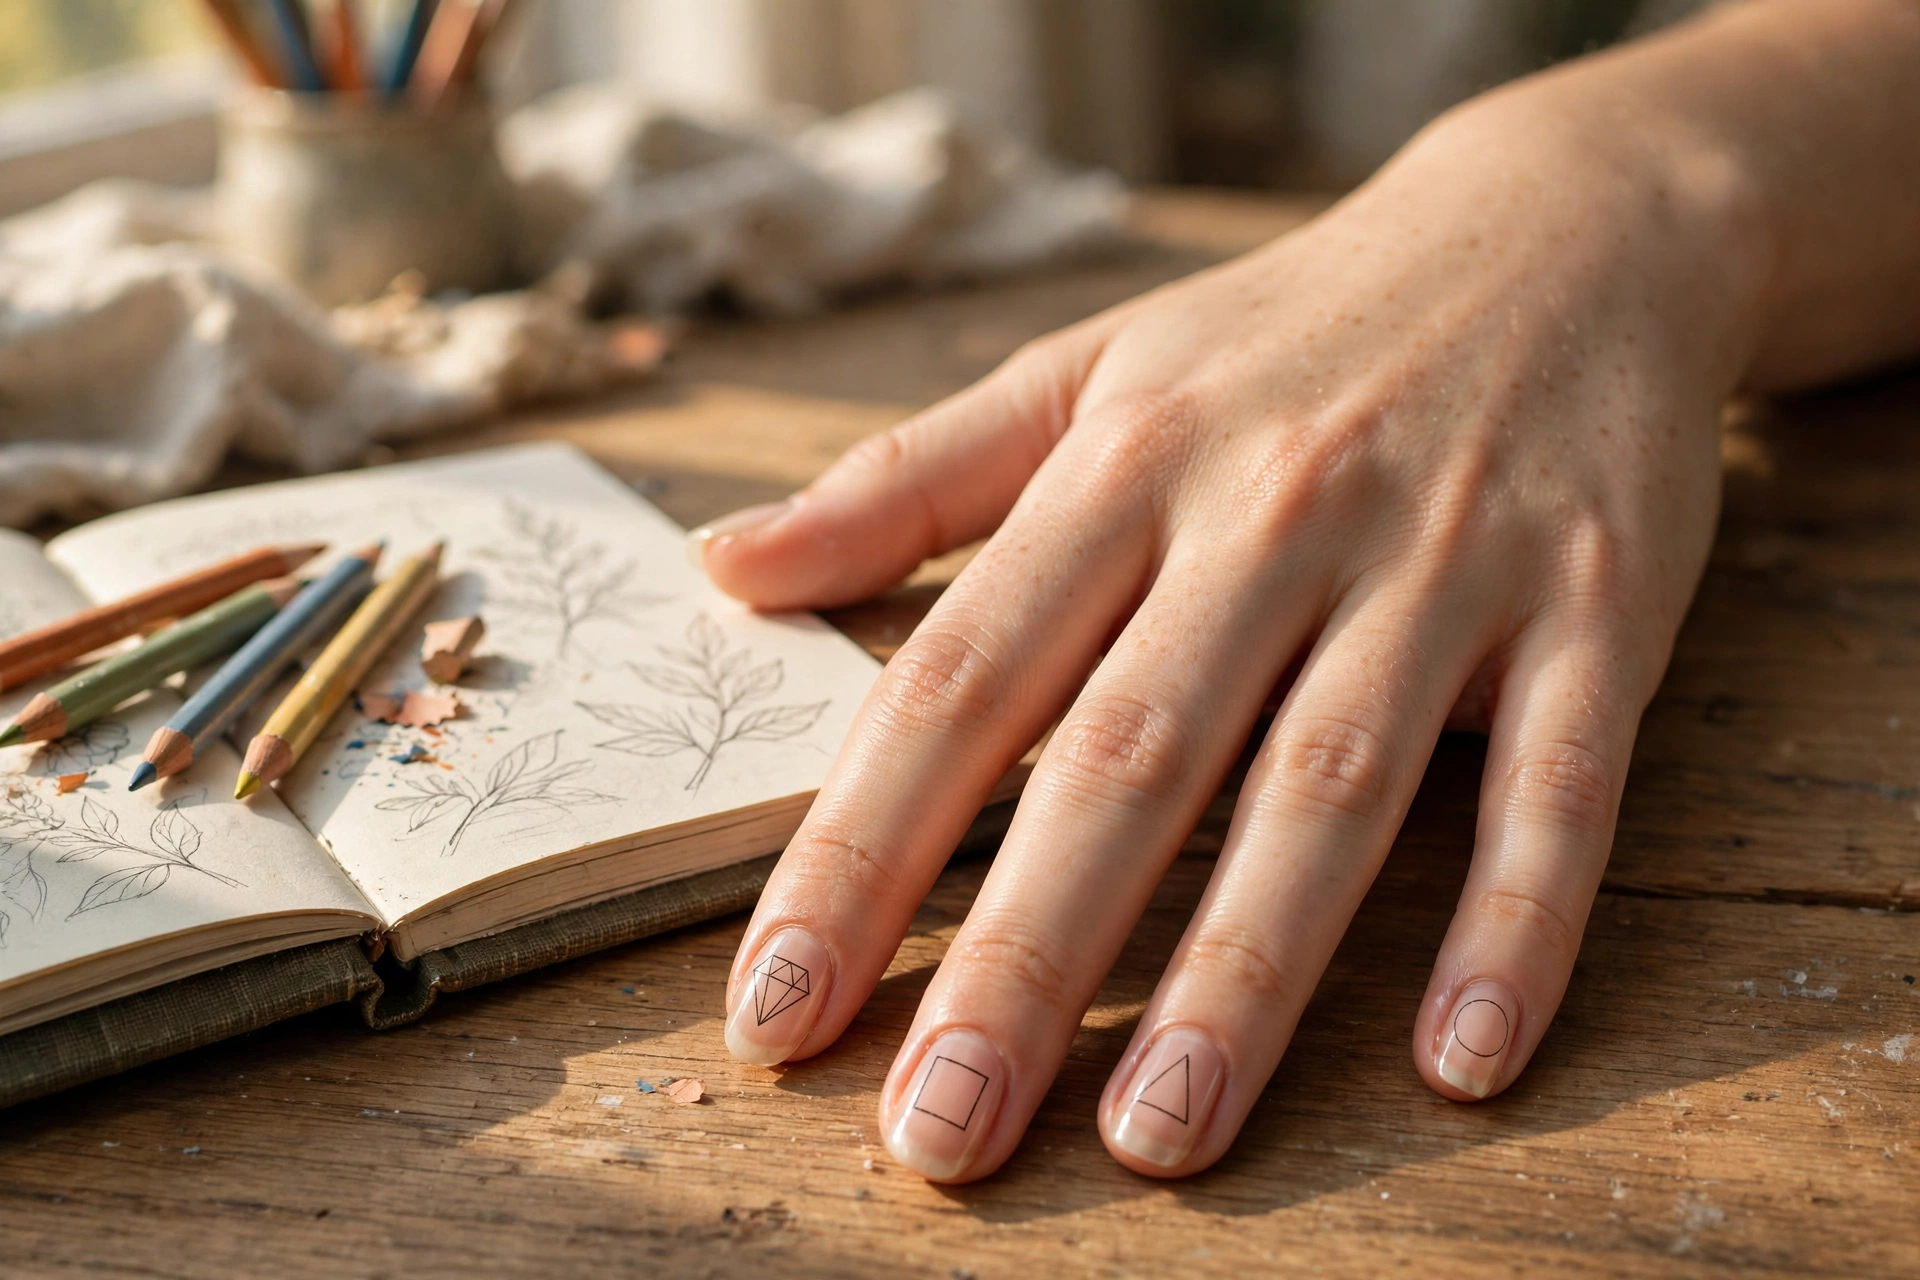
One different hollow shape per nail, a diamond, square, triangle, circle, drawn in fine black linework on a sheer nude base. The emptiness inside each outline is what makes this design feel modern rather than busy. Best done with a striping brush on fully dry polish. Difficulty: medium.
Negative Space
Negative space designs leave part of the natural nail bare and let the emptiness become the shape. They read as airy and expensive, grow out gracefully, and use less polish than full-coverage art.
11. The Negative-Space Triangle
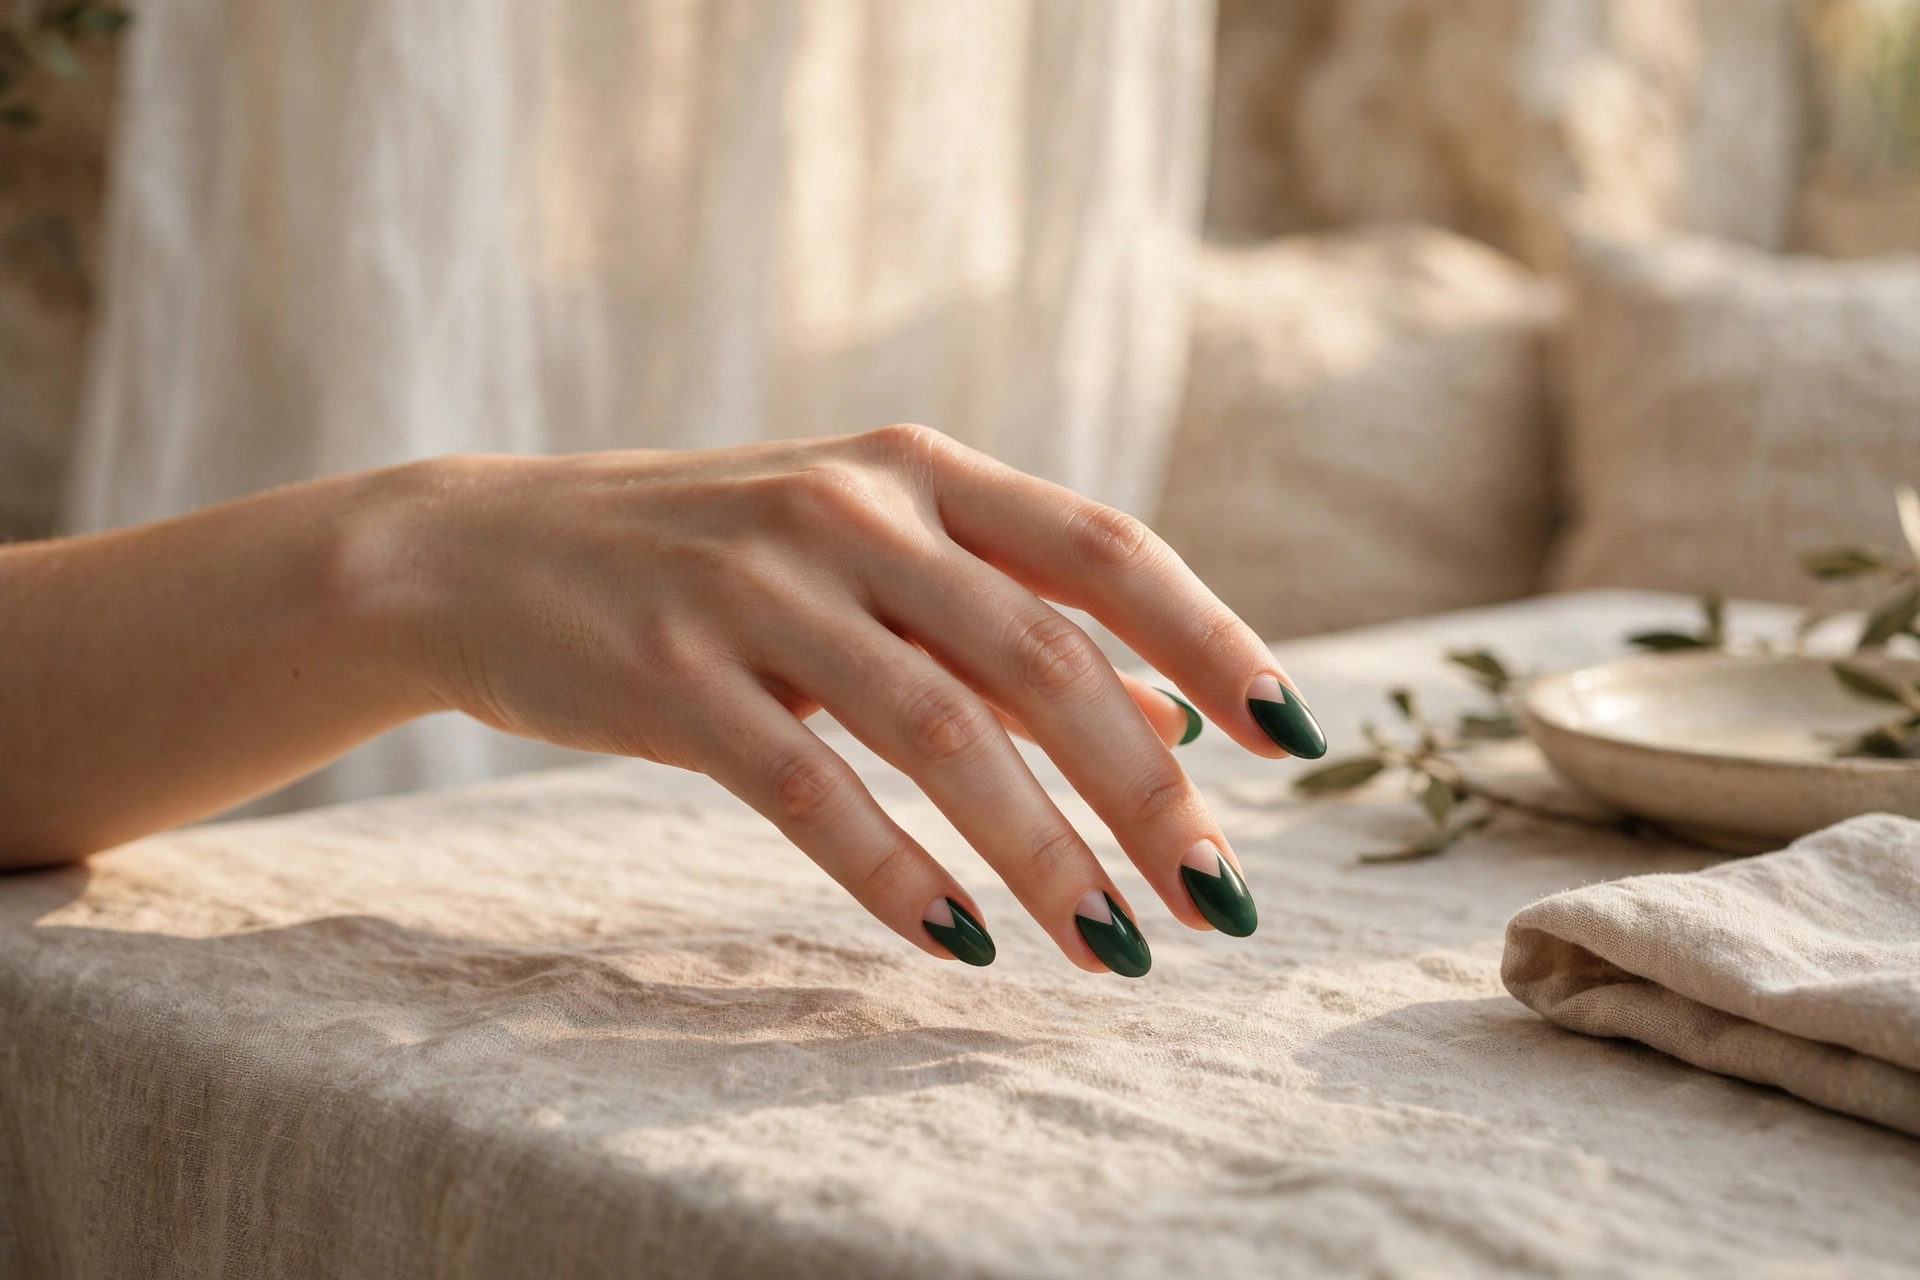
Deep forest-green nails with a single bare triangle of natural nail left exposed near the tip. Tape off the triangle before painting, then peel while wet to reveal the clean negative space. The bare triangle catches the eye precisely because everything around it is saturated. Difficulty: easy to medium.
12. The Line Break
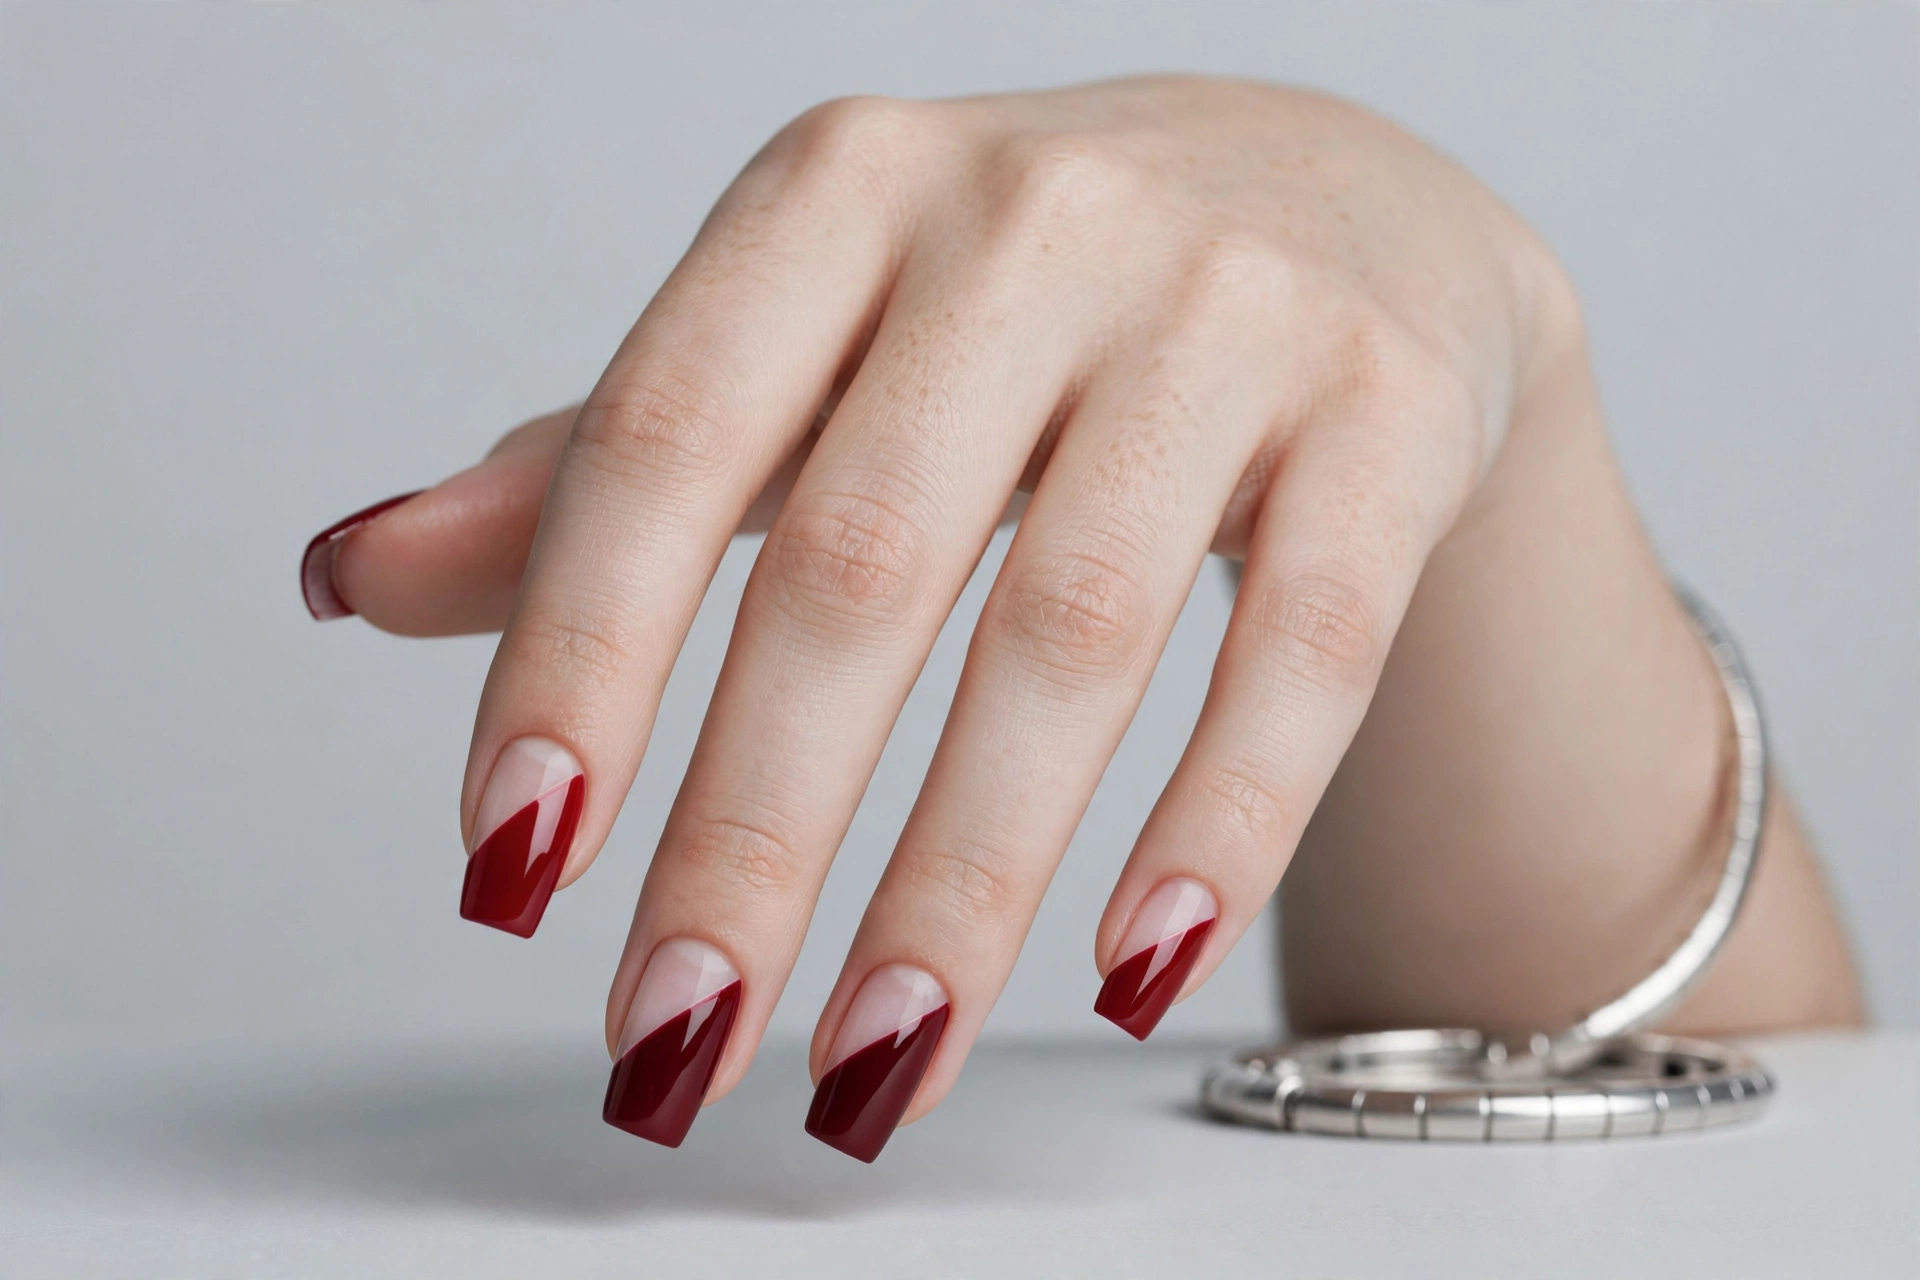
A glossy oxblood-red nail interrupted by one diagonal band of bare natural nail, like a crack in the color. Place one strip of tape diagonally, paint both sides, and peel. The single interruption keeps a dark manicure from feeling heavy. Difficulty: beginner.
13. The Grid
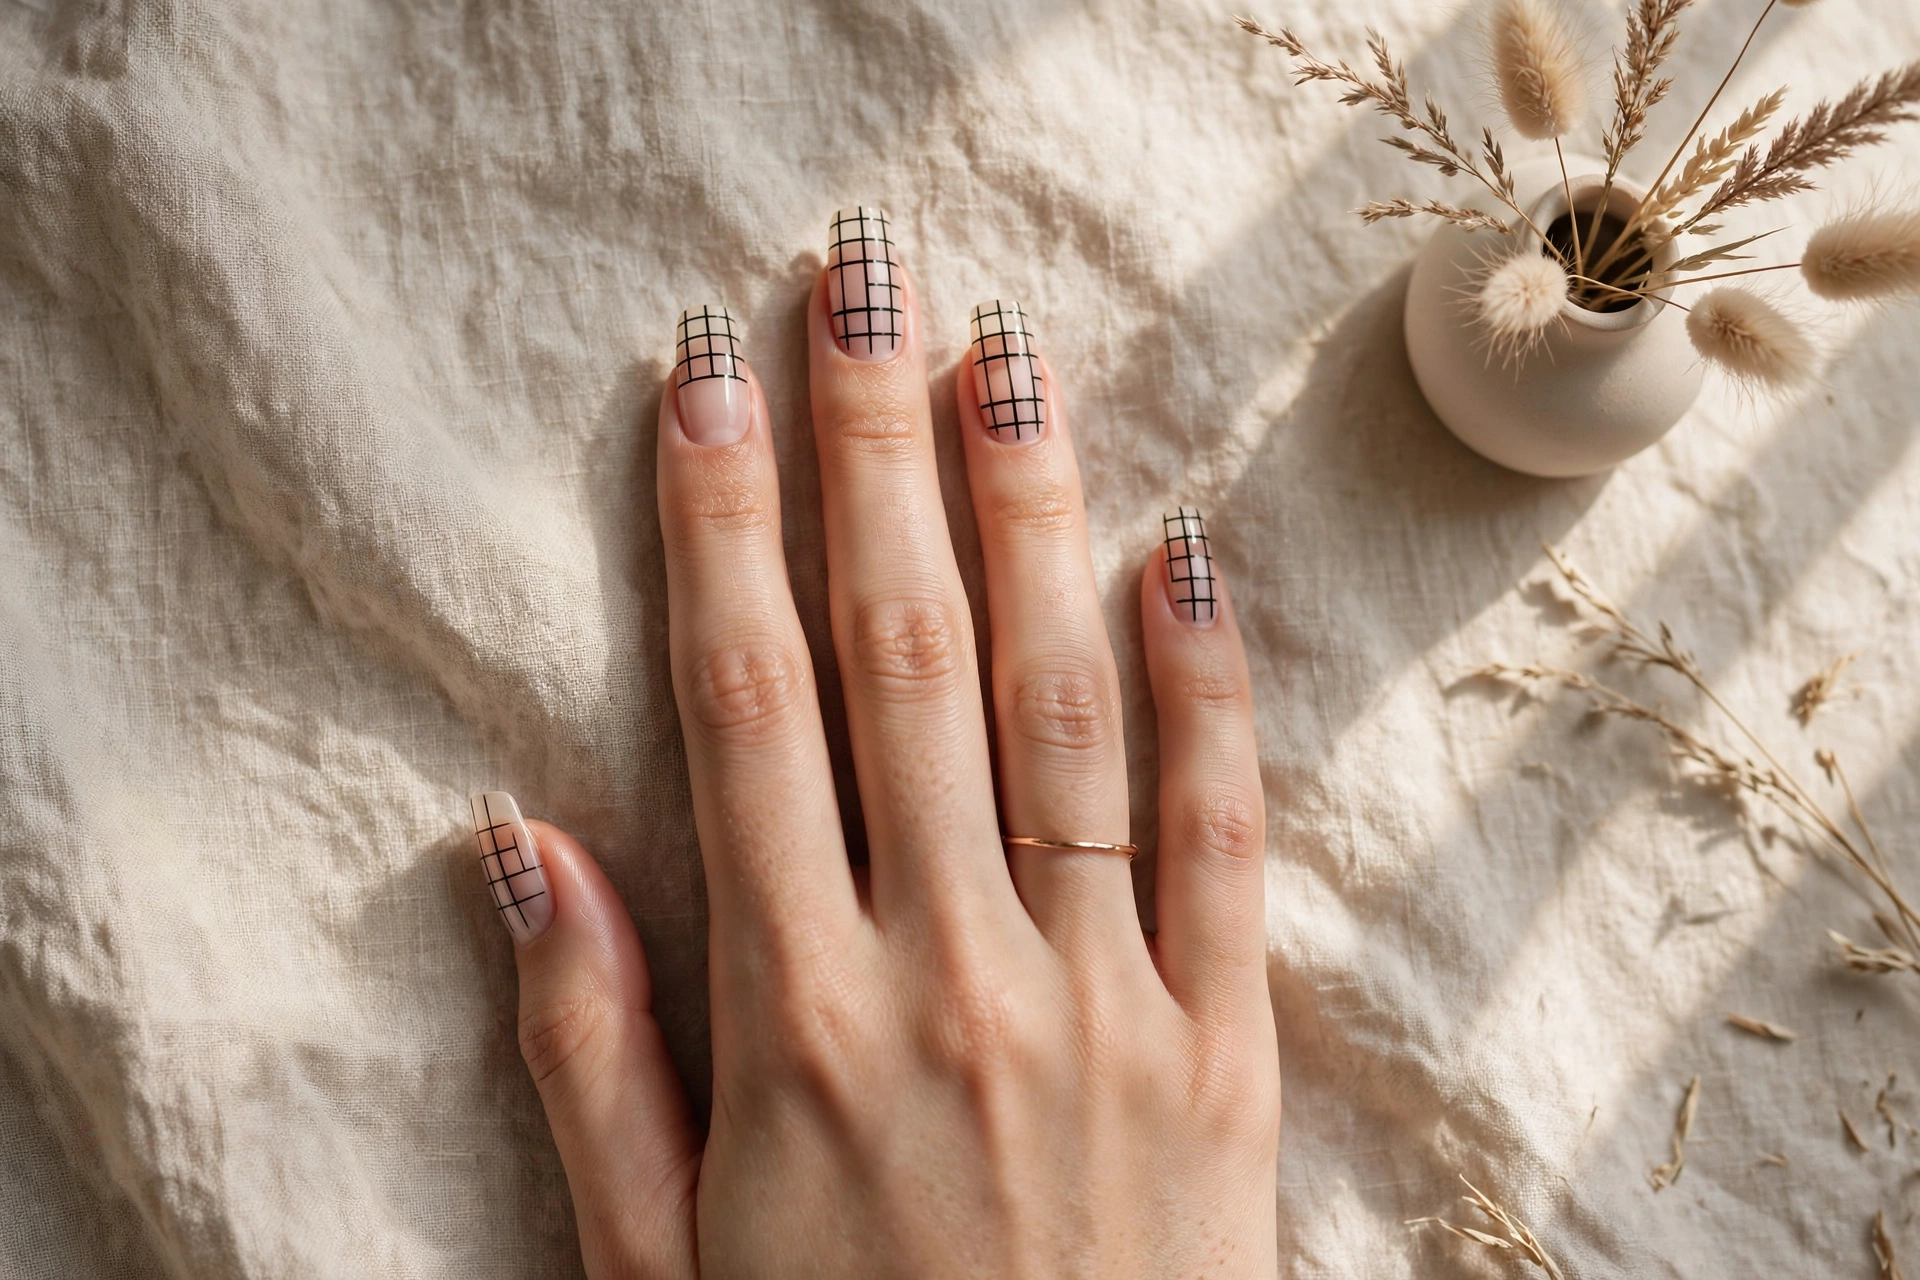
A crisp black grid over a sheer nude base, with some squares deliberately left as bare negative space. Build the grid with striping tape laid horizontally then vertically, paint over, and peel while wet. The unfinished squares are what lift this from a pattern to a design. Difficulty: medium.
14. The Cut-Out Arch
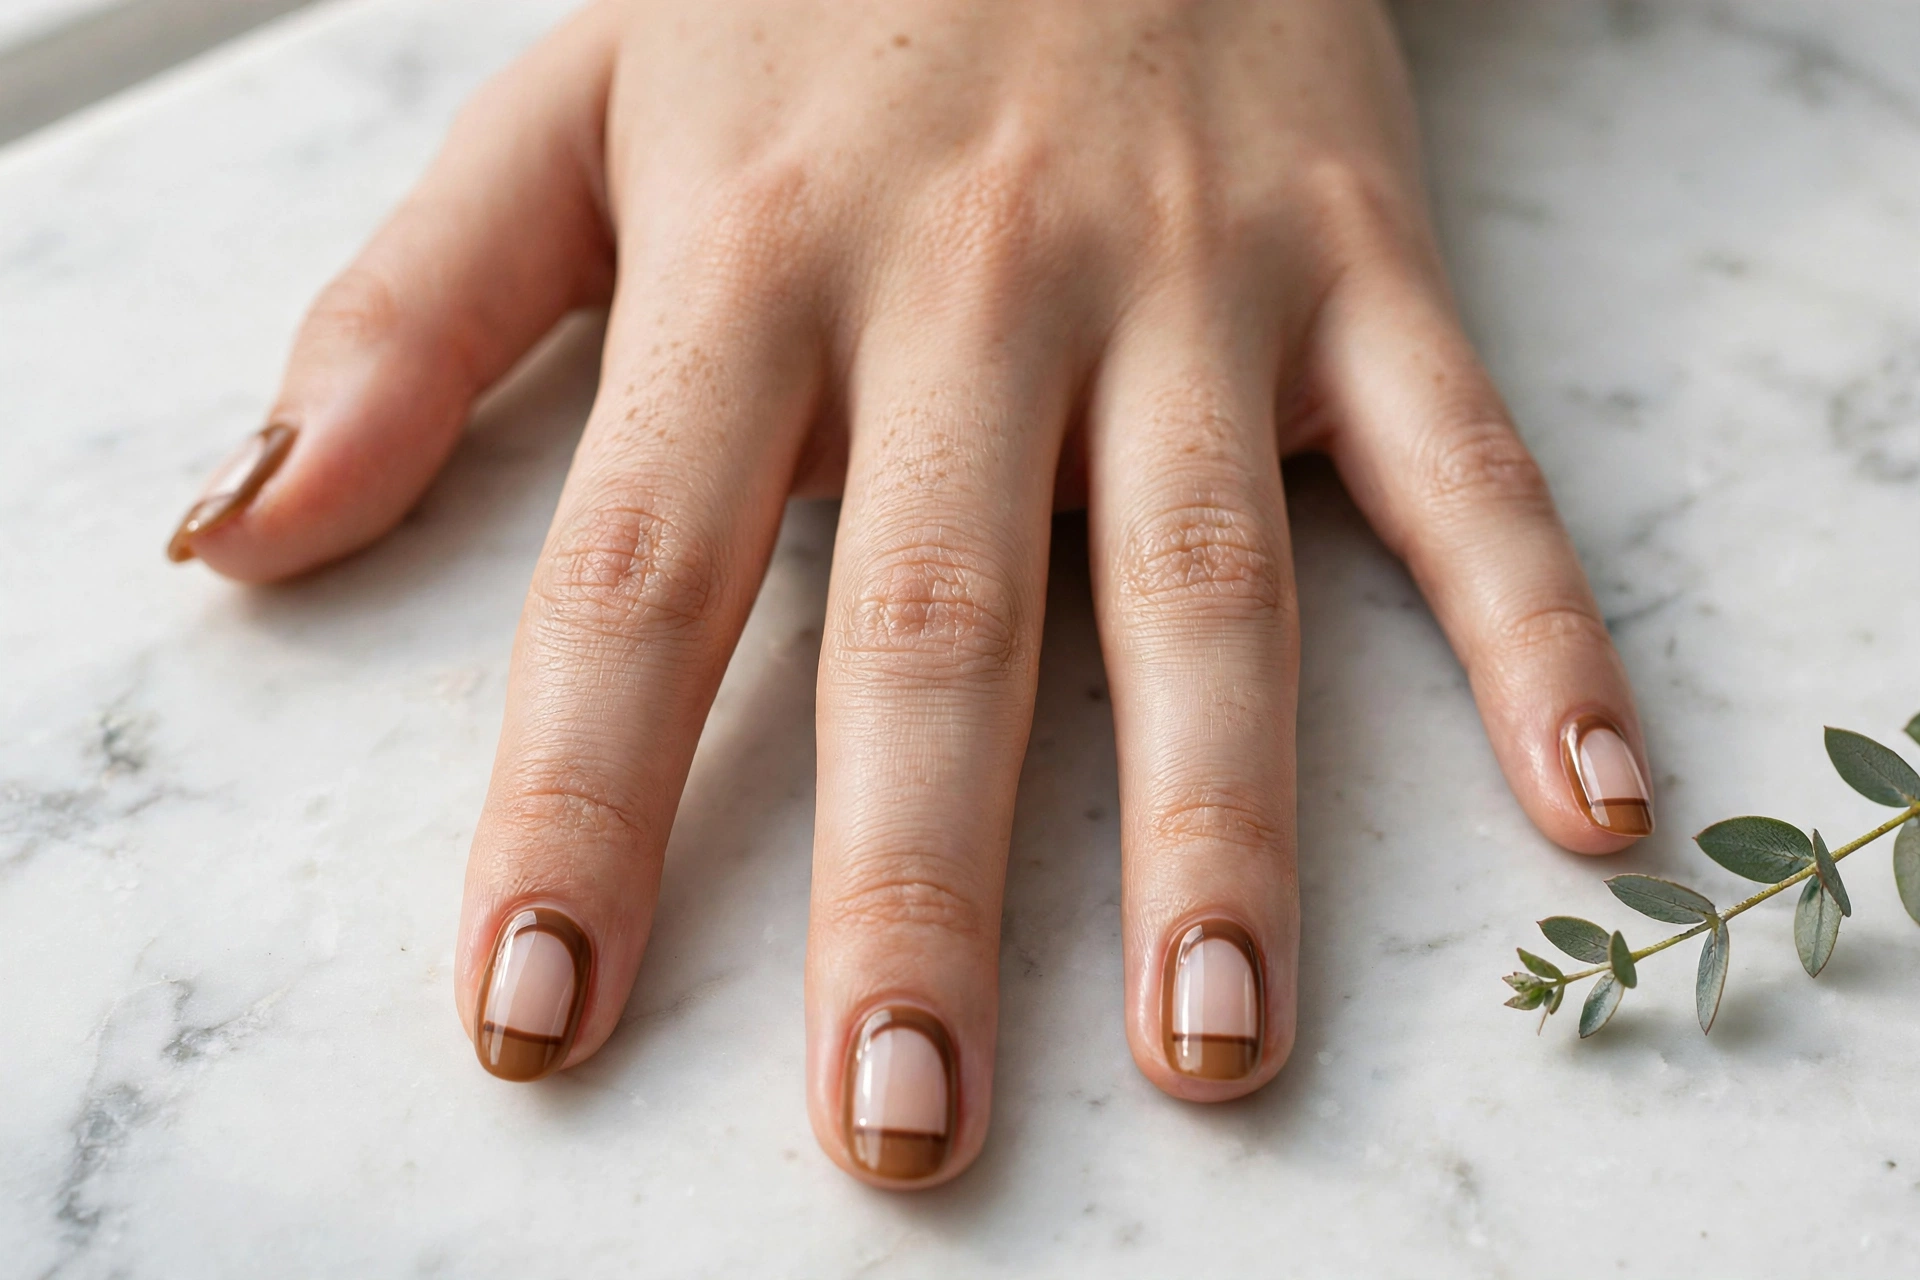
A warm caramel nail with an arched window of bare nail at its center, framed in chocolate brown. Use a small curved vinyl or cut a paper stencil for the arch. The soft earthy palette makes this the most wearable negative-space design on the list. Difficulty: medium.
Mixed & Abstract Geometry
These designs break the rules on purpose: asymmetric lines, optical illusions, and mixed motifs that feel more like gallery art than salon patterns. They take more time, but they are the ones people ask about.
15. Asymmetric Mixed Lines
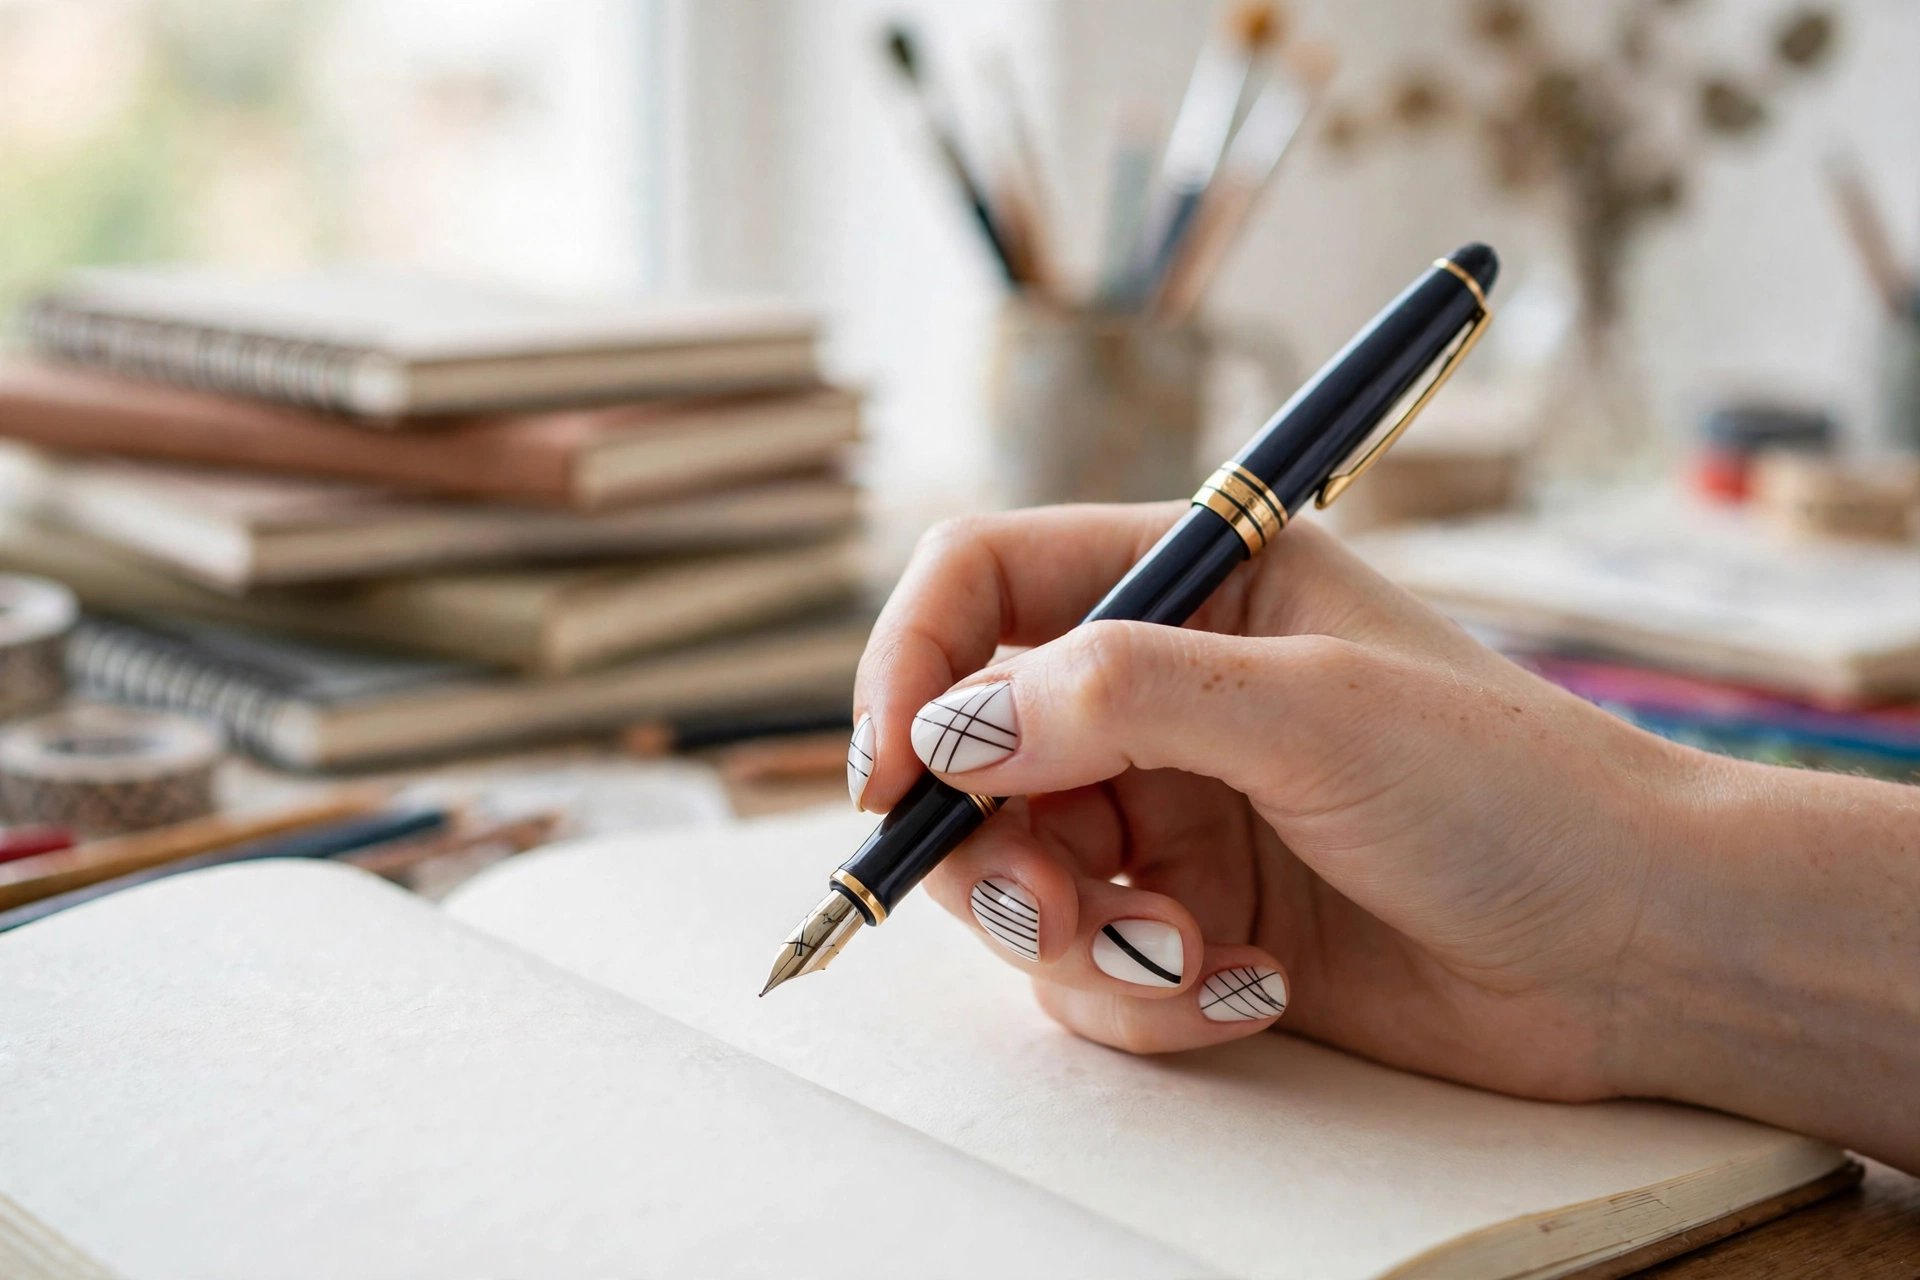
Every nail gets a different asymmetric arrangement of thin black lines on milky white: crossing lines on one, parallel angles on another, a single bold diagonal on a third. The rule is variety within a strict palette of two colors. Difficulty: medium.
16. The Optical-Illusion Cube
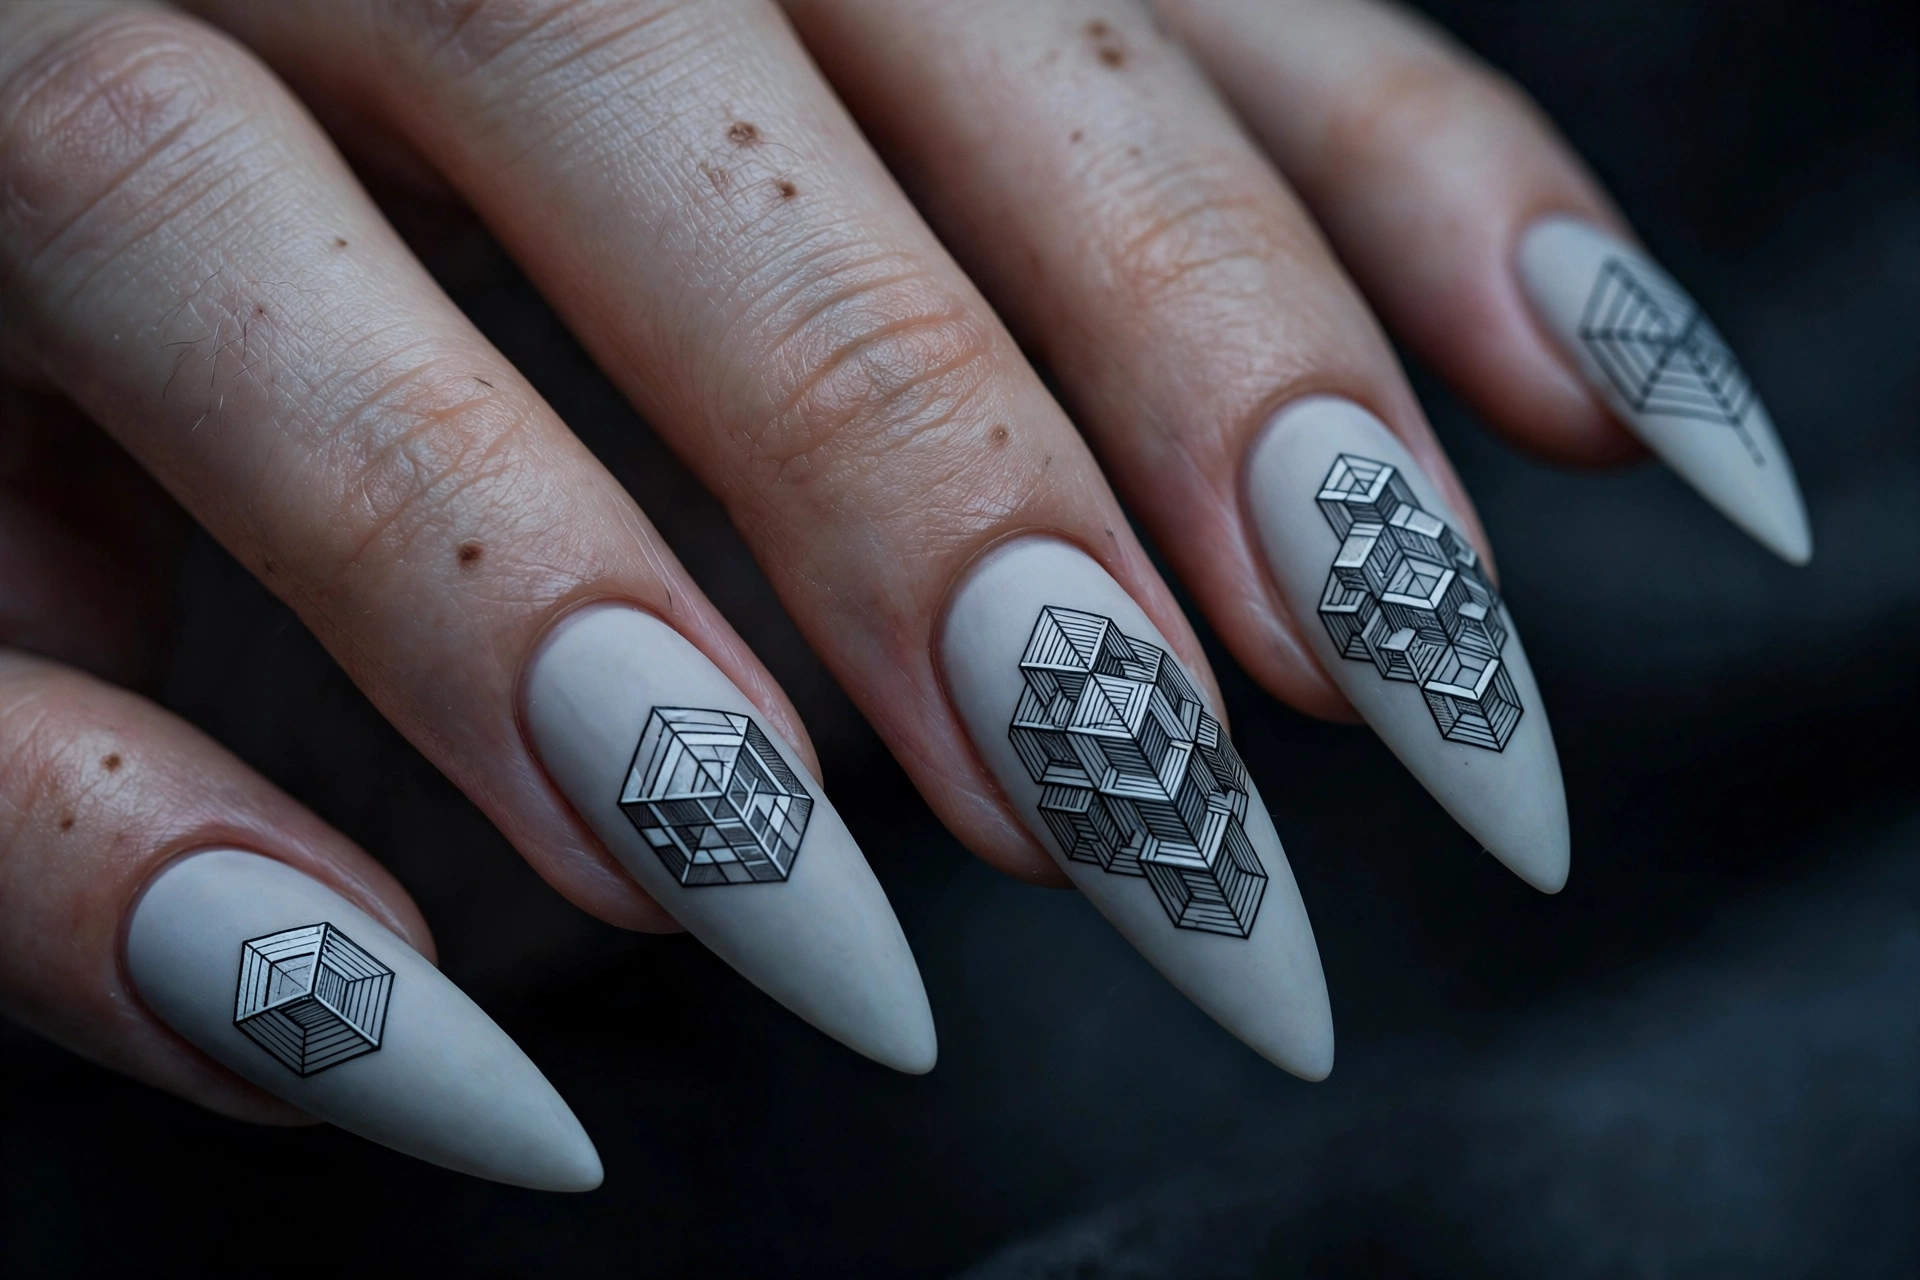
Isometric cubes drawn in black and white linework on pale gray, creating a 3D optical illusion. Sketch the cube lightly first, then commit with a striping brush. This is the most advanced design in this guide and looks best on longer nails, where the cube has room to breathe. Difficulty: advanced.
17. Stained-Glass Mosaic

Jewel-toned polygons in emerald, amber, ruby, and sapphire, separated by dark lead lines like a stained-glass window. Paint the dark lines first with a striping brush, then fill each cell with color. The glassy finish is what sells it, so use a glossy top coat and consider jelly polishes for the translucent effect. See also our jelly nail designs for more translucent looks. Difficulty: medium to advanced.
18. One Shape Per Nail
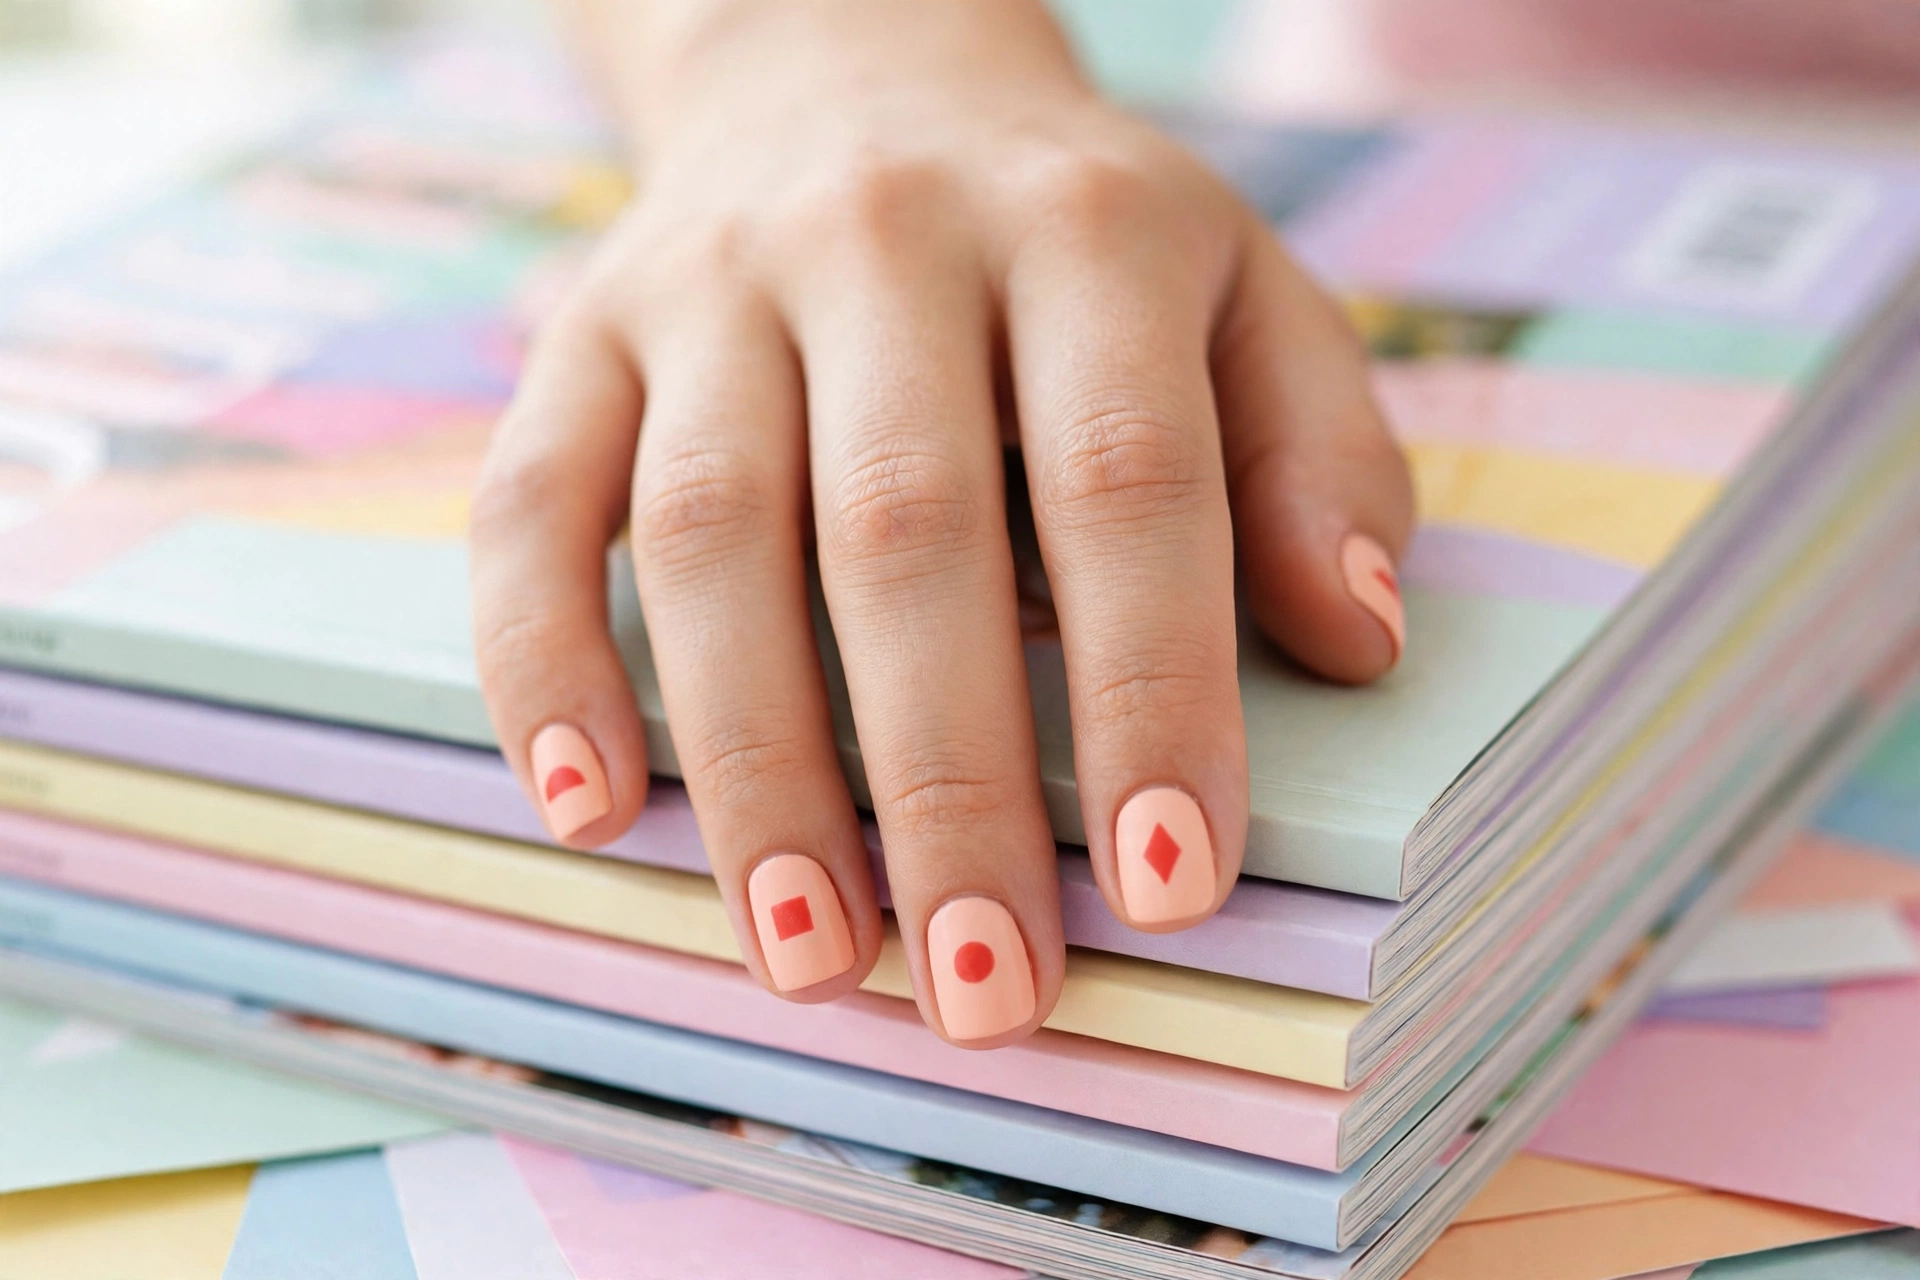
Five nails, five shapes: a triangle, square, circle, diamond, and half-moon, each in coral red on soft peach. The restraint of one shape per nail is what makes this chic rather than childish. Dotting tools handle the circle, tape handles the rest. Difficulty: beginner.
Geometric Nails in 2026: The Trends Worth Copying
Geometric art is not one look this year — it has split into clear directions, and most of them are already in this guide. Quiet-luxury micro-lines are the dominant salon request: one or two hair-thin lines on a nude or milky base (designs 1 and 2), worn with short, neat shapes. Mixed-finish geometry pairs matte and gloss inside the same design — the diagonal split (design 3) is the easiest version — so the pattern reads through texture as much as color. Metallics as structure, rather than decoration, keep growing: gold tape lines sealed under top coat (design 5) act like jewelry and survive the week better than glitter. Art-deco revival shapes — arches, fans, and stepped corners, like the cut-out arch (design 14) — are the bridal and event direction. And negative space has moved from trend to staple, because it grows out invisibly and suits the shorter lengths most people actually wear. If you only copy one trend, copy micro-lines: they take ten minutes and read as intentional at any distance.
How to Choose Your Geometric Style
Match the geometry to your nails and routine. Short nails suit single lines, small triangles, and dot clusters, since compact shapes don’t overwhelm a small canvas. Long nails carry grids, optical illusions, and full color blocks. Busy hands benefit from negative space and nude bases, which show less wear at the tips. For shape pairings, angular designs like chevrons and cubes complement the sharp edges of square and stiletto nails, while soft shapes like half-moons and arches suit oval and almond. If you are still deciding on a shape, our nail shapes guide breaks down all eight options.
Color-wise, geometric art is at its best in high contrast: black and white, navy and gold, oxblood and nude. Our black nail designs and gold nail designs galleries are natural companions to these ideas, and a matte top coat can transform any of the looks above, see matte nail designs for reference.
Planning a Full Set: Combining Designs Without Clashing
Wearing one design on all ten nails is the classic approach, but mixed sets look more designed — if they follow one rule: one palette, one hero. Pick a single color story of two or three shades, then let one or two nails carry the complex design while the rest support it quietly. A reliable formula is one hero nail (the grid, the mosaic, or the cube), two supporting nails with a medium design (triangles, chevrons), and two quiet nails (a pinstripe or a plain color block). As an example, built entirely from this guide:
| Nail | Design | Role |
|---|---|---|
| Thumb | 6. Triangle Color-Block Tips (sage on nude) | Supporting |
| Index | 1. The Single Pinstripe (black on nude) | Quiet |
| Middle | 13. The Grid (black on sheer nude) | Hero |
| Ring | 5. Metallic Stripe Lines (gold on nude) | Supporting |
| Pinky | Plain nude, no art | Quiet |
Mirror the same arrangement on the other hand and the set reads as one manicure rather than five experiments. The two failure modes to avoid are five heroes at once (the eye cannot settle) and mixing palettes between nails — shape variety is welcome, color variety is what clashes.
DIY or Salon? What Geometric Nails Actually Cost
Geometric art is one of the best-value designs to do yourself, because the tools are reusable and the technique — not the product — creates the effect. In a salon, expect geometric work to be priced as an art add-on: simple line work, dots, or a single shape per nail typically adds a small per-nail or per-set fee, while detailed hand-painted designs such as the stained-glass mosaic or the optical-illusion cube sit at the top of the art price range, and a full intricate set can push the total manicure well past double a plain one. Prices vary widely by city and salon, so ask for the art price before the appointment, not at the till. At home, the entire toolkit in this guide — striping tape, a liner brush, a dotting tool set, and vinyls — usually costs less than a single salon art add-on and lasts for dozens of manicures; your only ongoing cost is polish you already own. Book a professional when the design is advanced and the occasion is photographed (weddings, events), when you want the cube or mosaic on long nails, or when your non-dominant hand defeats you on freehand work. For the other sixteen designs here, DIY is not the budget compromise — it is simply the same result without the appointment.
Geometric Nail Designs: FAQs
What exactly are geometric nails?
Geometric nails are manicures built from straight lines, angles, and simple shapes such as triangles, squares, chevrons, grids, and dots, rather than freehand curves or painted scenes. They range from a single pinstripe to complex optical illusions, and most designs can be done at home with striping tape or a liner brush.
What tools do I need for geometric nail art?
The essentials are a base coat, two or more polish colors, nail striping tape, tweezers, a thin liner brush, a dotting tool, and a top coat. A cleanup brush dipped in polish remover handles mistakes. You do not need a lamp or gel polish to start; regular polish works for every technique in this guide.
How do I keep my lines straight and clean?
Three things matter most: let your base color dry completely before applying tape, press tape edges down firmly with an orangewood stick, and peel the tape while the second color is still wet. For freehand lines, anchor your pinky on a table, load less polish on the brush, and draw each line in one confident pull rather than a slow stroke.
Do geometric nails work on short nails?
Yes, geometric art is one of the best styles for short nails. Compact designs like a single pinstripe, triangle tips, dot clusters, or one shape per nail fit small nails perfectly and can even make them look longer. Avoid large grids and optical illusions on very short nails, since the pattern needs room to read clearly.
How long does geometric nail art last?
With a proper base coat, thin polish layers, and a sealed top coat capping the free edge, geometric designs last as long as any manicure: roughly 5 to 7 days with regular polish and 2 to 3 weeks with gel. Negative-space designs tend to look good longer because chips and grow-out are less visible against bare nail.
Can I do geometric designs with regular polish, or do I need gel?
Regular polish works perfectly for every design in this guide. Gel gives you more working time for freehand linework since it doesn’t air-dry, but tape techniques actually work best with regular polish because the peel-while-wet timing is more forgiving. Choose gel for longevity, regular polish for ease.
What is the easiest geometric design for a beginner?
The single pinstripe: one thin vertical line on each nail over a nude base, done with one strip of striping tape or a liner brush. The dot-matrix cluster and the line-break negative space are close runners-up, since neither requires a steady hand.
How do I fix a wobbly line without starting over?
Wait for the line to dry fully, then run a cleanup brush dampened with polish remover along the wobbly edge to straighten it. For tape designs, re-press a fresh strip of tape along the corrected line and repaint. If the base color underneath is intact, you only ever need to fix the top layer.
Can I use regular Scotch tape instead of striping tape?
Yes, for wide shapes. Scotch tape handles diagonal splits, color blocks, and line breaks well — press it to the back of your hand once or twice first to reduce its tack so it cannot lift your base coat, and cut it into thin strips with small scissors when you need narrower lines. Painter’s tape is gentler still, and washi tape cuts cleanly into stencil shapes. Striping tape keeps one real advantage: it is thin enough for micro-lines and grids without any cutting.
How do I paint geometric lines with my non-dominant hand?
Change the technique, not the design. Use tape methods for the hand you paint second — tape does the precision work, so a shaky painting hand matters far less. For brush designs, rest the nail being painted flat on the table and move the nail under the brush instead of moving the brush across the nail; your dominant hand stays in control either way. Painting your dominant hand first, while you are fresh, and keeping its design simpler than the other hand’s are both legitimate salon tricks, not cheats.
Can I do geometric designs on acrylics, gel extensions, or press-ons?
Yes — the geometry is identical; only the surface changes. On acrylics and gel extensions, work on the fully cured, wiped surface and seal with the system’s top coat; tape peels cleanly from cured gel. On press-ons, paint the designs before applying the nails: press-ons can be held on a stand or a loop of tape on a pencil, which gives you a stable, rotatable canvas and lets both of your hands stay dominant-side. It is the easiest way to attempt the advanced designs in this guide.


One Comment