

18 Glitter Nail Designs: Sparkle Without the Tackiness
Glitter nails get a bad reputation they don’t fully deserve. Done carelessly, glitter reads loud and messy. Done with the right method, it’s jewelry for your fingertips. The difference between sparkle that looks tacky and sparkle that looks expensive comes down to three things: the glitter type you choose, how you apply it, and how you pair it.
This guide covers 18 glitter nail designs organized by how much sparkle each one uses — so whether you want full glam or just a whisper of shimmer, you’ll find your look. It also includes real application methods nail techs use, plus how to remove glitter without destroying your nails.
By MyNailsDesigns • Published October 10, 2026
Full-Coverage Glitter: Maximum Sparkle, Done Right
Full glitter nails are the boldest way to wear sparkle. The trick to keeping them classy: pick one polished color family and let the glitter do the talking.
1. Champagne Gold Full Coverage
Fine champagne gold glitter over a nude base is the most wearable full-glitter look there is. The nude undertone softens the gold so it reads elegant instead of flashy, and it suits every skin tone. Works beautifully on almond nails for evenings out.

2. Burgundy Glitter Bomb
A deep burgundy glitter is full coverage for people who find gold too bright. The dark base keeps it moody and rich, so the sparkle catches light only when you move. Keep the nails short and square for a polished finish.

3. Holographic Silver Glitter
Holographic glitter shifts between silver, pink, and blue depending on the light, so one manicure gives you a different look all day. Fine holographic polish is much smoother and classier than chunky silver glitter. Long coffin nails show off the rainbow effect best.
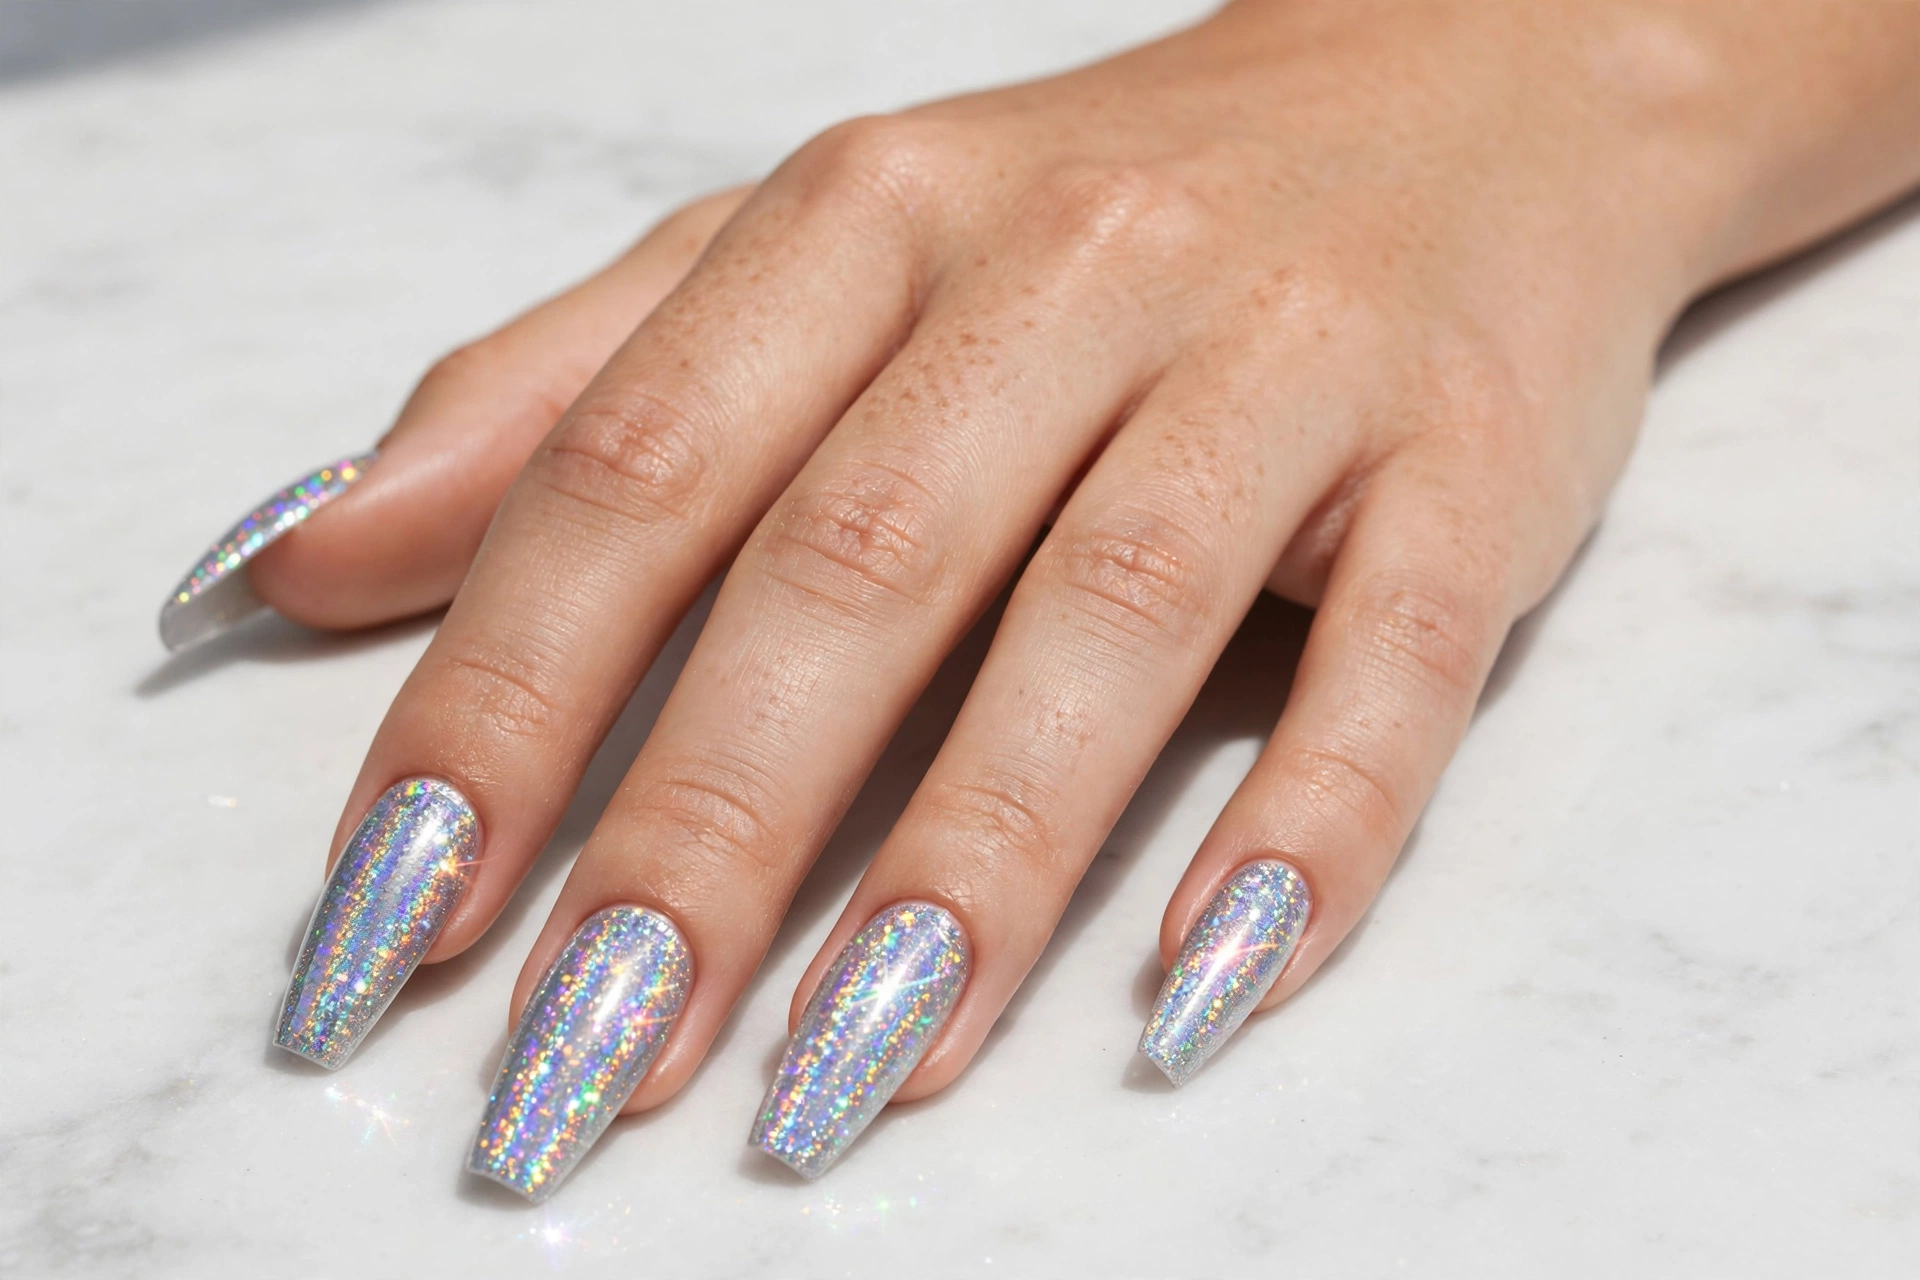
4. Rose Gold Glitter
Rose gold glitter sits between gold and pink, making it softer than either. It’s flattering on warm and cool skin tones alike and pairs well with delicate jewelry. Oval nails with a smooth glitter finish suit both weddings and everyday wear.

5. Emerald Green Glitter
Jewel-tone glitter is the fastest route to a luxurious look. Emerald green reads rich and festive without screaming holiday, and it works year-round with darker wardrobes. Almond nails keep the long glitter surface elegant.

Glitter Gradients & Fades: The Elegant Middle Ground
Gradient glitter — dense at one end, fading to bare nail at the other — gives you sparkle with restraint. This is the application style nail techs recommend most for glitter skeptics.
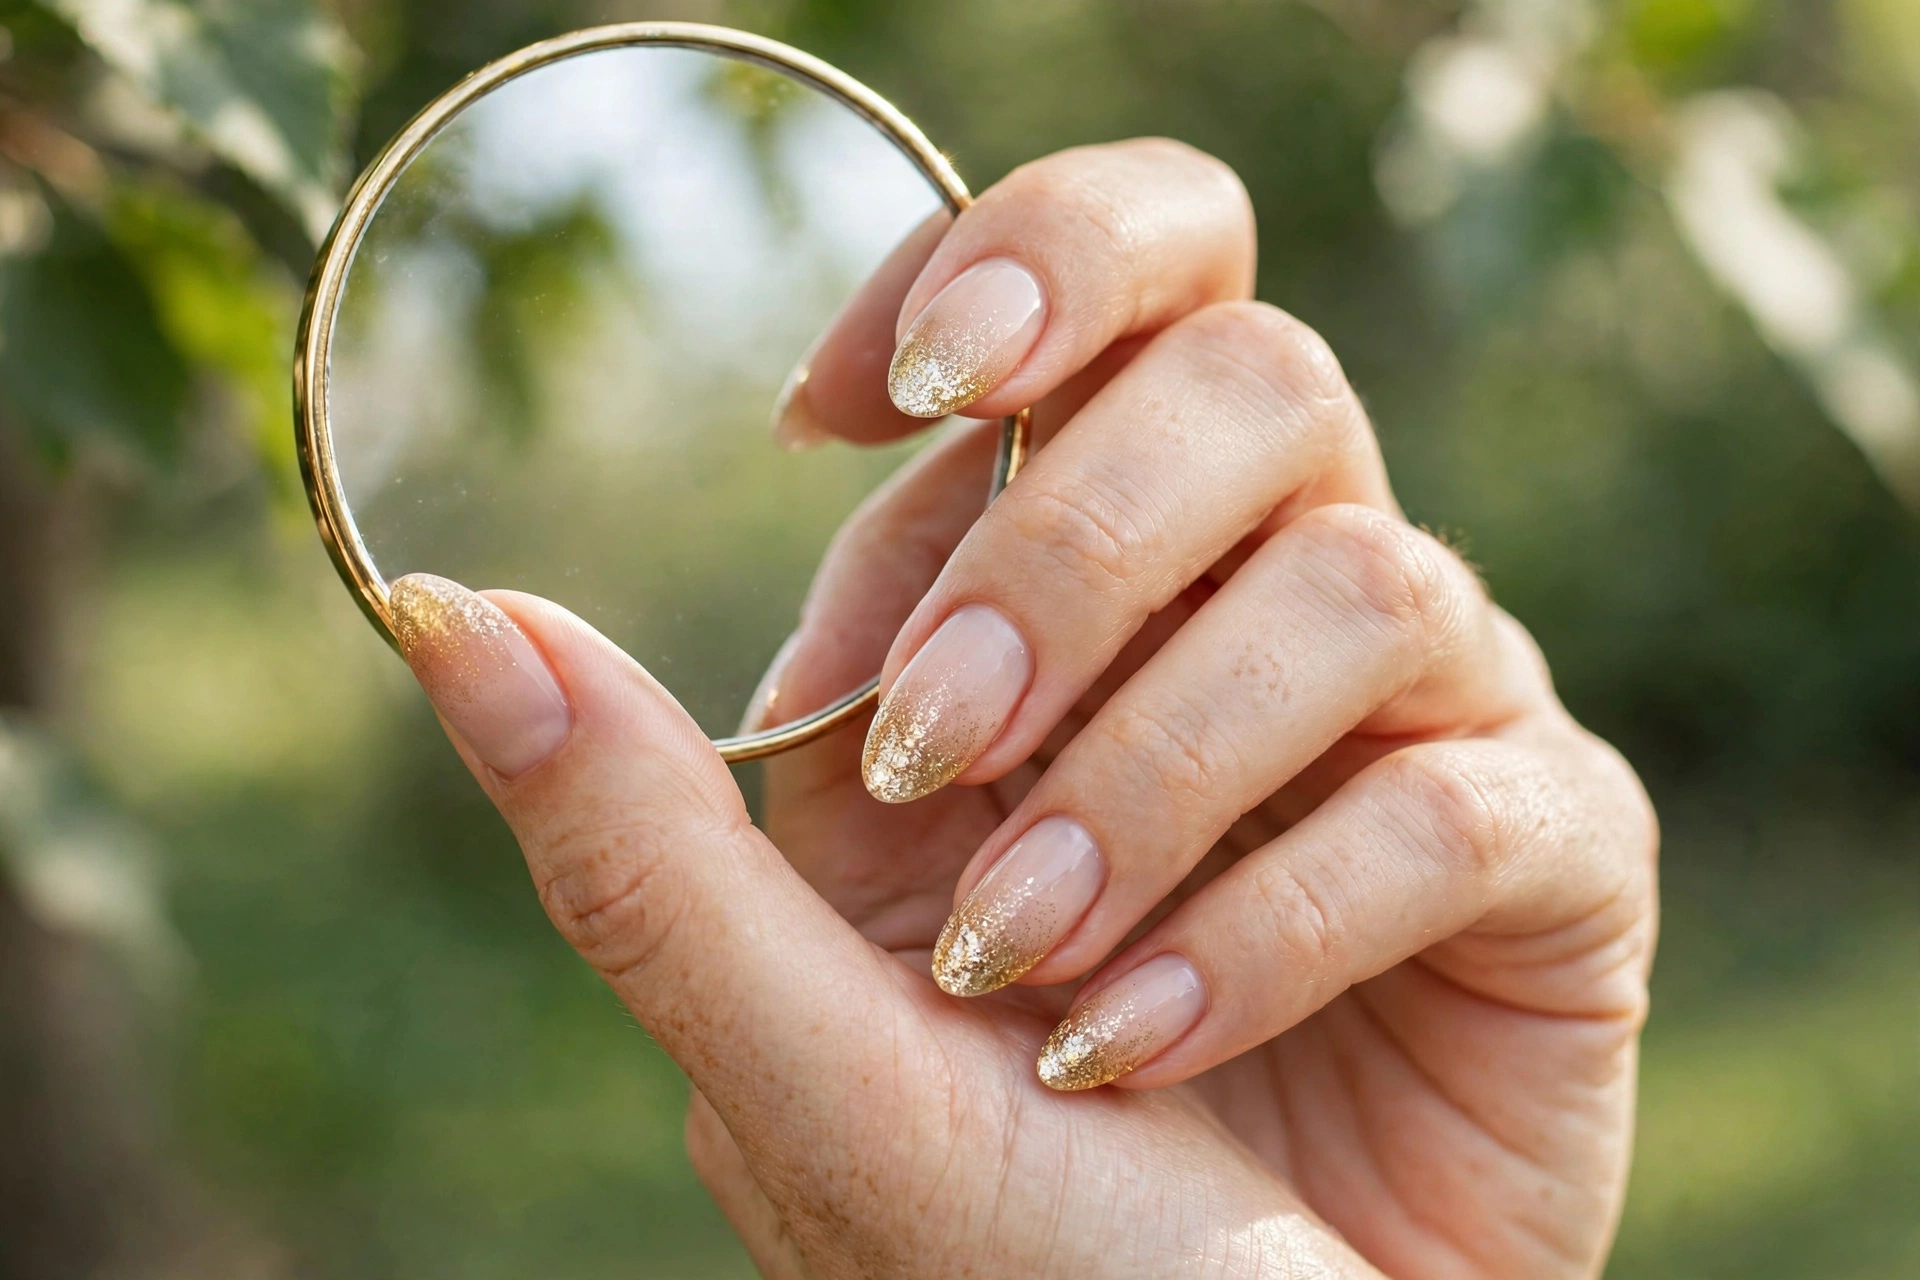
6. Nude-to-Gold Glitter Ombre
Sheer nude at the cuticle melting into dense gold glitter at the tips is the most requested glitter ombre in salons. Use the sponge-dab method: apply glitter polish to a makeup sponge and press it onto the tips for a smooth, seamless fade. Almond nails suit this best.
7. Silver Glitter Fade on Pink
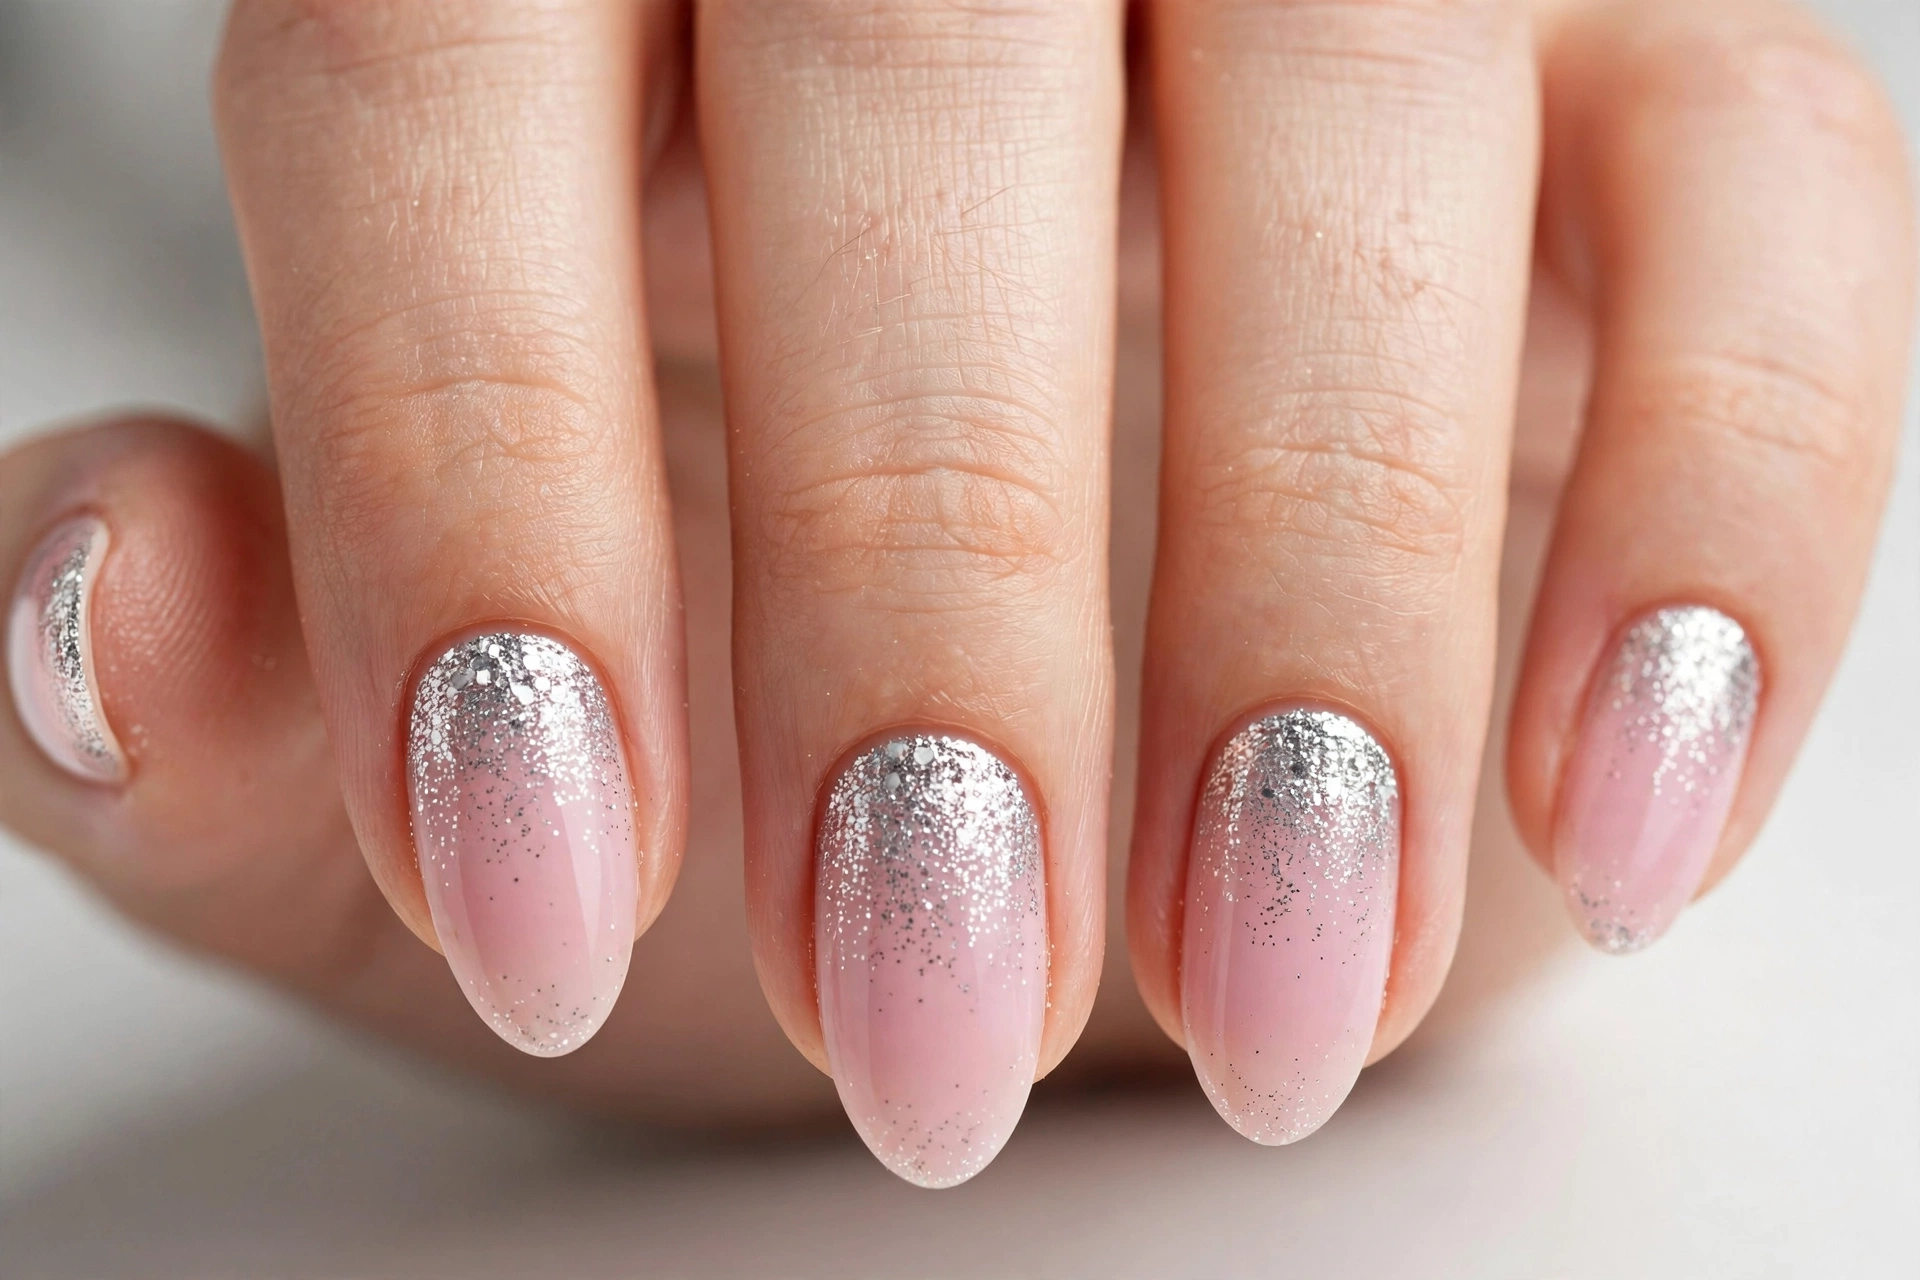
Reverse the direction: silver glitter dense at the cuticle fading out toward the tips over a soft pink base. The glitter near the cuticle reads like jewelry sitting at the base of each nail. Easy to DIY — just layer more polish at the bottom and feather upward with a dry brush.
8. Midnight Blue Glitter Gradient
A dark blue base with silver glitter fading in from the tips looks like a night sky. The trick is layering: two thin coats of the blue, then sponge on silver glitter only at the tips, finishing with a glossy top coat to smooth the texture.

9. Copper Glitter Fade on Milky Nude
Copper glitter over a milky nude base is warm and understated — autumn in a manicure. Apply the milky nude first, let it dry fully, then dab copper glitter from the tips inward so it dissolves into the nude. This one flatters shorter nails too.

Glitter Accent Nails: Sparkle in Small Doses
When you want glitter without committing to it on every finger, accent nails are the answer. One or two glitter nails against a calm base reads intentional and chic.
10. Silver Glitter Accent on Matte Black
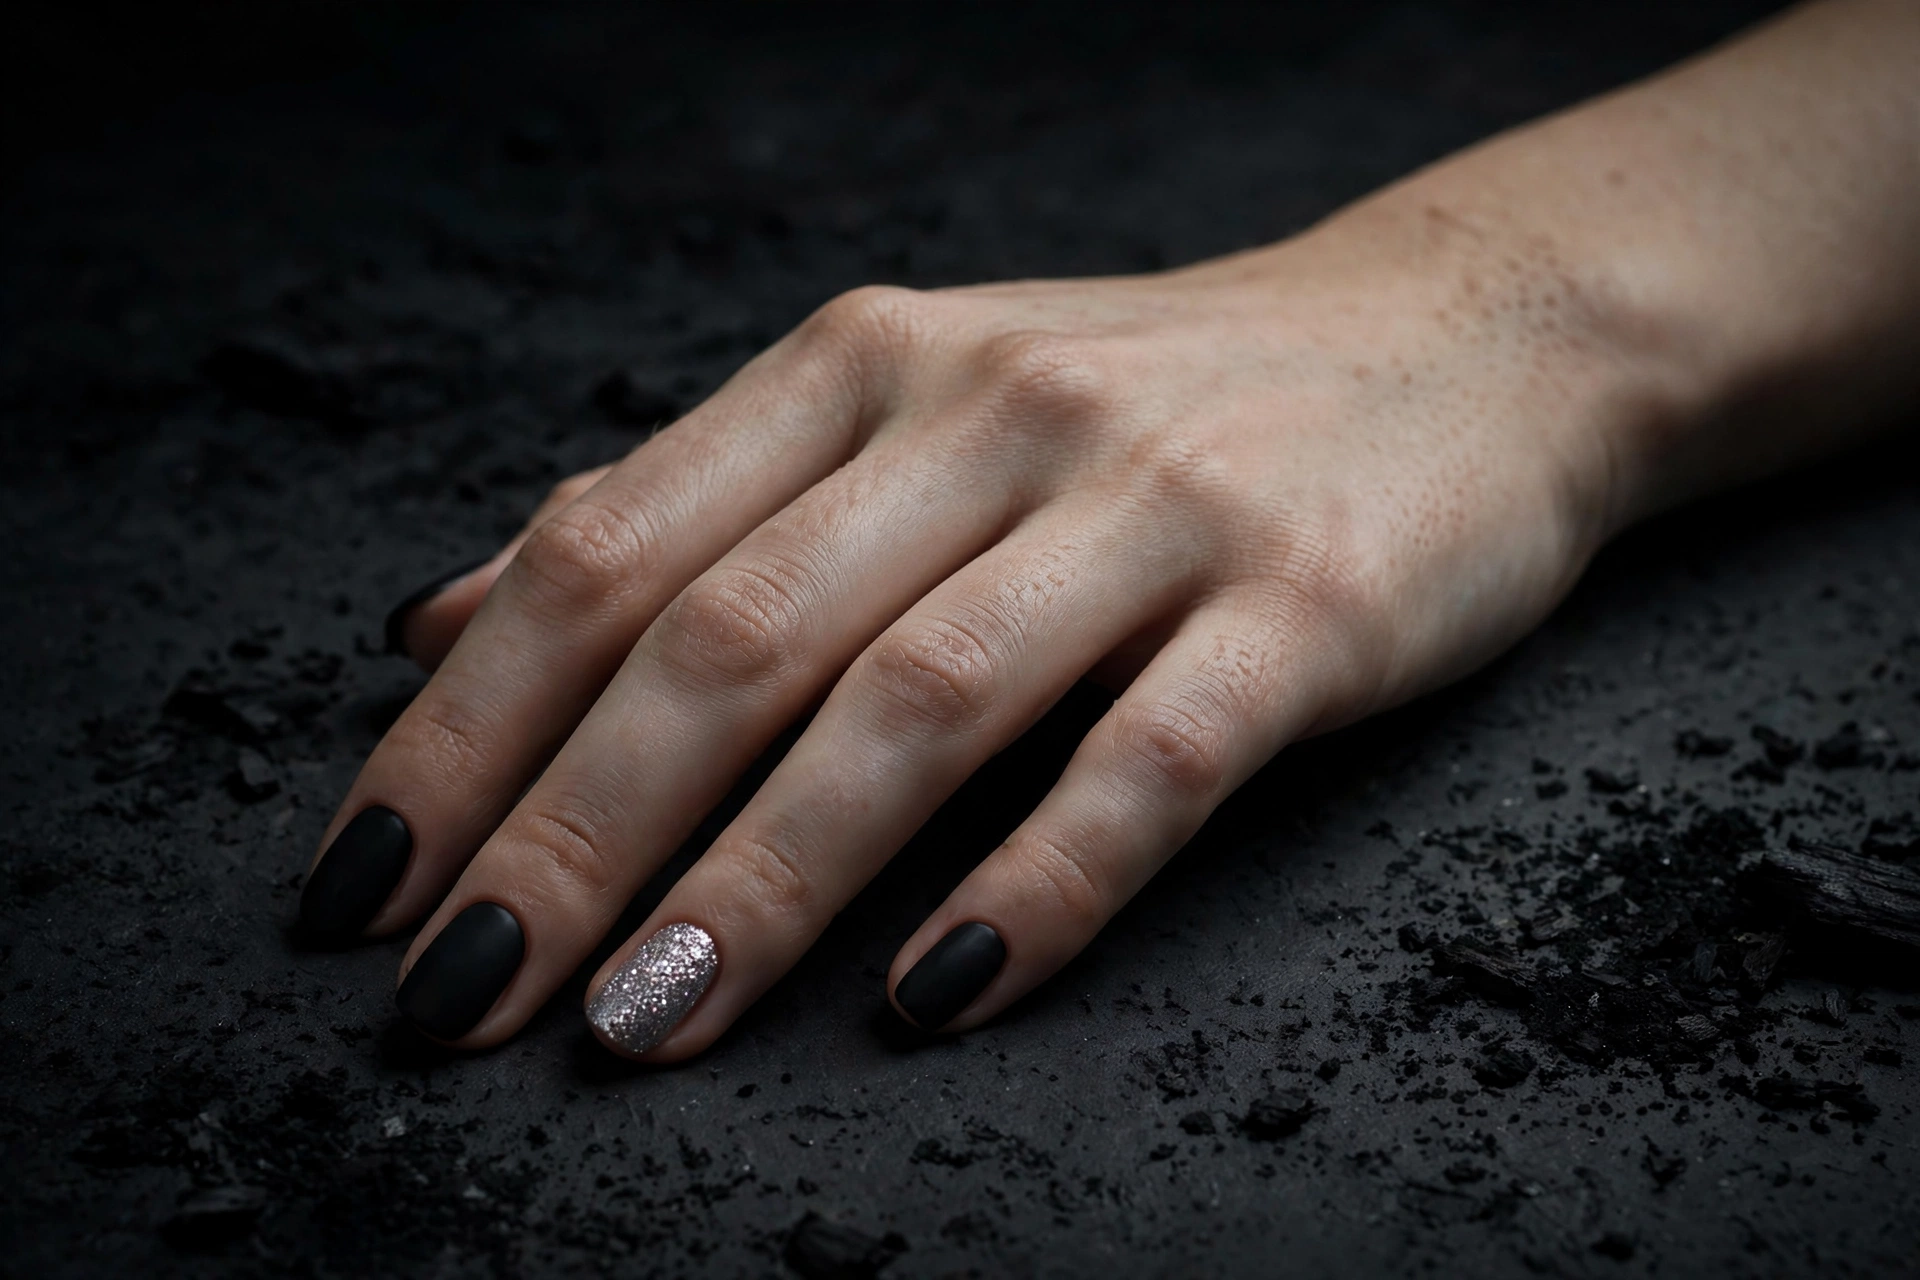
Matte black on nine nails with one silver glitter ring finger is a striking contrast — the matte texture makes the glitter pop even more. Pick the ring finger on both hands for symmetry. This is a classic night-out combination.
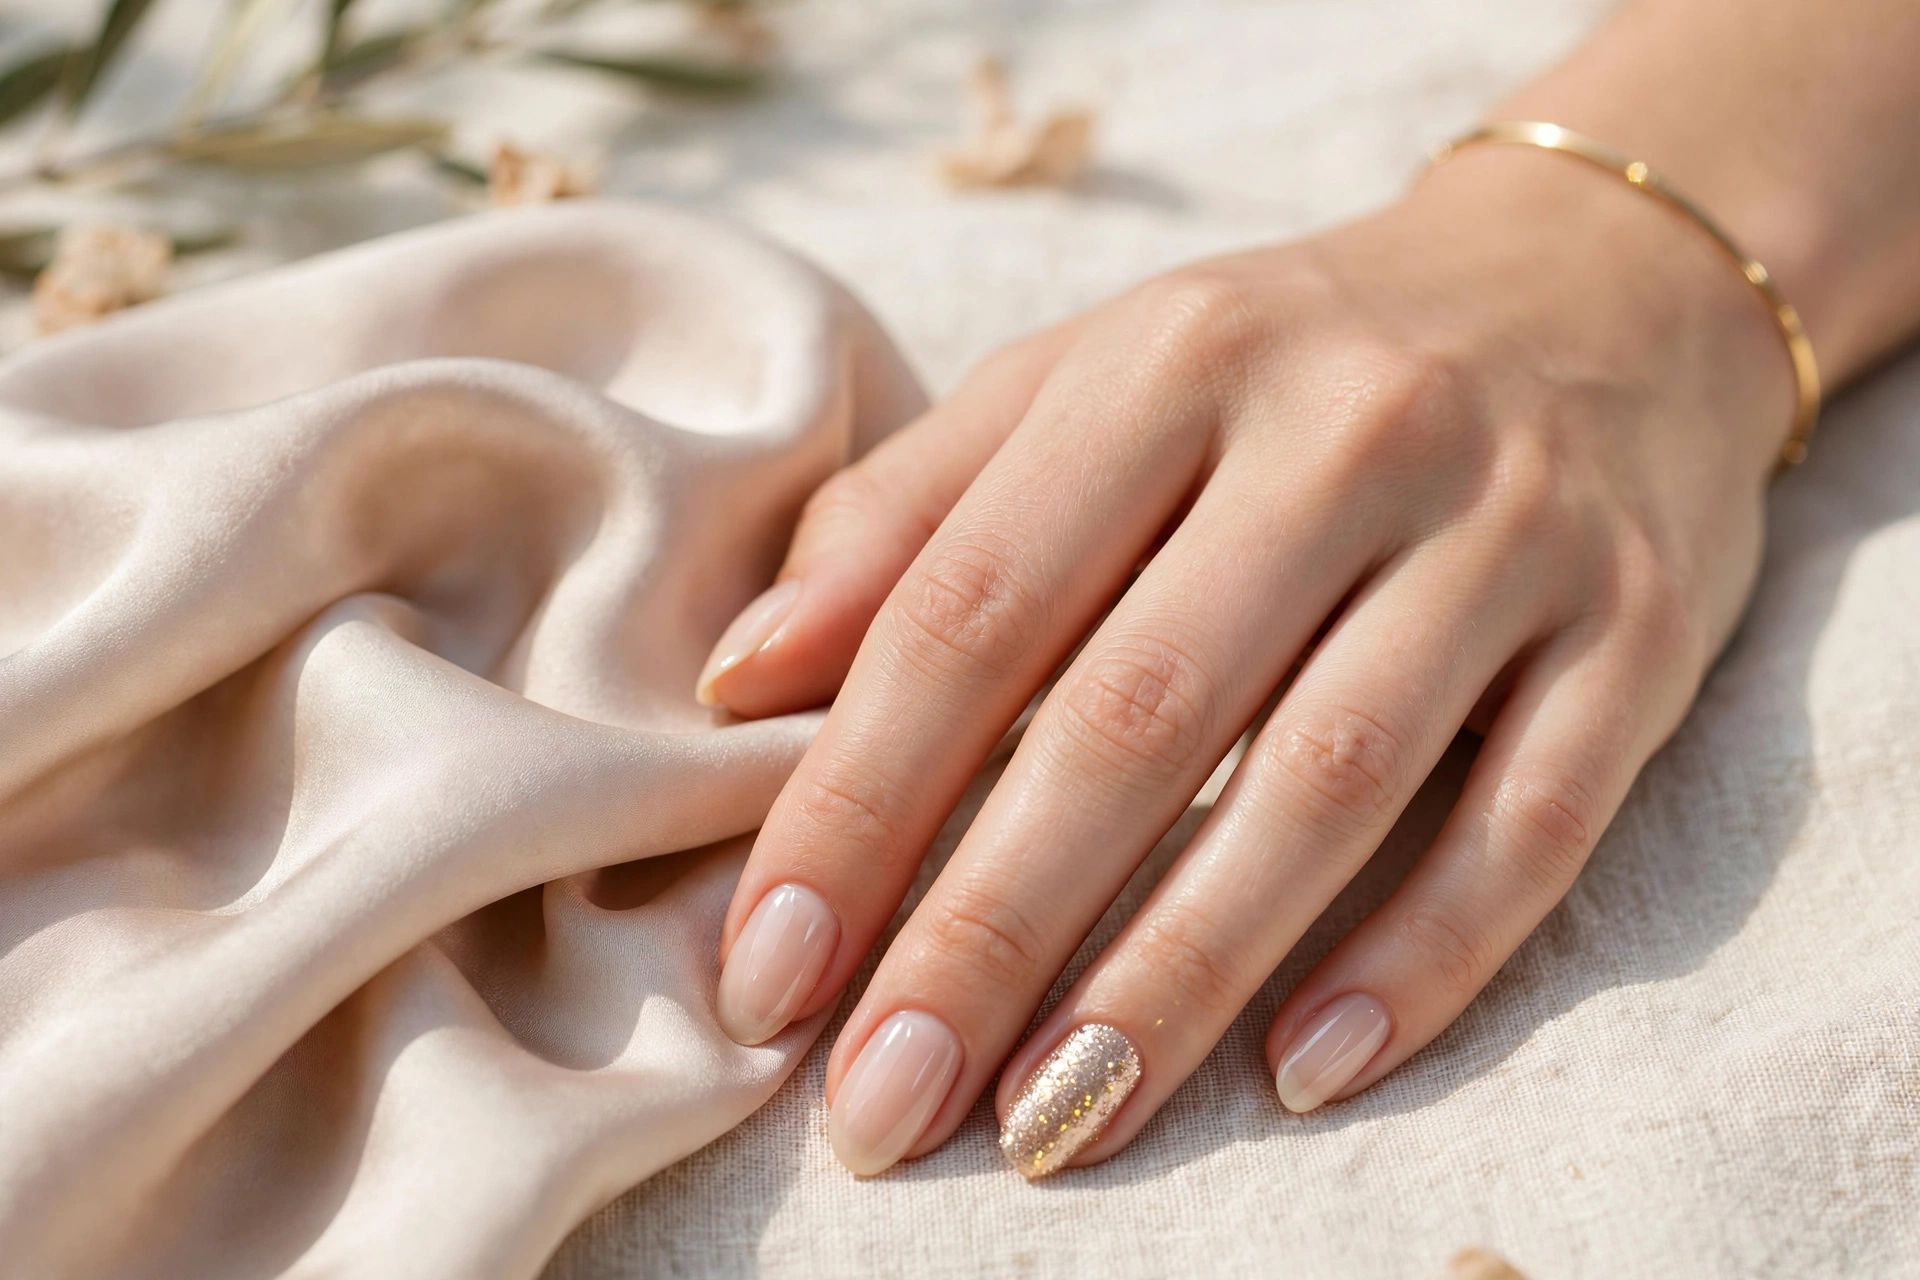
11. Champagne Glitter Ring-Finger Accent
Sheer glossy nude with one champagne glitter accent nail is the most office-friendly glitter manicure that exists. The accent looks like a piece of jewelry rather than a statement, and it survives conservative dress codes. For more sheer neutral inspiration, see our milky nail ideas.
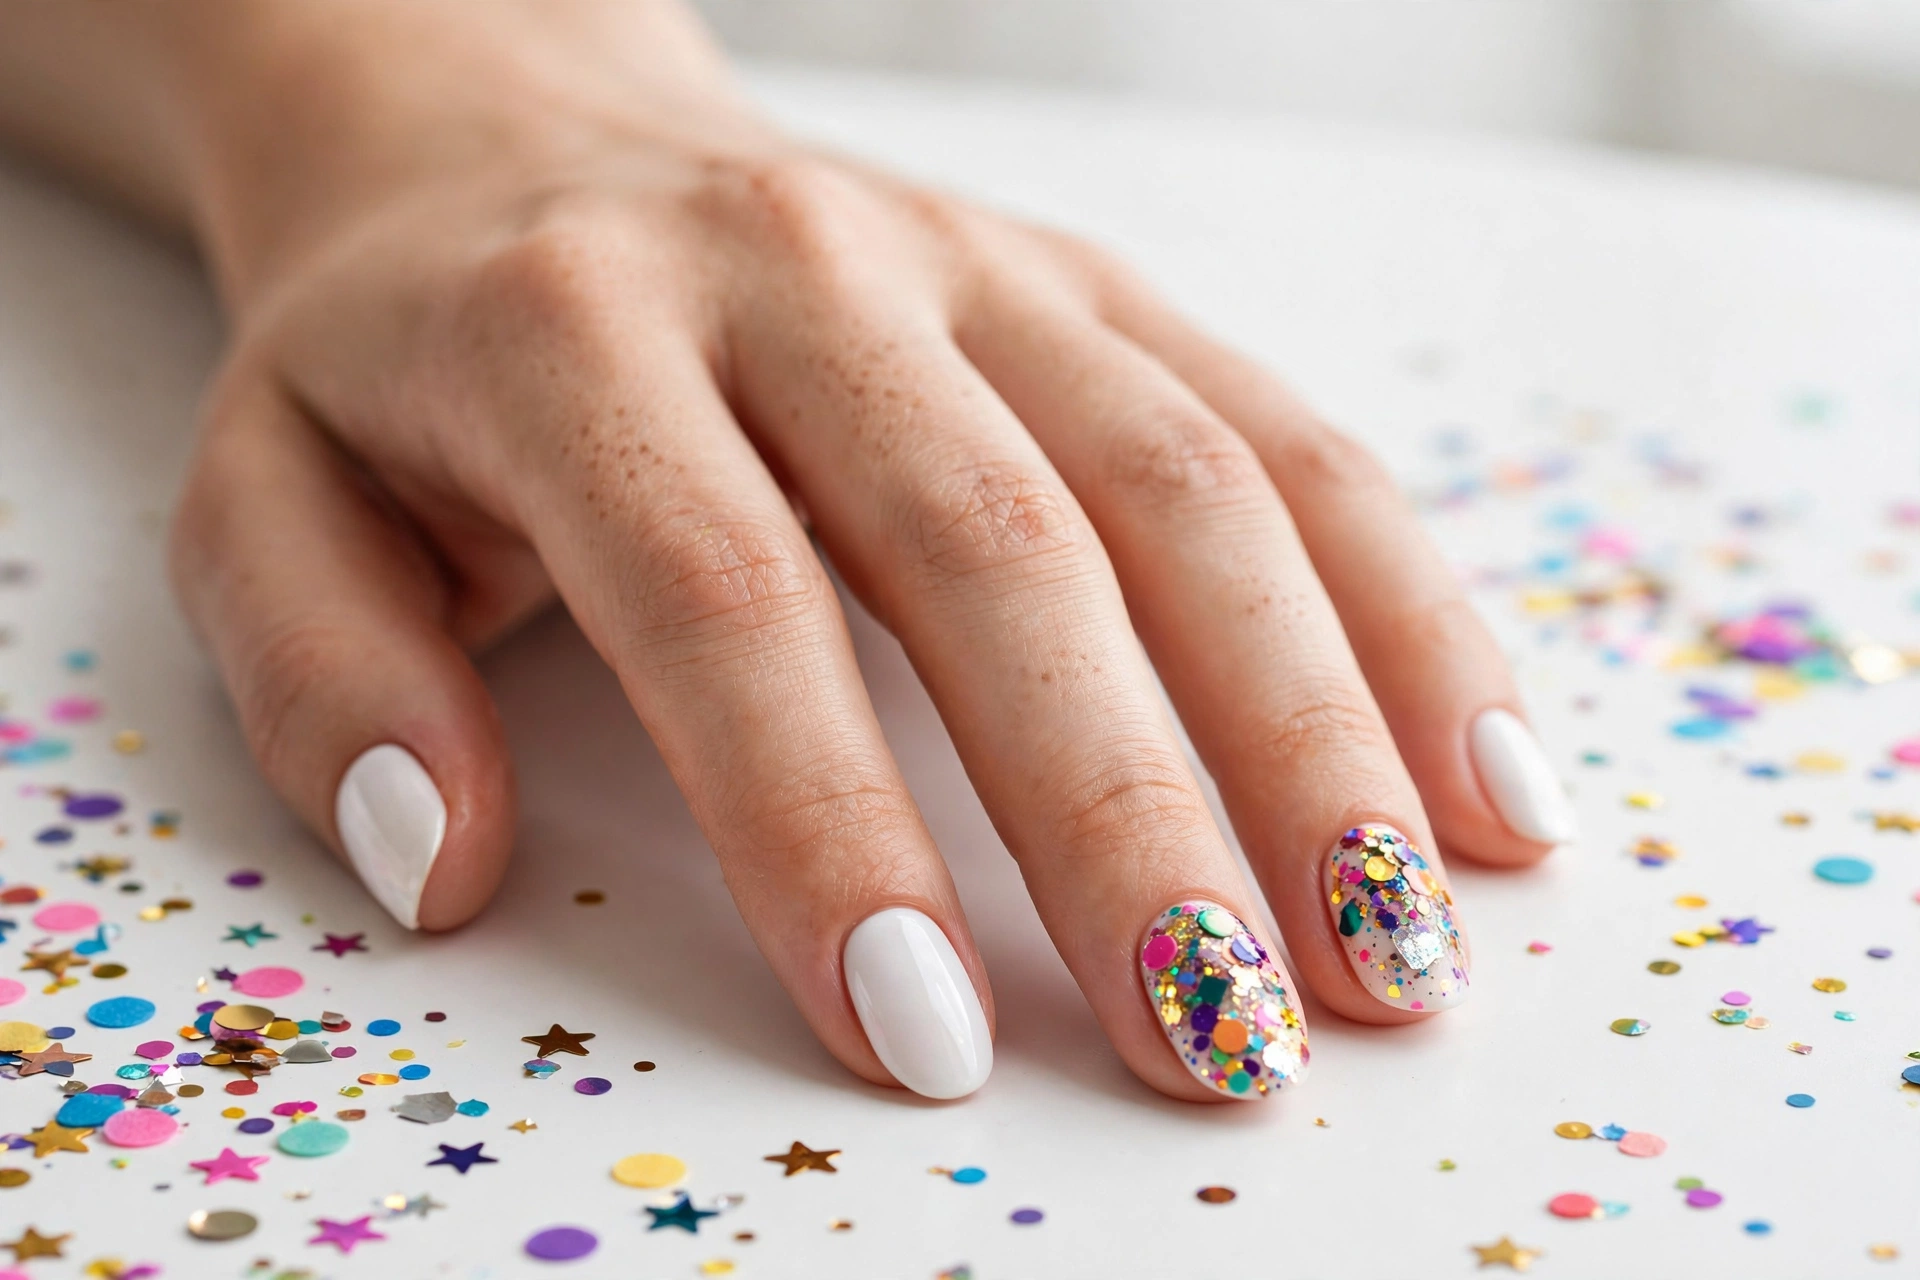
12. Multi-Color Confetti Accent Nails
White or nude base with two accent nails covered in chunky multi-color confetti glitter is pure celebration — birthdays, New Year’s Eve, parties. Keep the confetti to two nails max so it stays playful instead of chaotic. Seal with a thick top coat so the chunky pieces don’t catch on things.
13. Gold Glitter Half-Moon Accents
A small gold glitter half-moon at the cuticle of each nail over sheer nude is the subtlest glitter design on this list. Paint the half-moon with a thin brush or use a reinforcement ring as a stencil. It looks like delicate gold jewelry set into each nail.

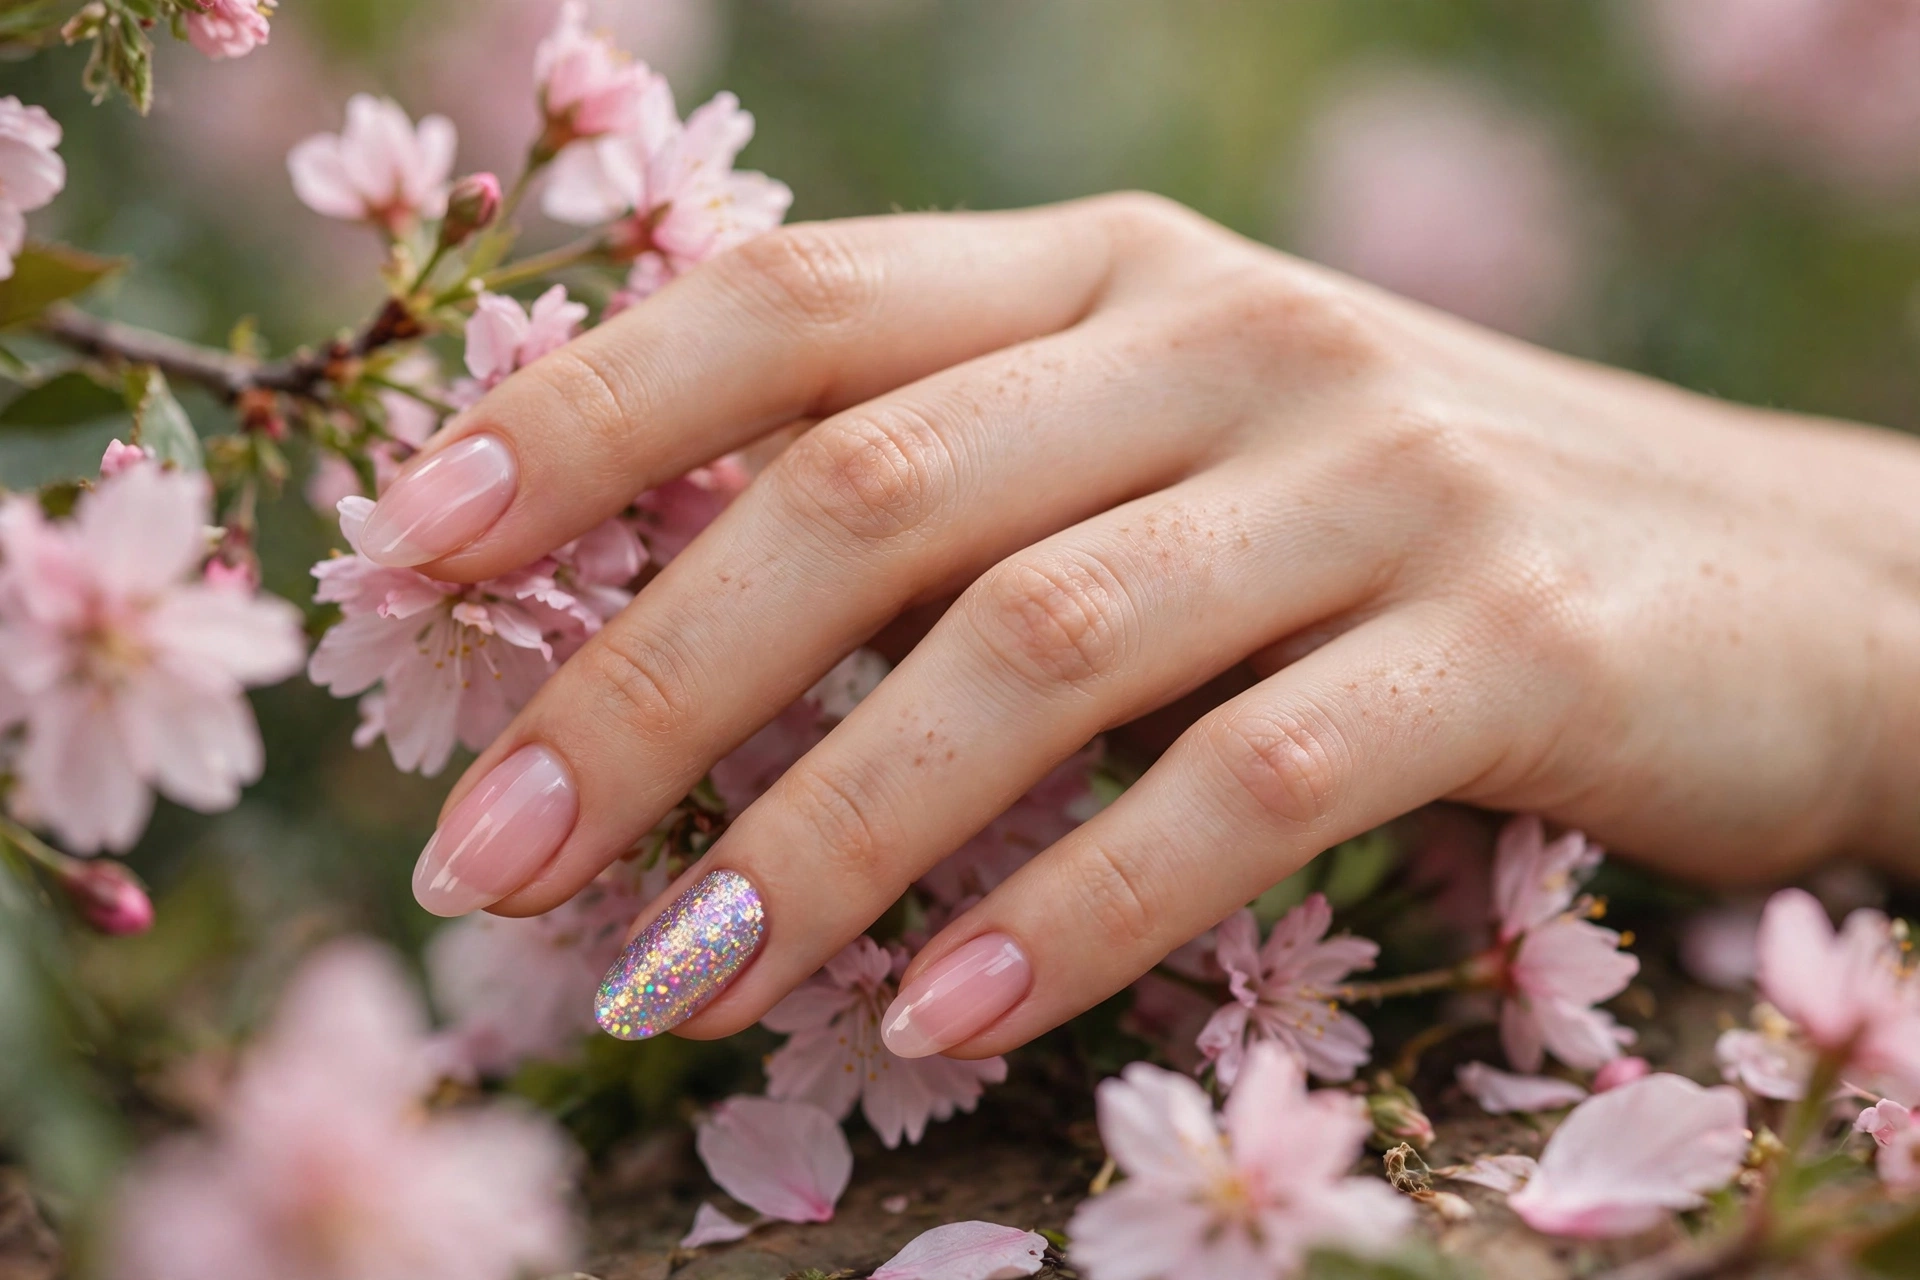
14. Iridescent Glitter Accent
One iridescent glitter nail — the kind that shifts pink, blue, and green — on a sheer pink manicure gives you magic with minimal effort. Iridescent glitter is fine enough to look expensive, and a single accent keeps it from tipping into costume territory.
Glitter Nail Art & Shapes: Glitter as Design
Beyond coverage and gradients, glitter works as a design element — lines, shapes, and textures drawn with sparkle. These need a steady hand but deliver the most custom looks.
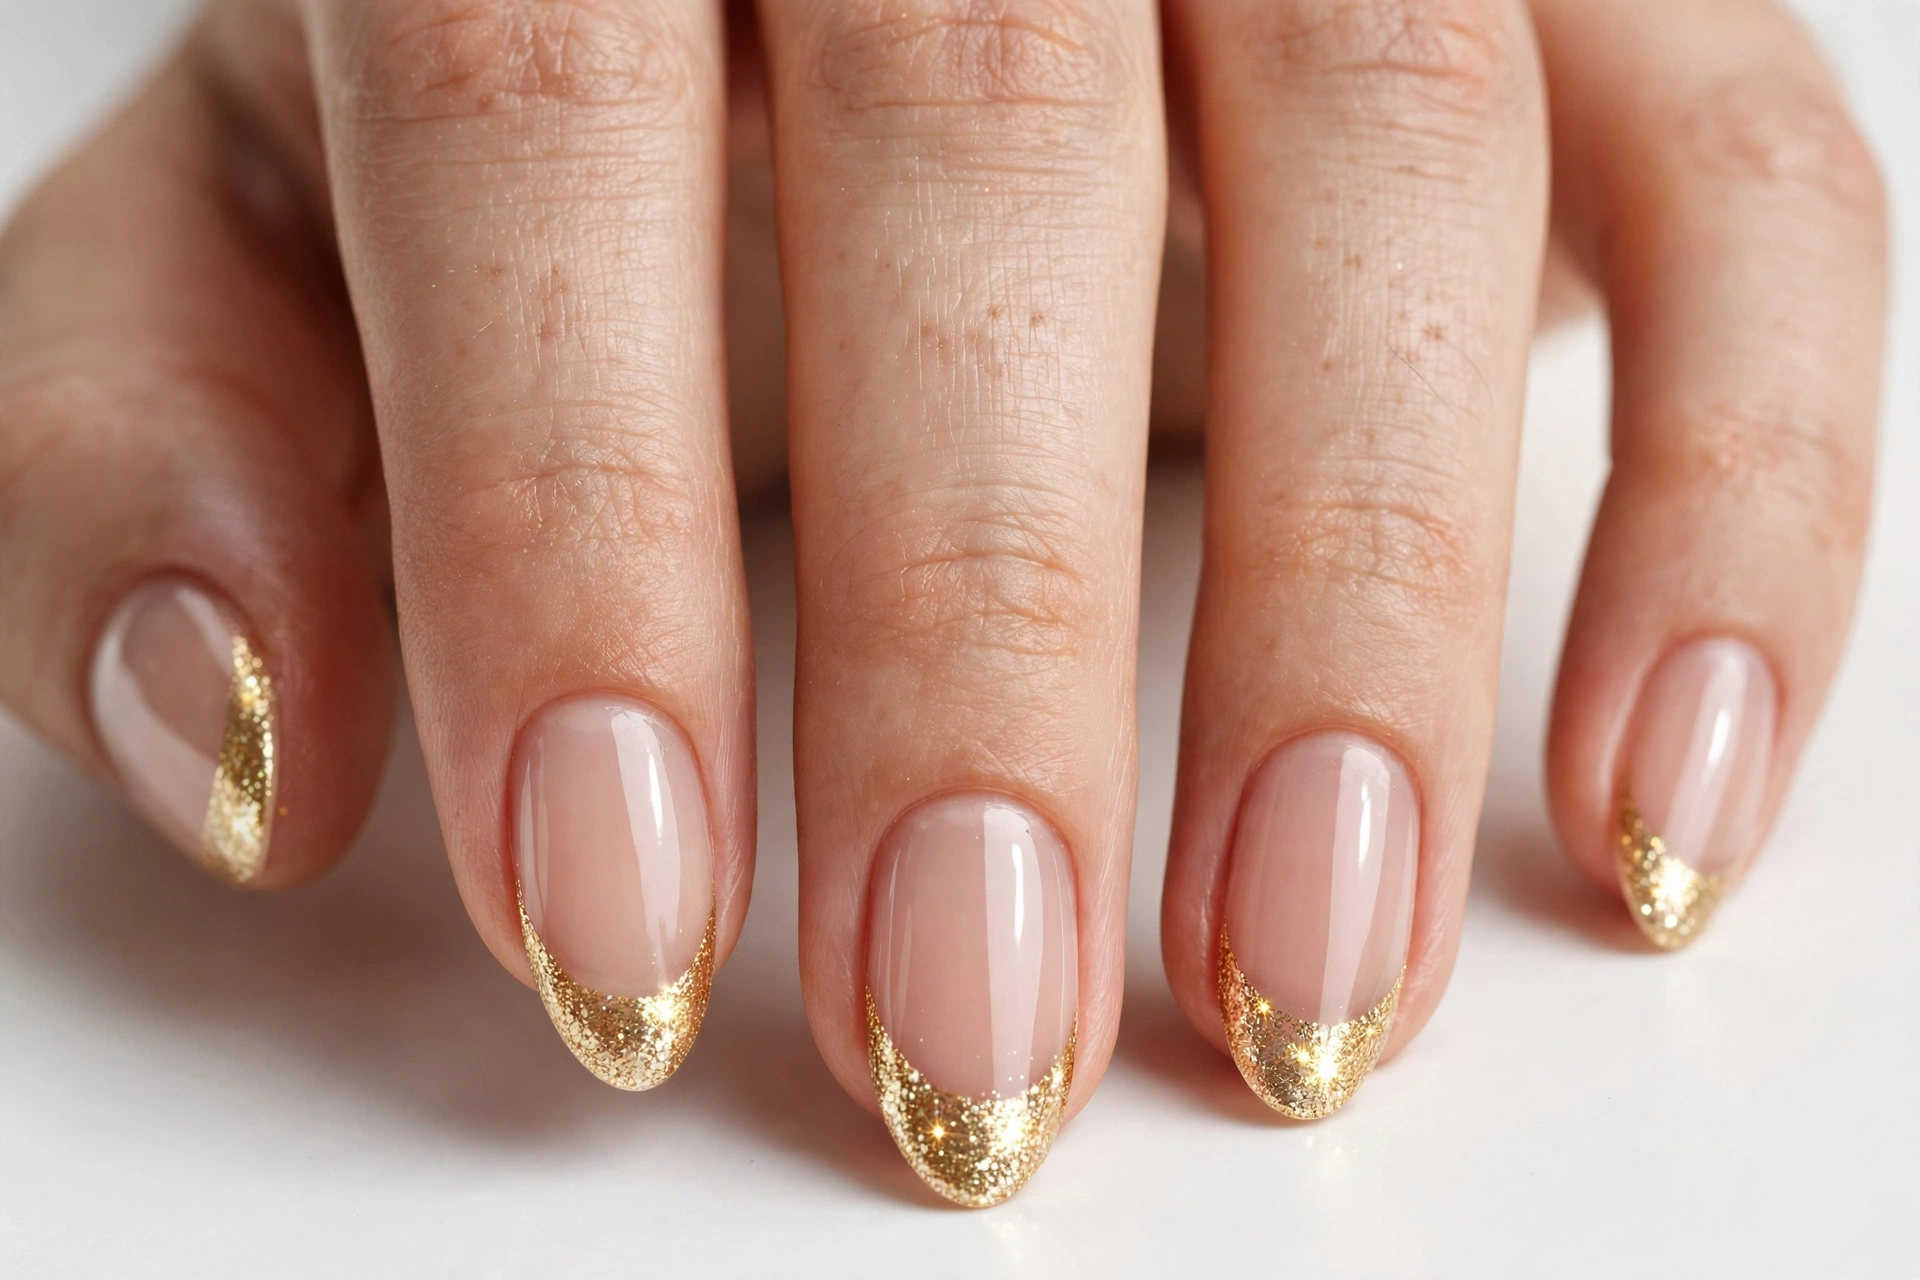
15. Gold Glitter French Tips
Swap the white French tip for fine gold glitter. The classic French shape keeps it refined while the glitter modernizes it. Draw the smile line with a thin brush, then fill the tip with glitter polish in two thin coats so the edge stays crisp.
16. Star-Shaped Glitter on Navy
Deep navy polish with star-shaped glitter pieces scattered on top reads like a night sky. Use a dotting tool or tweezers to place the stars while the base is still tacky, then seal. Space them unevenly — randomness looks more natural than a grid.

17. Silver Glitter Chevron Tips
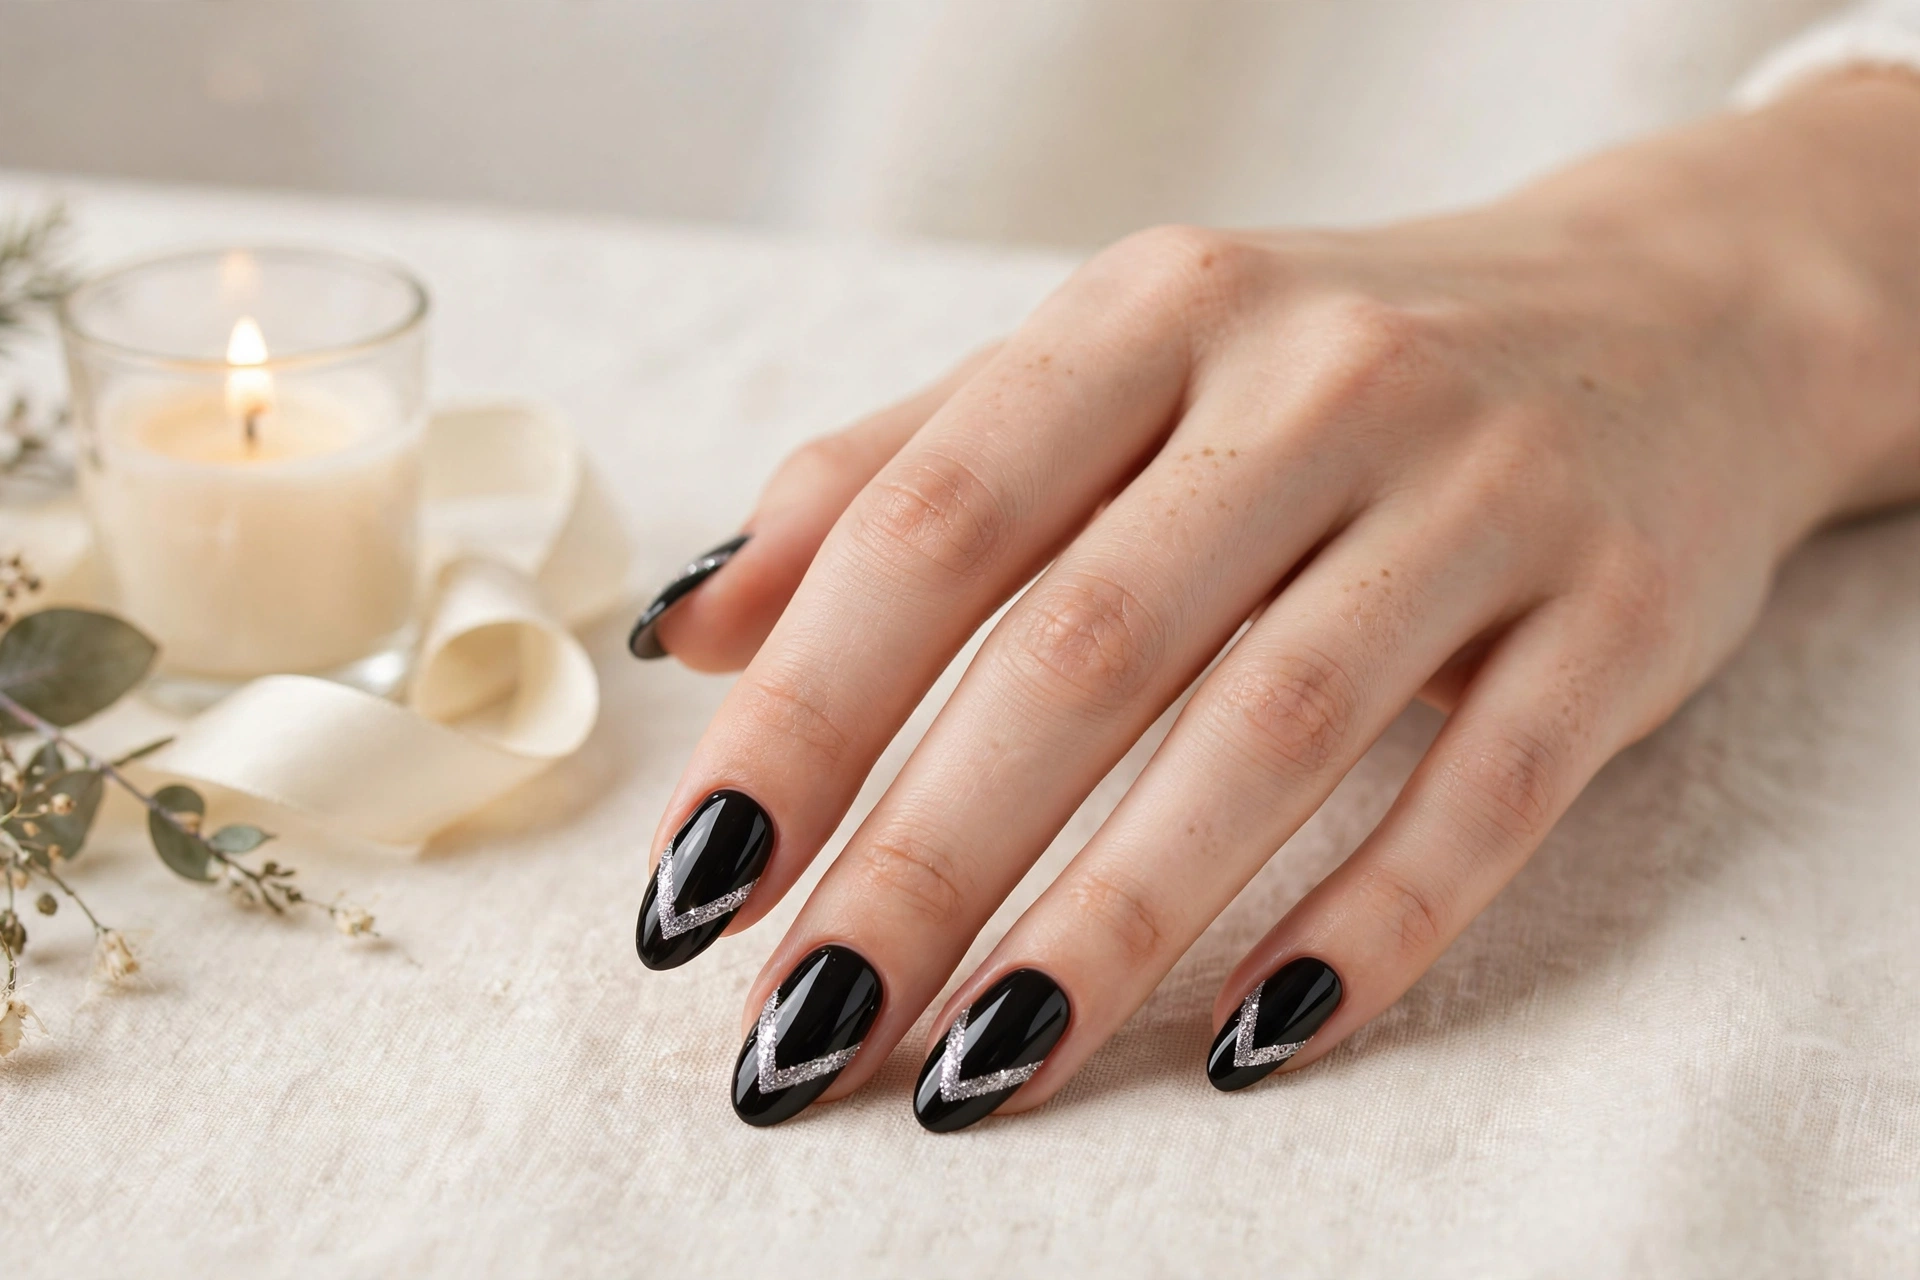
A sharp chevron (V-shape) of silver glitter at the tips over glossy black is geometric and modern. The crisp V elongates the nail, so it suits shorter nails that need length. Map the V with striping tape before painting the glitter.
18. Chunky Holographic Confetti Topper
A nude base topped with chunky holographic confetti pieces is maximum drama done tastefully. The nude base lets the confetti pieces be the star. Press each piece into wet clear polish with tweezers, then cap with two top coats so the edges don’t lift.

How to Apply Glitter Nails: 4 Methods That Actually Work
Glitter polish from the bottle gives uneven coverage, so nail techs rarely paint it on straight. Here are the four methods that produce smooth, dense, professional-looking glitter nails.
Method 1: Glitter polish straight from the bottle
The simplest approach — fine glitter polish in 2 to 3 thin coats. Works well for micro-glitter and holographic polishes. The downside: it can look patchy with chunkier glitters, and loose particles need a heavy top coat to smooth down.
Method 2: Sponge dabbing (loose glitter)
Apply a clear base coat, then dab loose glitter onto the wet nail with a makeup sponge or silicone tool. The sponge presses the particles flat and gives dense, even coverage that painted glitter polish can’t match. Best for full coverage and gradients.
Method 3: Burnishing for gradients
For fades and ombres, apply glitter polish to a sponge and press it onto the nail from the tip inward, using less pressure as you go. A dry brush swept over the transition line softens the edge. This is how salons create seamless glitter gradients.
Method 4: Encapsulation (gel/acrylic)
For long wear, the glitter is sealed between layers of gel or acrylic — applied to the wet base layer, then covered with builder gel or acrylic and filed smooth. Encapsulated glitter lasts the full life of the enhancement and never feels rough. Ask your nail tech for “glitter encapsulation” if you want weeks of sparkle.
How to remove glitter nails without the struggle
Glitter’s biggest downside is removal. The foil method is what salons use: soak a cotton ball in acetone, place it on the nail, wrap each fingertip in aluminum foil, and wait 10 to 15 minutes. The polish lifts off instead of needing to be scrubbed. Never peel glitter off — it pulls up the top layer of your natural nail. If the glitter still resists, gently buff the top coat off first so the acetone can reach the polish underneath.
Glitter Types Compared
| Glitter type | Texture | Sparkle level | Easiest for | Removal difficulty |
|---|---|---|---|---|
| Fine/micro glitter polish | Smooth | Medium | Full coverage, beginners | Easy to moderate |
| Loose glitter (dabbed) | Slightly textured | High | Dense coverage, ombres | Moderate |
| Holographic glitter | Smooth | High (rainbow) | Statement full sets | Moderate |
| Chunky confetti glitter | Raised, dimensional | Very high | Accent nails, toppers | Hard — needs foils |
| Shaped glitter (stars, hexagons) | Raised | High | Nail art designs | Hard — place carefully |
| Iridescent/dichroic glitter | Smooth | Medium-high (color-shifting) | Subtle accents | Easy to moderate |
More Inspiration
Glitter pairs naturally with deep seasonal shades — see our Christmas nail designs and Thanksgiving nail designs for festive glitter pairings, or explore gold nail designs and silver nail designs if you want to build a metallic manicure. For the nail shapes that show off glitter best, check the nail shapes guide.
Glitter Nails: Frequently Asked Questions
How do you make glitter nails look classy instead of tacky?
Three rules keep glitter classy: choose one color family instead of mixing several, prefer fine or holographic glitter over chunky pieces, and balance the sparkle with calm surroundings — a nude base, an accent nail, or a gradient. Context matters too: fine gold glitter on almond nails reads elegant where chunky multicolor glitter reads playful.
What is the best way to apply glitter for even coverage?
Sponge dabbing gives the densest, most even coverage: press loose glitter onto wet clear polish with a makeup sponge so the particles sit flat and packed together. Painted-on glitter polish works for fine glitters but tends to look patchy with chunkier pieces.
How do you remove glitter nail polish easily?
Use the foil method: soak cotton in acetone, place it on the nail, wrap the fingertip in aluminum foil, and wait 10 to 15 minutes so the polish softens and lifts off. Never peel glitter polish off, since it takes the top layer of the natural nail with it.
Does glitter nail polish damage nails?
The glitter itself doesn’t damage nails — bad removal does. Peeling or aggressive scraping weakens the nail plate. With proper acetone-foil removal and a strengthening base coat underneath, glitter is no harder on nails than regular polish.
How long do glitter nails last?
Glitter polish on natural nails lasts about 7 to 10 days with a good top coat, since the texture helps it grip. Encapsulated glitter in gel or acrylic lasts 2 to 3 weeks, the same as any gel or acrylic set.
Can you wear glitter nails to the office?
Yes — stick to accent nails or gradients. One champagne glitter accent on a sheer nude manicure, or a subtle nude-to-gold fade, stays well within conservative dress codes while still giving you sparkle.
Do you need a special top coat for glitter nails?
Chunky glitter benefits from a thicker top coat to smooth the raised texture and stop edges catching. Apply one normal top coat, let it dry, then add a second layer over chunky pieces. Gel top coat over encapsulated glitter gives the smoothest, glossiest finish.
What nail shape is best for glitter?
Almond and coffin shapes give glitter the most surface area to shine on, making them the most dramatic choices. But glitter suits every shape — short square nails with a dark glitter look especially polished, and gradients work on any length.



2 Comments