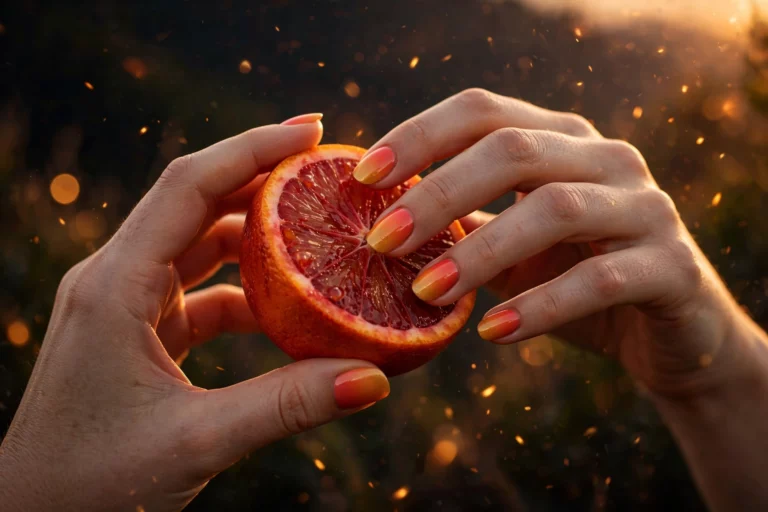
16 Rainbow Nail Designs, From Skittle Manis to Aurora Chrome
Rainbow nails are the simplest way to wear every color you love at once. A true rainbow manicure uses multiple colors in one set, from the classic one-color-per-nail skittle to blended gradients and hand-painted rainbow motifs. Below are 16 rainbow nail designs organized by how the rainbow is applied, so you can jump to the technique that fits your skill level, nail shape, and mood. Each idea has its own photo and honest notes on difficulty, shape, and wearability.
Rainbow Nails in 2026: The Trend Edit
Four finishes dominate rainbow nails right now, and the useful secret is that none of them needs a new technique — each is a twist on a method already in this list. Aura rainbow nails blur a soft blob of color into the center of each nail; treat them as a sponged gradient (idea 10) with the color concentrated in the middle instead of blended tip to base. Cat eye rainbow nails use magnetic gel polish in jewel tones over a dark base, the pigment pulled into a light streak with a magnet before curing — the moody, grown-up end of the spectrum. Jelly rainbow nails are skittles in sheer, tinted polish: two thin coats of a translucent color, the natural nail glowing through like stained glass. And the mohair texture — soft, fuzzy horizontal bands dragged across the nail with a nearly dry fan brush — layers best over an ombré (idea 9 or 11) once the gradient underneath is fully dry. Pick the classic version first, then re-wear it in a 2026 finish.
Skittle Manis: One Color Per Nail
Skittle nails give every rainbow color its own nail. It is the easiest rainbow technique, works on any nail length, and lets you play with saturation: bold, pastel, neon, or muted.
1. Classic Rainbow Skittle
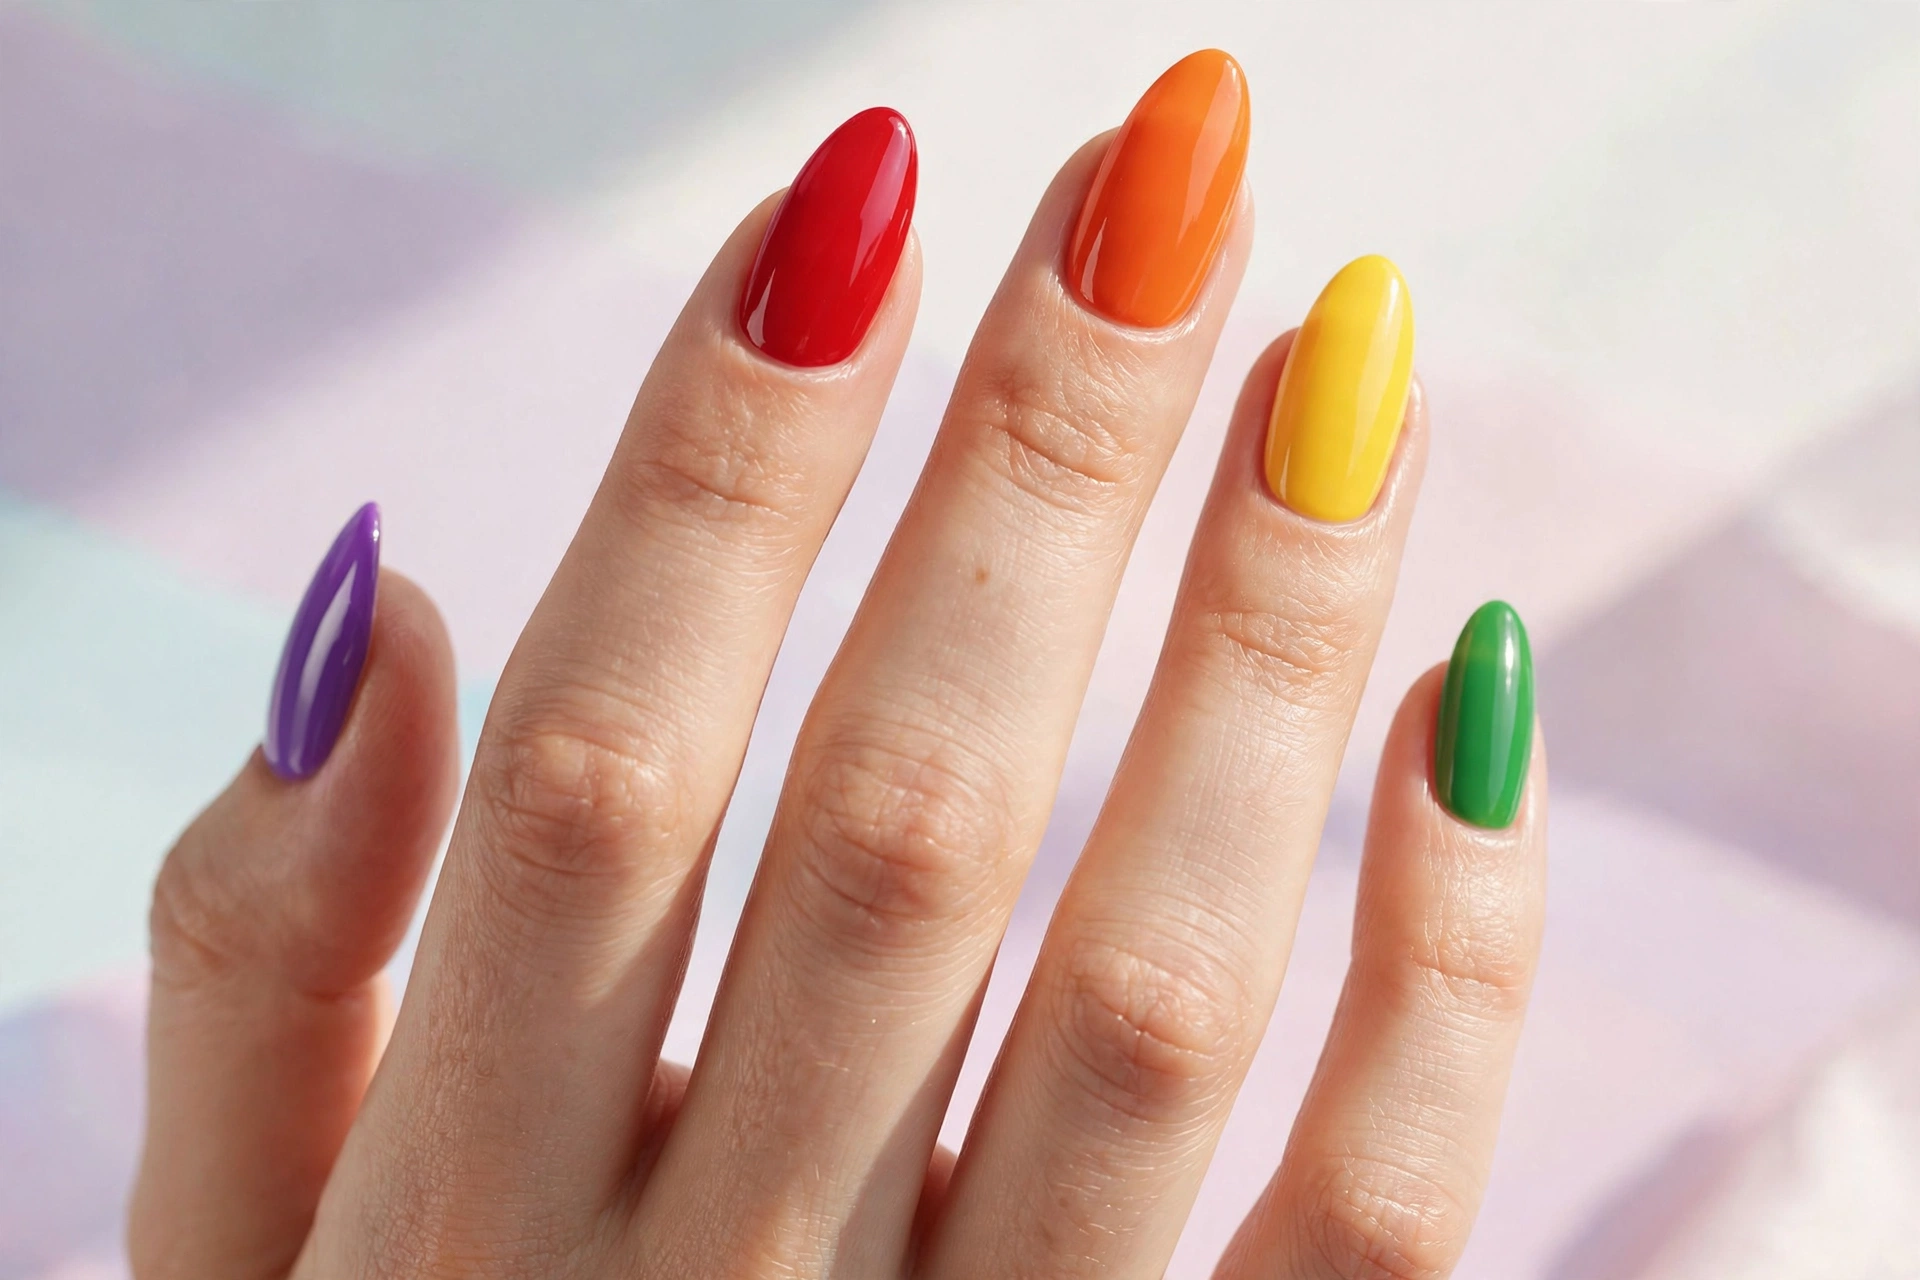
The classic rainbow skittle assigns one saturated color to each nail, red through violet, for maximum color payoff. It needs no art skills: pick six crème polishes with similar opacity, paint each nail one color, and finish with a glossy top coat. Long almond or oval shapes show the color order best, since the rainbow reads down the hand. For the cleanest result, use polishes from the same finish family so the shine matches across all ten nails.
Step by step: (1) Shape and clean the nails, push cuticles back, and wipe each nail with remover or alcohol so the polish grips. (2) Apply a ridge-filling base coat — and if you are using brights or neons, make it white; the white base is what makes rainbow colors read true. (3) Paint your non-dominant hand first while your control is freshest, working pinky to thumb so your brush hand never crosses wet nails. (4) Apply two thin coats of each color rather than one thick one; thin coats dry faster and chip later. (5) Clean up the edges with a small flat brush dipped in remover, working while the polish is still slightly wet. (6) Finish with a glossy top coat, capping the free edge of every nail, and re-apply a thin layer of top coat on day three to refresh the shine.
2. Pastel Rainbow Skittle

A pastel skittle swaps saturated shades for soft baby pink, peach, butter yellow, mint, and sky blue. The lighter palette makes rainbow nails wearable in conservative settings and flatters short, natural nails. Pastels can look streaky in one coat, so apply two thin coats over a white base or ridge-filling base coat. This version suits round or squoval shapes and anyone who wants color without the boldness. See our milky nail designs if you like the soft end of the spectrum even more.
3. Neon Rainbow Skittle
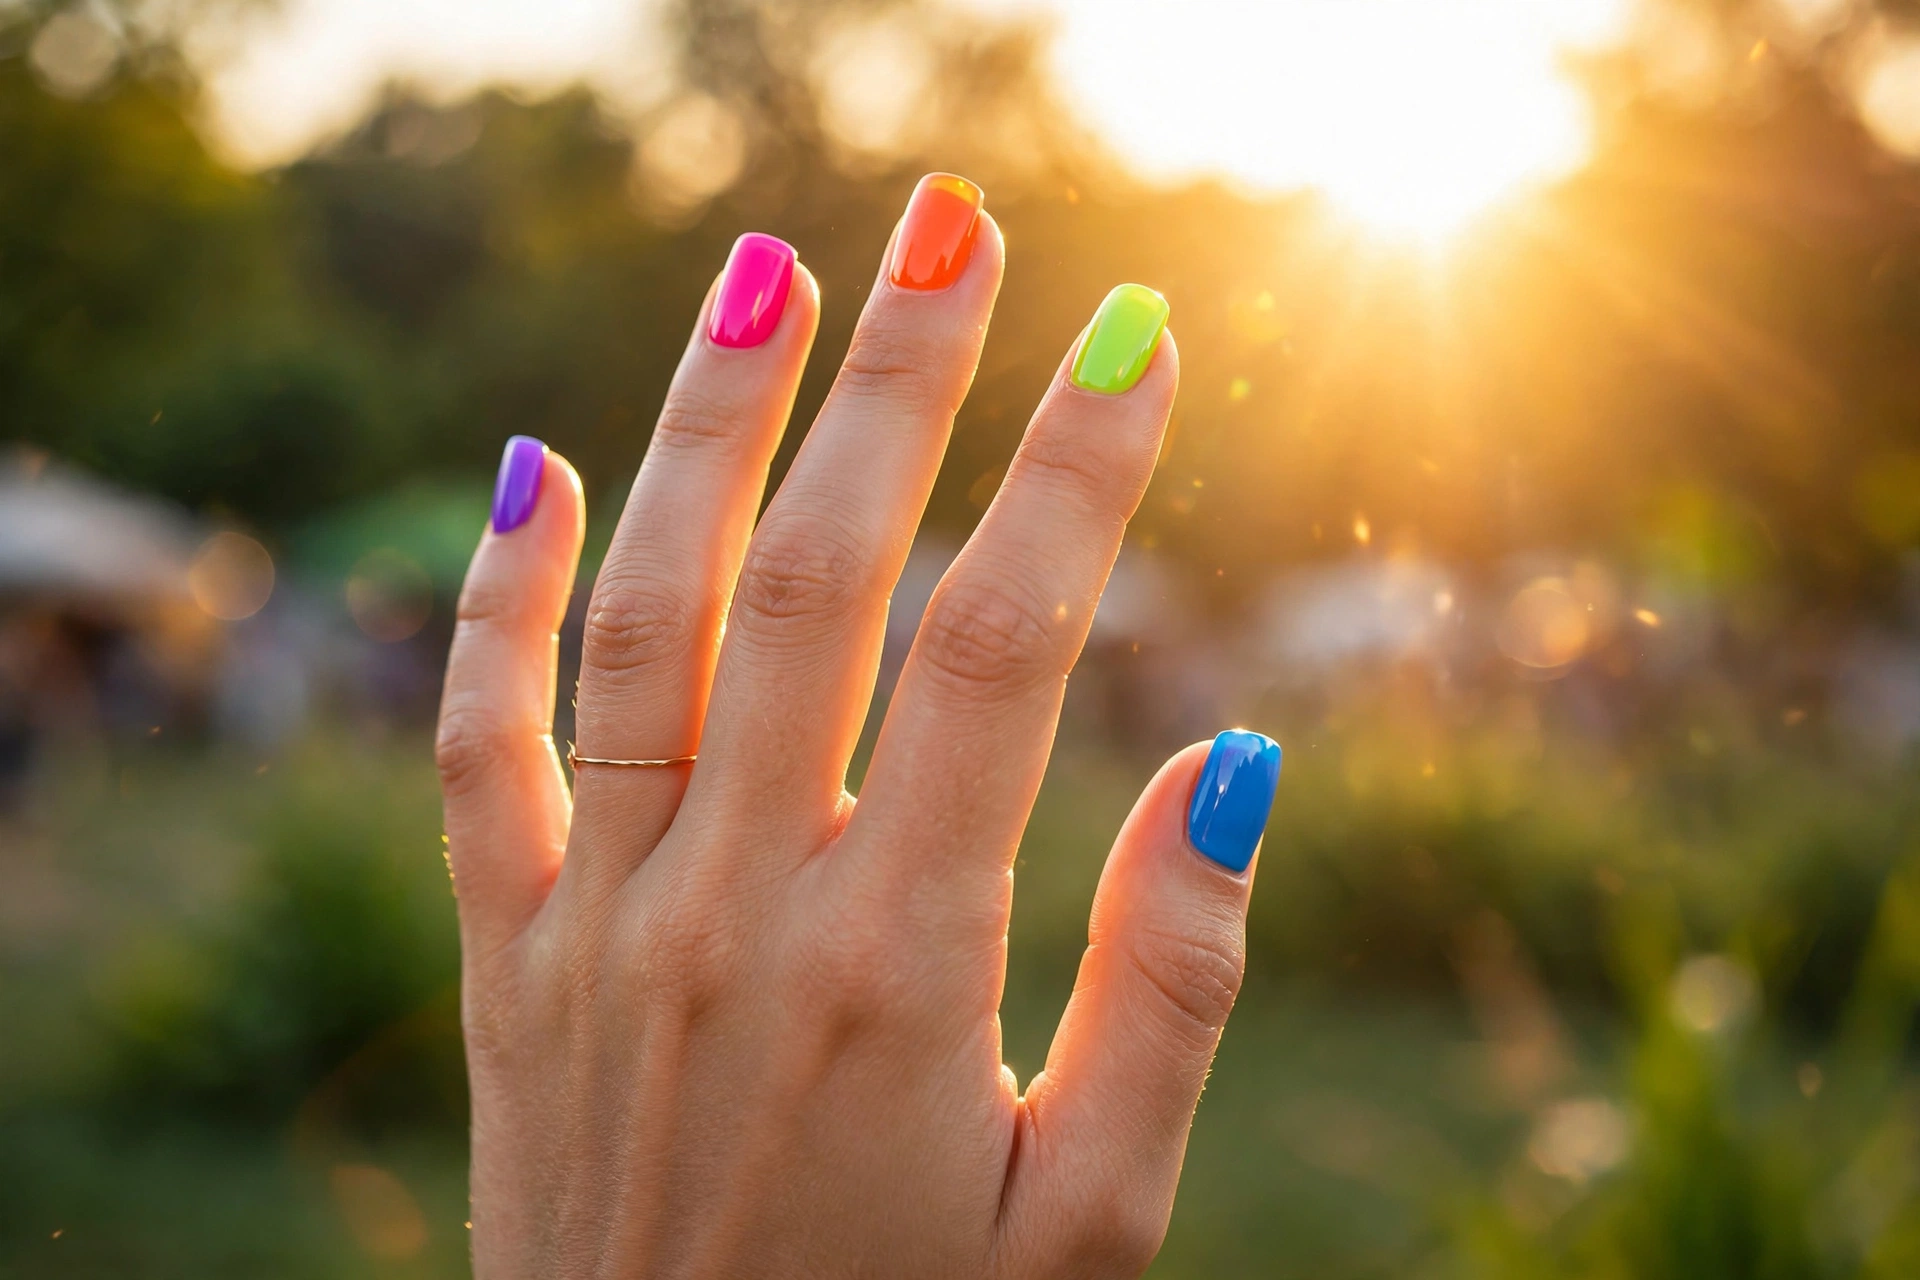
Neon skittles are the festival version: hot pink, tangerine, lime, teal, and electric violet, each as bright as it gets. Neon polish dries slightly matte and porous, so it needs a white base coat underneath for true brightness and two layers of glossy top coat to seal the color. These shades can stain the nail plate, so never skip base coat. Square or medium almond shapes carry the energy best, and this is the skittle to choose for summer, vacations, and Pride season.
4. Dusty Rainbow Skittle
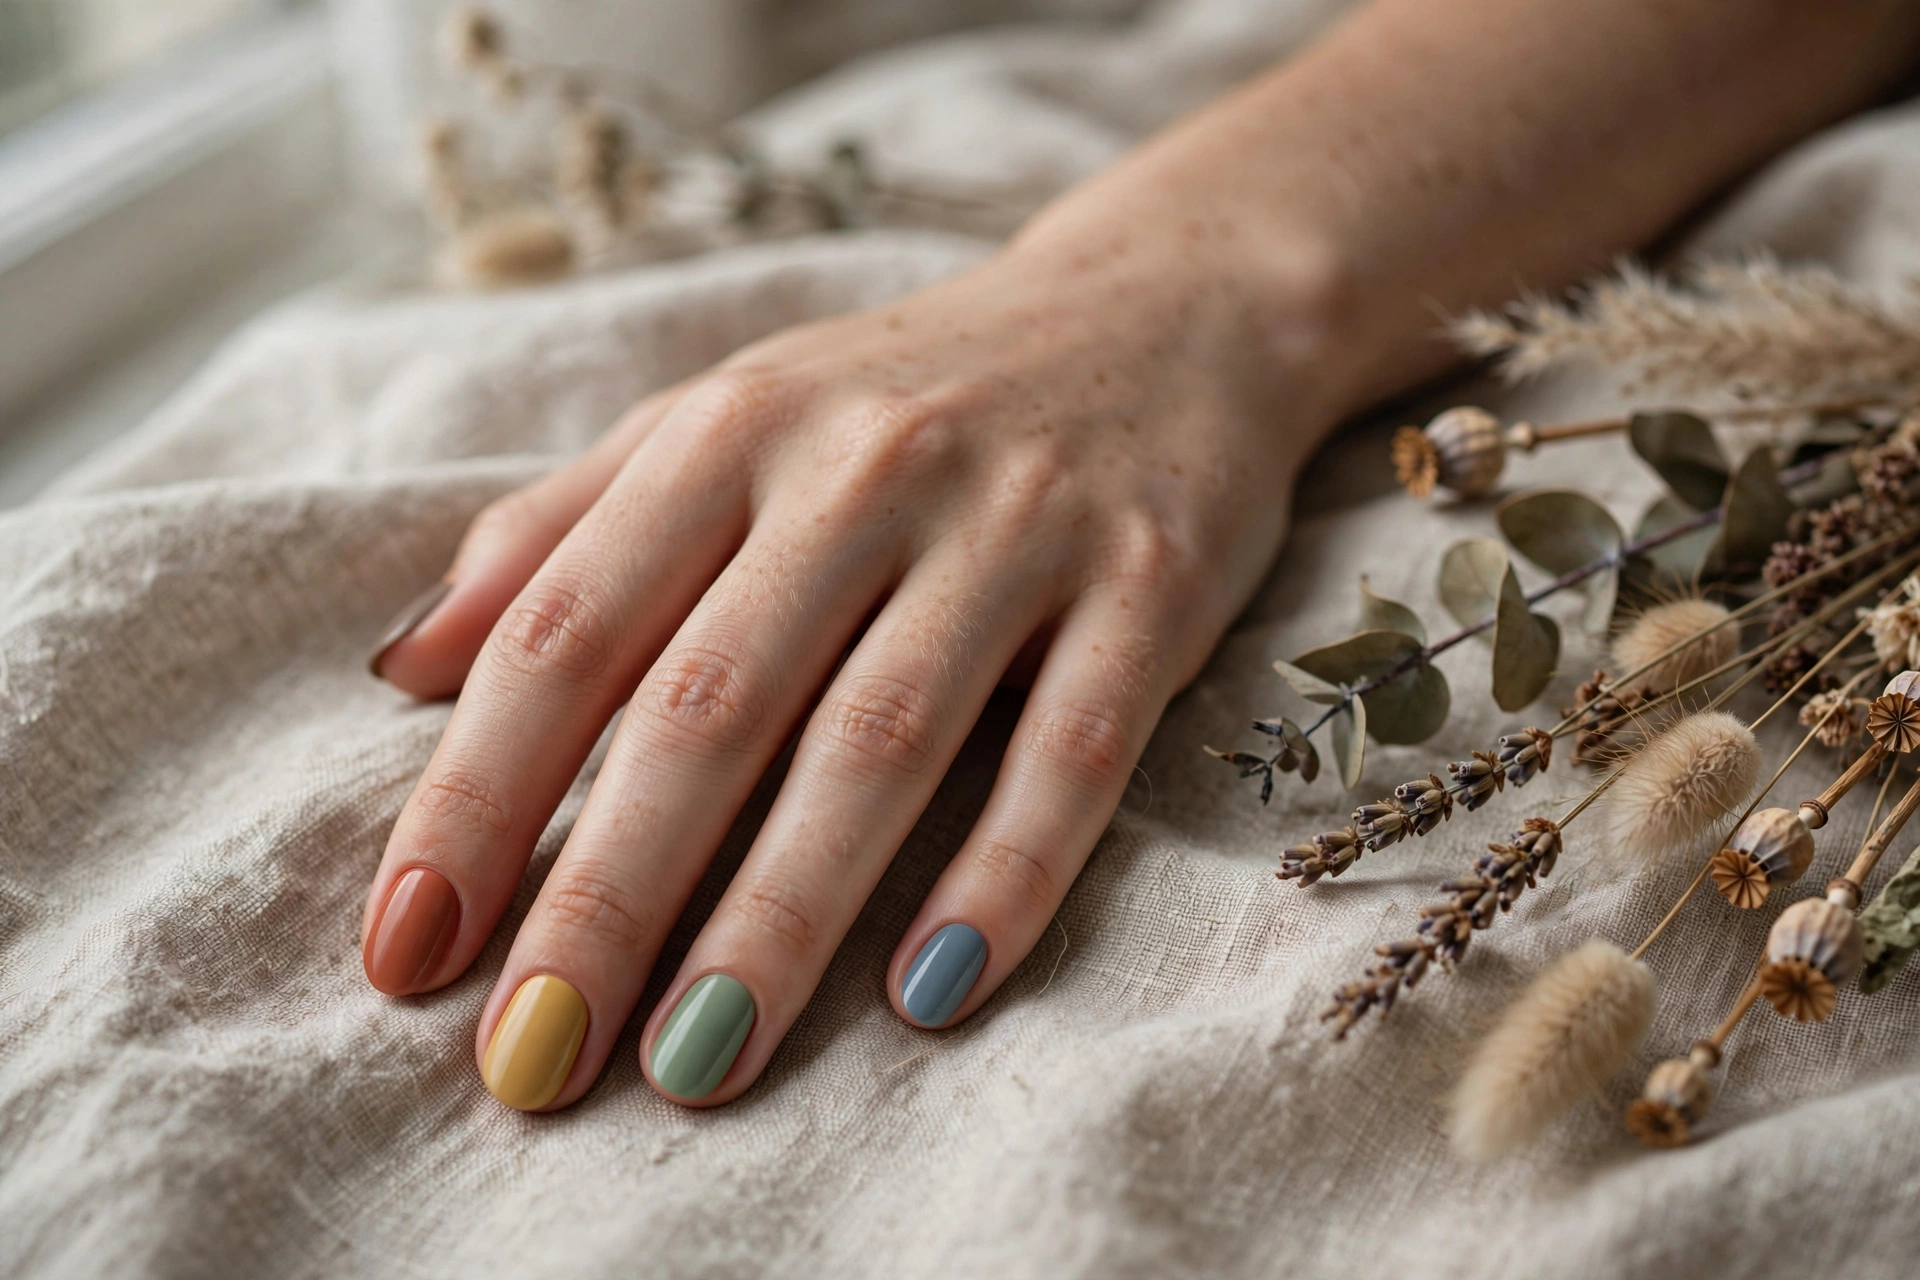
A dusty rainbow uses muted, grayed-down tones: terracotta, mustard, sage, dusty blue, and mauve. The result reads sophisticated rather than playful, and it pairs well with autumn wardrobes and knitwear. Because the colors sit close together in saturation, this skittle looks best with a satin or matte top coat rather than high gloss. It works on every nail length and is the easiest rainbow to wear if bright colors are not your usual style.
Rainbow French & Tips
Rainbow tips keep most of the nail neutral and put the color only at the edge. These are the most wearable rainbow designs for work, weddings, and anyone who wants color with restraint.
5. Rainbow French Tips
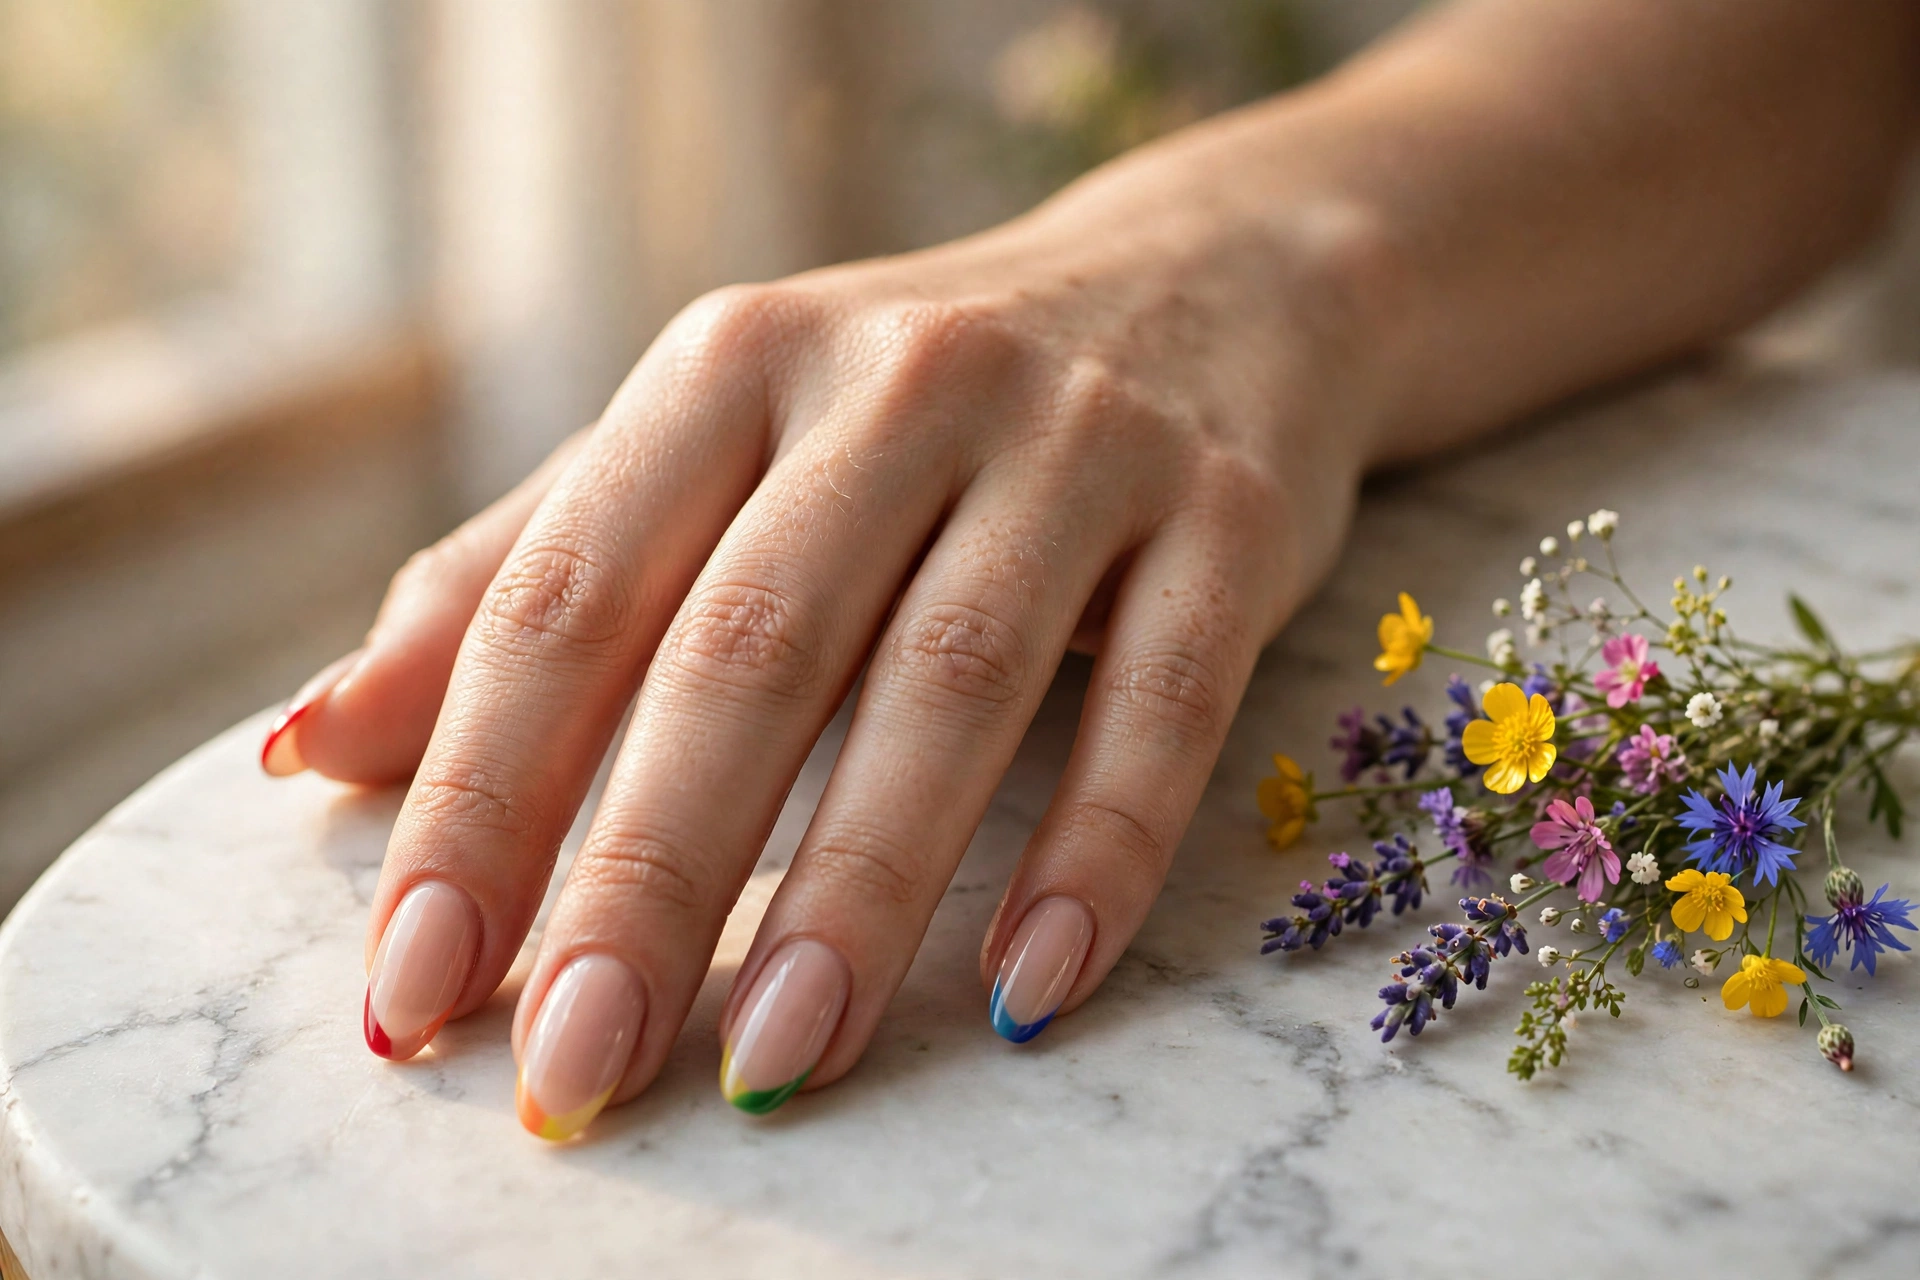
Rainbow French tips paint each tip a different bright color over a sheer nude base. The neutral base keeps the look polished while the tips deliver the rainbow. Use nail tape or a thin detail brush for crisp smile lines, and choose polishes with strong pigment so yellow and light green cover in two coats. Long almond or oval nails give each tip enough room to show its color. This is the rainbow French to pick for events where you want fun without full coverage.
6. Rainbow Micro French
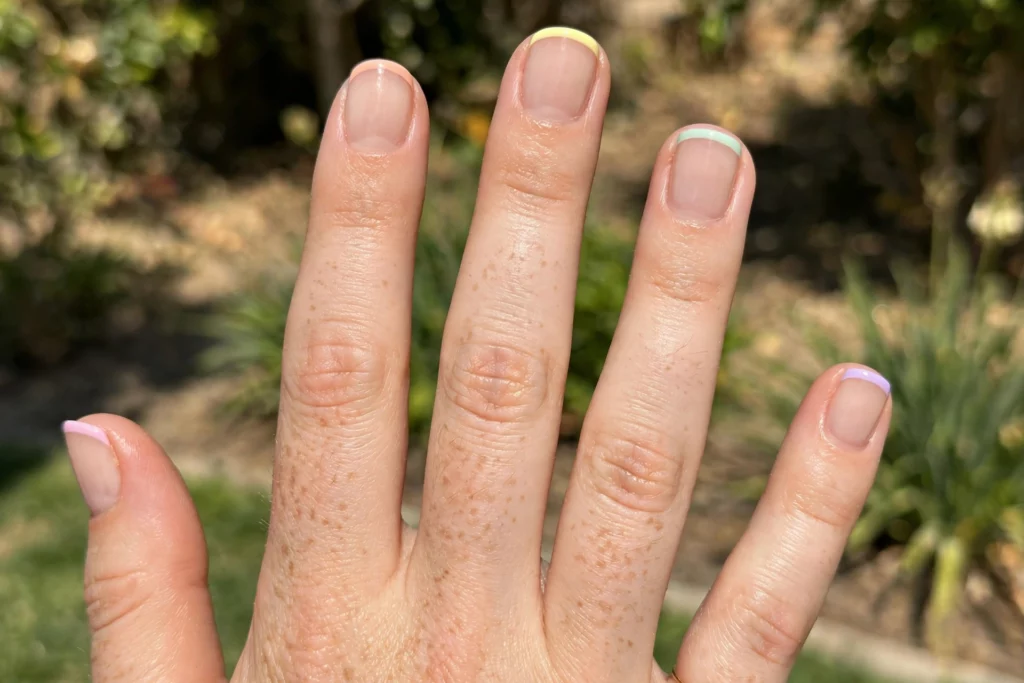
The micro French shrinks the tip to a hairline stripe, one pastel shade per nail. It is the subtlest rainbow on this list and the best choice for short nails and professional settings. A detail brush or a fine liner pen does the line work; rest your painting hand on a table for steadiness. Because the color band is so thin, even one coat of pastel shows cleanly. Keep the base sheer and glossy for contrast against the matte-clean lines.
7. Diagonal Rainbow Tips
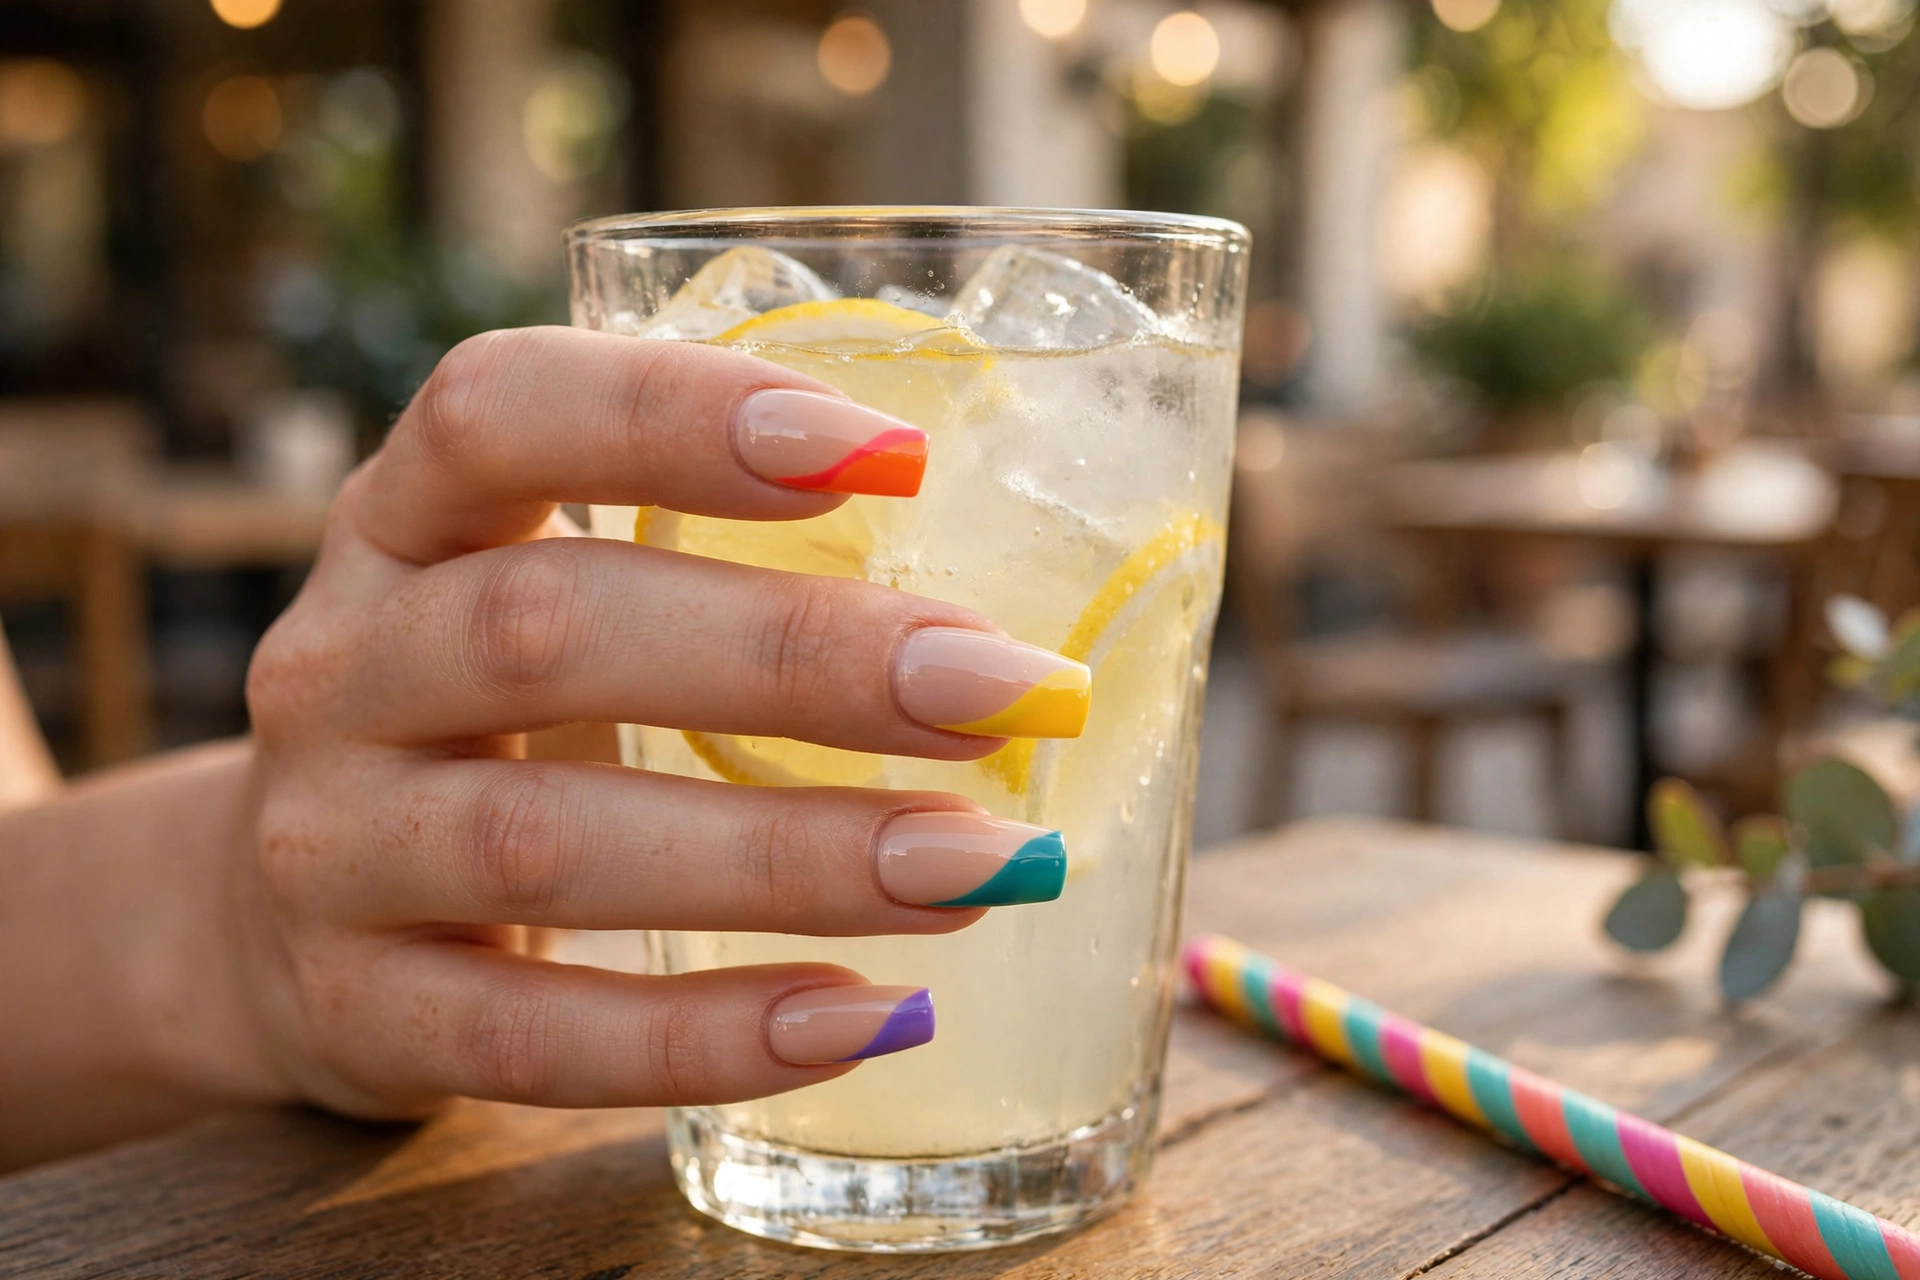
Diagonal tips cut the color across the nail at an angle instead of following the smile line. The asymmetry feels modern and elongates the nail, which flatters wide nail beds. Each nail gets a different bright color in a bold diagonal band. A striping brush or angled brush keeps the line straight; wipe the brush between colors so shades do not muddy. Medium to long coffin or almond shapes give the diagonal enough space to read clearly.
8. Outlined Rainbow French
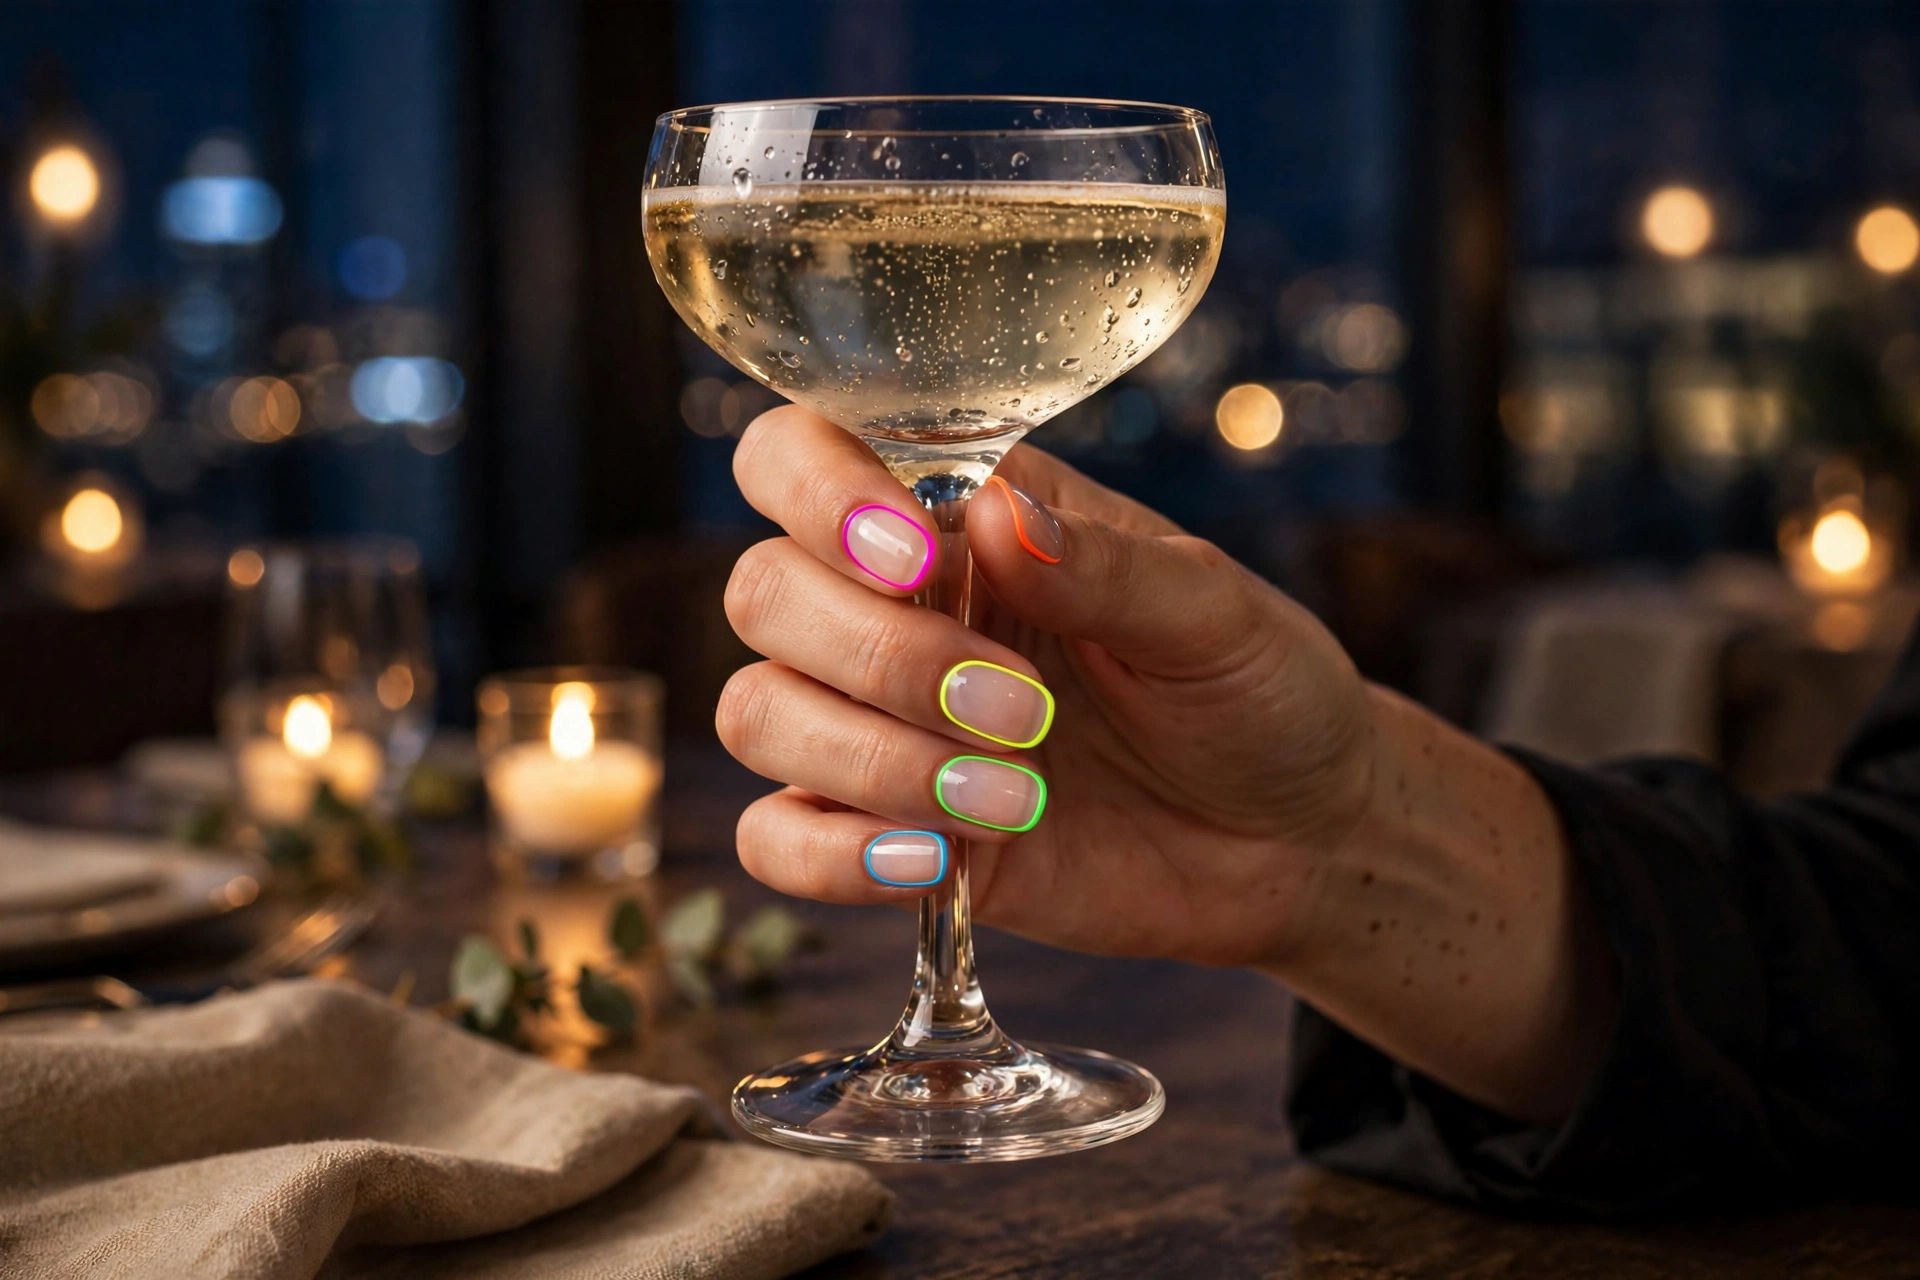
This design traces a thin colorful outline around the entire edge of each nail, one neon shade per nail, over a milky base. The outline effect reads graphic and jewelry-like, especially under evening light. Use a fine liner brush and steady, light pressure; the line should be even in width all the way around. Short oval nails work beautifully here, and a glassy top coat makes the neon lines glow.
Ombré & Gradient Rainbows
Gradients blend rainbow colors into each other instead of separating them. These take more technique than skittles, but the blended result is the most color-rich look on the list.
9. Striped Rainbow Ombré
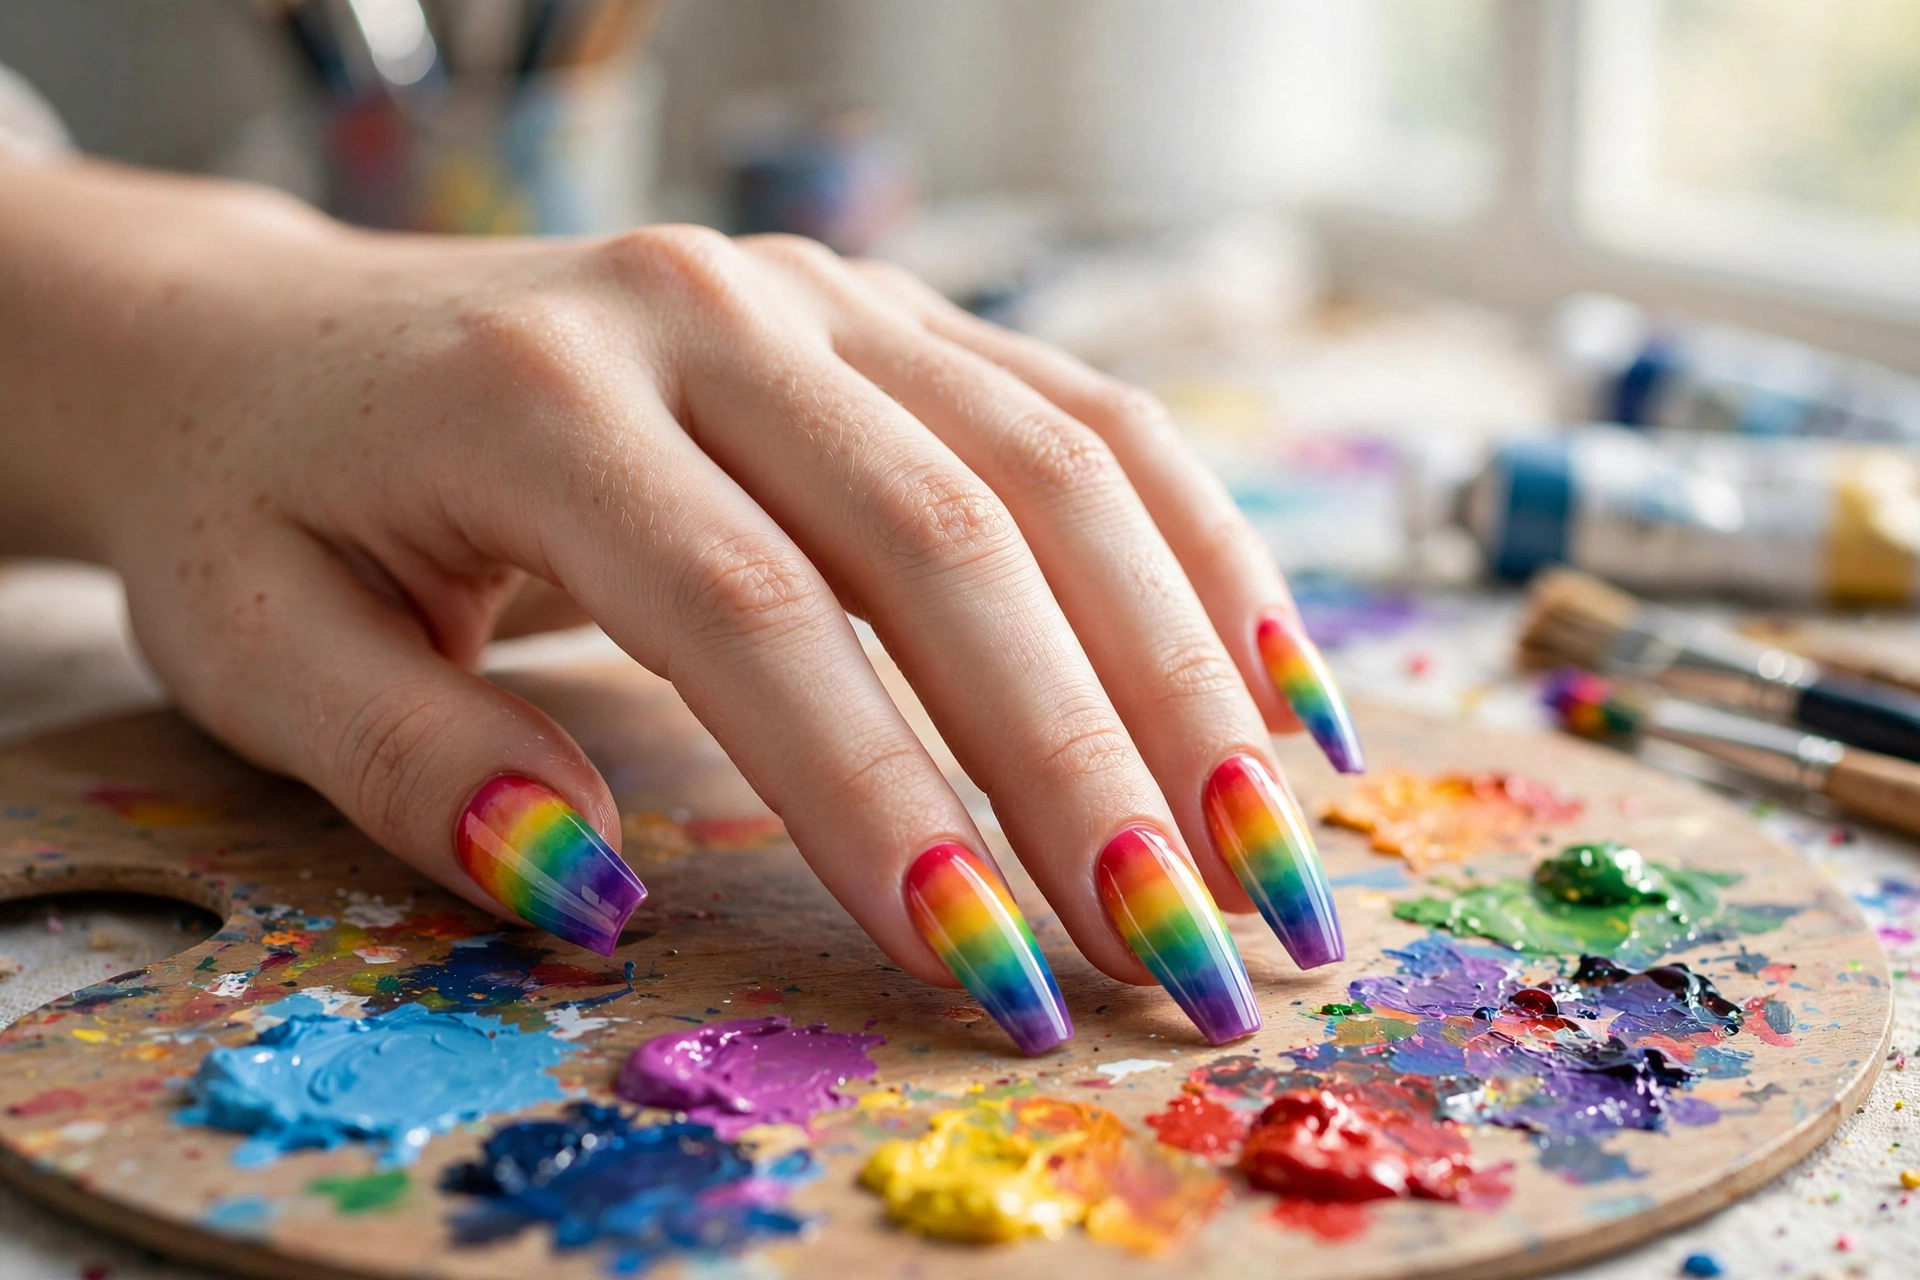
Striped rainbow ombré stacks red through violet as horizontal bands on every nail, blended at the edges. Work with wet polish and blend each boundary with a clean detail brush before it sets; gel polish gives more working time than regular polish. Long coffin or stiletto nails show all six bands best. Apply over a white base so the colors stay vivid, and expect this to take the longest of any design here. The payoff is a full rainbow on every single nail.
10. Sponged Pastel Rainbow Gradient
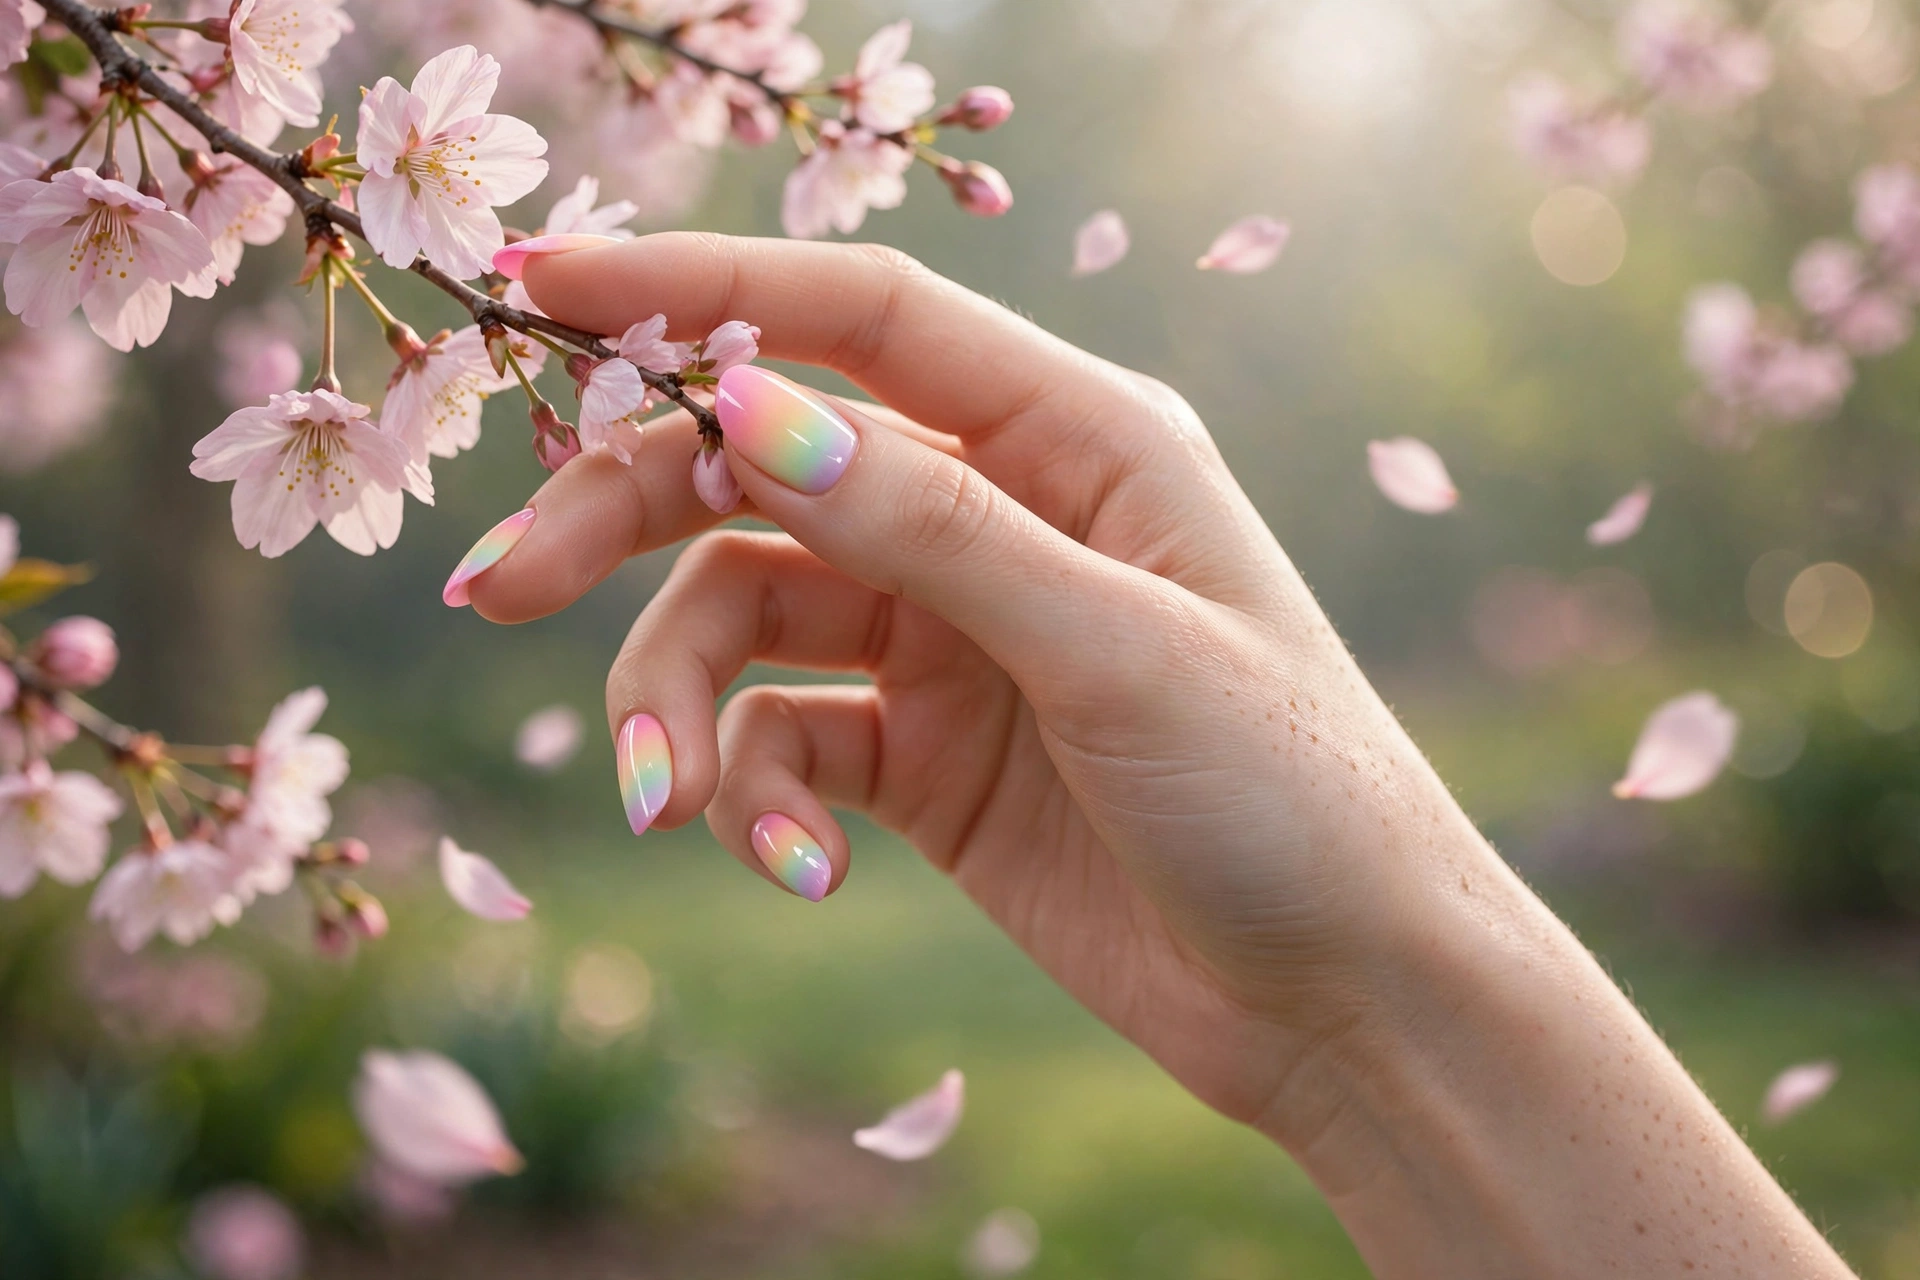
The sponge technique dabs pastel polish onto the nail with a makeup sponge, creating a soft gradient from pink through peach, yellow, mint, and lilac. Sponge in light, repeated taps rather than one heavy press, and let each layer dry before adding the next to avoid muddying. Clean up the skin around the nail with a brush dipped in remover. This is the gentlest gradient for beginners and looks dreamy on almond or oval shapes. It pairs naturally with the soft aesthetic of our milky nails.
11. Hand-Span Gradient
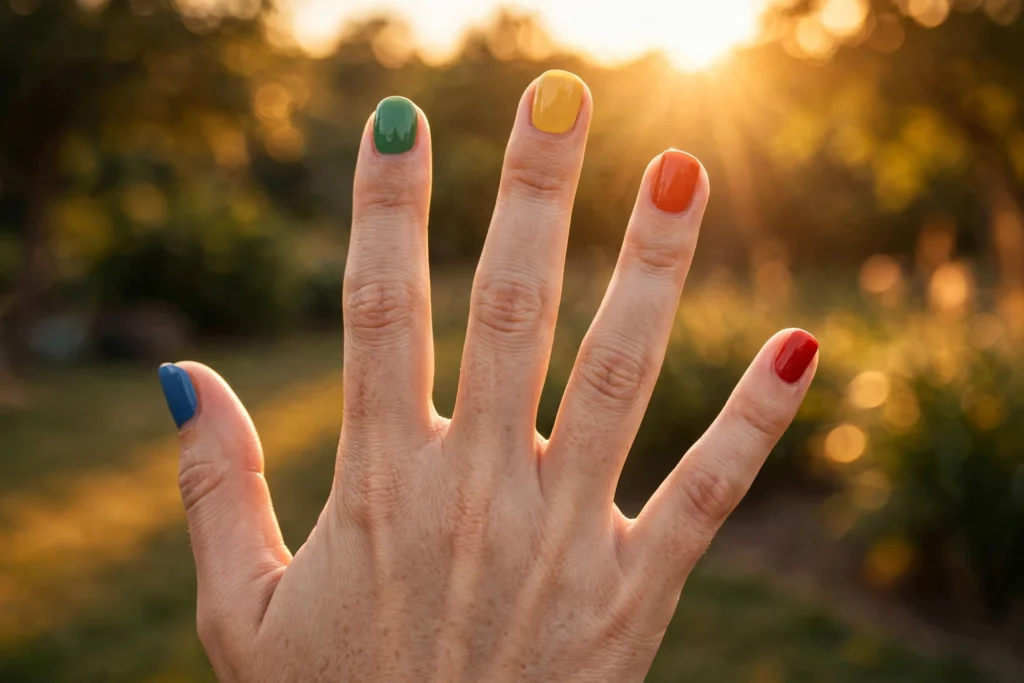
The hand-span gradient puts one color per nail like a skittle, but chooses shades that flow into each other, red on the pinky through orange, yellow, green, to blue on the thumb. Seen together, the hand reads as one continuous gradient. It is as easy as a skittle but looks more designed. For the smoothest flow, pick shades with similar depth and finish, and order them in true spectral order. Any nail length works; this is an excellent first rainbow for beginners.
12. Aurora Chrome Rainbow
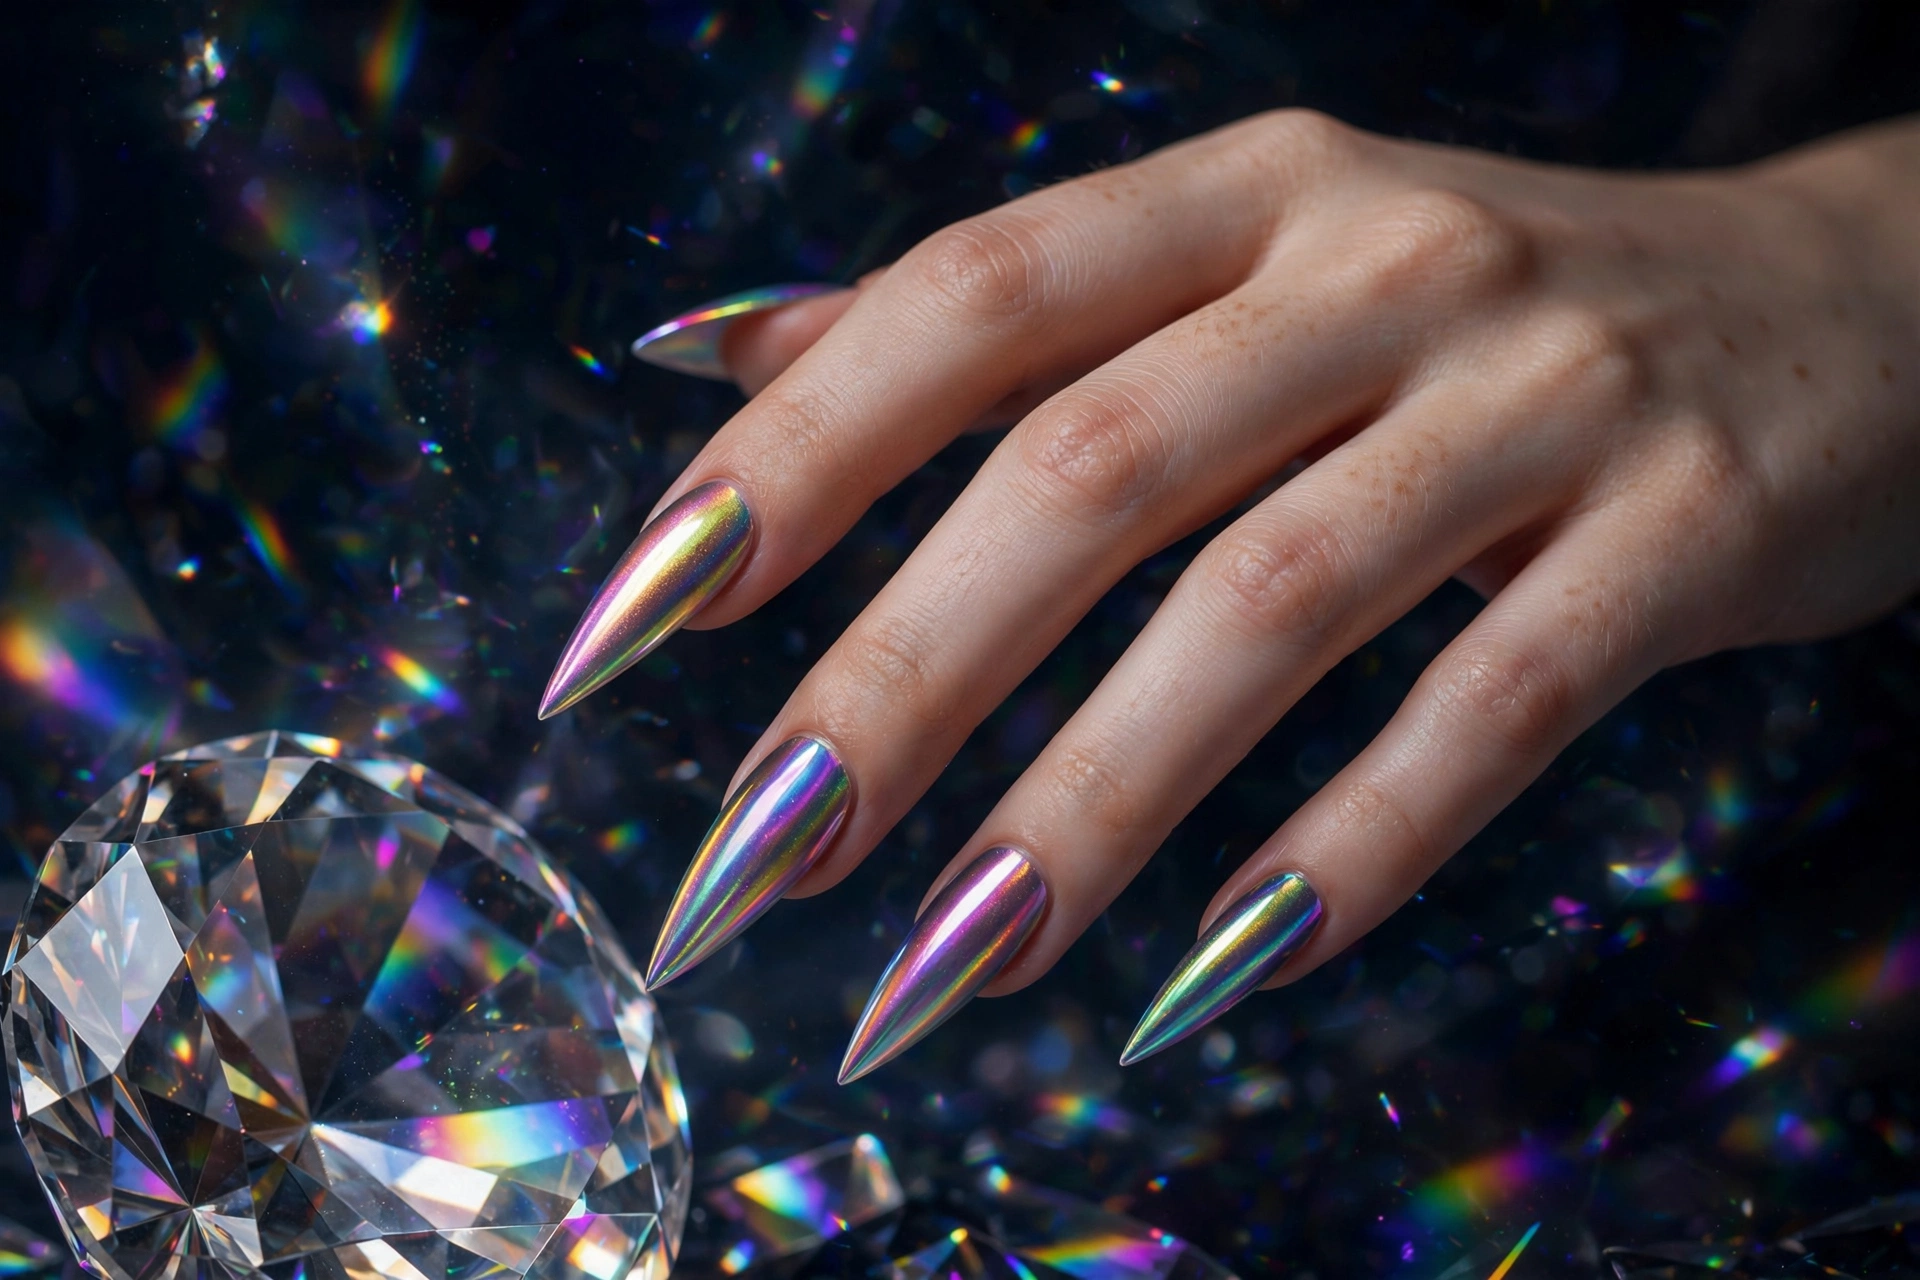
Aurora chrome powder over a dark or multicolor base shifts through pink, gold, green, blue, and violet as the light moves. It gives you a rainbow that changes with every angle, no art required. Chrome powder applies over a no-wipe gel top coat, burnished with a sponge applicator, then sealed with another top coat. Long stiletto or almond shapes maximize the color shift. For more metallic inspiration, browse our gold nail designs.
Rainbow Nail Art & Motifs
Motifs put recognizable rainbow imagery on the nail: arches, swirls, confetti, and flowers. These are the most playful designs and the ones people photograph most.
13. Corner Rainbow Arches
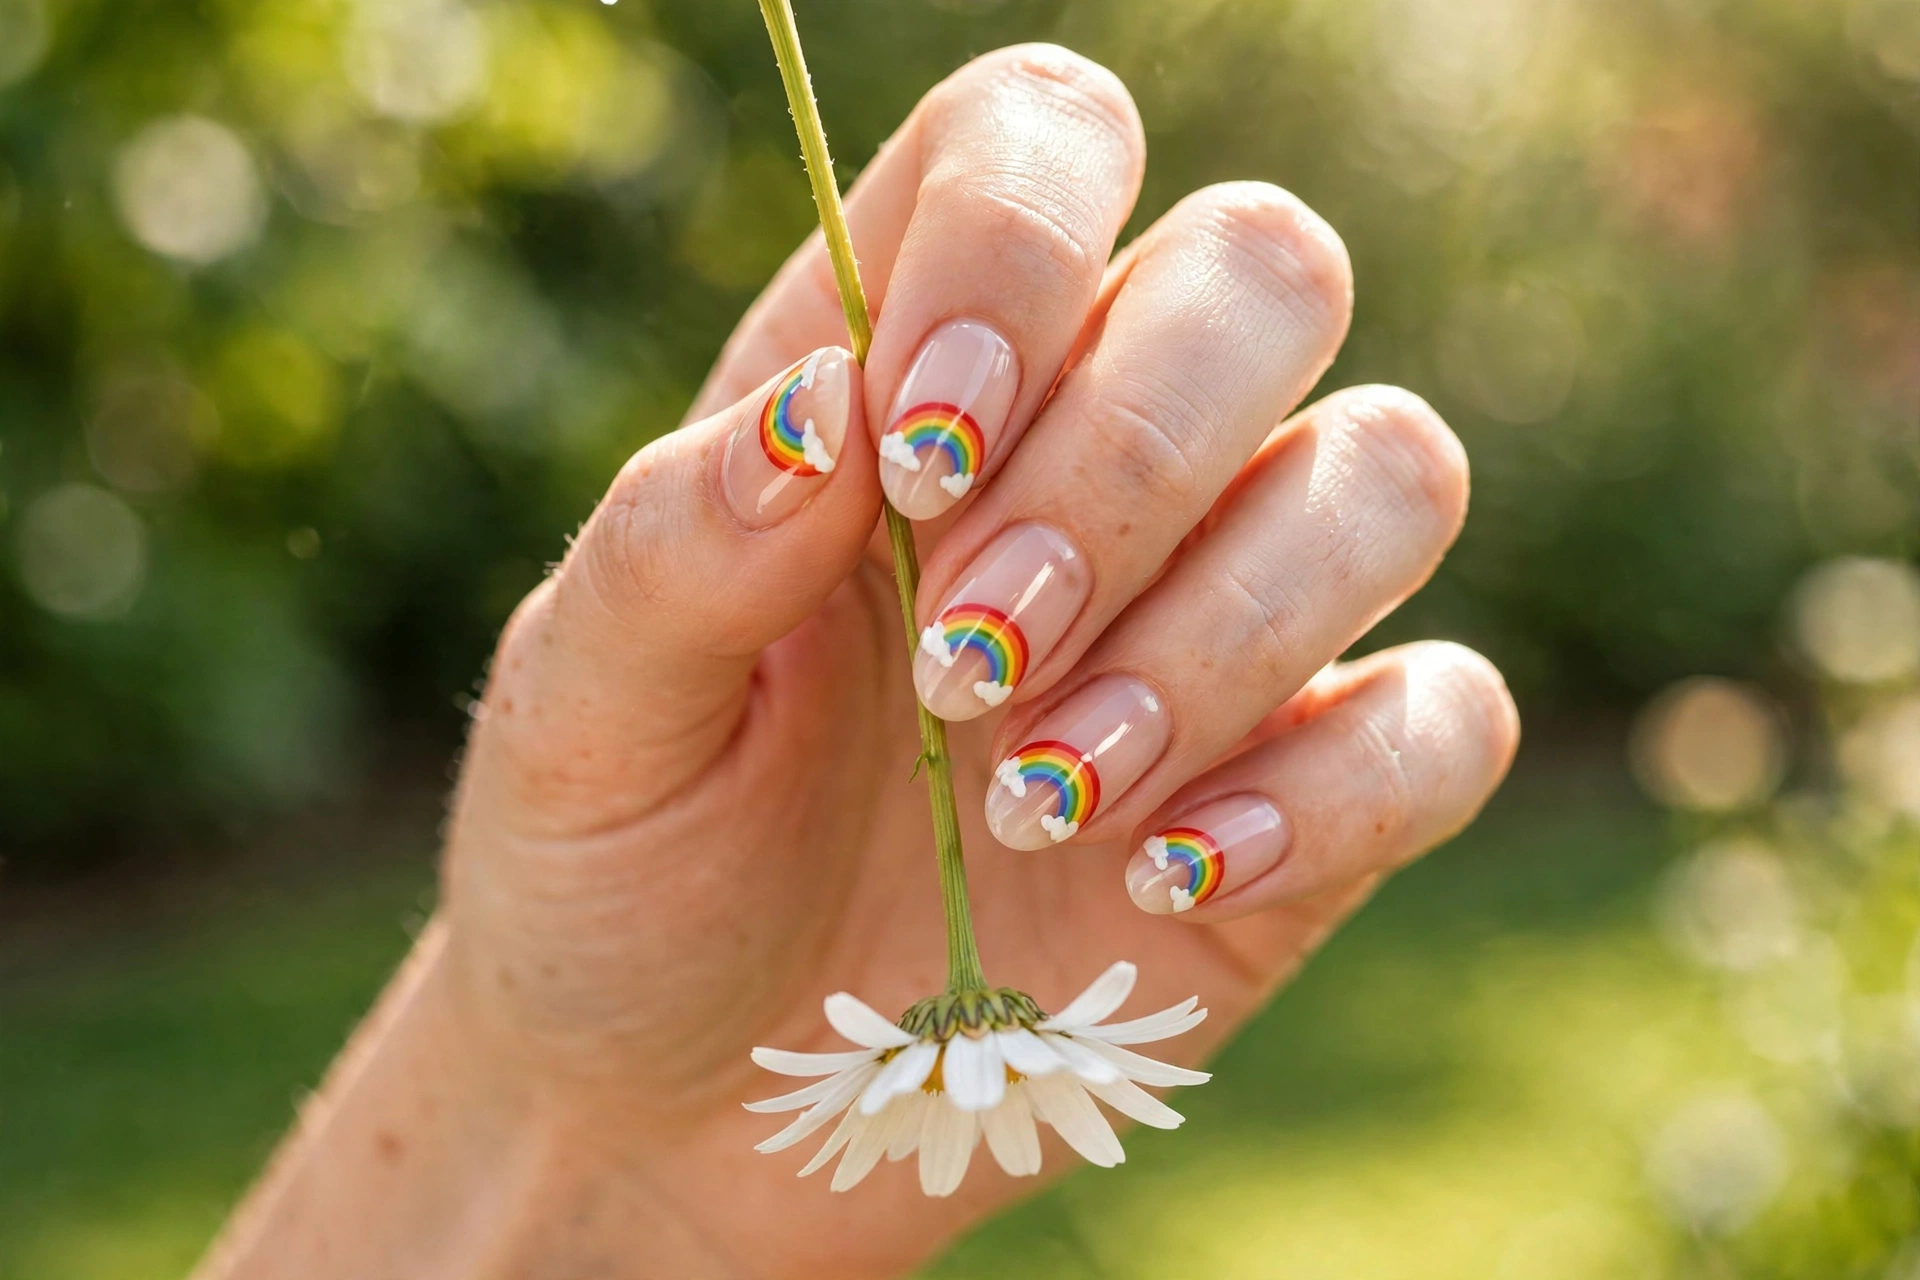
A tiny rainbow arch rises from one corner of each nude nail, finished with a small white cloud at each end. Use a detail brush for the curved stripes and a dotting tool for the clouds. Keep the arches small so they do not overwhelm short nails; this motif scales well to any length. It is the most charming rainbow design here and a favorite for spring, Pride, and cheerful everyday wear.
14. Rainbow Swirl Waves
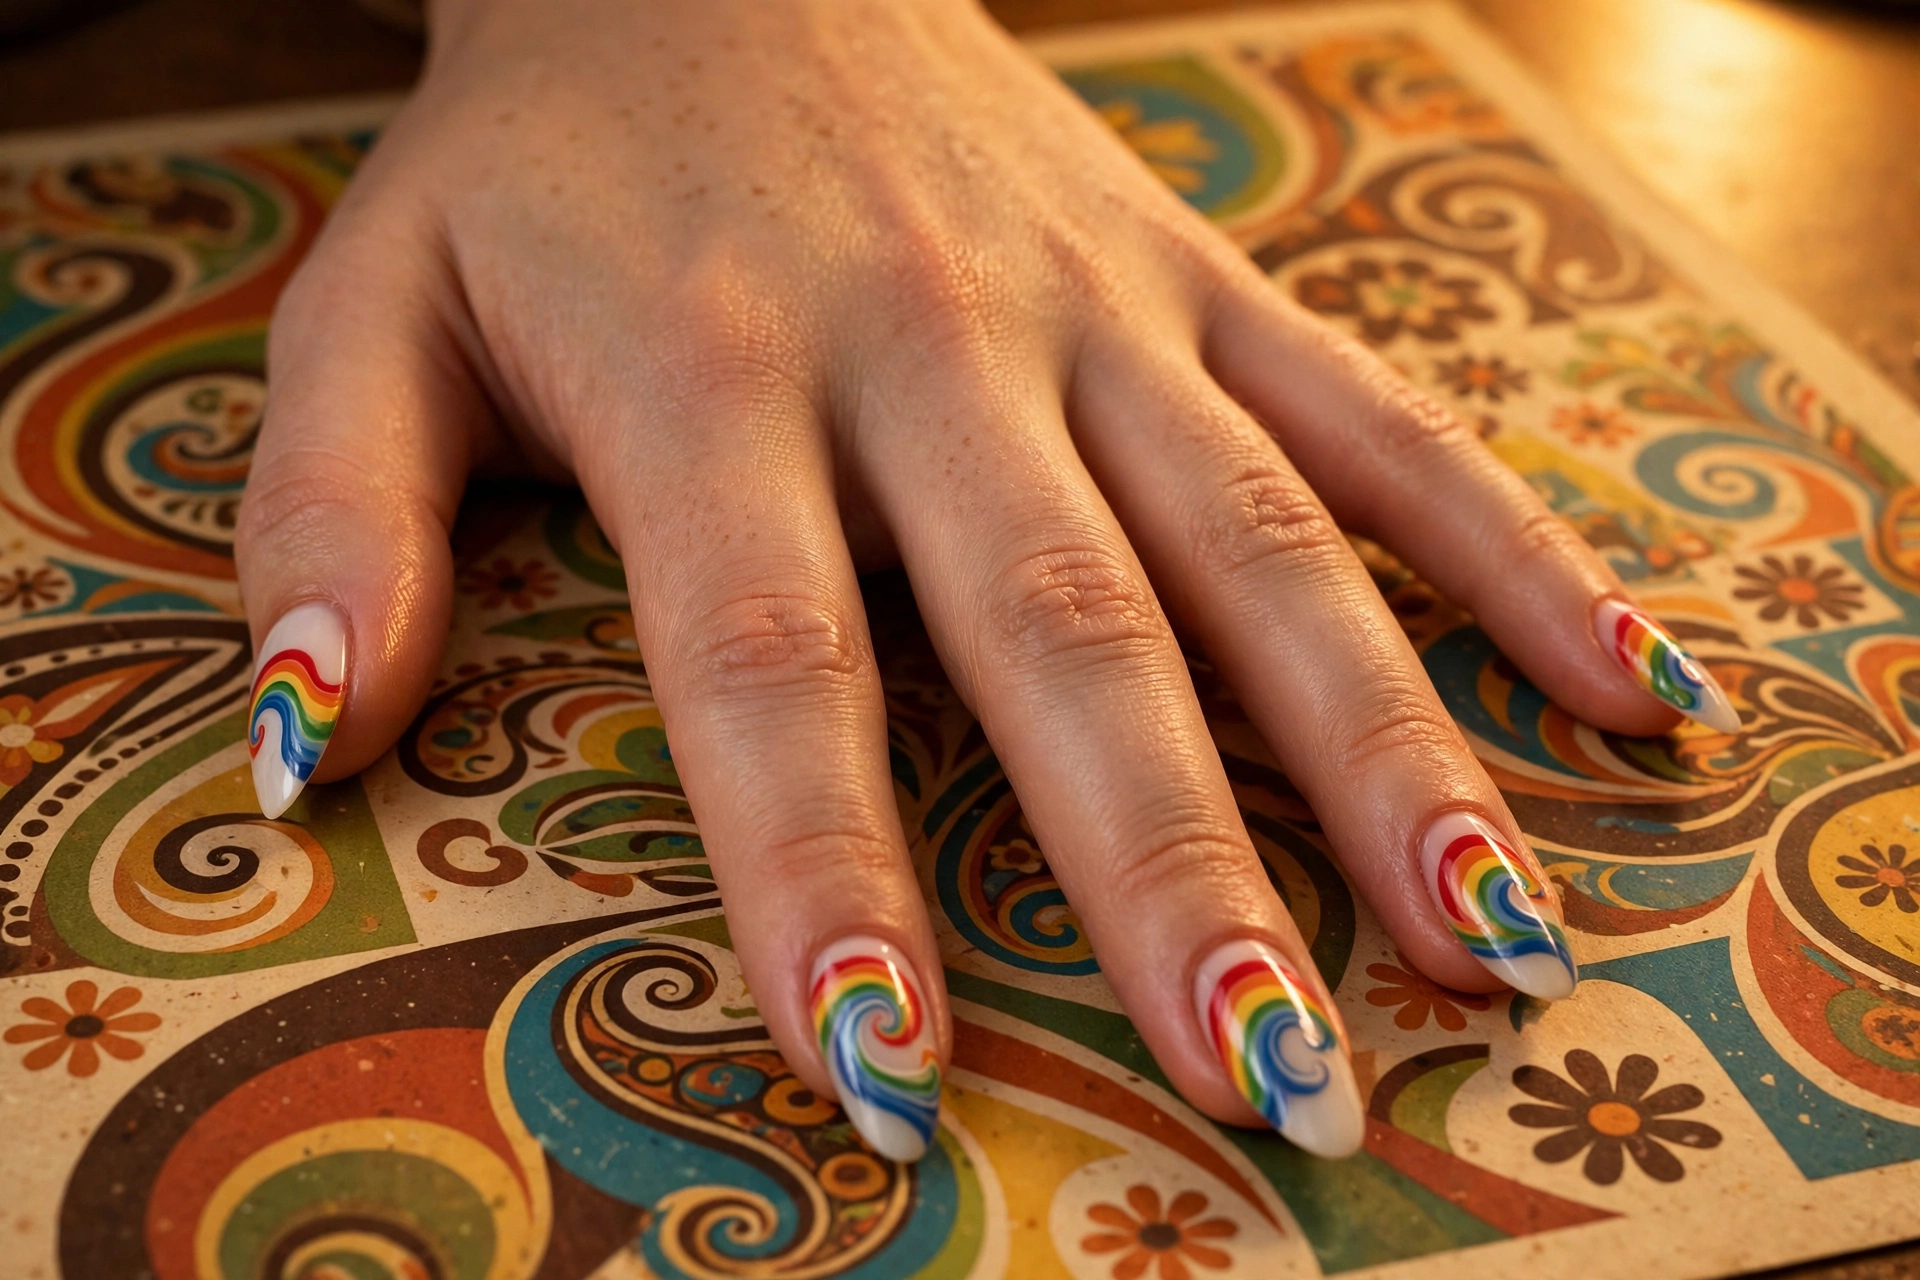
Retro swirl waves in pink, orange, yellow, teal, and blue flow across a milky base like 1970s poster art. Draw each wave with a detail brush in one confident stroke; slight wobbles add to the hand-drawn charm. The milky base keeps the look soft and lets the colors pop. Long almond nails give the waves room to travel. Seal with a thick glossy top coat to smooth the line work.
15. Rainbow Confetti Dots
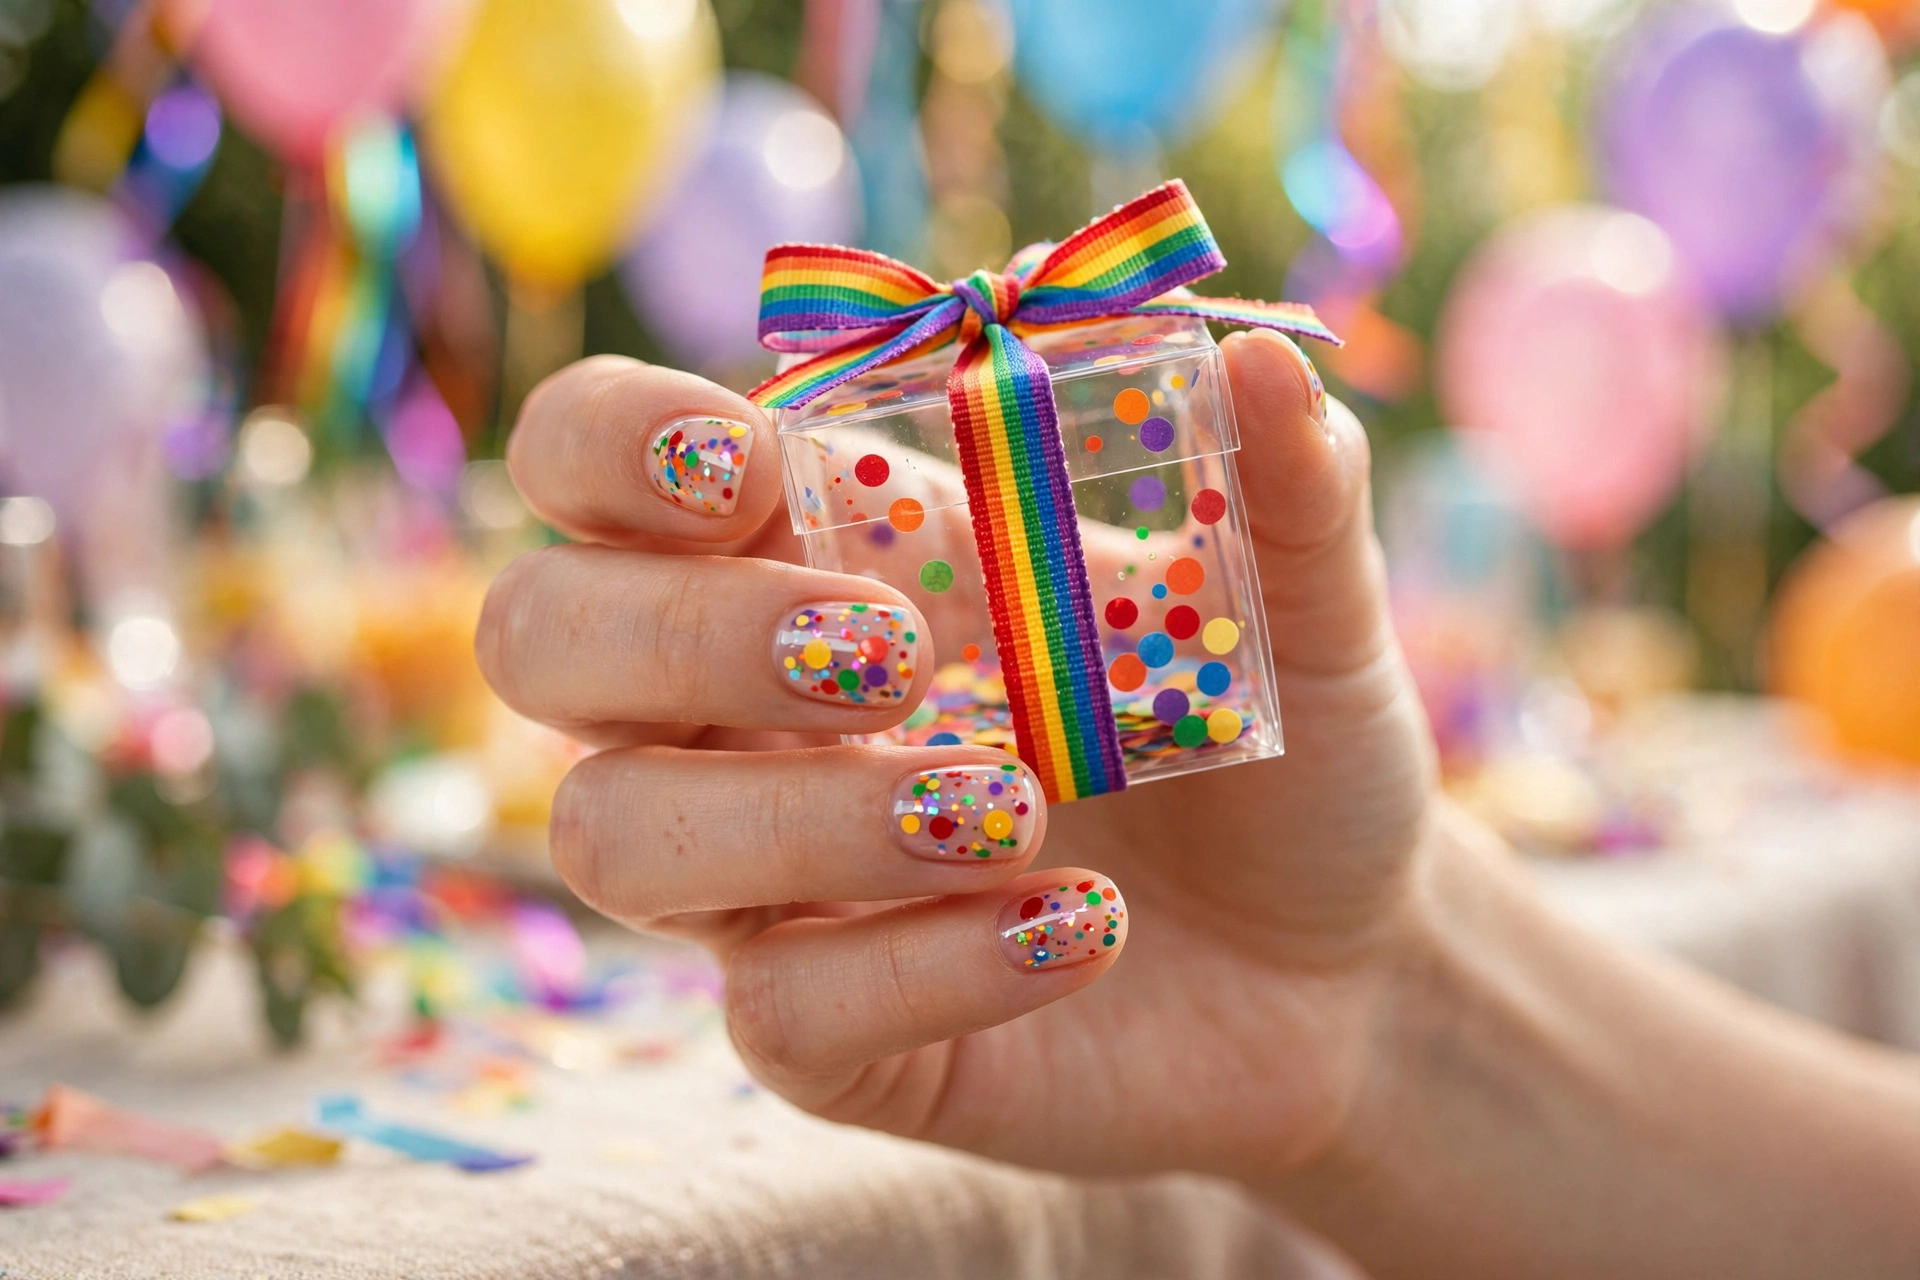
Confetti dots scatter multicolor dots of different sizes over a clear or nude base. Use dotting tools or the rounded end of a bobby pin, varying dot size for a true confetti feel. This is the fastest rainbow art on the list and nearly impossible to mess up. Short rounded nails suit it perfectly, and it doubles as party or birthday nail art. Two layers of top coat keep the dots smooth to the touch.
16. Rainbow Daisy Florals
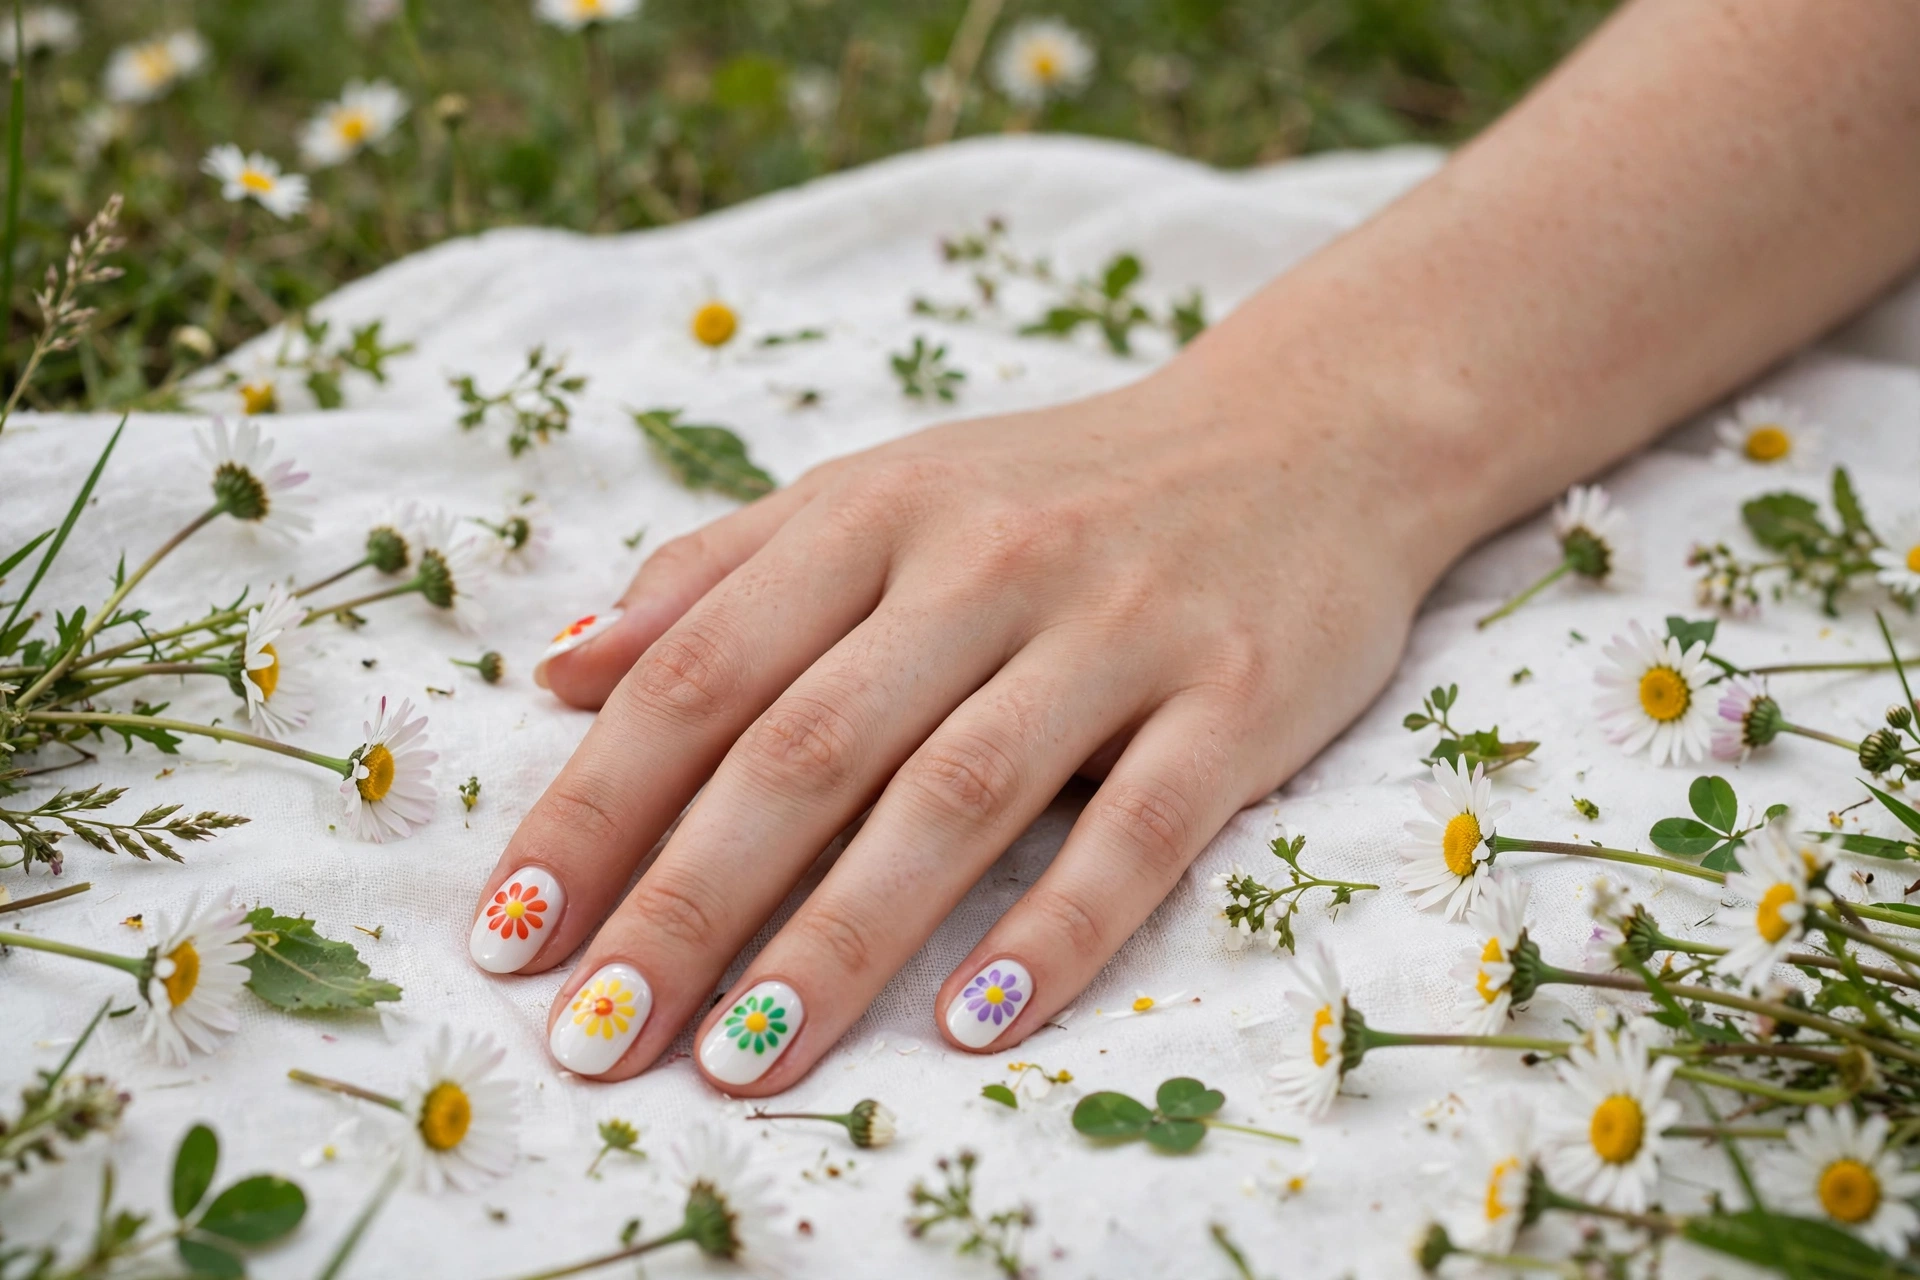
Each daisy gets petals in different rainbow colors around a yellow center, painted on a white base. Paint five or six oval petals per flower with a detail brush, then dot the center. White polish makes the petal colors look their brightest. This design suits oval or squoval nails and reads fresh and feminine for spring and summer. If floral nail art is your thing, you will also like the botanical ideas in our green nail designs.
Choosing Your Rainbow: Technique Comparison
Not sure which rainbow to try first? This table compares the four techniques on difficulty, best nail shape, and how they wear day to day.
| Technique | Difficulty | Best nail shape | Wearability |
|---|---|---|---|
| Skittle manis | Beginner | Any shape or length | Excellent; chips are easy to touch up one nail at a time |
| Rainbow French & tips | Beginner to intermediate | Almond, oval, coffin | Very good; neutral base hides regrowth, tips wear first |
| Ombré & gradients | Intermediate to advanced | Long almond, coffin, stiletto | Good; blended edges show chips more, gel helps |
| Rainbow art & motifs | Intermediate | Almond, oval, round | Good; small motifs chip less than full coverage |
If you are new to nail shape choices, our nail shapes guide explains which shape suits your hands and lifestyle.
Rainbow Troubleshooting: 5 Fixes
Your gradient went muddy. You blended colors that sit too far apart on the color wheel, or kept sponging after the polish started to set. Blend only neighbors (red into orange, never red into green), and stop while the surface still looks wet.
Pastels look streaky. Pastel pigment is naturally patchy in one coat. A white or ridge-filling base plus two thin coats fixes it; a third coat usually causes more streaks than it cures.
Neons stained your nails. Saturated pigment settles into the nail plate when base coat is skipped. Always base-coat under neons, and lift existing stains with a gentle buff and a few days of clear polish rather than more remover.
Chrome powder lifted or dulled. Aurora chrome (idea 12) fails when the top coat under it is over-cured or the finished nail is not sealed at the free edge. Burnish the powder onto a tacky, just-cured no-wipe top coat, then seal and cap the edge.
Smile lines look wobbly. Do not repaint the whole tip — flood lines are a cleanup problem, not a painting problem. A flat brush with remover, run along the smile line while the tip is wet, sharpens any French on this list.
What to Ask for at the Salon (and What It Costs)
Rainbow designs confuse booking systems because one set can mix several techniques, so describe the method, not just the picture: ask for a “skittle manicure” for one color per nail, “rainbow French tips” for colored tips on a nude base, or a “sponged rainbow gradient” for blended color. Most salons price these as nail art rather than a plain manicure — expect a per-nail art charge or a flat design fee on top of the base service, with chrome (idea 12) usually billed as a separate add-on because it needs gel and powder. Gradients and striped ombré take the longest chair time, so book them as an art appointment, not a basic slot; skittles and confetti dots are the fastest and cheapest rainbow you can order. Bringing the photo of the exact design from this list saves the usual five minutes of interpretation.
Rainbow Nails: Frequently Asked Questions
What are skittle nails?
Skittle nails are a manicure where each nail is painted a different solid color, named after the candy. A rainbow skittle uses the colors of the rainbow, one per nail, and it is the easiest way to do rainbow nails because it requires no nail art at all.
How do you do rainbow nails at home?
Start with clean, shaped nails, apply base coat, then paint your chosen rainbow technique: one color per nail for a skittle, colored tips for a rainbow French, or sponge-blended colors for a gradient. Use a white base under brights and neons, clean up edges with a small brush dipped in remover, and seal everything with top coat.
What nail shape is best for rainbow nails?
Almond and oval shapes suit most rainbow designs because their length shows off color order and gradients. Short round or squoval nails work well for skittles, micro French, and confetti dots. Very long coffin and stiletto shapes are best for striped ombré and chrome, which need surface area to blend or shift color.
Do rainbow nails work on short nails?
Yes. Skittles, micro French tips, corner arches, and confetti dots all look excellent on short nails because they do not need much surface area. Choose designs that keep most of the nail neutral, like outlined French or confetti, if you want color that does not overwhelm short nails.
Which colors go in a rainbow manicure?
A traditional rainbow manicure uses six colors: red, orange, yellow, green, blue, and violet (purple). Some versions add indigo for the classic seven-color spectrum. Pastel, neon, and dusty versions keep the same order but change the saturation.
How long do rainbow nail designs last?
With regular polish, rainbow nails last about 5 to 7 days; with gel polish, 2 to 3 weeks. Designs with a neutral base, like rainbow French or confetti on clear, show regrowth less than full-coverage skittles. Always use base coat under bright and neon colors to prevent staining.
Can rainbow nails look classy instead of costume-like?
Yes, if you control the saturation and coverage. Pastel skittles, dusty tones, micro French tips, and outlined French all read polished rather than playful. Keeping most of the nail nude and limiting color to the tips or a thin outline is the reliable formula for a grown-up rainbow.
Can you do rainbow nails with regular polish, or do you need gel?
Most of this list works in regular polish: skittles, French tips, confetti dots, and sponged gradients are all standard lacquer techniques. Gel earns its place for two designs — aurora chrome, because the powder needs a cured no-wipe top coat to grip, and striped ombré, because gel’s longer working time makes blending easier. If you only own regular polish, start with the skittles and French designs and nothing is lost.
What are aura rainbow nails?
Aura nails place a soft, blurred cloud of color in the center of each nail, fading out to a sheer or milky edge. A rainbow aura set uses a different spectrum color per nail. Create the effect with the sponge method from idea 10, but dab the color into the middle of the nail instead of blending it from base to tip, and keep the edges deliberately hazy.
How do I stop rainbow gradient colors from going muddy?
Blend neighboring colors only — red into orange, orange into yellow, blue into violet — and never drag the sponge across non-neighbors like red and green, which neutralize into brown. Work while the polish is wet, use a clean section of sponge for each boundary, and seal with top coat as soon as the gradient looks right rather than adding one more pass.
Are rainbow nails appropriate for work?
They can be. The office-safe formula is restraint in coverage and saturation: a micro French with hairline pastel tips (idea 6), an outlined French (idea 8), or a dusty skittle (idea 4) in muted tones all read as polished rather than costume. Keep nails short to medium, choose one design family rather than mixing motifs, and let the neutral base do the professional work.