20 Celestial Nail Designs: Stars, Moons & Galaxies
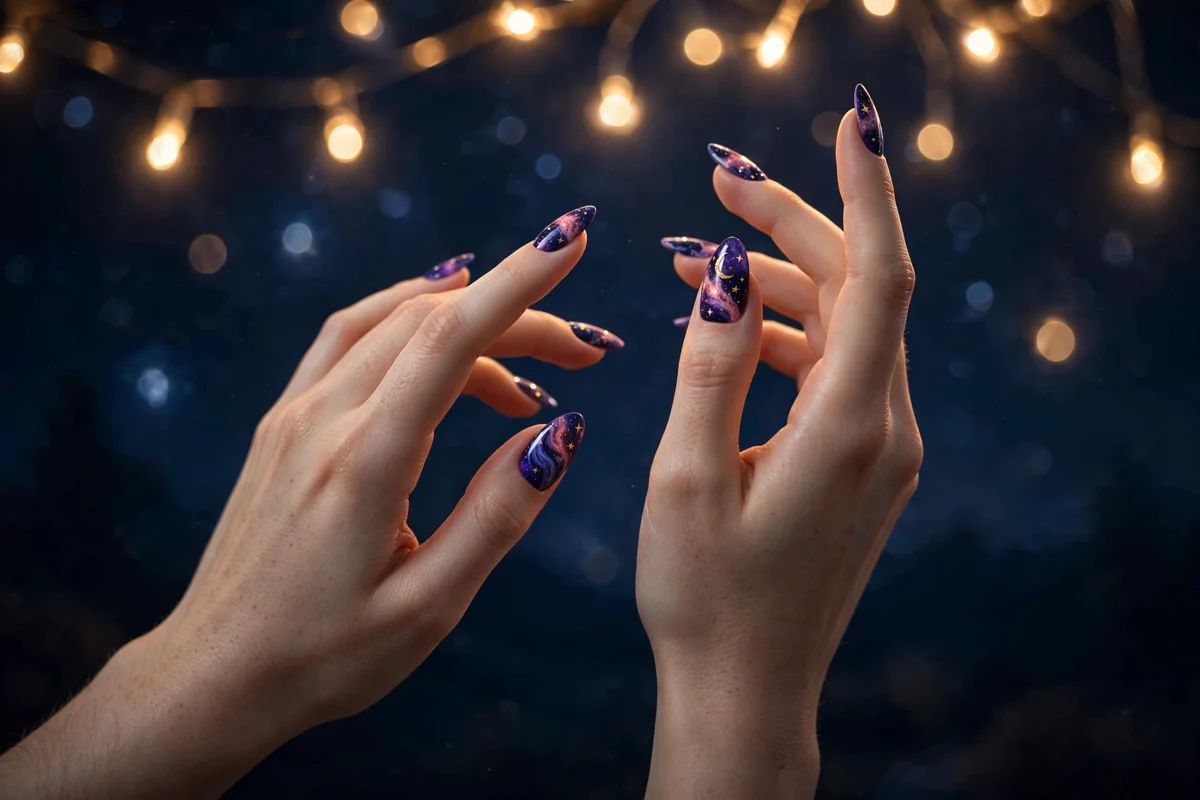
Celestial nails — stars, moons, galaxies, and constellations painted across your fingertips — have become one of the most searched nail aesthetics for good reason. Unlike a single trendy color, celestial nail art spans a whole visual language: quiet gold moons for minimalists, full nebula galaxies for maximalists, and everything in between. Nail techs I follow have been posting cosmic sets nonstop because the look works on every nail length and flatters every skin tone.
This guide covers 20 celestial nail designs organized by the cosmic subject they star in — starry nights, moon phases, galaxies, and constellations — so you can find your exact vibe. It also includes genuine how-to techniques for painting stars, moons, and galaxy backgrounds at home, plus a comparison of the methods so you can pick the one that matches your skill level.
By MyNailsDesigns • Published October 10, 2026
Starry Nights: Gold Stars on Dark Skies
Star-based designs are the easiest entry point into celestial nails. They need the fewest tools, suit short nails, and the contrast of tiny metallic stars on a dark base reads expensive with almost no effort.
1. Midnight Sapphire Starfield
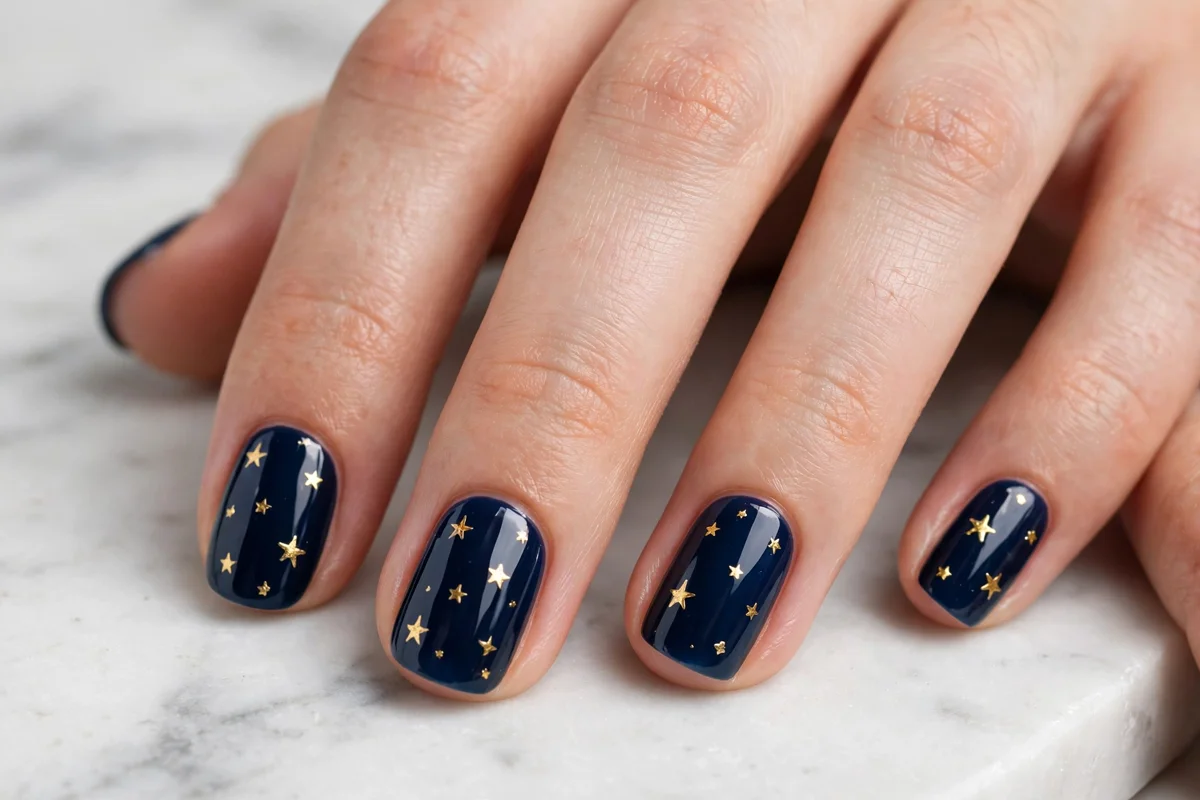
Deep navy creme with scattered hand-painted gold five-pointed stars. The gold-on-navy pairing is the classic celestial combination — warm metal against a cool night-sky base — and it suits both short squoval and long almond nails. This is the design to try first: paint two coats of navy, let them dry fully, then dot gold stars with a dotting tool or fine brush.
2. Negative-Space Twinkle Stars
Sheer nude polish with a few tiny gold star decals scattered near the cuticle. The barely-there base keeps this fully office-appropriate, while the stars give it personality. Because the base is sheer, regrowth barely shows, so this is one of the longest-wearing celestial looks in this guide. A forgiving minimalist route into the trend.

3. Gold Starburst Foil
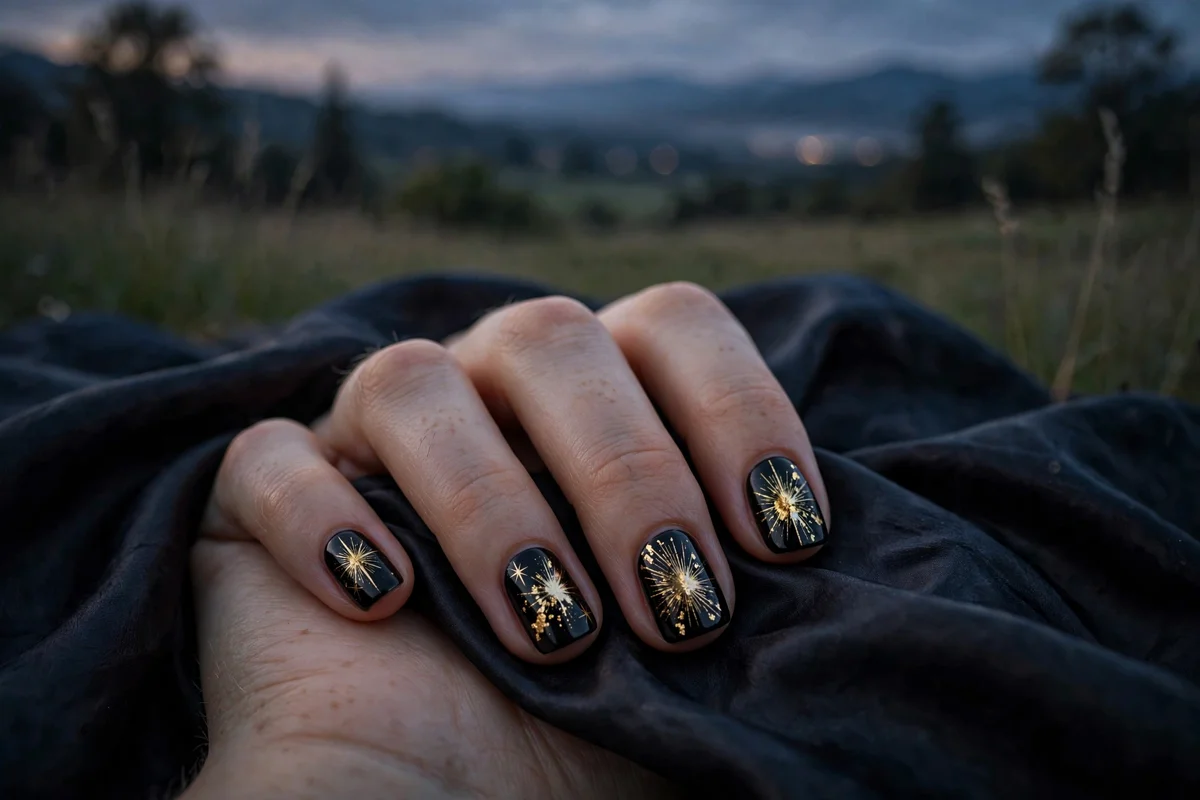
Glossy black nails with gold foil starbursts radiating from one corner of each nail. Foil does the heavy lifting here — torn pieces of transfer foil pressed onto a tacky layer create those explosive rays without any drawing skill. Keep nails short and square so the bold contrast stays polished rather than heavy. See our black nail designs for more dark-base ideas.
4. Starry French Tips
A French manicure reworked for the cosmos: nude base, midnight-blue tips, each tip dotted with tiny white stars. Painting the stars only on the tip keeps the freehand work minimal — three or four dots per nail is plenty. White stars on navy tips photograph beautifully, which is why this design does so well at weddings and events.

5. Micro-Glitter Milky Way Fade
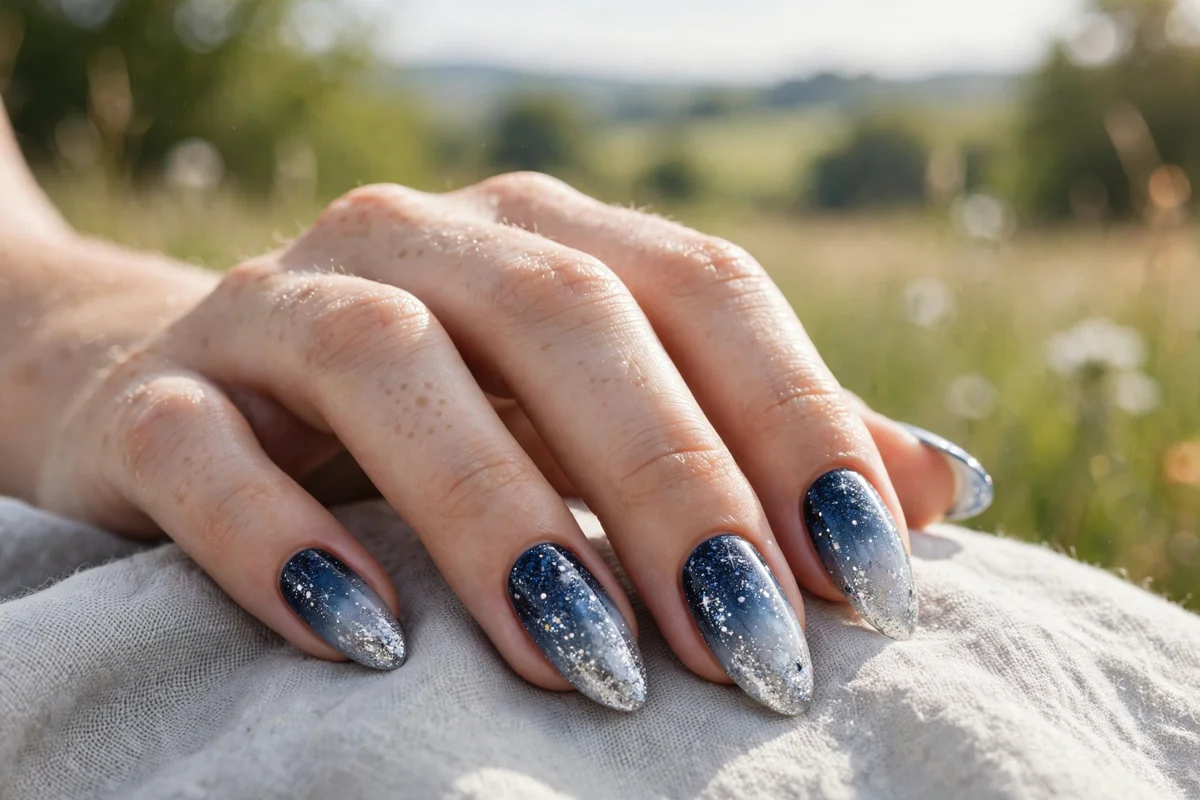
A gradient of silver and midnight-blue micro-glitter that fades from dense sparkle at the cuticle to a sheer shimmer at the tip. The fine particle size is what makes this look like the Milky Way instead of craft glitter — coarse glitter reads cheap, micro-glitter reads like stars. Apply with a sponge for the smoothest fade, and pair with glitter techniques you already know.
Moon Phases: The Prettiest Celestial Motif
Moon art has a built-in advantage: a crescent is one of the easiest shapes to paint by hand. A curved stroke with a liner brush is all it takes, which makes moon designs the sweet spot between impressive and genuinely DIY-friendly.
6. Gold Crescent Moons on Nude
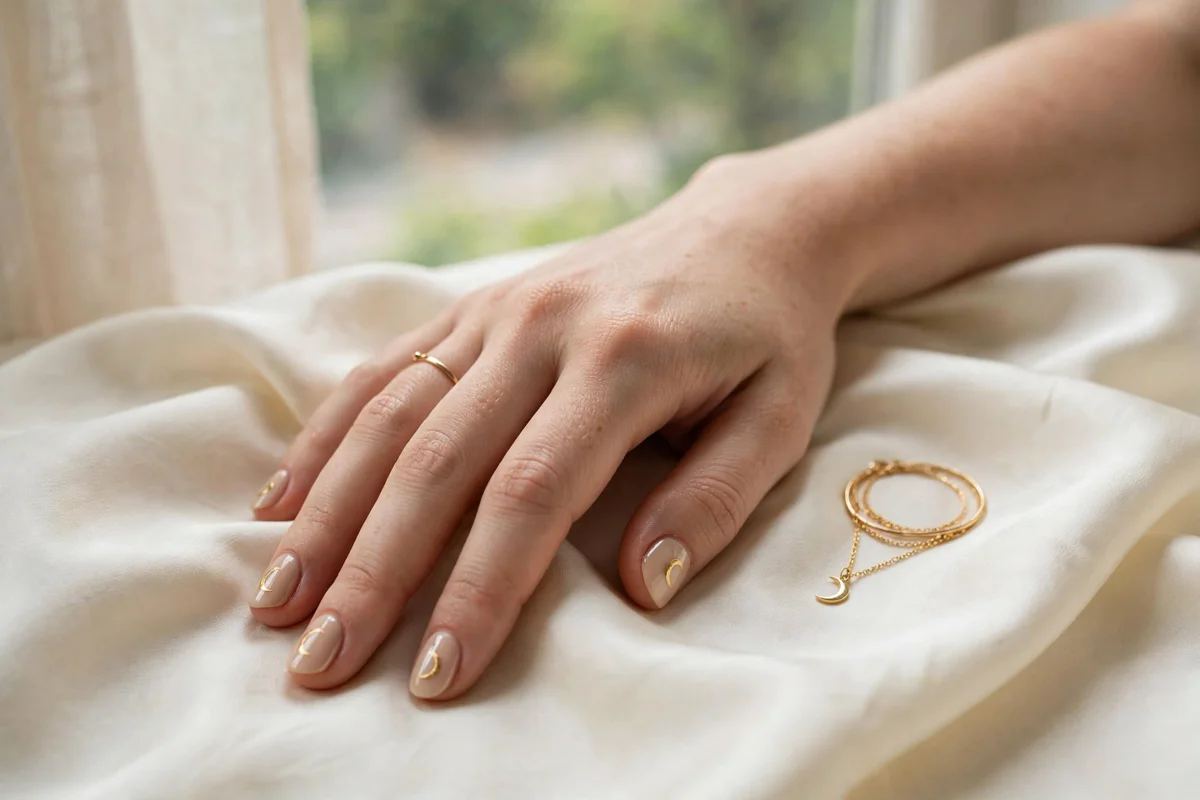
Glossy nude nails, each with a single small gold crescent moon near the tip. One motif repeated cleanly across all ten nails looks intentional and elegant. This suits short natural nails best — the small canvas keeps the crescent proportional — and pairs naturally with delicate gold jewelry. Explore more gold nail designs if metallic accents are your thing.
7. Moon Phase Sequence
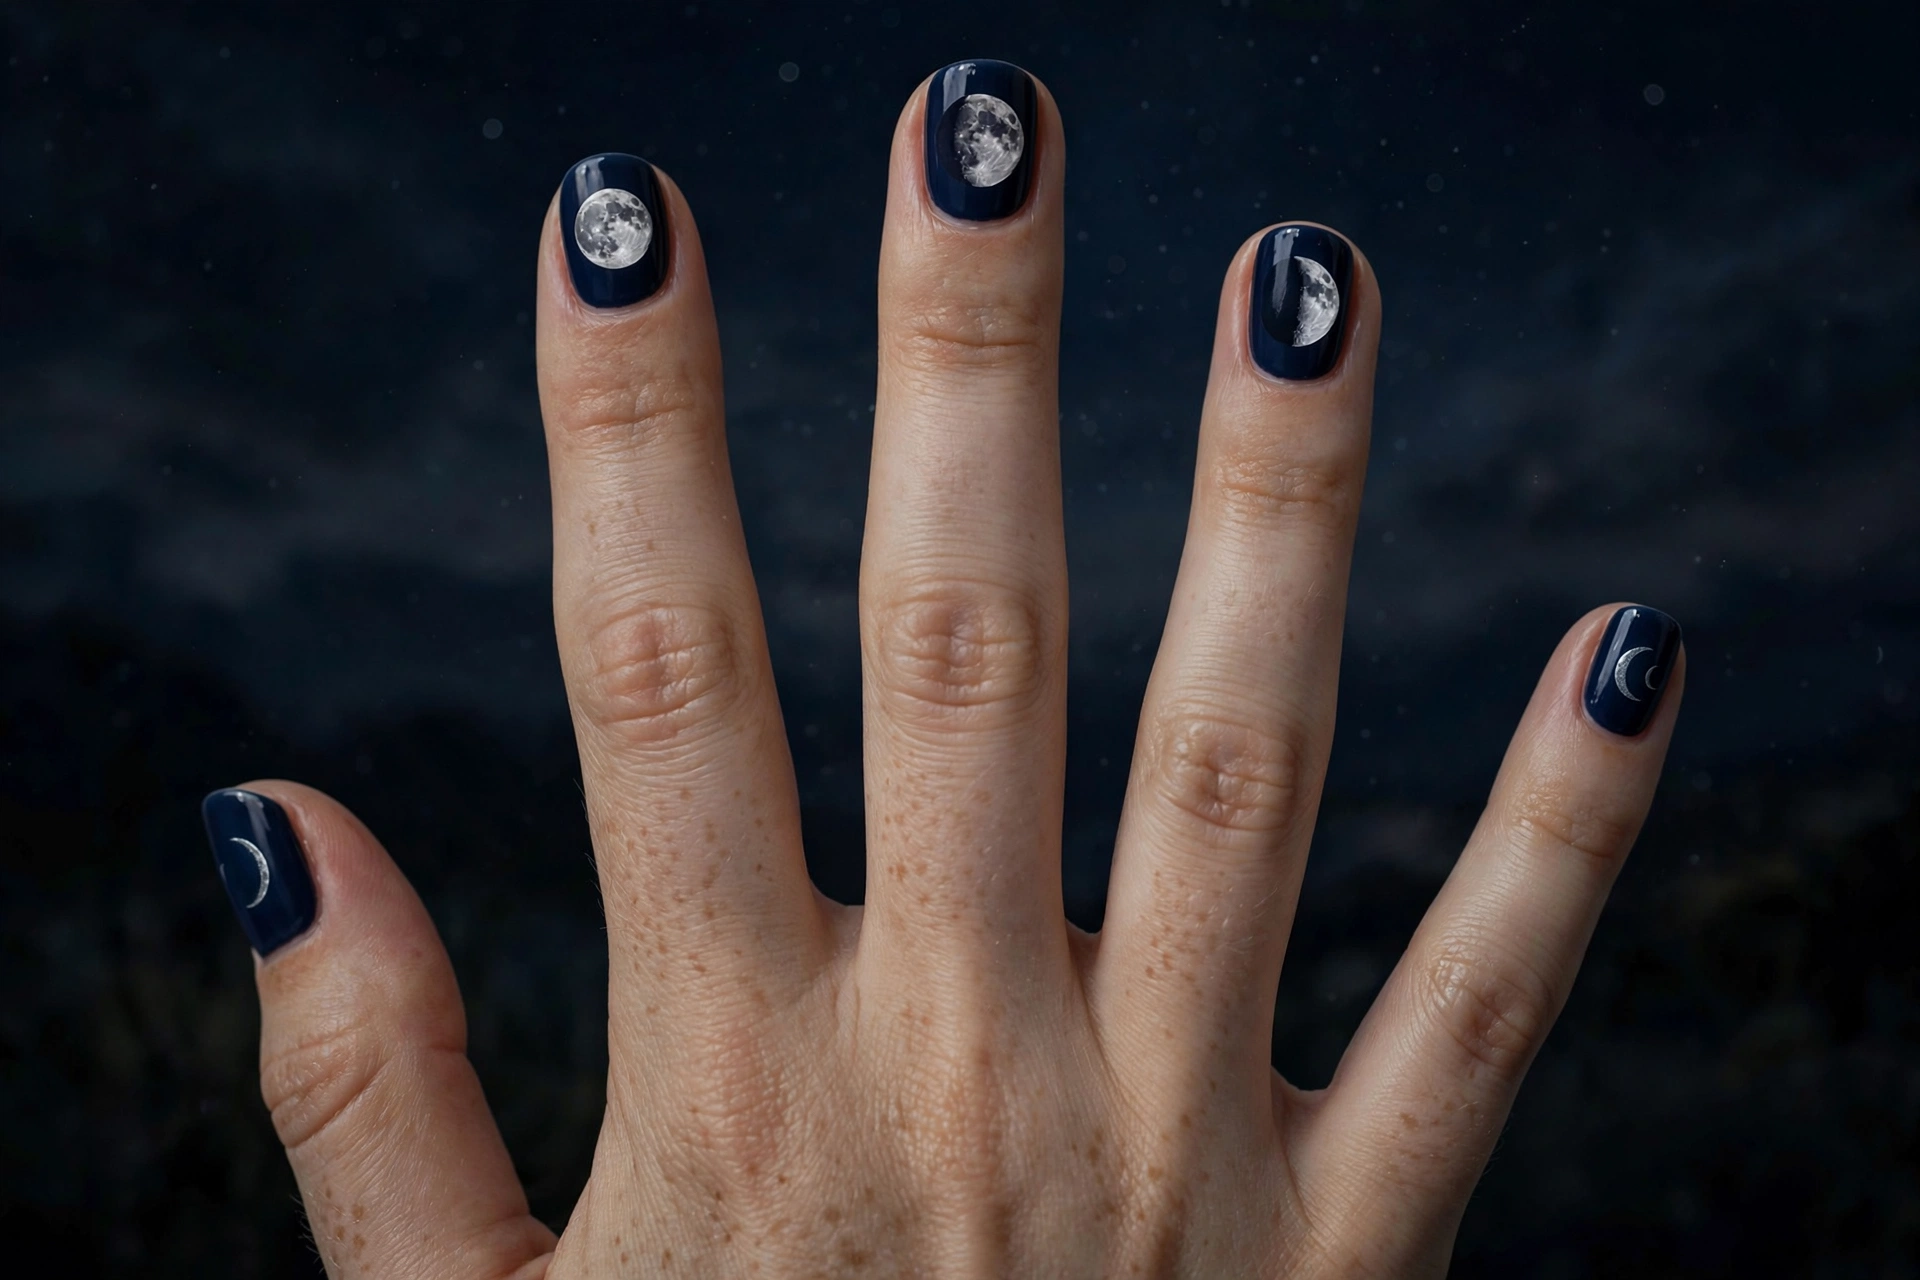
Five almond nails showing the lunar cycle in order — crescent, half, gibbous, full — painted in silver on deep navy. Let each nail be one phase and the set tells a story across the hand. Paint the phases with the same silver polish and the same brush size so the sequence reads as one design rather than five random moons.
8. Reverse French Crescent
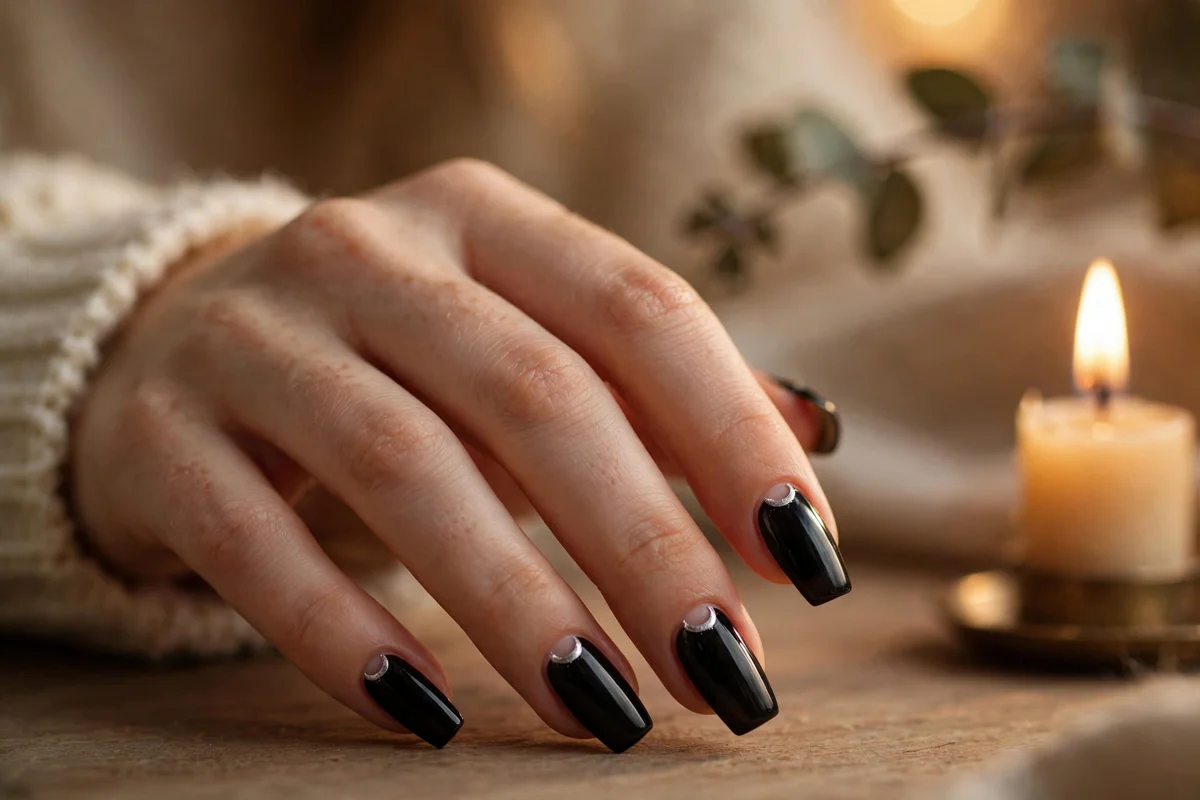
Deep black nails with a delicate silver crescent painted at the cuticle, like a reverse French manicure redrawn as a moon. The crescent follows the natural curve of the cuticle, so it flatters the nail shape instead of fighting it. A thin liner brush and a steady pinky-anchored hand are the only tools this needs.
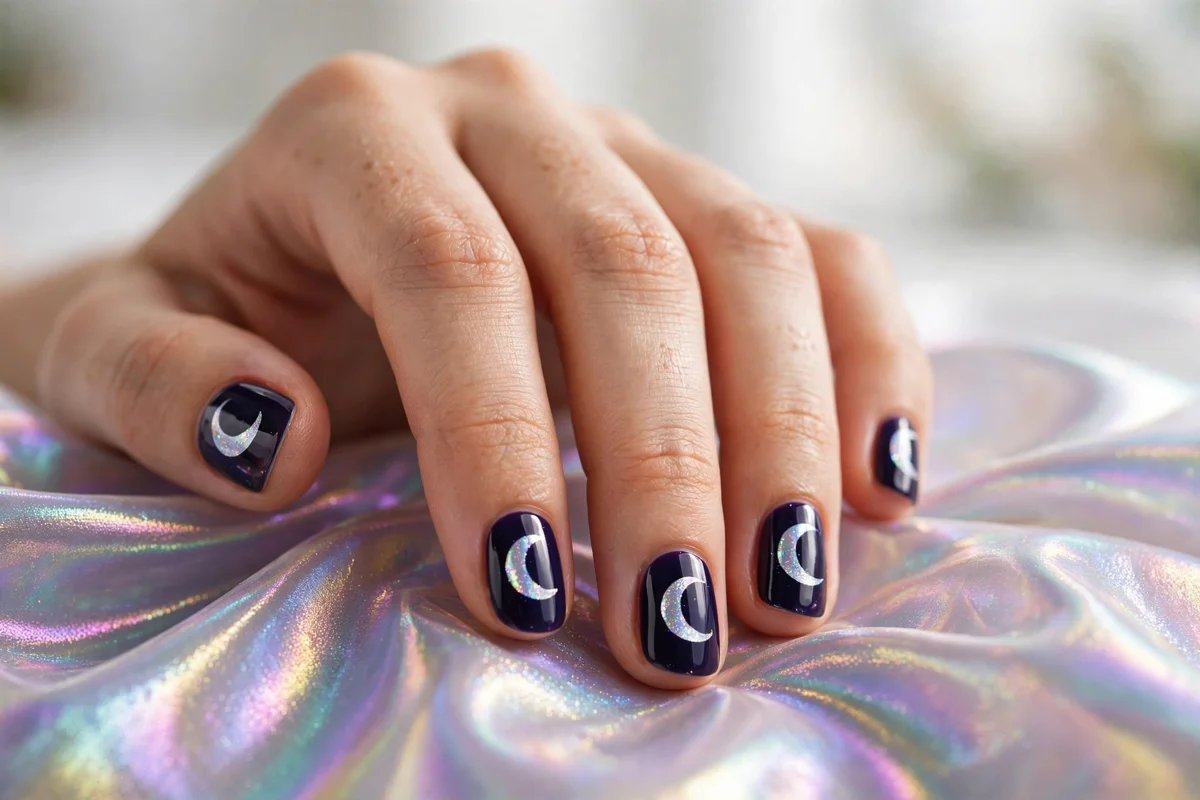
9. Holographic Silver Moons
Midnight-purple nails with shimmering holographic chrome crescent moons. Chrome powder burnished over a cured gel layer gives the moons that mirror finish regular polish cannot match. This is the most high-impact moon design here — it catches light from across the room — so it suits evenings and events more than everyday office wear.
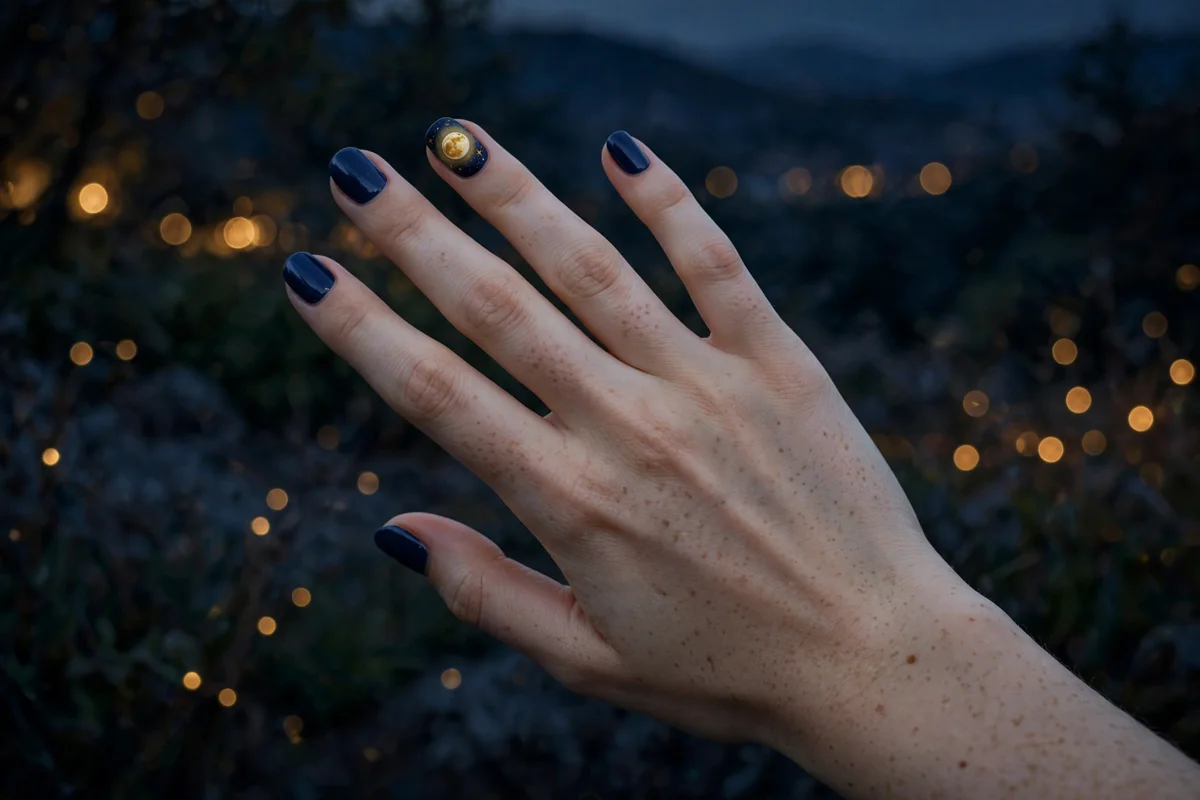
10. Full Moon Halo
Deep navy nails with one accent nail carrying a large glowing full moon wrapped in a soft golden halo. Keeping the moon to a single accent nail is the smart version of this design — one big moon reads dramatic, ten big moons reads busy. Paint the halo with a dry brush, feathering gold outward so it fades into the navy.
Galaxy & Cosmos: Nebula Backgrounds
Galaxy nails are the showpiece of celestial nail art — swirled nebula color that makes each nail a tiny cosmos. The signature method is the makeup-sponge technique, and it genuinely rewards practice: the first attempt looks cloudy, the third looks like deep space.
11. Classic Sponge Galaxy
The original galaxy manicure: purple, cosmic blue, and rose pink sponged over a black base, finished with white star dots. The trick is layering — sponge the darkest color first, then dab lighter nebula colors on top, and always work while the polish is wet so the colors melt together. This is the technique explained step by step in the how-to section below. For more cosmic color inspiration, see our purple nail designs.
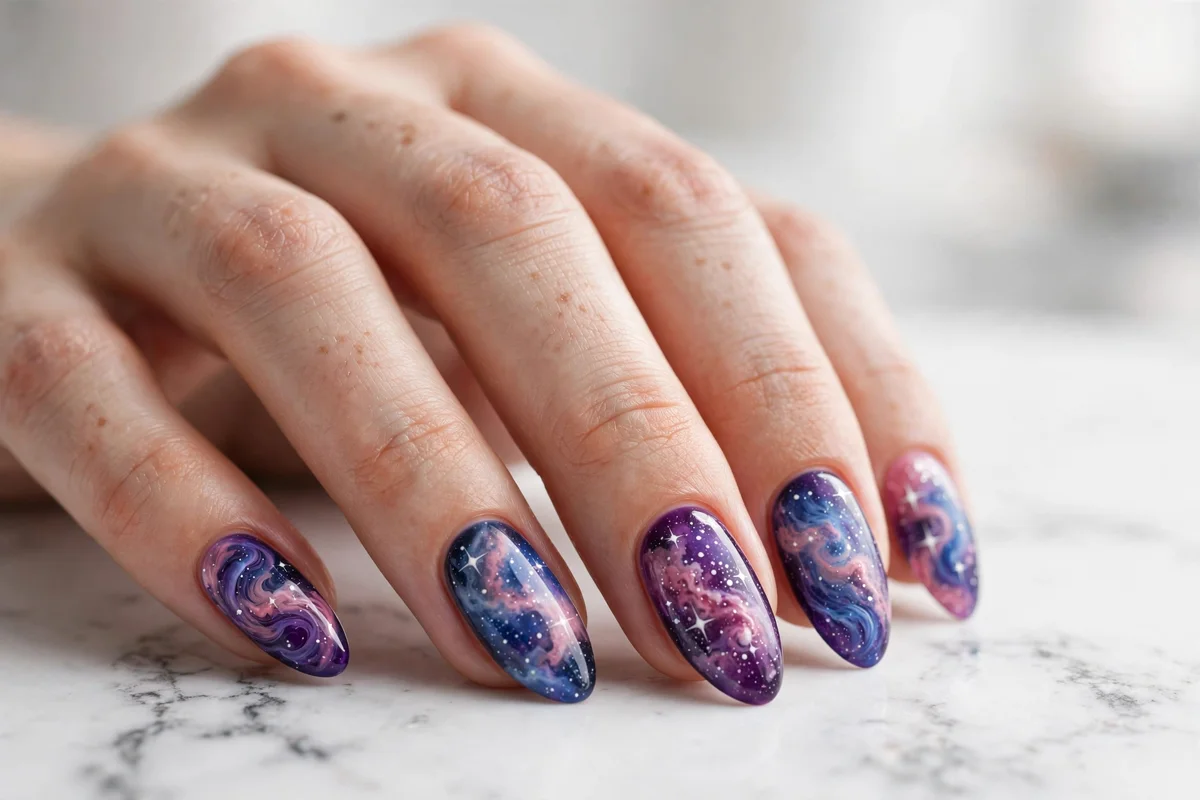
12. Aurora Galaxy
Ribbons of emerald green, teal, and violet swirled like the northern lights over a dark base. The aurora version skips the pink and blue nebula clouds entirely — green is the lead color, which makes this the most distinctive galaxy in the set. It needs medium to long nails; the ribbon effect gets cramped on very short ones.
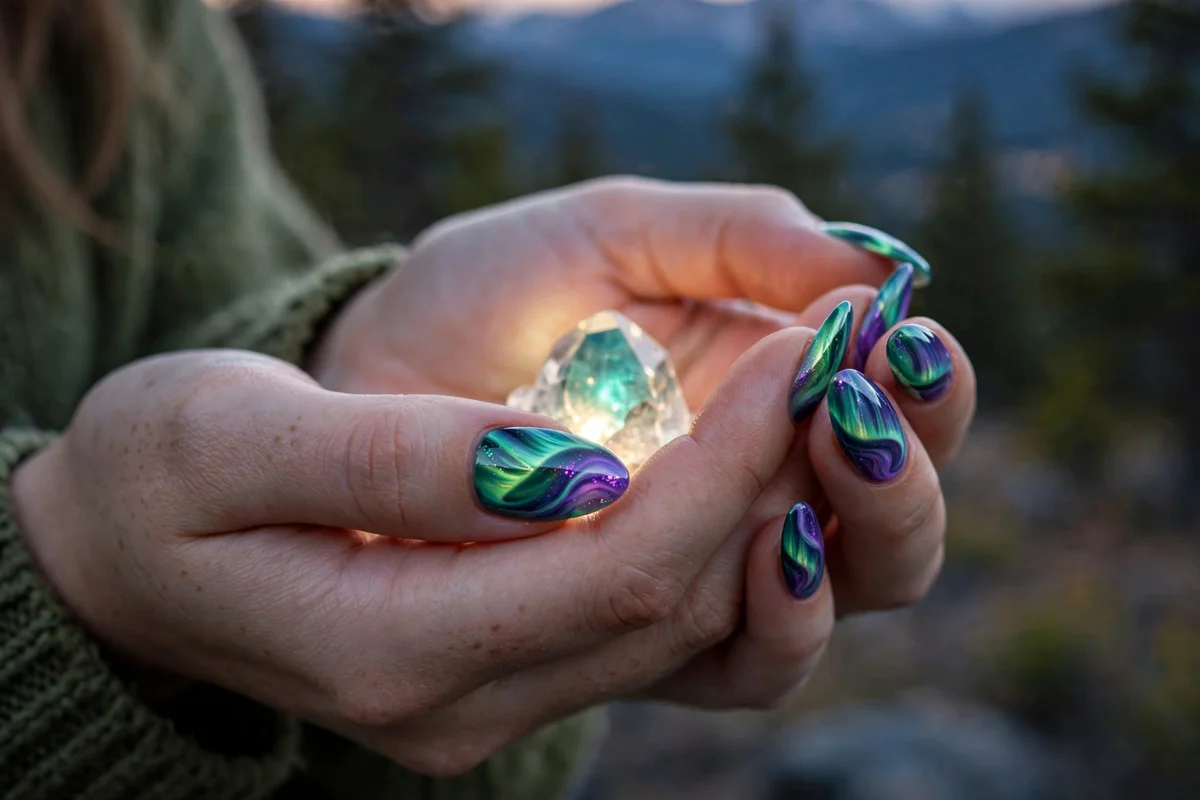
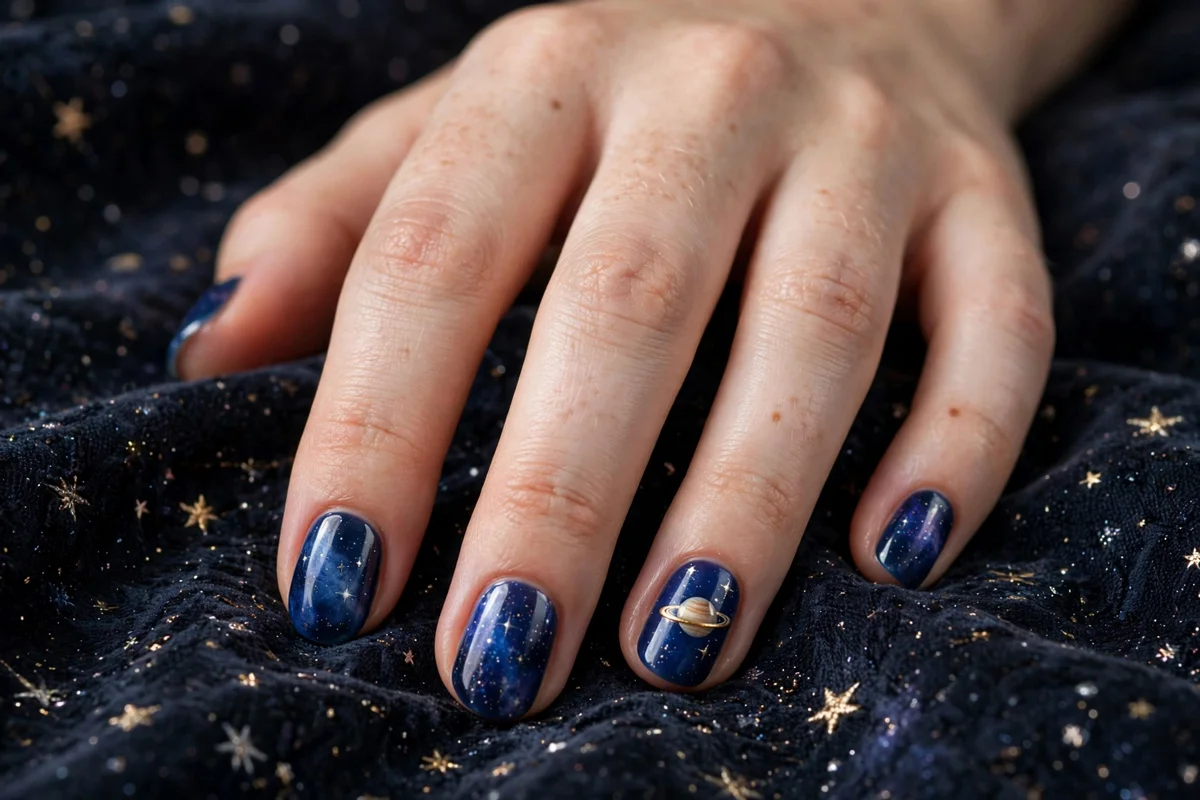
13. Planet Ring Accent
Deep blue galaxy nails with one accent nail featuring a small Saturn-like planet wrapped in a thin gold ring. The planet is easier to paint than it looks: a small gold circle, a darker crescent of shadow on one side, and a thin ring line drawn across. One planet per hand is enough — it is the jewelry of the design, not the background.
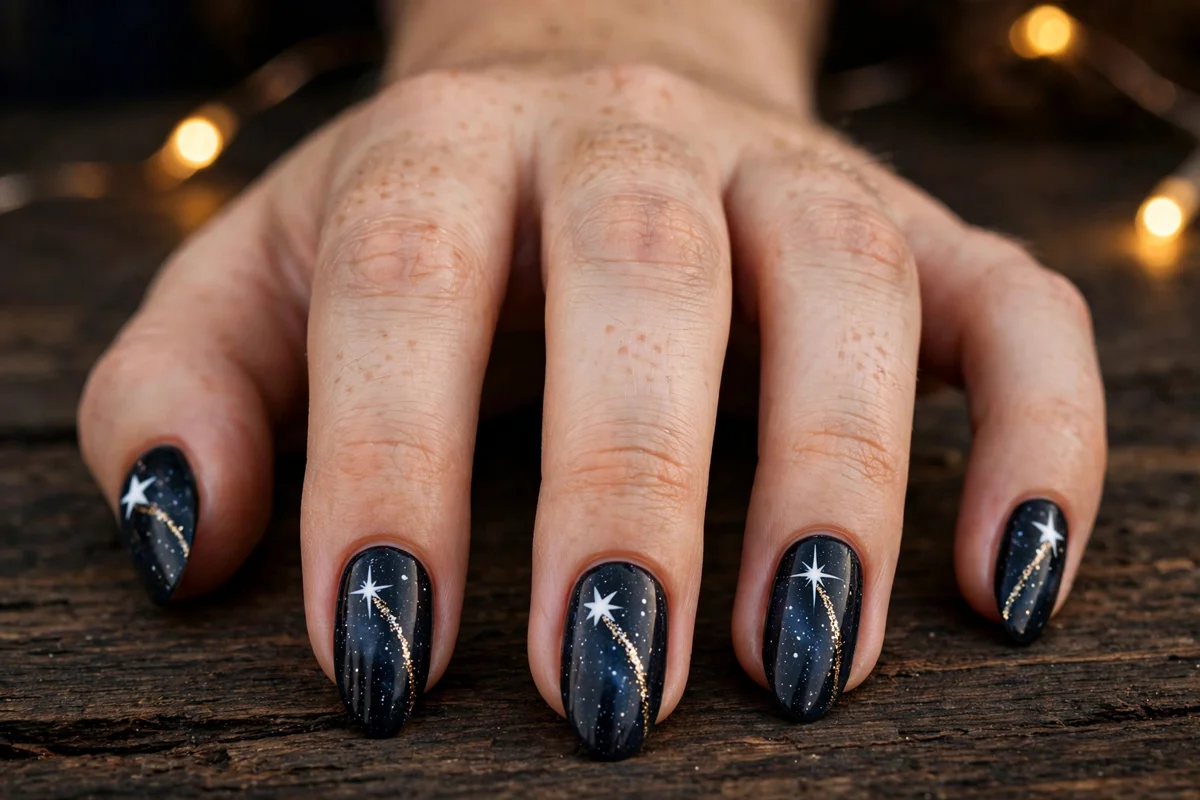
14. Shooting Star Trail
Dark galaxy nails streaked with bright white shooting stars and fine gold trails painted across the nail surface. Draw the trail first as a thin curved line, then place the star head at its front — the streak should taper from the star, not the other way around. This design photographs best in warm light, where the gold trails pick up a glow.
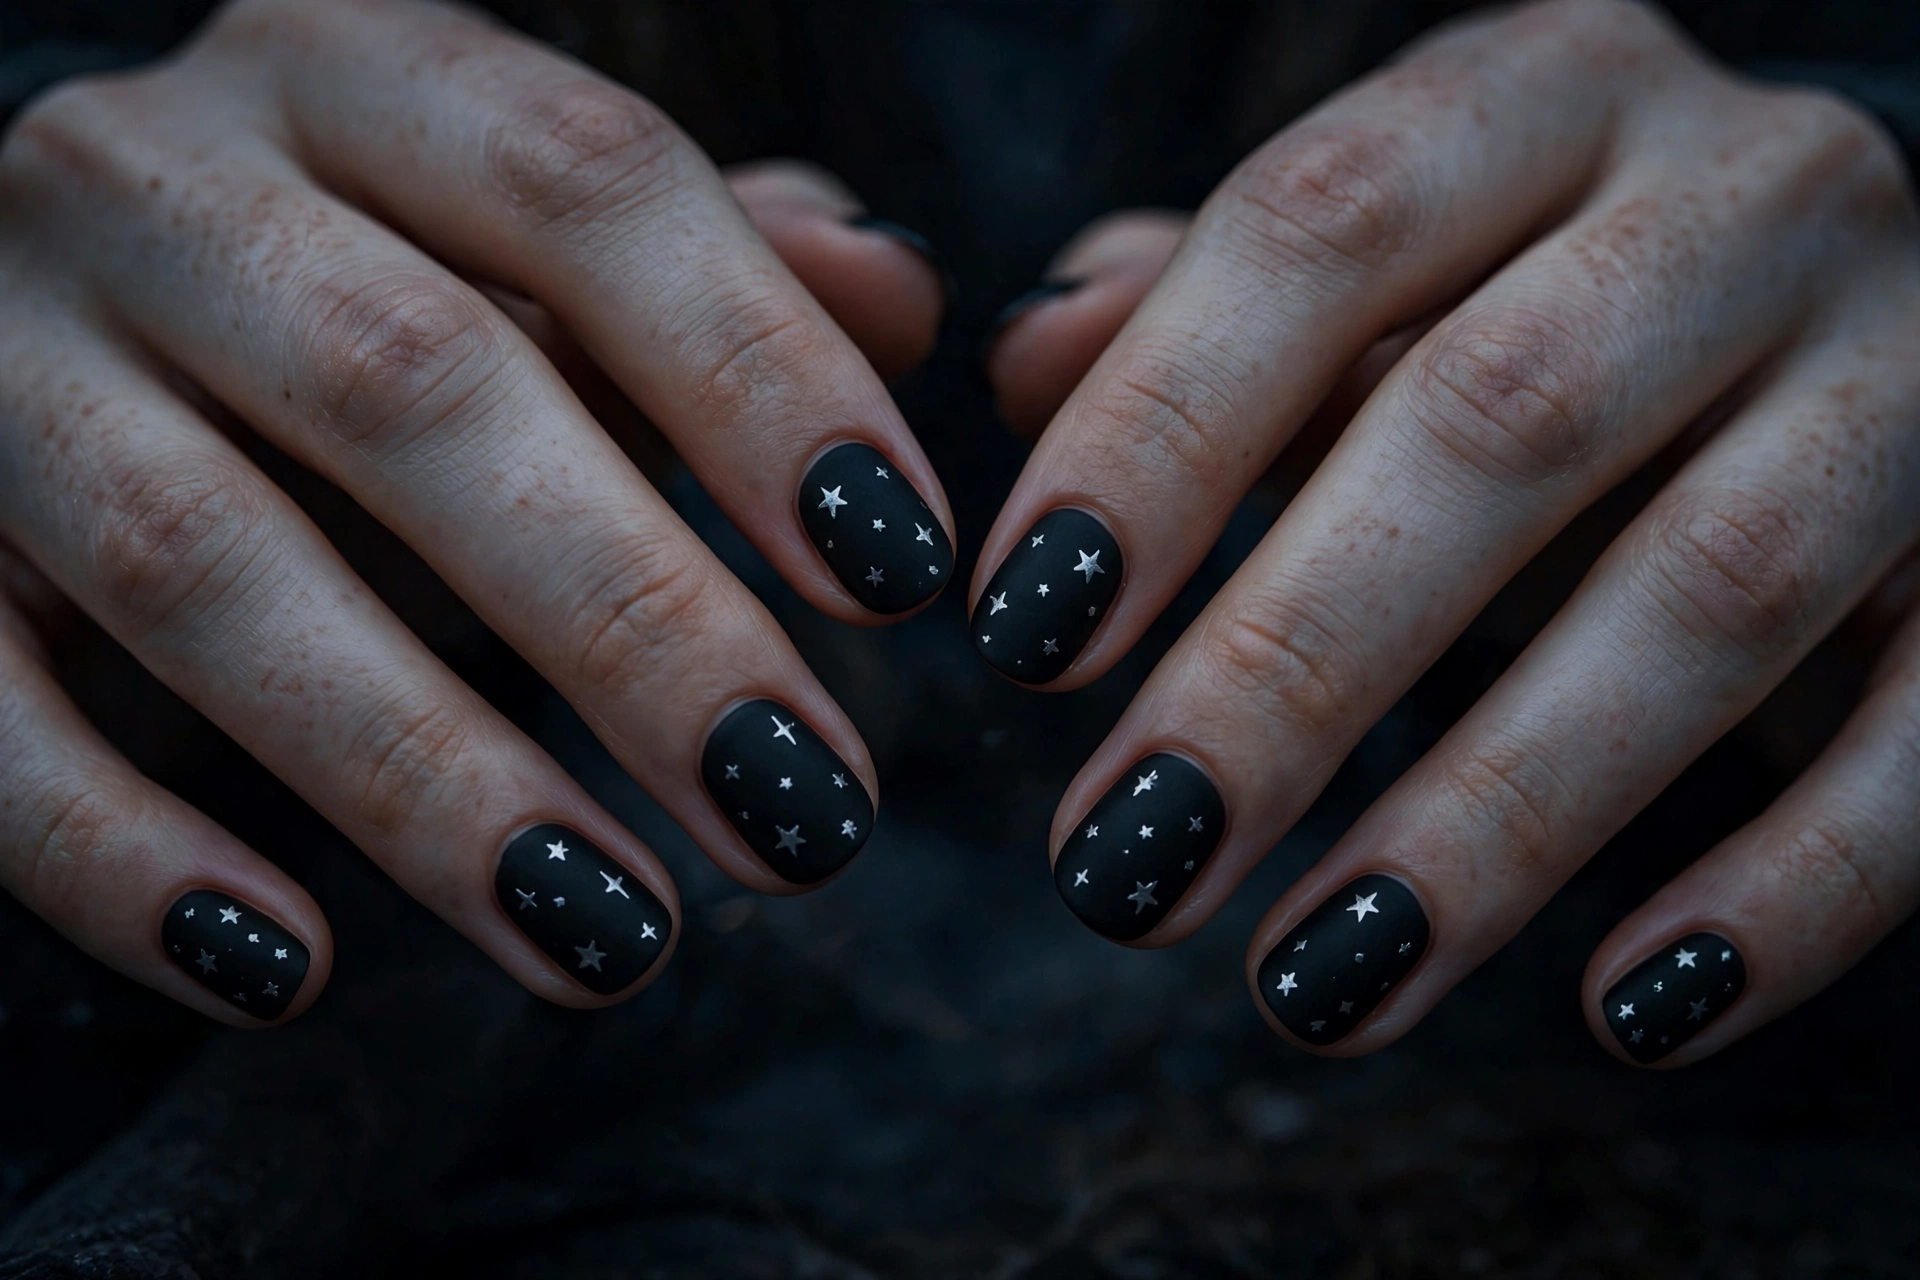
15. Matte Black Cosmos
Matte black nails dotted with tiny silver stars — the night sky stripped to its essentials. A matte top coat over black is what makes this work; glossy black with silver stars looks like a party, matte black with silver stars looks like deep space. This is the lowest-maintenance cosmic design here and it suits short square nails perfectly.
Constellations & Celestial Symbols: Fine-Line Cosmic Art
Constellation and symbol designs trade bold color for fine detail — gold lines and dots on dark or neutral bases. They look intricate but the technique is mostly connect-the-dots, which puts them within reach of patient beginners.
16. Zodiac Constellation Map
Deep navy nails mapped with gold dot-and-line constellations, like a star chart shrunk to fingertip scale. Plan each constellation on paper first — five to seven dots and connecting lines per nail keeps it readable. The star-chart styling pairs beautifully with deep blue nail designs.

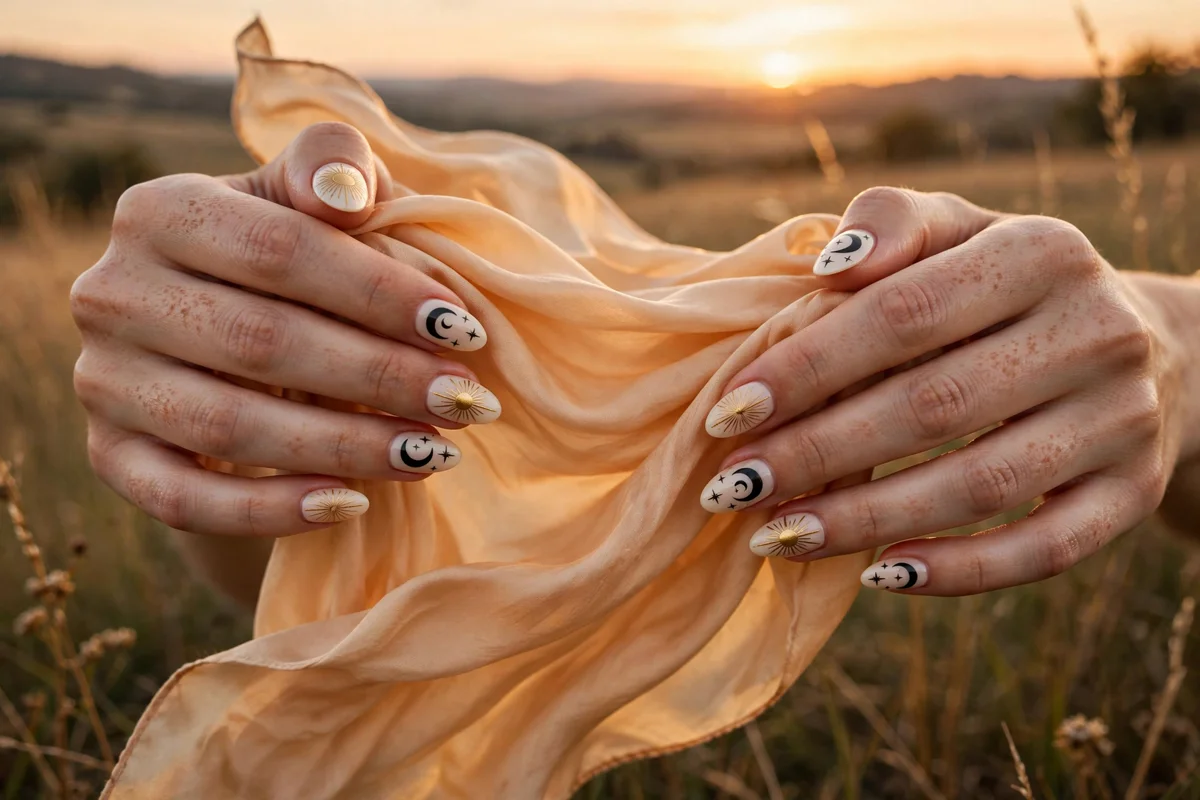
17. Sun & Moon Celestial Pairing
Ivory nails alternating radiant gold suns and black crescent moons with tiny star accents. The light base makes this the most daytime-friendly celestial design in this guide — no dark polish, no glitter, just crisp symbols. The sun-and-moon pairing also gives the set a balanced look that works for both hands without mirroring exactly.
18. Celestial Symbol Mix
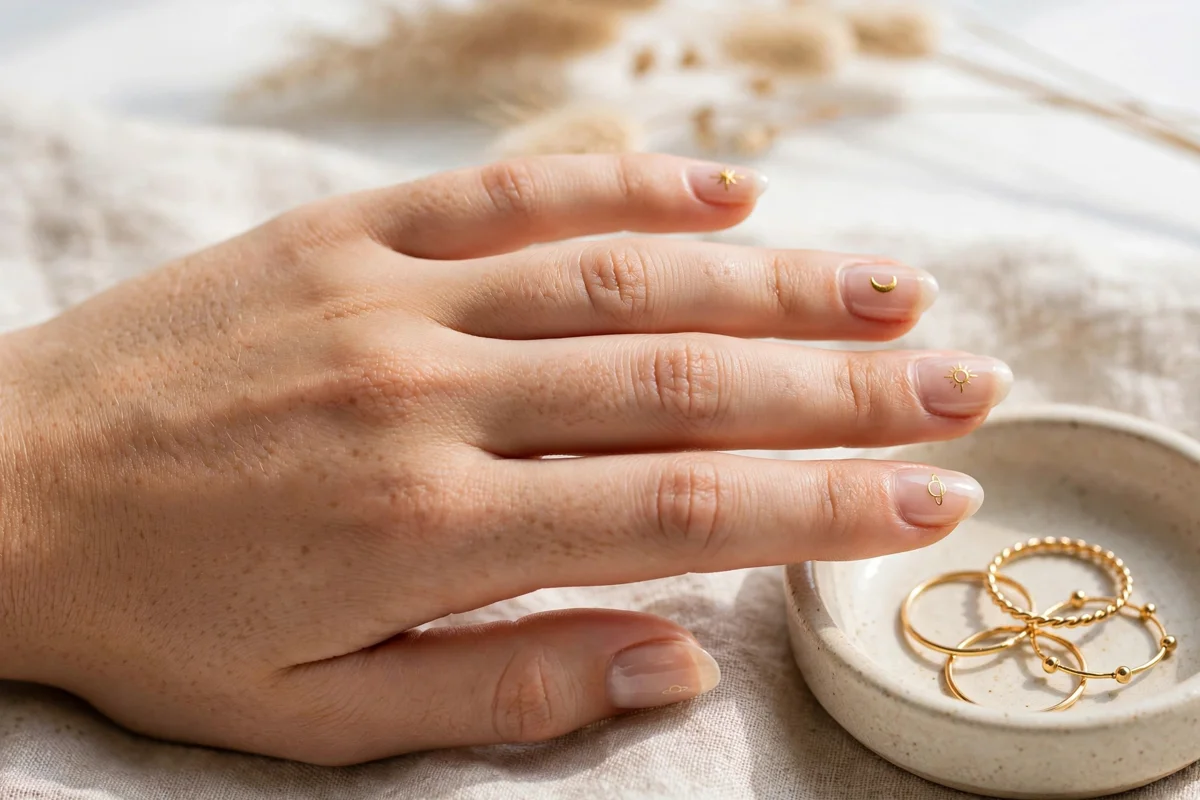
Sheer nude nails, each carrying a different tiny gold symbol — a star, a crescent moon, a sun, a small planet. Assigning one symbol per nail keeps each design simple while the set feels rich. Because the base is nearly bare, this grows out gracefully and suits anyone who wants celestial nail art without committing to dark polish.
19. Personal Constellation Accent
Deep purple nails with the ring finger carrying your own zodiac constellation in gold dots and lines. Personalization is the whole point — look up your sign’s star pattern and recreate it with a dotting tool. One constellation accent keeps the set wearable; a full set of constellations can look busy at a glance.

20. Golden Charms on Ivory
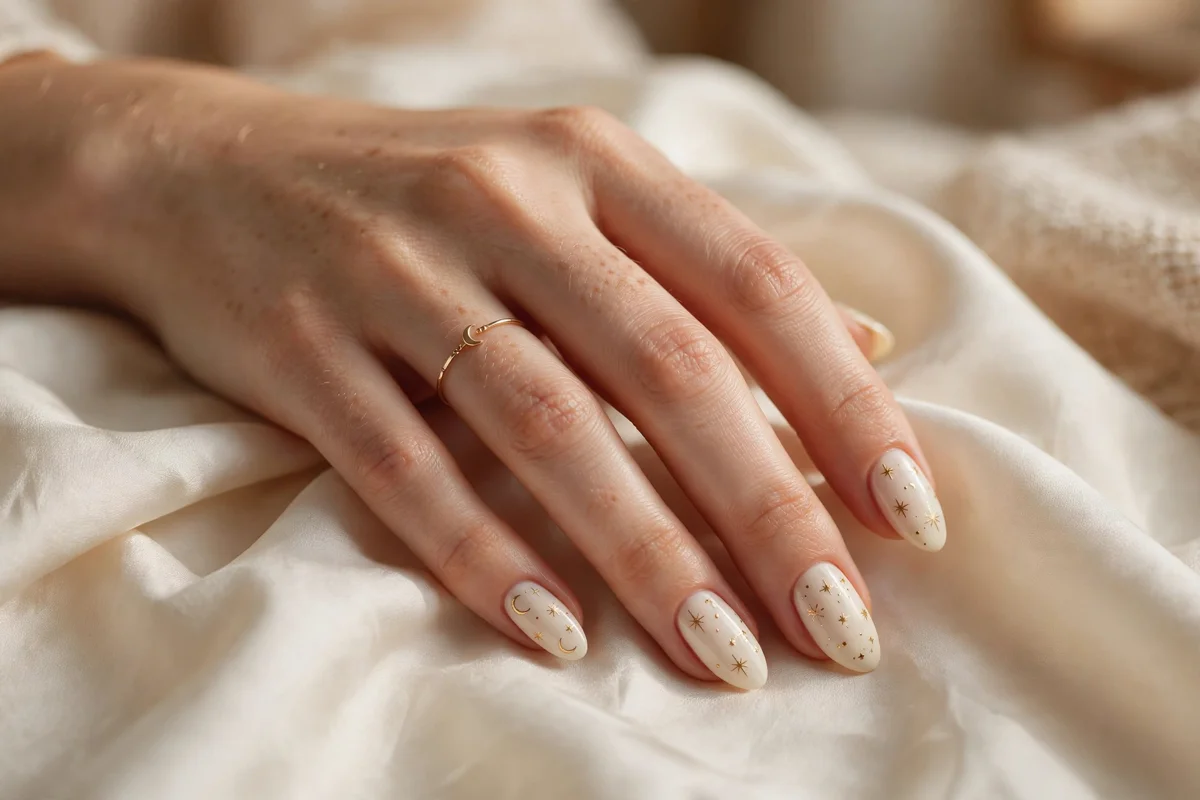
Ivory-cream nails decorated with delicate gold celestial charms — tiny painted stars and crescent moons with fine outline detail. The charm style works because the gold outlines read as jewelry against the pale base. Keep the nail shape almond or oval; the soft shape matches the delicate art better than sharp square tips.
Which Celestial Design for Which Occasion
The 20 designs above span boardroom-safe to full costume party, so match the motif to the moment:
- Office and everyday: Negative-Space Twinkle Stars (2), Gold Crescent Moons on Nude (6), and the Celestial Symbol Mix (18). Sheer bases, tiny motifs, discreet regrowth.
- Weddings and formal events: Starry French Tips (4) for a classic-with-a-twist set, or Golden Charms on Ivory (20) and the Sun & Moon Pairing (17) for light, photographic looks that will not fight a ring or a bouquet.
- Evenings and parties: Holographic Silver Moons (9), the Classic Sponge Galaxy (11), and the Aurora Galaxy (12) — the high-shine, high-contrast sets that catch light across a room.
- Halloween and witchy season: Matte Black Cosmos (15), the Reverse French Crescent (8), and the Moon Phase Sequence (7) lean darkest and most mystical.
- Your birthday: the Zodiac Constellation Map (16) or the Personal Constellation Accent (19) in your own sign — the two designs in this guide that are literally written in your stars.
How to Paint Celestial Nail Art at Home
Celestial designs look advanced, but the core techniques are beginner-friendly once you know the mechanics. Here is the honest method behind the galaxy and symbol looks above.
The galaxy sponge technique, step by step
Apply two coats of black or deep navy and let them dry completely — the dark base is non-negotiable, because nebula colors only glow against darkness. Then, on a cosmetic sponge, paint horizontal stripes of your nebula colors (purple, blue, pink, a touch of white), and dab the sponge straight down onto the nail two or three times. Do not drag it. Re-sponge a second layer while wet so the colors melt into clouds instead of sitting as stripes. Finish with white dots for stars: a large dotting tool for a few bright stars, a small one for scattered pinpricks. Seal with top coat once everything is dry to the touch.
Painting stars without a steady hand
Small stars are the easiest celestial detail because imperfect stars still read as stars. Load a fine liner brush with white or metallic polish, touch it to the nail, and pull a short line — repeat from the same center point at different angles to form a five-pointed star, or simply cross two lines for a four-pointed sparkle. If freehand feels risky, nail-art decals and stamping plates give perfectly crisp stars and moons in minutes; there is no shame in the shortcut, and most salon techs use decals for tiny motifs too.
Painting a clean crescent moon
Paint a full circle in metallic polish, let it dry for a minute, then paint a second circle of your base color overlapping the first — the uncovered sliver becomes a perfect crescent. The overlap method beats trying to draw a crescent freehand, and it works for any moon size. Keep the moon off-center on the nail; centered moons look like logos, off-center moons look like art.
Common mistakes to avoid
The most frequent error is layering sponge colors onto wet base polish, which drags the black up and muddies the nebula — let the base dry fully first. The second is using too many nebula colors; three plus white is the sweet spot, five turns to brown-grey mush. And metallic details (gold stars, chrome moons) need a top coat with a light touch: one smooth pass, not three scrubbing strokes, or the metallic sheen dulls. If your galaxy looks cloudy rather than cosmic, you almost certainly sponged too many layers.
The magnetic shortcut: cat-eye celestial nails
The finish behind most of the celestial sets going viral right now is not paint at all — it is magnetic (cat-eye) gel polish. The polish contains fine metallic particles, and holding a small magnet over the wet, uncured nail pulls those particles into a band of light that shifts as your hand moves. On a deep navy, purple, or black magnetic shade, that moving band reads as moonlight or a galaxy core, which is why cat-eye has become the default base for moon and star art in 2026.
To use it as a celestial base: apply your dark magnetic gel, and before curing, hold the magnet above the nail for 8 to 10 seconds. Gather the particles into the center and the nail glows like a full moon behind the art you add on top; drag them toward one edge and you get a vignette that makes a painted crescent (using the overlap method above) look lit from within. Cure immediately, nail by nail, so the pattern cannot relax back into plain shimmer. Then add stars, moons, or constellation dots exactly as described in the sections above — the magnetic layer replaces the flat base color, nothing else changes. Two honest limits: cat-eye needs gel and a lamp (regular magnetic polish exists, but the effect is weaker and wears in days), and the glow only shows on darker shades, so it suits the night-sky designs in this guide rather than the ivory sets. Ideas 9, 11, and 12 all translate directly onto a magnetic base.
Choosing Your Celestial Technique
Different celestial methods suit different skill levels, budgets, and patience. This comparison shows where each one wins.
| Method | Skill level | Time per hand | Best for | Wear |
|---|---|---|---|---|
| Hand-painted details | Beginner to intermediate | 30–45 min | Stars, moons, constellations with personal control | Lasts as long as your base manicure, typically 5–7 days |
| Sponge galaxy | Beginner | 20–30 min plus drying | Nebula backgrounds; forgiving since clouds hide errors | 5–7 days; glitter versions chip a little faster at tips |
| Nail decals and stickers | Total beginner | 10–15 min | Crisp tiny stars and moons with zero drawing | 3–5 days unless sealed well with top coat |
| Chrome powder and foil | Intermediate | 40–60 min | Mirror-finish moons and starbursts with real shine | 7–10 days with gel; foil lifts sooner under regular polish |
| Press-on celestial sets | No skill needed | 10 min to apply | Instant intricate art for events or photos | 5–14 days depending on glue versus adhesive tabs |
| Cat-eye (magnetic) gel | Beginner to intermediate | 40–50 min including curing | A glowing moonlight or galaxy-core base under painted stars and moons | 2–3 weeks with gel; the magnetic pattern does not fade, the manicure grows out first |
If you are deciding between methods, start with the sponge galaxy plus decal stars — it delivers the biggest visual payoff for the least skill, and you can graduate to freehand moons once your brush control improves. Our nail shapes guide can help you pick the shape that flatters each design.
What Celestial Nails Cost: Salon vs. DIY
Celestial art is priced like other hand-painted nail art: you pay for the base manicure plus the time the art takes. At a salon, expect a gel manicure with simple celestial details (dotted stars, one crescent accent) to run about $55–$80 in total. Full sponge galaxies, chrome moons, or constellation sets are detailed art, and most salons add $15–$30 on top of the manicure for the extra chair time; magnetic cat-eye finishes are usually a $10–$25 specialty upcharge because of the per-nail magnet work. Press-on celestial sets cost $15–$40 depending on whether they are hand-painted.
At home, the math flips after two or three manicures. A dotting tool set, a fine liner brush, and a cosmetic sponge cost a few dollars and last for years, and the galaxy method uses polishes most nail drawers already hold. The one real investment is gel: a lamp and a magnetic gel shade ($40–$70 for a starter setup) only make sense if you will reuse them — otherwise decals over regular polish deliver most of the look for the price of a single salon visit. Bringing a photo of the exact design from this guide is the simplest way to get an accurate quote before you sit down.
Celestial Nails: Frequently Asked Questions
What polish colors work best for celestial nails?
Dark, saturated bases — black, midnight navy, deep purple — give stars and metallic details the contrast they need to pop. For the nebula itself, purple, cosmic blue, and pink or rose are the classic trio, with white or silver for star dots. If you prefer light bases, ivory and sheer nude work beautifully with gold celestial symbols, as ideas 17 through 20 show.
How do I paint stars on nails without a steady hand?
Use the cross method: two short crossed lines make a four-pointed sparkle star, and it takes no precision at all. For five-pointed stars, pull five short strokes from one center point. And if freehand still feels shaky, star decals and stamping plates give flawless results — most of the crisp star designs you see online use them.
Can I do galaxy nails on short nails?
Yes. Galaxy and starry designs actually adapt well to short nails because the art does not depend on nail length — the nebula clouds just get smaller. Keep the star dots tiny on short nails so the design does not look crowded, and choose designs 1, 2, 5, and 15, which were all photographed on short to medium lengths.
How long do celestial nail designs last?
About the same as any manicure with the same base: 5 to 7 days with regular polish, 2 to 3 weeks with gel. Metallic and foil details can wear a little faster at the tips, so cap the free edge with top coat and reapply top coat every two to three days to extend the design.
What nail shapes suit celestial designs best?
Almond and oval are the most versatile — their curved tips echo the moon and planet motifs naturally. Square and squoval suit bold graphic designs like starbursts and matte cosmos. Long stiletto or coffin nails give galaxy art the most canvas, but they also make intricate designs look busy, so keep long-nail sets to two or three motifs.
Do metallic star and moon details chip faster than regular polish?
Metallic polishes are slightly more prone to tip wear because their larger pigment particles do not bond as tightly. The fix is simple: let the metallic layer dry fully before top coat, then seal the free edge. Chrome powder and foil under gel last the longest of all the metallic methods.
How do I remove glittery galaxy nails without damaging my nails?
Use the foil method: soak a cotton pad in acetone, place it on the nail, wrap the fingertip in foil, and wait 10 minutes. The glitter lifts off with the pad instead of requiring scraping. Never peel glitter polish off — it takes layers of your nail plate with it. Finish with cuticle oil to rehydrate.
Are celestial press-on nails worth trying?
For events, photos, or testing the trend before committing, yes — press-ons now carry genuinely detailed celestial art, including constellations and galaxy prints that would take an hour to hand-paint. Choose glue for a week or more of wear and adhesive tabs for a weekend. For everyday wear, a salon or DIY gel set lasts longer and looks more natural at the cuticle.
Can I do celestial nails with regular polish, or do I need gel?
Regular polish handles most of this guide: the sponge galaxy, dotted stars, crescent moons, and constellation lines all work in standard formulas, and decals are polish-agnostic. Gel earns its place in three spots — chrome powder moons need a cured gel surface to burnish onto, magnetic cat-eye polish only holds its pattern when cured nail by nail, and foil transfers stick best to a gel tacky layer. Expect 5 to 7 days from a regular-polish set versus 2 to 3 weeks from gel.
What do celestial nail designs symbolize?
The motifs carry the meanings people have always given the night sky. Moon phases stand for cycles, change, and intuition, which is why the phase sequence (design 7) is a favorite for birthdays and new beginnings. Stars read as guidance and hope; constellations are identity, especially zodiac sets (designs 16 and 19) matched to your sign; and the sun-and-moon pairing (design 17) is the classic balance symbol — light and dark in one set. None of this is required to wear them, but it is why celestial sets are so often chosen for milestone moments.
How much do celestial nails cost at a salon?
Typically $55–$80 total for a gel manicure with simple celestial details. Intricate work — full galaxies, chrome moons, mapped constellations — usually adds $15–$30 of art time, and a magnetic cat-eye base adds $10–$25. Hand-painted press-on celestial sets run $15–$40 if you would rather skip the appointment.