18 Swirl Nail Designs, From Retro Waves to Modern Art
Swirl nails are the rare trend that flatters everyone and forgives beginners. A single flowing line can look like high-end nail art, and the technique behind it is simpler than it appears. Below are 18 swirl nail designs organized by swirl era and style, so you can jump straight to the look that matches your taste: 70s retro, modern minimal, marbled fluid, or bold graphic.
Every design below comes with its own photo and honest notes on shape, difficulty, and wearability. Because this is a technique-driven trend, this article also teaches the actual methods: three genuine ways to create swirls at home, the tools nail techs reach for, and the mistakes that ruin most first attempts.
All 18 Designs at a Glance
Short on time? This table sums up the whole guide: how each design is made, how hard it is, and the nail length that flatters it. Full notes and a photo for every design follow below.
| Design | Method | Difficulty | Best length & shape |
|---|---|---|---|
| 1. 70s Sunset Waves | Liner brush | Easy to medium | Long almond |
| 2. Flower-Power Psychedelic Swirls | Liner brush + dotting tool | Medium | Long almond or stiletto |
| 3. Lava Lamp Blob Swirls | Liner brush or wet marble | Easy | Short oval |
| 4. Disco Sunset Gradient Waves | Sponge gradient + liner brush | Medium | Long stiletto |
| 5. Harvest Gold Retro Waves | Liner brush | Easy | Short rounded or square |
| 6. Nude with a Single White Wave | Liner brush | Easy | Any length or shape |
| 7. Tonal Taupe Swirls | Wet marble or liner brush | Easy | Medium squoval |
| 8. French Tip Swirls | Liner brush | Medium | Medium almond |
| 9. Micro Black Line Swirls | Liner brush | Medium | Short almond |
| 10. Blush Wet-Marble Swirls | Wet marble | Medium | Long coffin |
| 11. Blooming Gel Watercolor Swirls | Blooming gel | Easy | Medium oval |
| 12. Water-Marble Swirls | Water-marble dip | Hard | Medium almond |
| 13. Smoky Quartz Swirls | Wet marble | Medium | Long almond |
| 14. Ocean Wave Swirls | Wet marble + liner brush | Medium | Long coffin |
| 15. Neon Contrast Swirls | Liner brush | Easy to medium | Long square |
| 16. Y2K Chrome Swirls | Liner brush + chrome powder | Medium | Medium almond |
| 17. Black-and-White Op Art Spirals | Liner brush or stickers | Medium | Short square |
| 18. Rainbow Ribbon Swirls | Liner brush | Medium | Long oval |
How to Do Swirl Nails at Home
Swirl nails are painted with a fine liner brush, drawn freehand with a steady hand and thin polish lines. The three reliable methods are the dry liner-brush technique for defined waves, the wet-marble technique for blended veins, and blooming gel for soft watercolor swirls. Each suits different skill levels.
Start with the basics that all three methods share. Prep and shape your nails, push back cuticles, and apply base coat. Paint your base color and let it dry fully if you are using regular polish, or cure it if you are using gel. A fully dry or cured base is the single most important detail: wet base coat dragging into your swirls is what makes most beginner attempts look muddy.
You need a fine liner brush with long, thin bristles, which holds enough polish to draw a continuous curve without reloading every few millimeters. A small clean-up brush dipped in acetone (or alcohol for gel) lets you straighten wobbly edges or erase a line you hate before it sets. Keep a lint-free wipe nearby to keep the liner brush tip sharp.
Method 1: Liner-Brush Swirls
The liner-brush method gives you the most control and is the best starting point for defined wave and stripe swirls. Load only the tip of the brush, wipe excess on the bottle neck, and draw each curve in one smooth motion. If your wrist angle feels awkward mid-line, lift the brush, reposition, and continue the curve rather than forcing it. Nail techs recommend practicing the wave motion on a nail tip or paper first until the line flows without thinking.
Method 2: Wet-Marble Swirls
Wet-marble swirls are made by dropping accent colors onto a still-wet base and dragging them together with a brush or needle before curing or drying. This is the method behind stone-like veins and organic marble effects. The critical rule is timing: work while everything is wet, keep colors to two or three so the pattern stays readable, and cure or dry immediately once you like the pattern.
Method 3: Blooming-Gel Swirls
Blooming gel is a clear gel layer that makes color drops spread and bloom on their own into soft watercolor swirls. Apply a thin coat of blooming gel and do not cure it, dot or draw your colors on top, and watch them diffuse. Use less color than you think; a small dot spreads into a wide bloom. Cure the moment the pattern looks right, since it keeps spreading while uncured.
Which Swirl Method Suits You
Pick your method by matching it to your skill level and the look you want. This table compares the three techniques side by side.
| Method | Best for | Difficulty | Polish type | Key tip |
|---|---|---|---|---|
| Liner-brush swirls | Defined waves, stripes, graphic lines | Easy to medium | Regular or gel | Keep the brush lightly loaded; practice the curve first |
| Wet-marble swirls | Stone veins, organic marble effects | Medium | Regular or gel | Work fast while everything is wet; two to three colors max |
| Blooming-gel swirls | Soft watercolor blooms and petals | Easy | Gel only | Use tiny dots; cure the moment the spread looks right |
Retro 70s Swirls
The 70s invented the nail swirl: warm sunset palettes, groovy organic curves, and wavy stripes pulled straight from wallpaper and van art. These five designs are the soul of the swirl trend and the reason it keeps coming back.
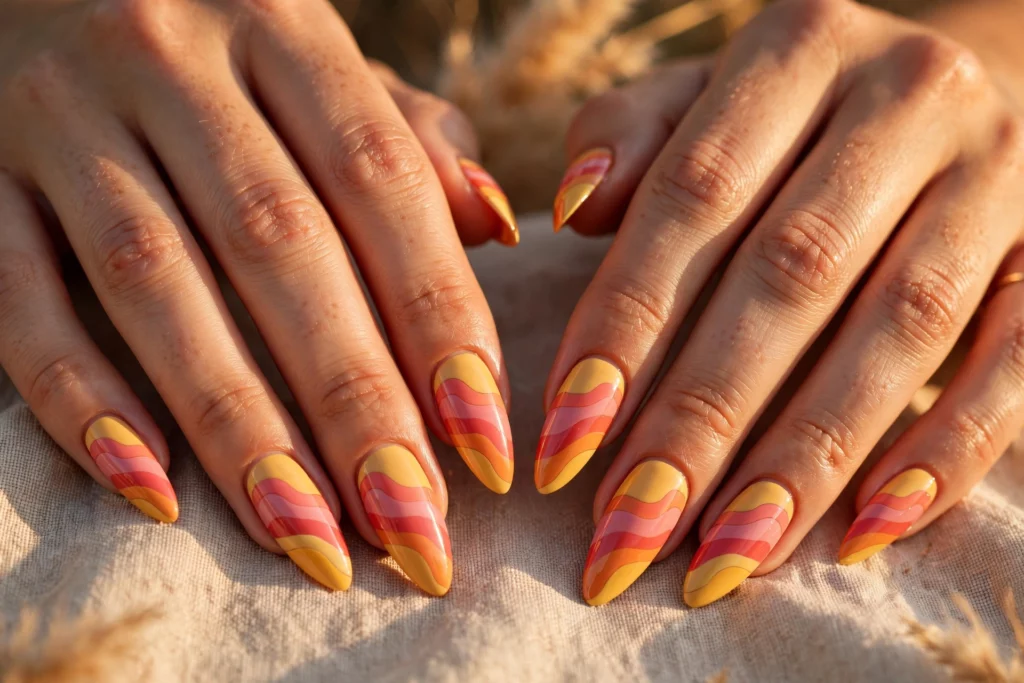
1. 70s Sunset Waves
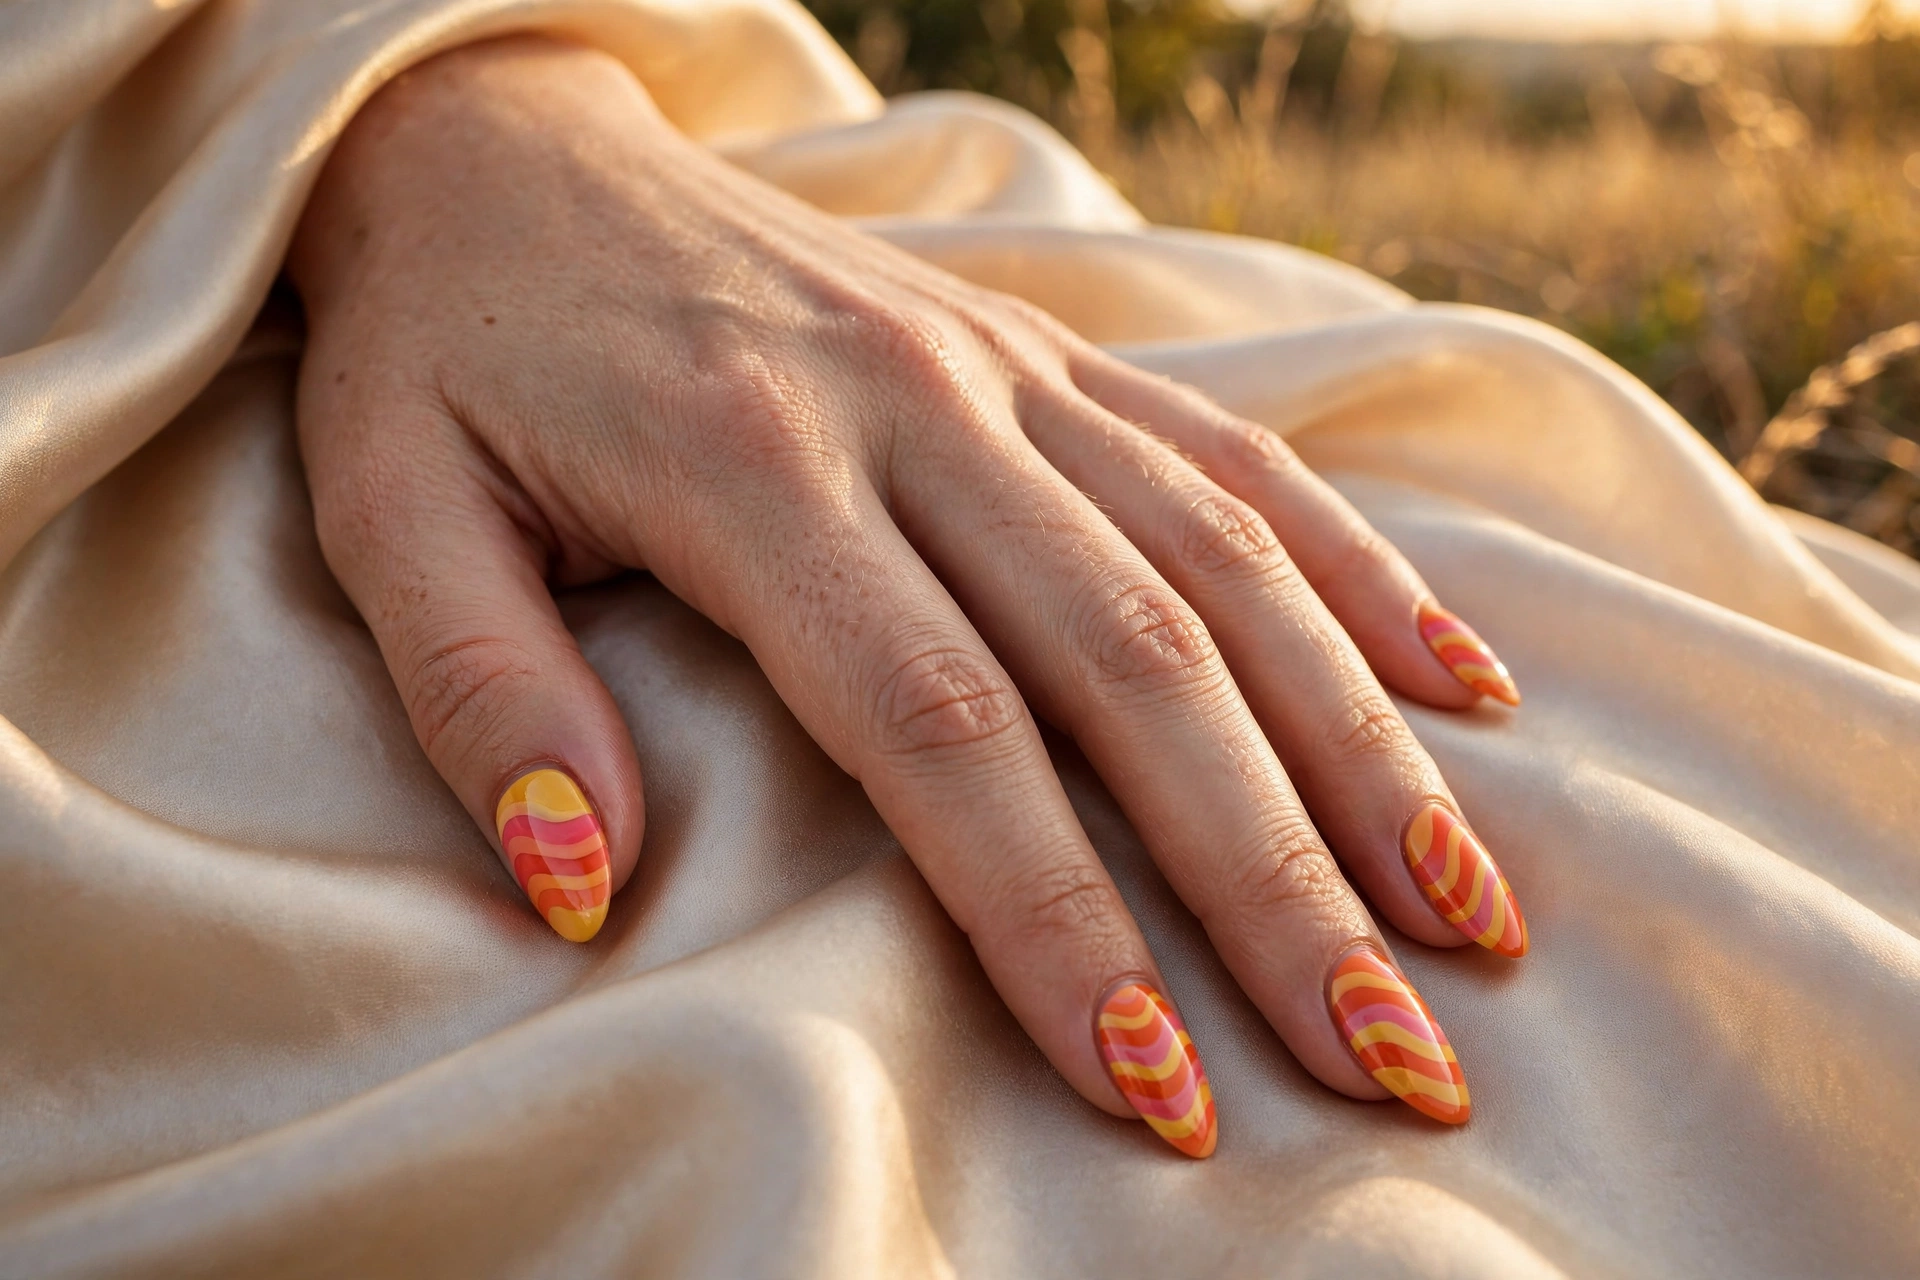
Horizontal wavy stripes in orange, coral pink, and golden yellow sweep across each nail like a vintage sunset poster. This is the most recognizable swirl design ever made, and it flatters warm skin tones beautifully.
Long almond nails give the stripes room to flow. Use the liner-brush method with three colors, painting each stripe in one smooth pass and curing or drying between colors so the stripes stay crisp. Difficulty: easy to medium, an excellent first swirl project.
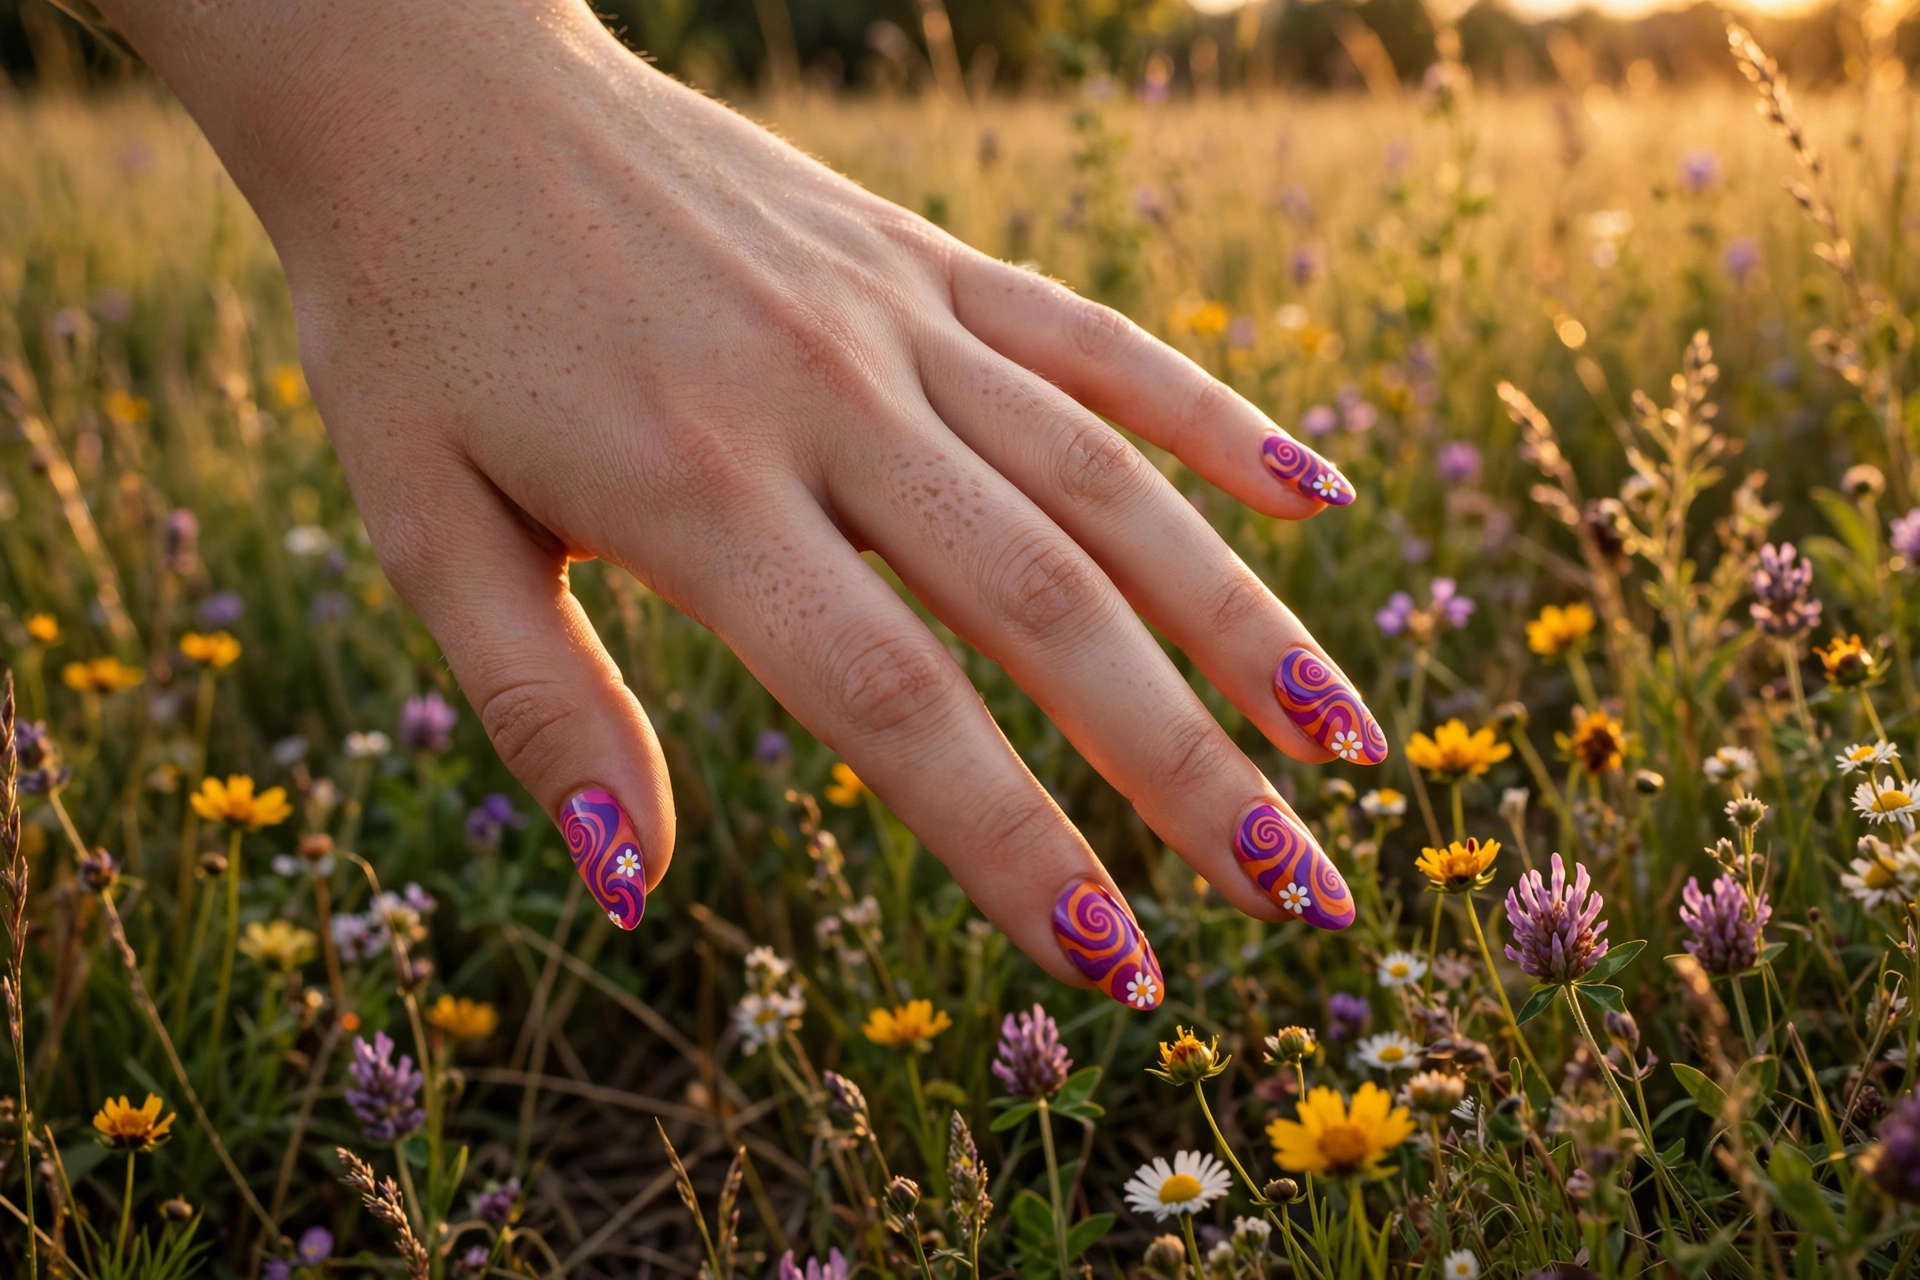
2. Flower-Power Psychedelic Swirls
Bold spiraling patterns in magenta, orange, purple, and teal, finished with tiny daisy accents. It is loud, joyful, and the most fun you can have with a liner brush.
Long almond or stiletto nails suit the busy pattern best. Paint the swirls first, then dot the daisies with a dotting tool: five white dots around a yellow center. Keep the palette to four colors so the design reads as curated rather than chaotic. Difficulty: medium.
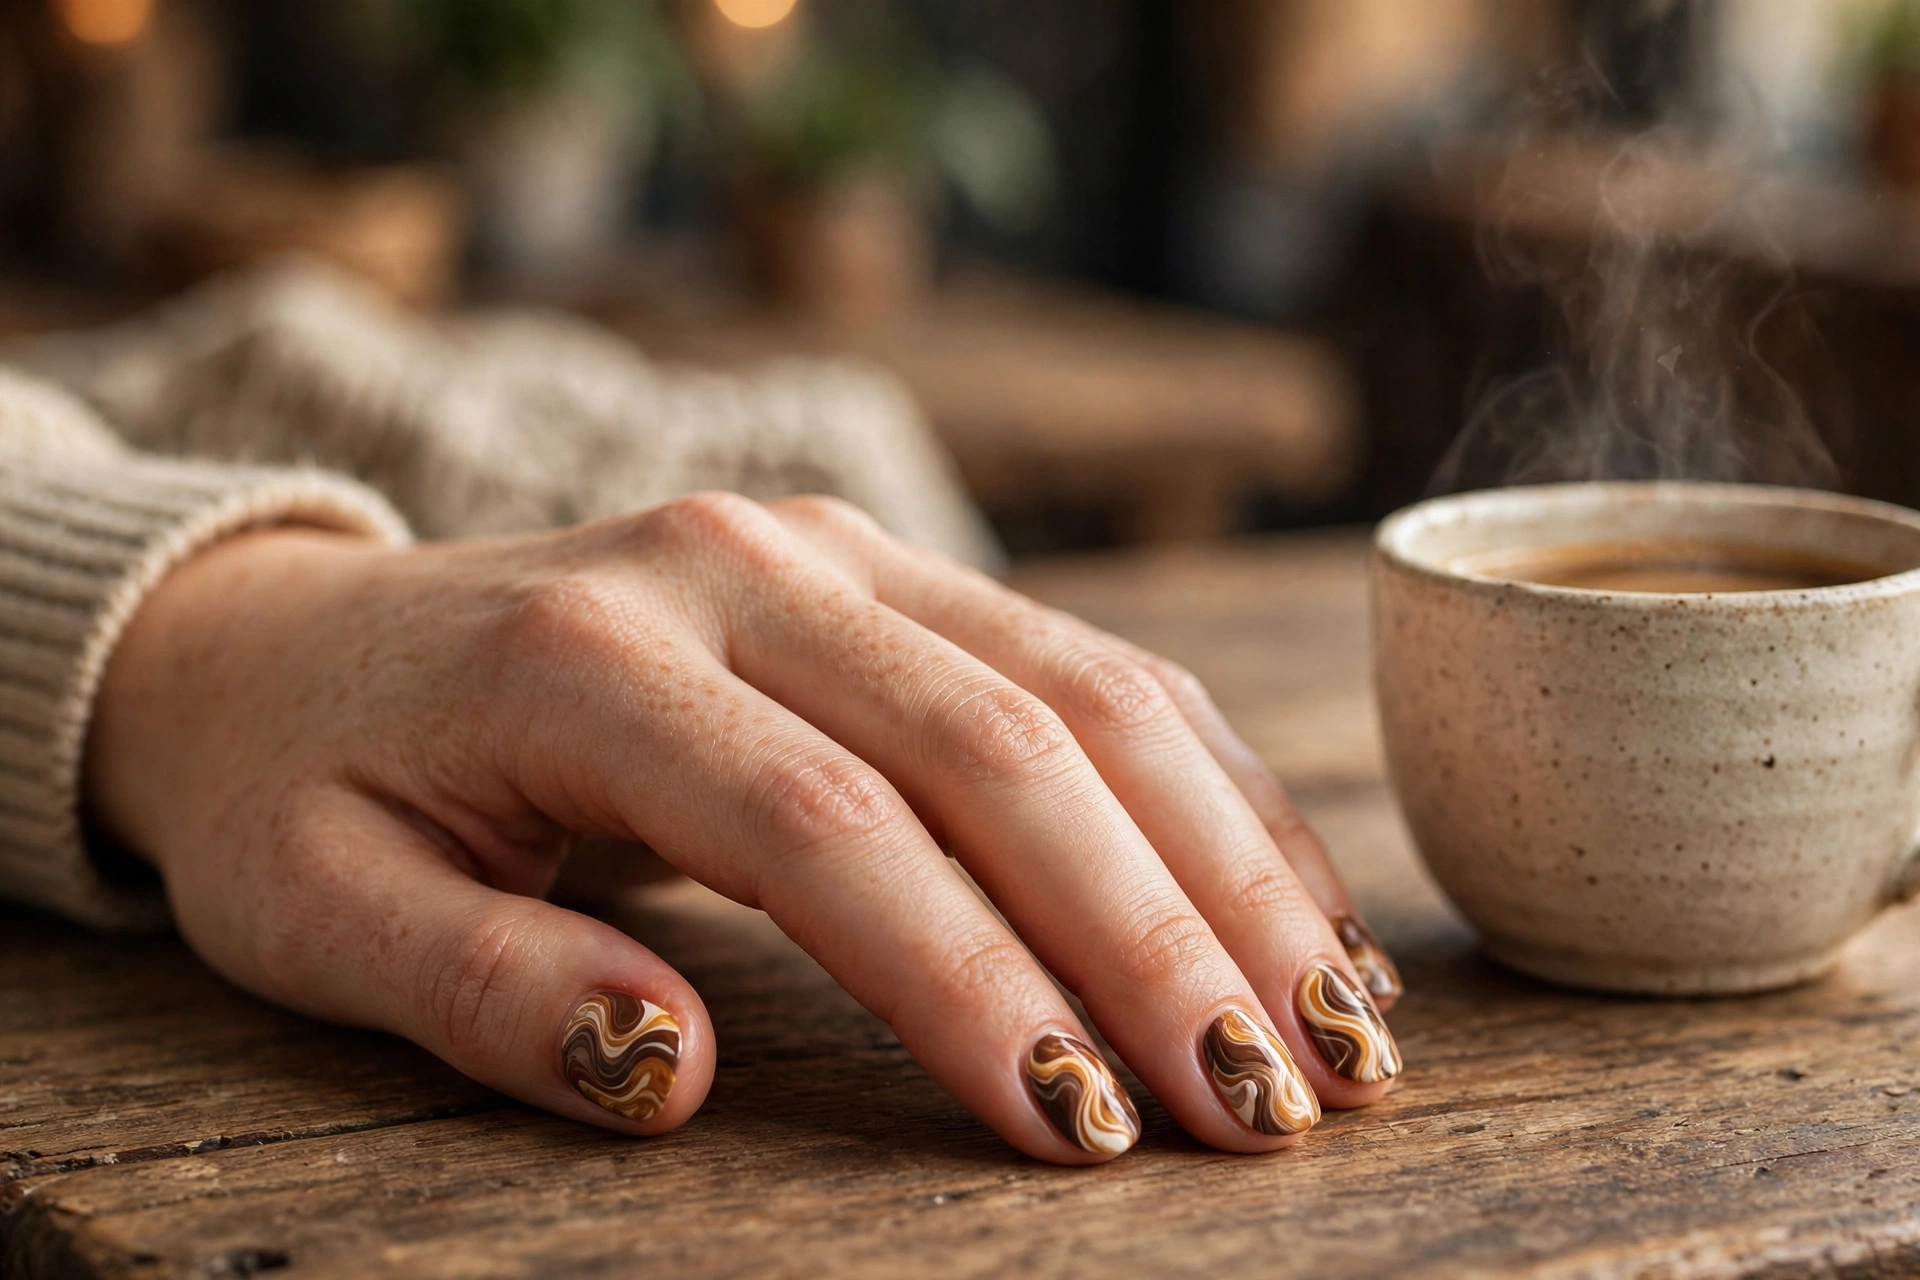
3. Lava Lamp Blob Swirls
Groovy organic blob swirls in chocolate brown, burnt orange, and cream over a nude base, like the wax drifting inside a lava lamp. The rounded, blobby shapes are far more forgiving than sharp waves, which makes this the kindest retro design for shaky hands.
Short oval or rounded nails are perfect here. Paint rounded blob outlines with the liner brush and fill them in, or use the wet-marble method with brown and orange drops for an even dreamier drift. Difficulty: easy.
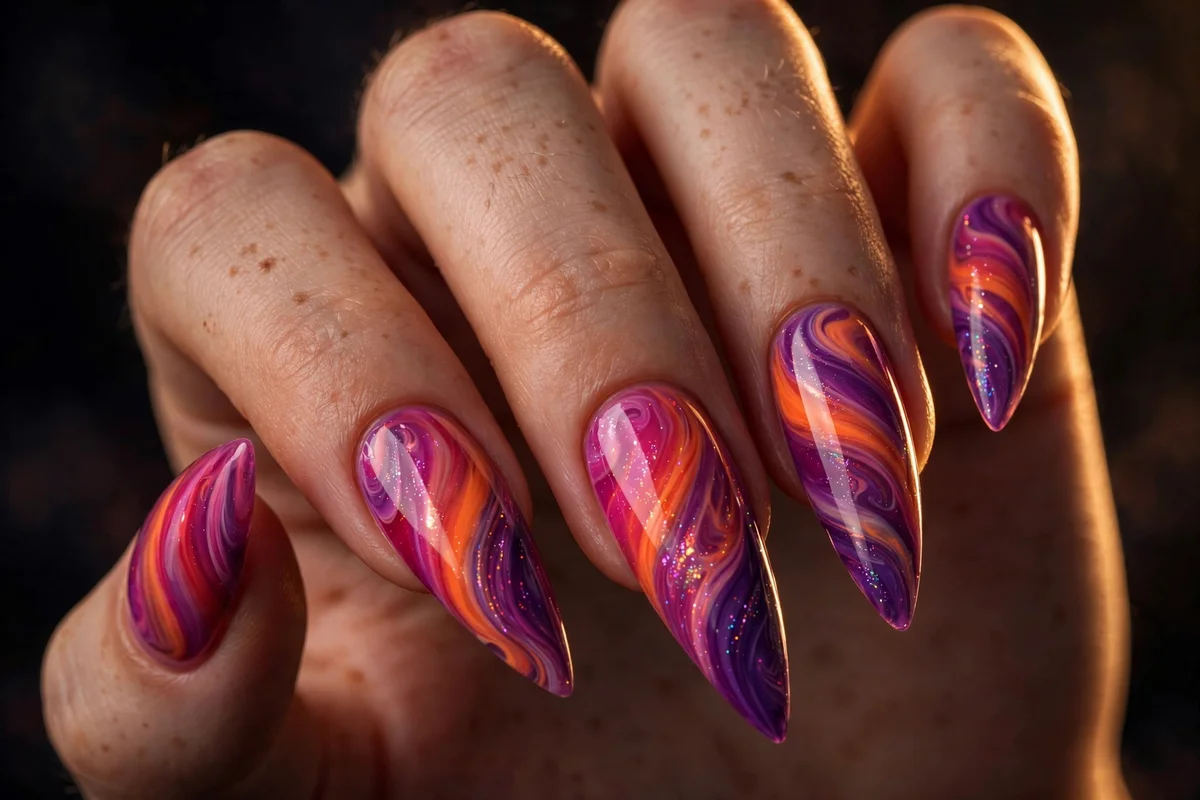
4. Disco Sunset Gradient Waves
Diagonal flowing waves blend magenta, hot orange, and deep purple in a glossy gradient that catches light like a disco floor. The gradient base does half the work: even simple wave lines look expensive over it.
Long stiletto nails show the gradient to full effect. Sponge the gradient onto the nail first, then draw the darker wave lines over it with a liner brush once the base is dry. Glossy top coat is essential for the liquid shine. Difficulty: medium.
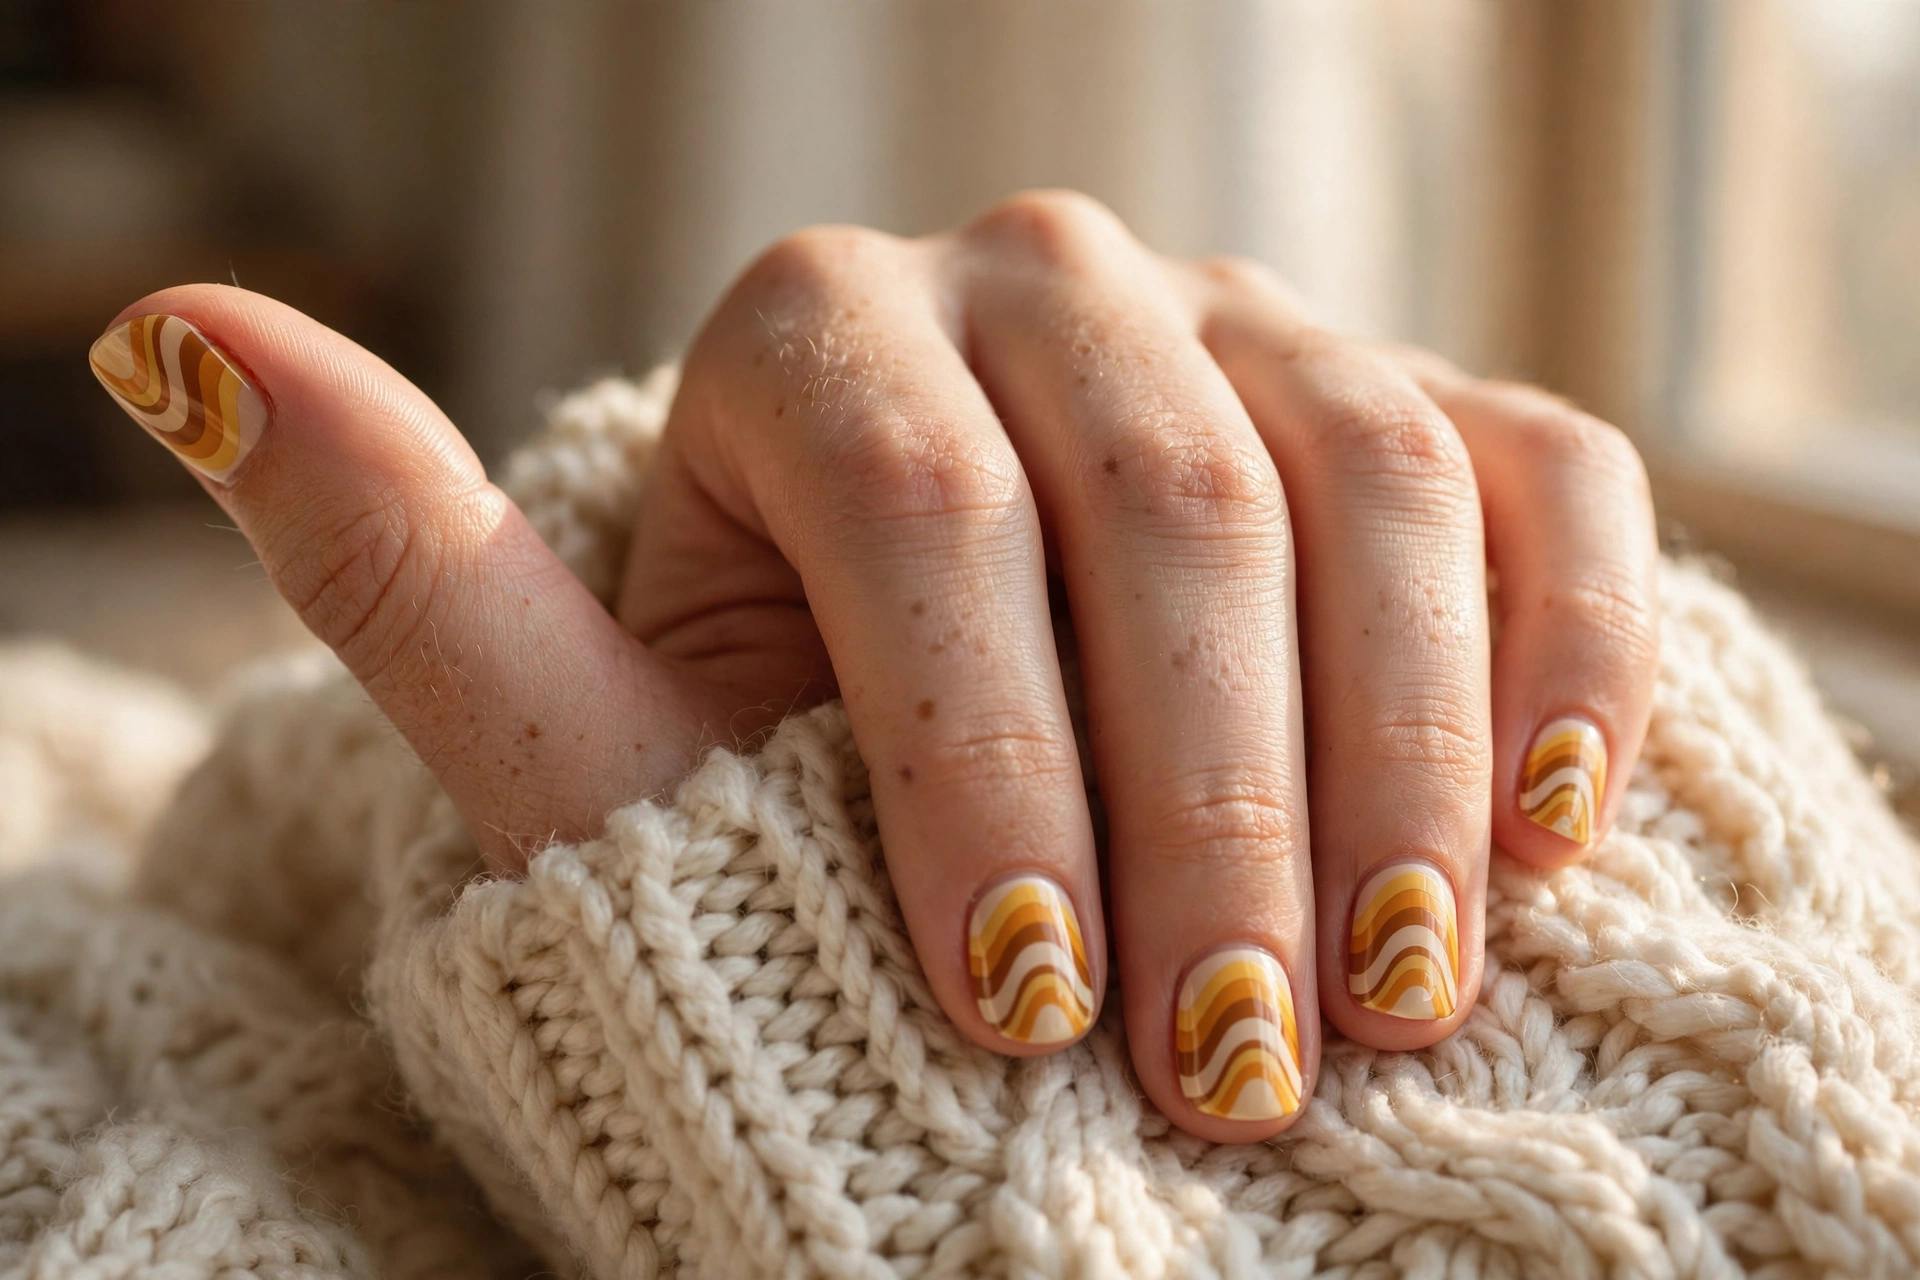
5. Harvest Gold Retro Waves
Flowing mustard yellow and caramel waves over a warm cream base. It is the most wearable 70s swirl: retro in spirit, neutral enough for everyday wear, and lovely against knitwear in cooler months.
Short rounded or square nails keep it practical. Two colors plus the cream base keep the design clean; the liner-brush method handles it easily. This is one of the best swirl choices for shorter nails, since the high contrast reads clearly on a small canvas. Difficulty: easy.
Modern Minimal Swirls
Modern swirl nails strip the trend back to a single elegant line: sheer bases, negative space, and one confident curve. These four are the office-friendly end of the swirl spectrum.
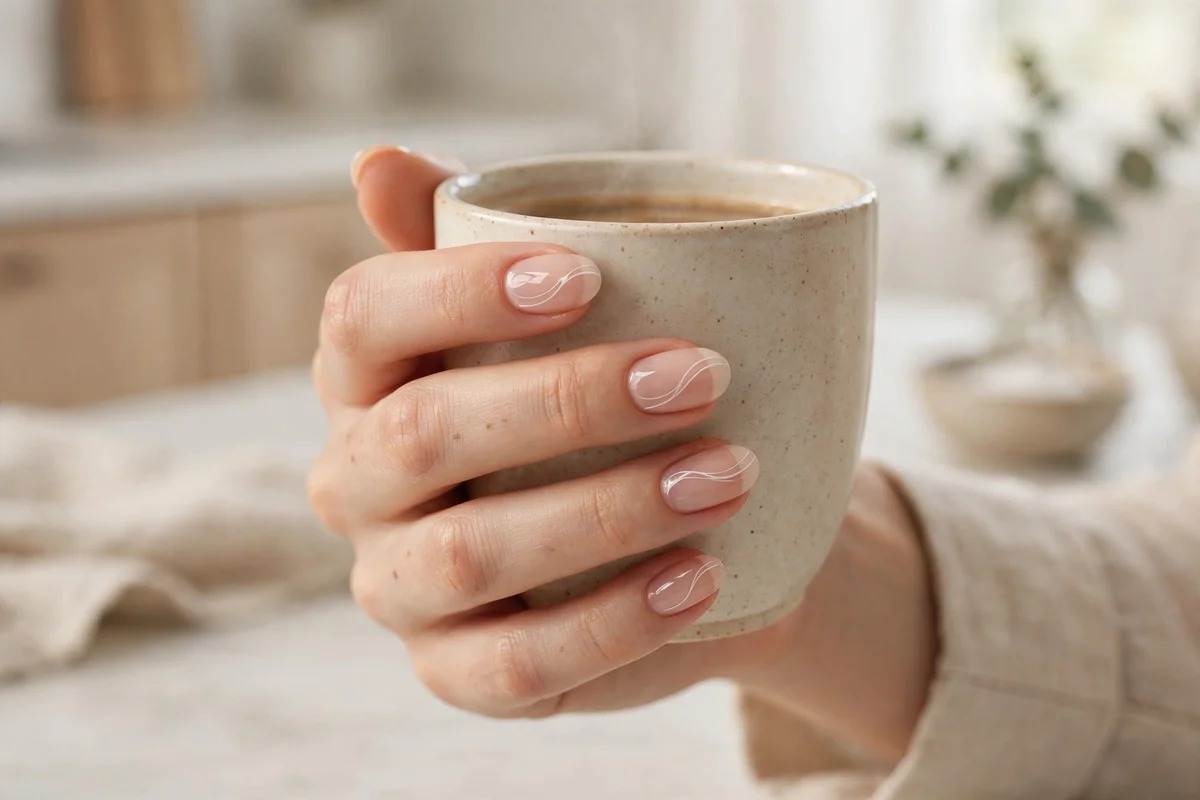
6. Nude with a Single White Wave
A sheer nude base with one delicate white wave line across each nail. It reads as polished and intentional from a distance, and only reveals its artistry up close.
This suits any length and shape, which makes it the safest swirl for workplaces. One pass with a fine liner brush is all it takes; resist the urge to add more lines, since the restraint is the design. Difficulty: easy.
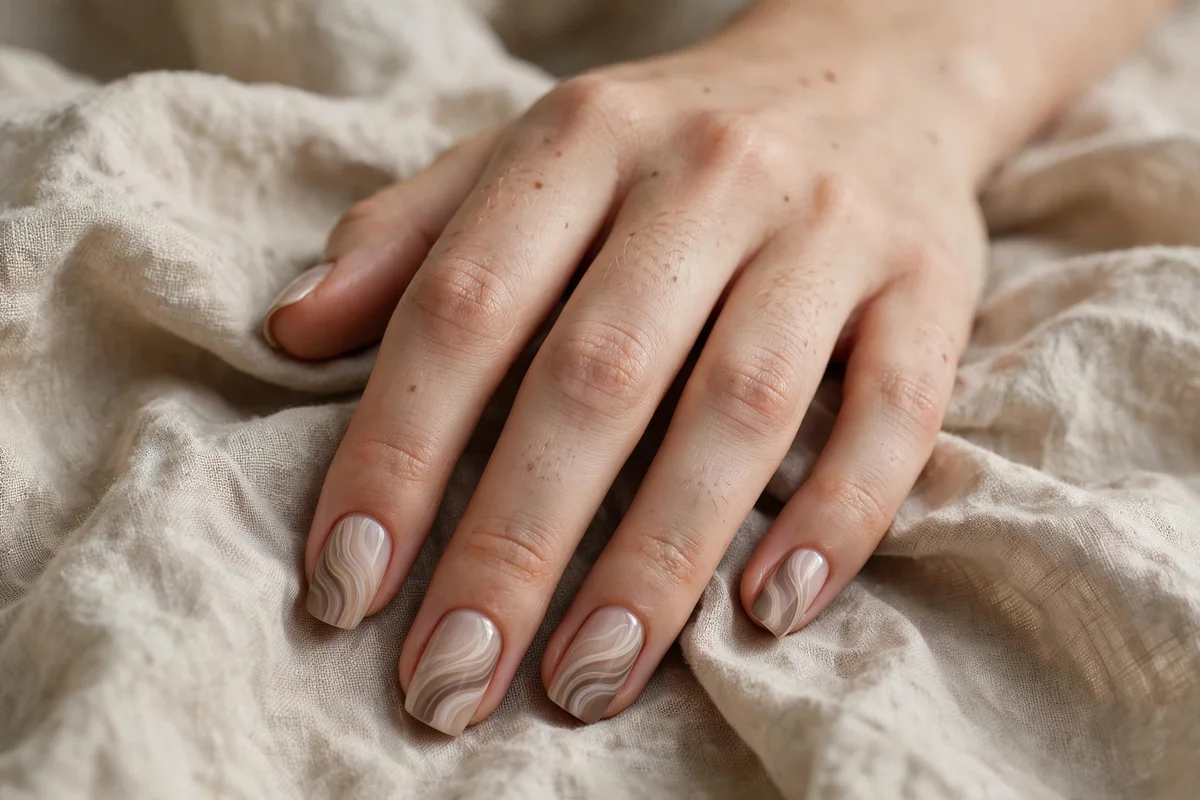
7. Tonal Taupe Swirls
Soft sheer waves in three shades of warm beige and mushroom taupe layered over a translucent base. Monochrome swirling looks sophisticated and pairs with everything in your wardrobe.
Medium squoval nails show the tonal layering well. Use the wet-marble method with two taupe shades over a sheer base for the softest blend, or liner-brush waves for more definition. Difficulty: easy.
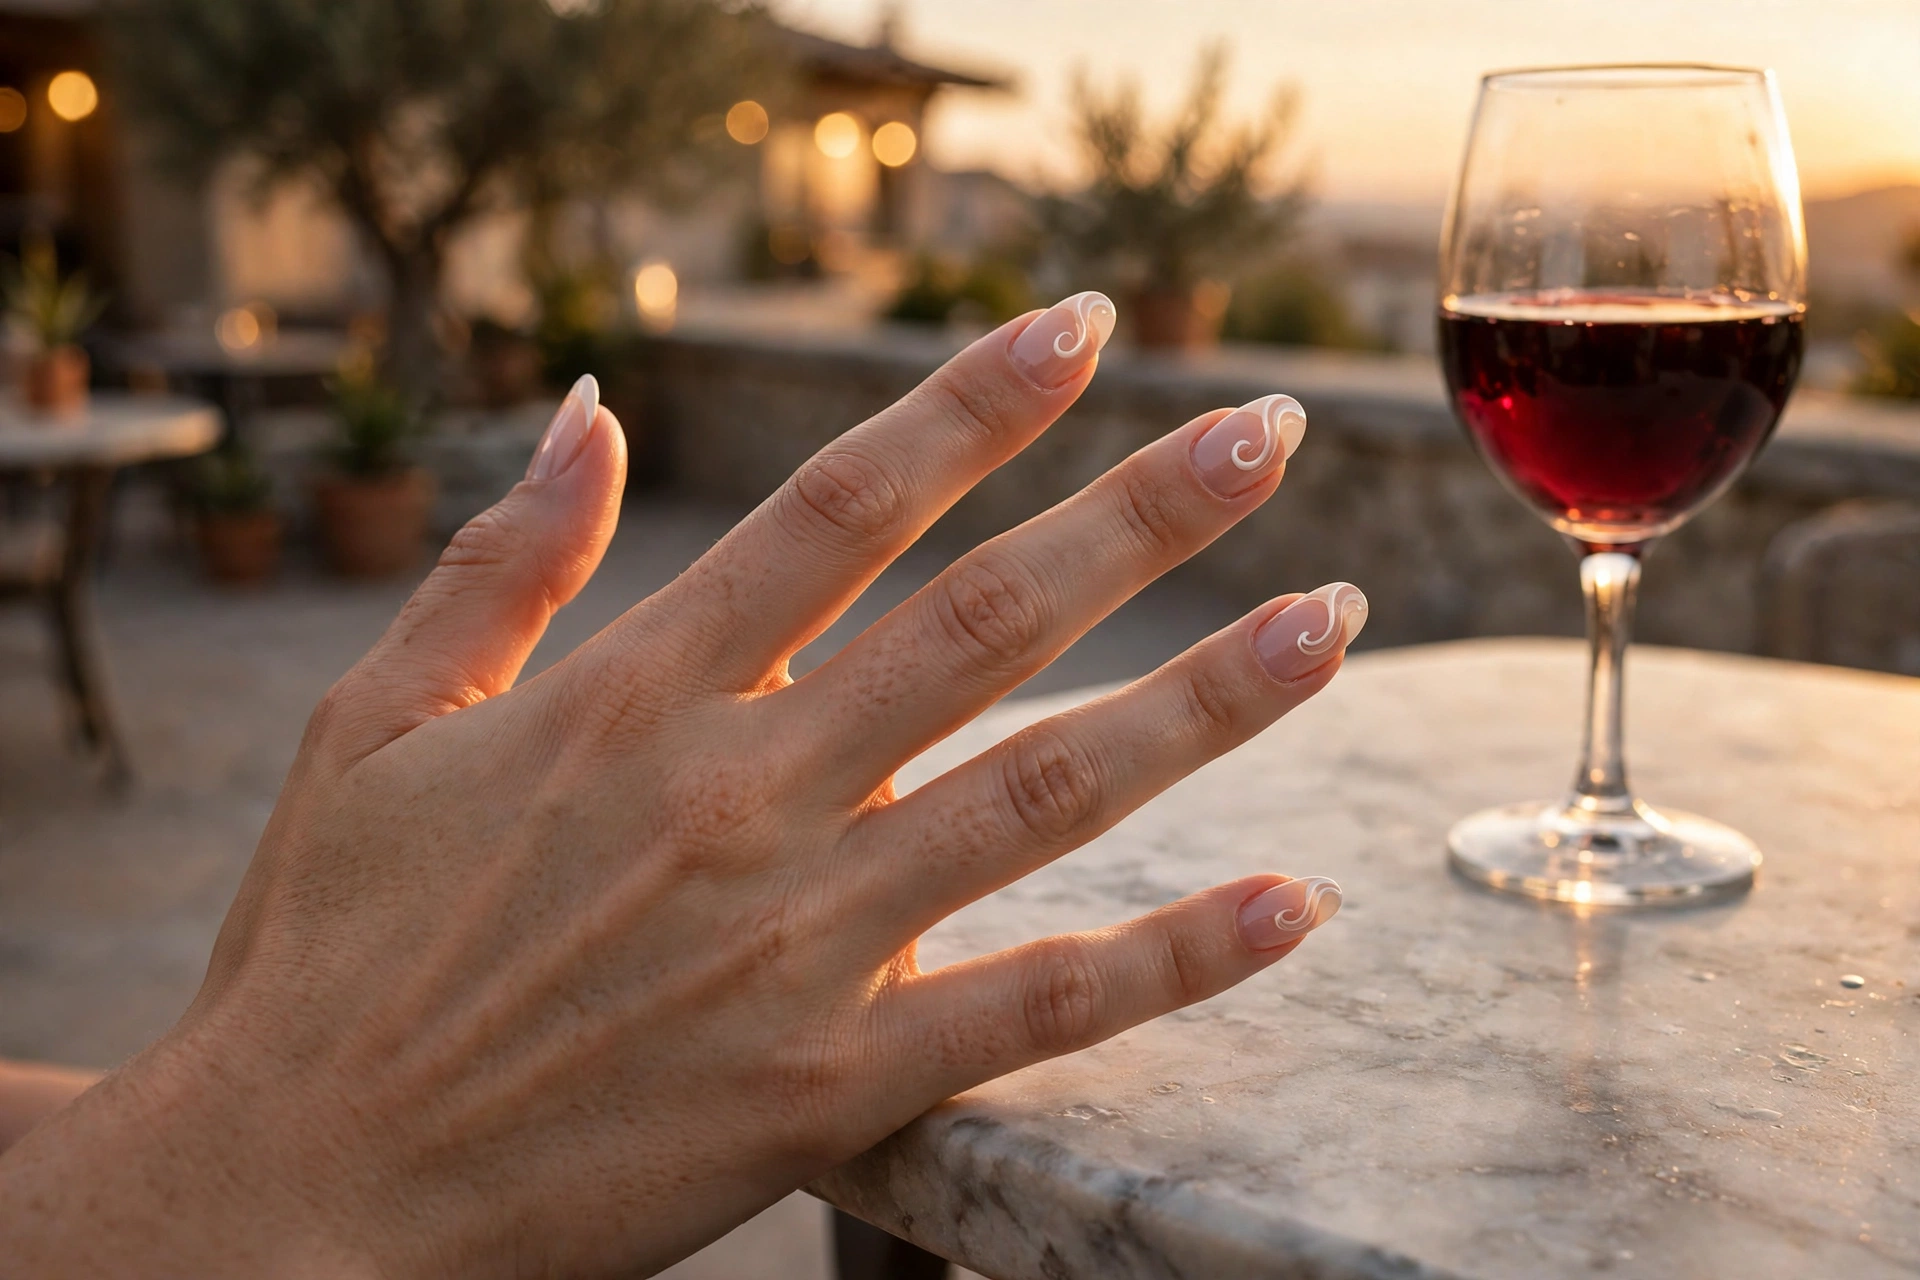
8. French Tip Swirls
Classic white French tips that flow into a soft white swirl wave across a sheer nude base. It keeps the beloved French silhouette and adds one artistic gesture.
Medium almond nails are the sweet spot. Paint the French tip first, then extend the tip line into a wave across the nail with your liner brush while keeping the curve continuous. If you love French manicures, see our white nail designs collection for more takes on the classic. Difficulty: medium.
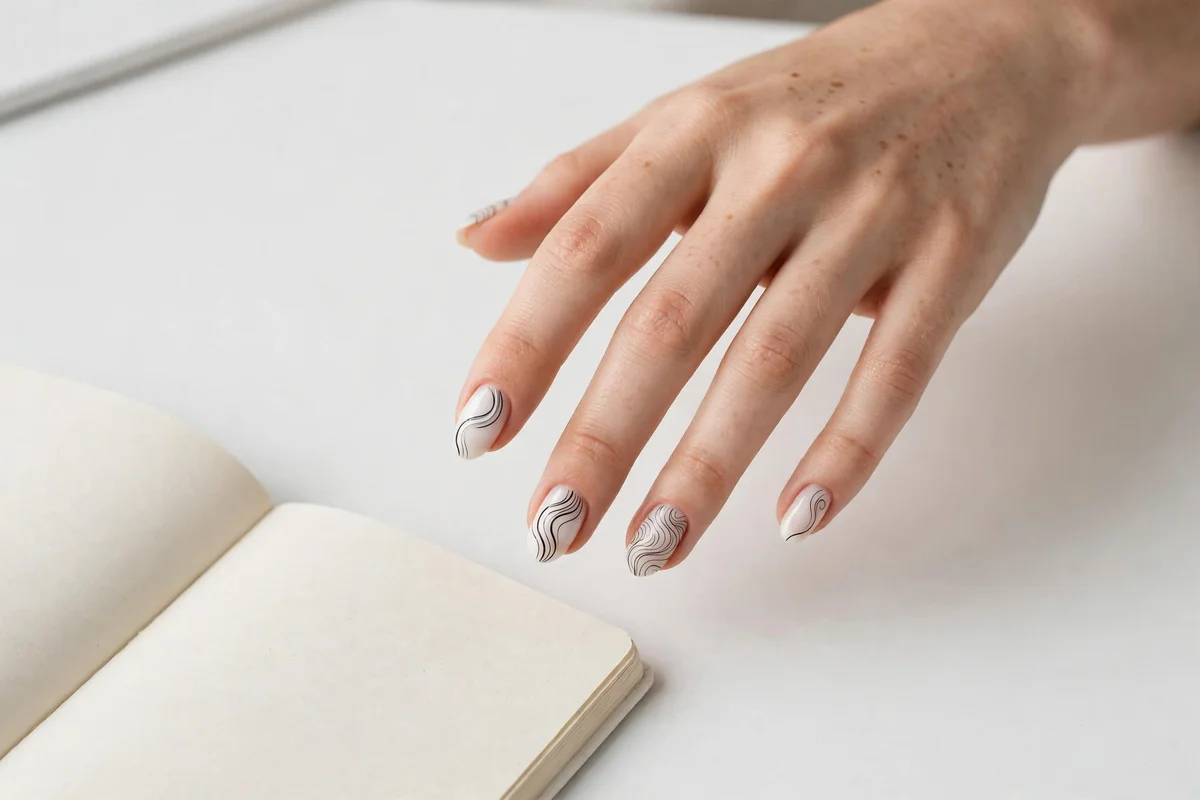
9. Micro Black Line Swirls
Ultra-fine black wave lines over a milky white base, like delicate ink drawings on porcelain. The contrast is graphic but the lines are so fine that the overall effect stays elegant.
Short almond nails suit this best. A very fine liner brush and a steady hand matter here; keep lines thin by loading almost no polish and drawing slowly. One or two lines per nail is enough. Difficulty: medium.
Marble & Fluid Swirls
This is swirling as a fluid medium: wet paint, spreading gel, and dipped marble that looks like stone, water, or sea. These five designs show off the wet techniques from the how-to section above.
10. Blush Wet-Marble Swirls
Blush pink and white marbled together in soft organic veins, like rose quartz. It is romantic without being sweet, and the marbling makes every nail subtly different.
Long coffin nails give the veining space to flow. Use the wet-marble method: pink base, white drops, then drag with a fine brush before curing. If you want to explore stone effects further, our marble nail designs guide covers the full range. Difficulty: medium.
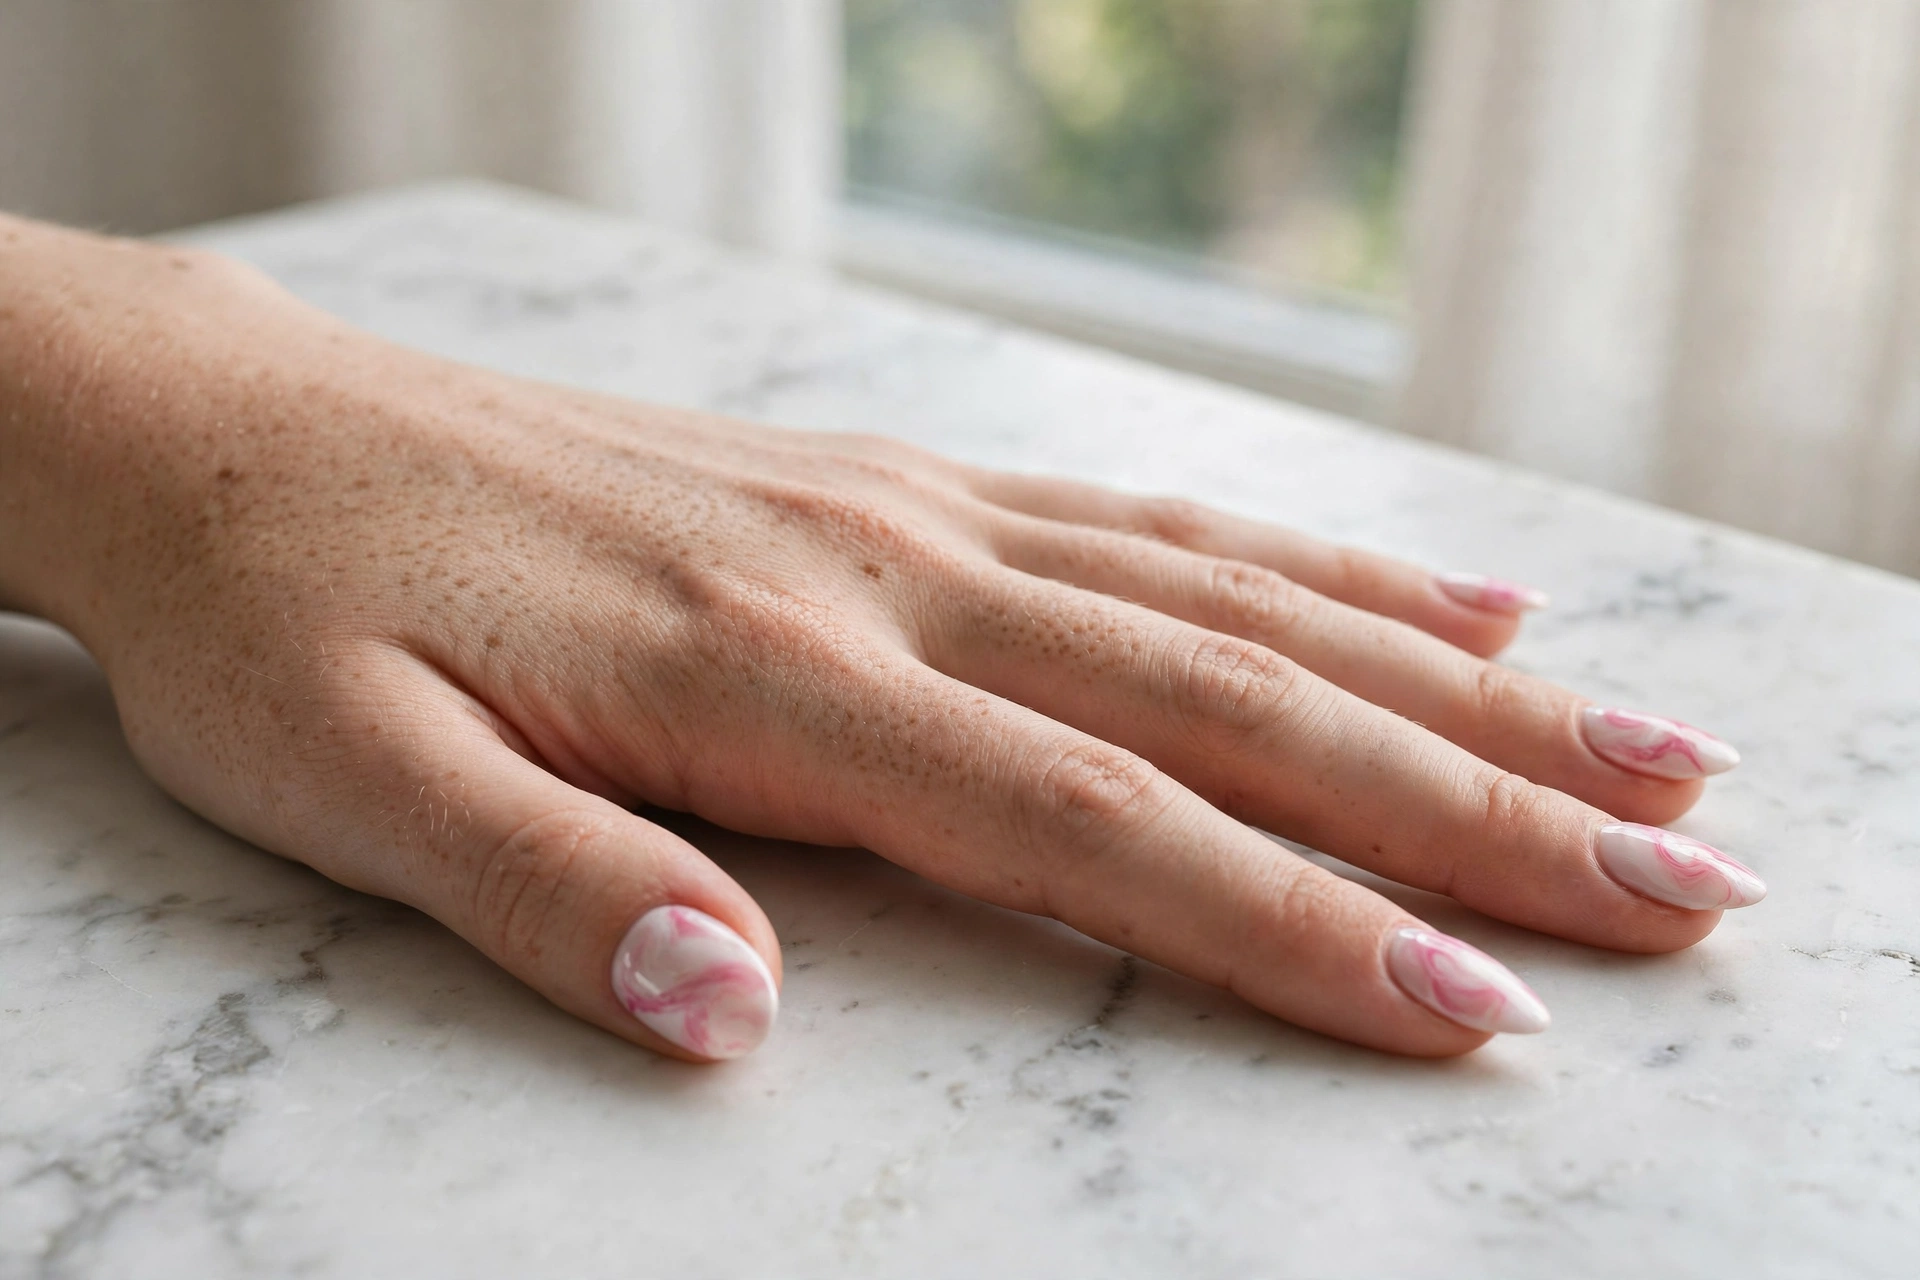
11. Blooming Gel Watercolor Swirls
Dreamy watercolor swirls of rose pink, lavender, and white that spread and melt into each other. Blooming gel does the artistic heavy lifting, so this looks advanced while being one of the easiest designs here.
Medium oval nails suit the soft look. Remember the blooming rules: uncured blooming gel, tiny color dots, cure the moment the spread looks right. This design is very forgiving of beginners. Difficulty: easy.
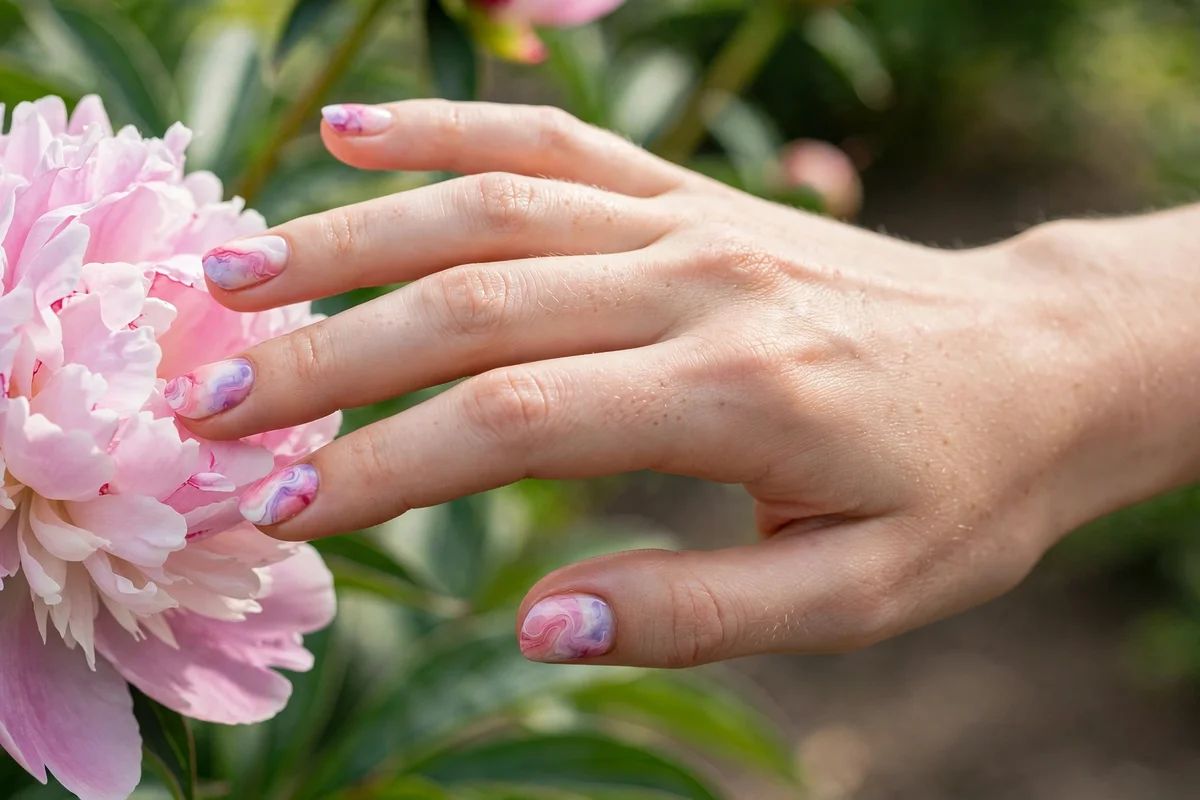
12. Water-Marble Swirls
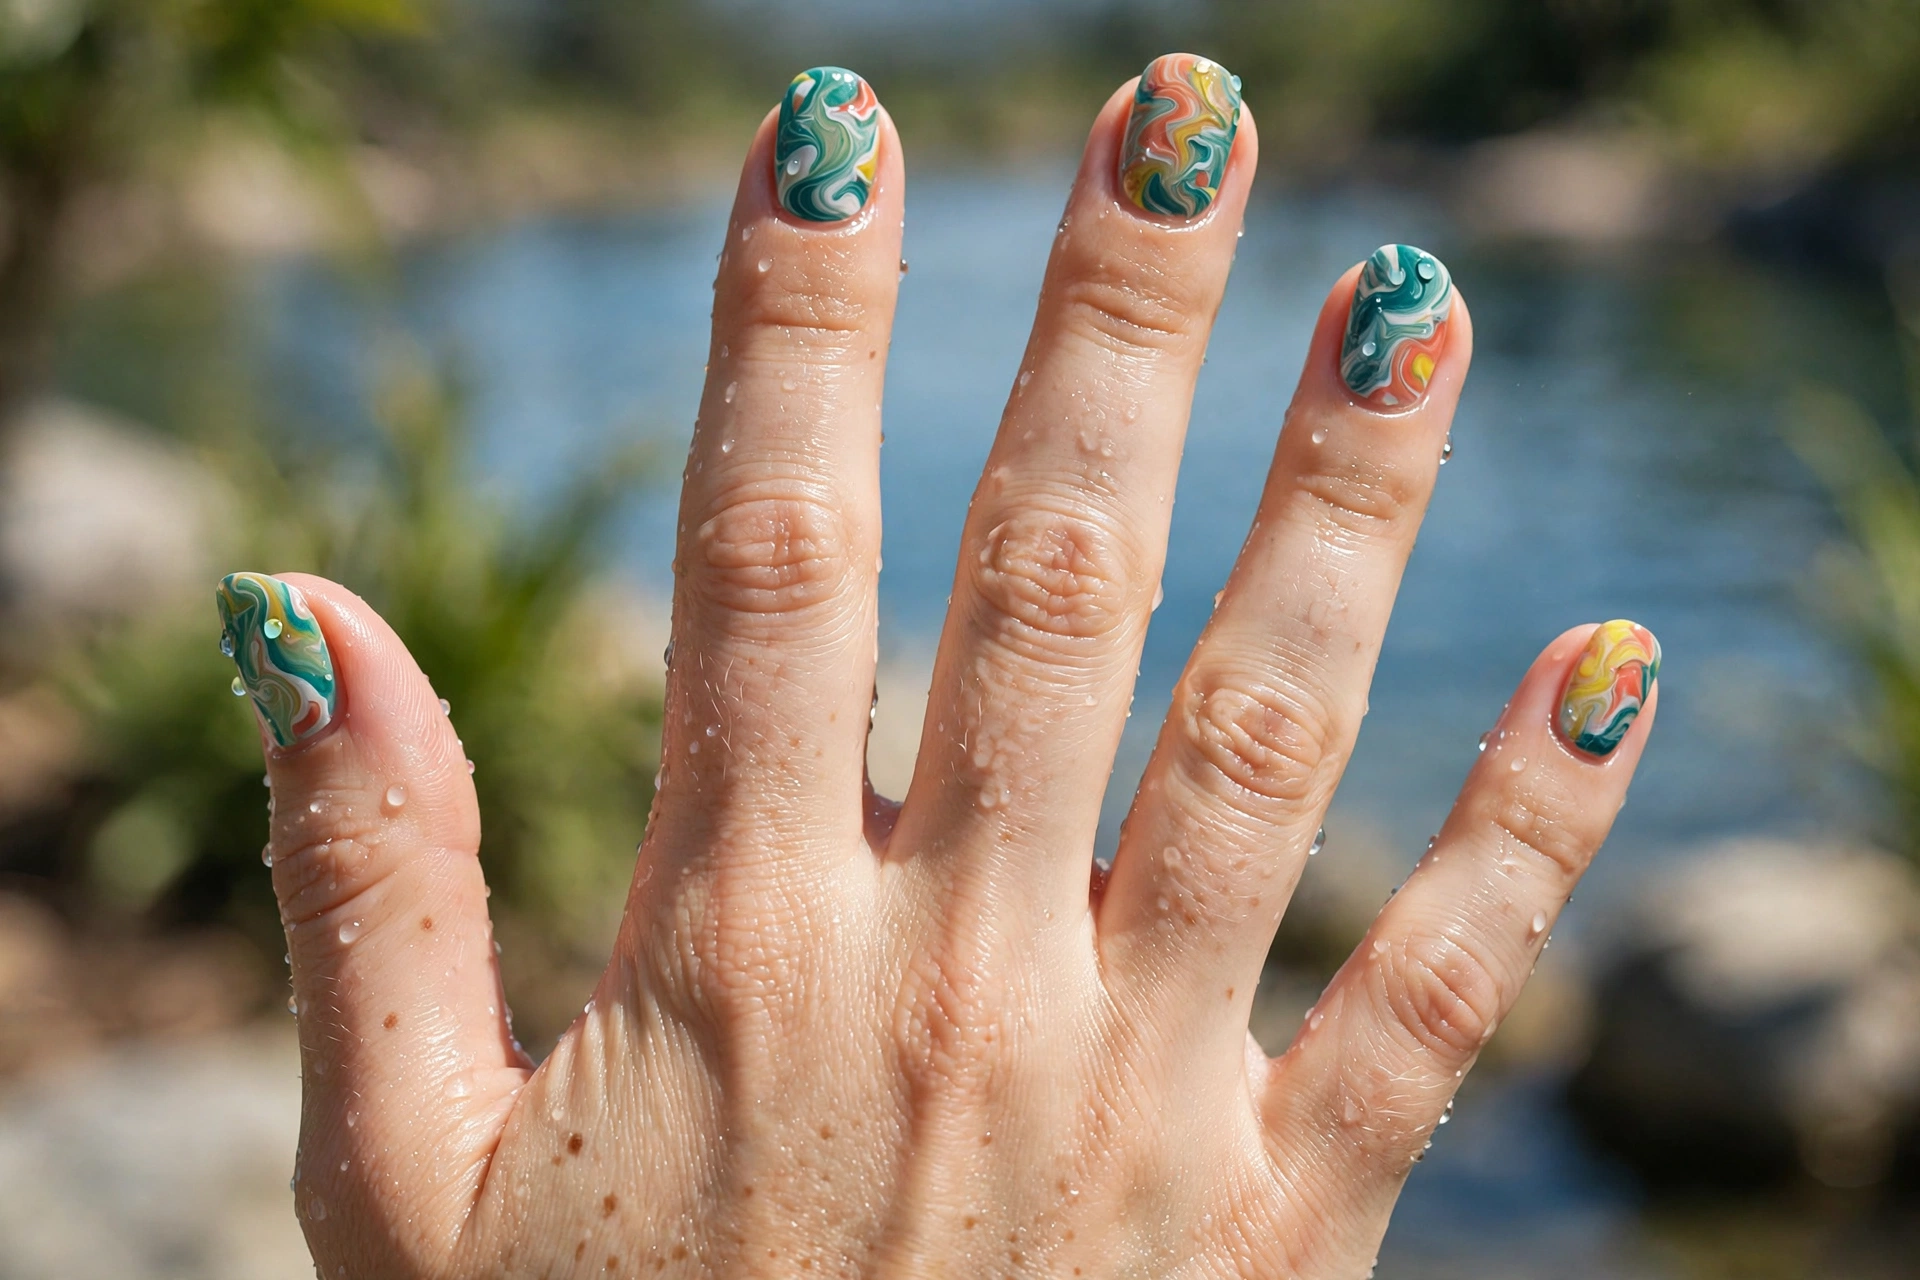
Psychedelic swirls of teal, coral, yellow, and white marbled like paint dropped in water, with a glossy finish that looks wet. No two nails match, which is the whole charm.
Medium almond nails work well. The classic water-marble dip is messy: tape around your nails or use liquid latex, dip each finger, and clean up generously. It takes practice, so expect your first attempt to be a learning run. Difficulty: hard.
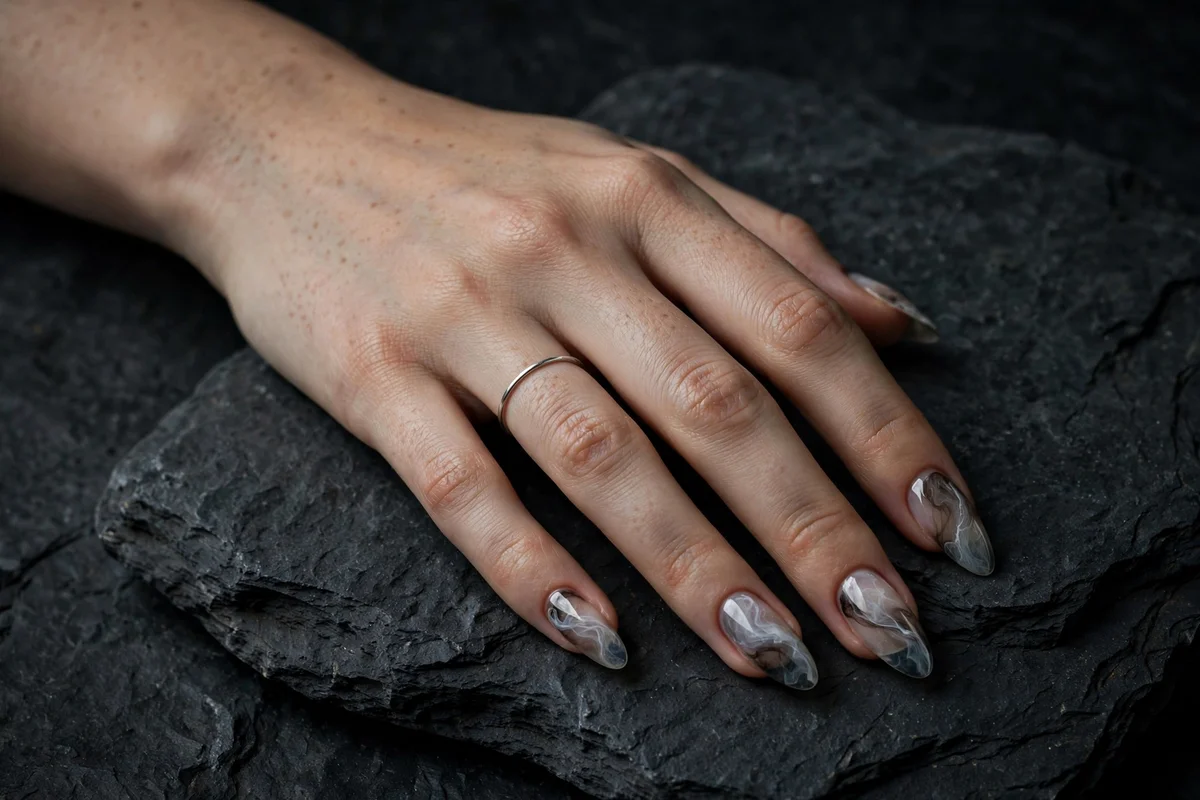
13. Smoky Quartz Swirls
Elegant gray and white stone veining over a translucent base, with subtle smoky depth like real quartz. It is the most grown-up swirl in this article and pairs beautifully with silver jewelry.
Long almond nails show the veining at its best. The wet-marble method with gray drops over a sheer base creates the stone effect; keep the veining sparse so it reads as natural stone rather than muddy gray. Difficulty: medium.
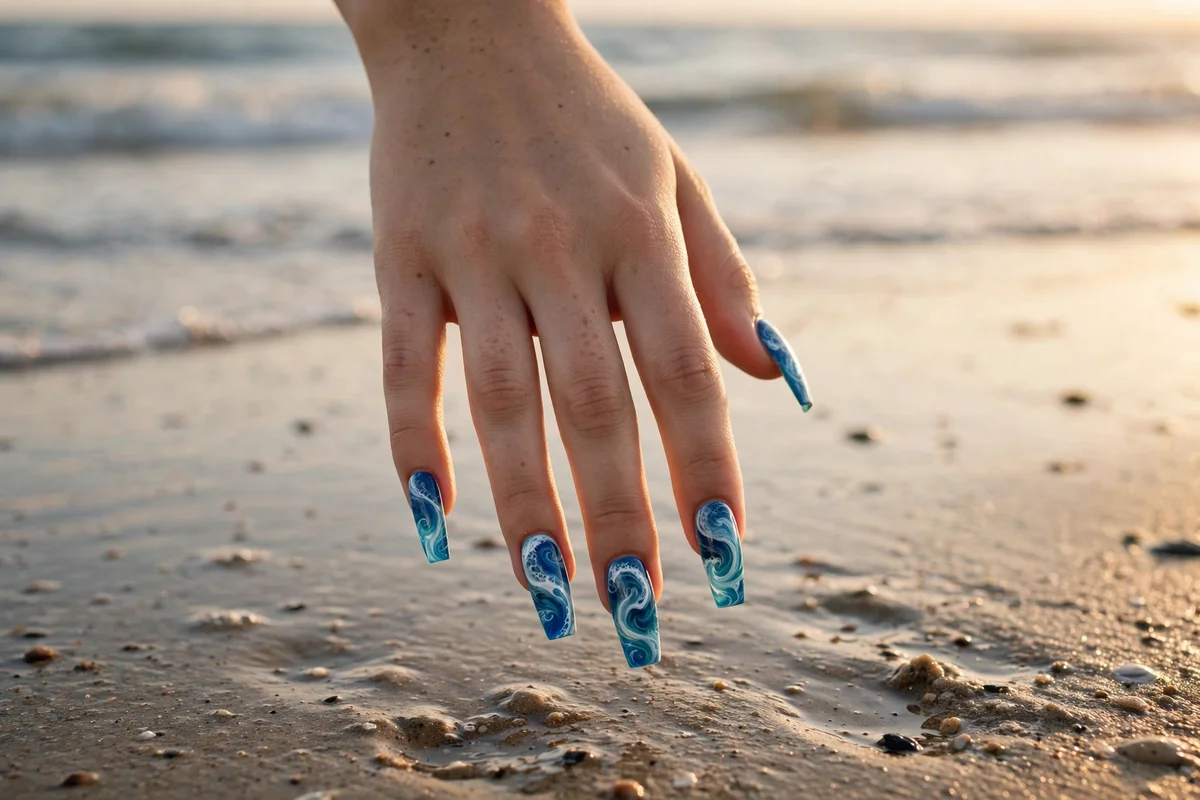
14. Ocean Wave Swirls
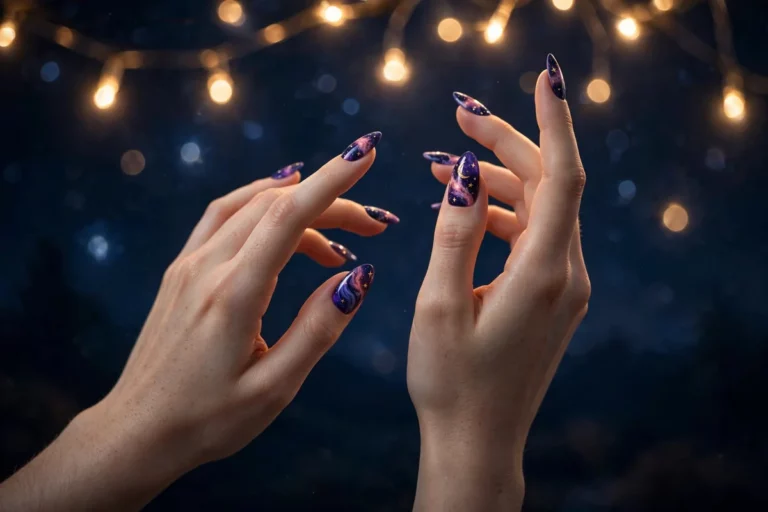
Fluid swirling waves in deep blue, turquoise, and seafoam white that look like aerial photos of breaking surf. A perfect vacation manicure.
Long coffin nails carry the drama. Layer the blues with the wet-marble method, then add thin white wave lines on top with a liner brush for the foam effect once the base is dry. Seal with gloss for the water shine. Difficulty: medium.
Bold Graphic Swirls
When you want the swirl to be the whole statement: high contrast, neon, chrome, and optical-illusion spirals. These four designs are for maximalists and nights out.
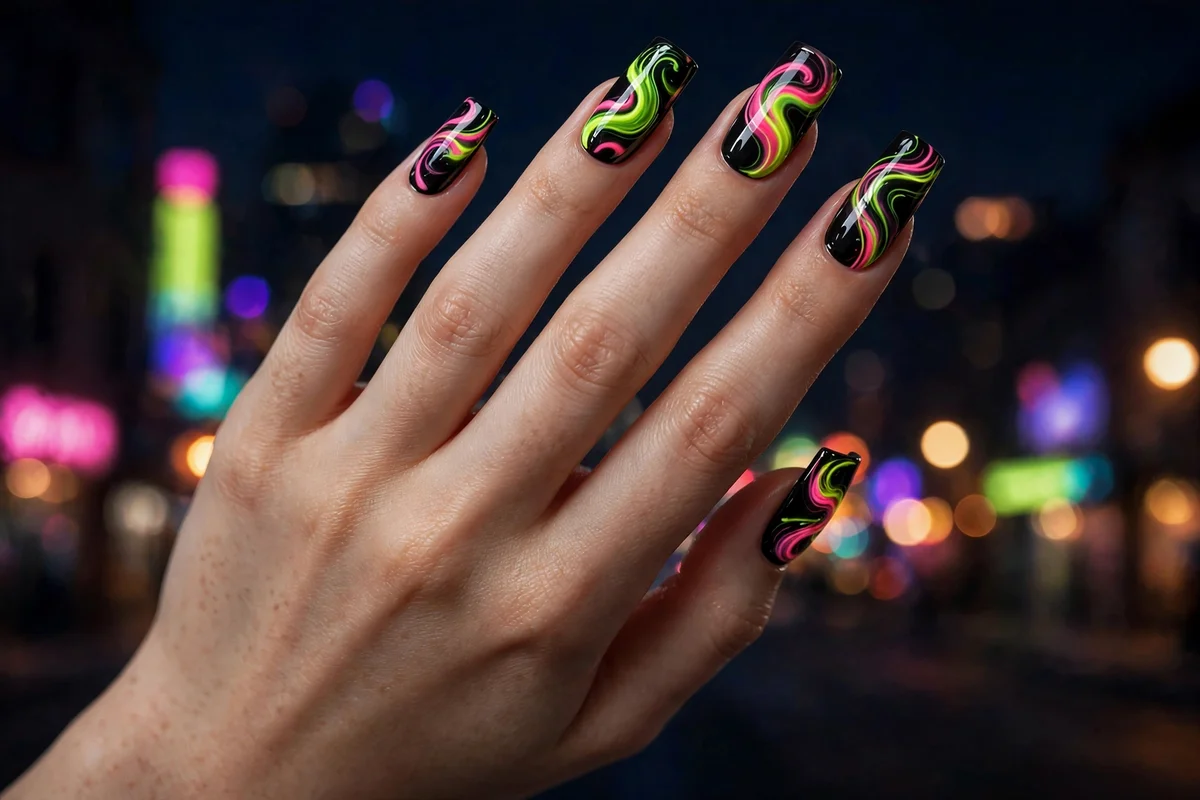
15. Neon Contrast Swirls
Glowing waves of neon lime green and hot pink swirling across a glossy black base. The black background makes the neons look electric, especially under evening light.
Long square nails suit the graphic energy. Paint the black base first and let it dry completely, then draw neon waves with a liner brush. Neon pigments can stain, so use a good base coat. Difficulty: easy to medium.
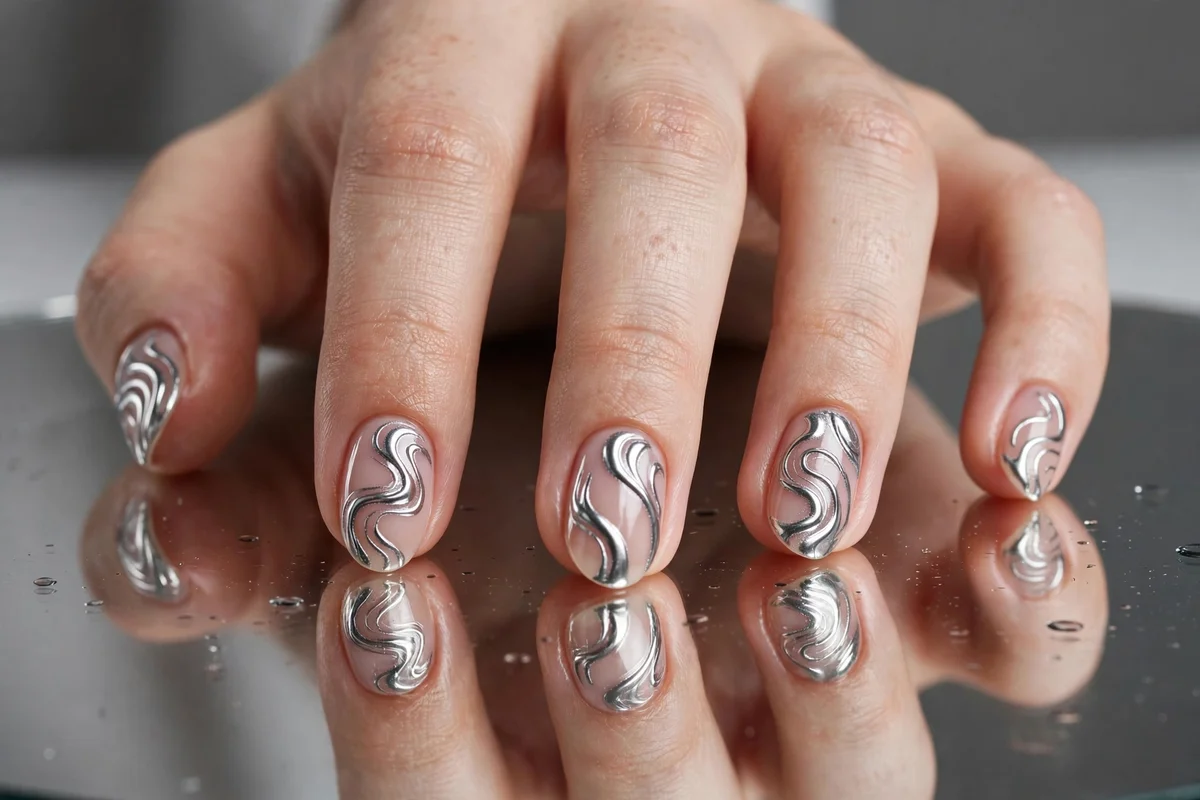
16. Y2K Chrome Swirls
Molten silver chrome waves rippling across a sheer nude base. The mirror-metallic finish catches light with every hand movement, which is exactly the Y2K revival energy.
Medium almond nails are ideal. Paint the swirl lines, then burnish chrome powder over them (or use a chrome-effect polish) and seal with a no-wipe top coat so the mirror finish survives. Difficulty: medium.
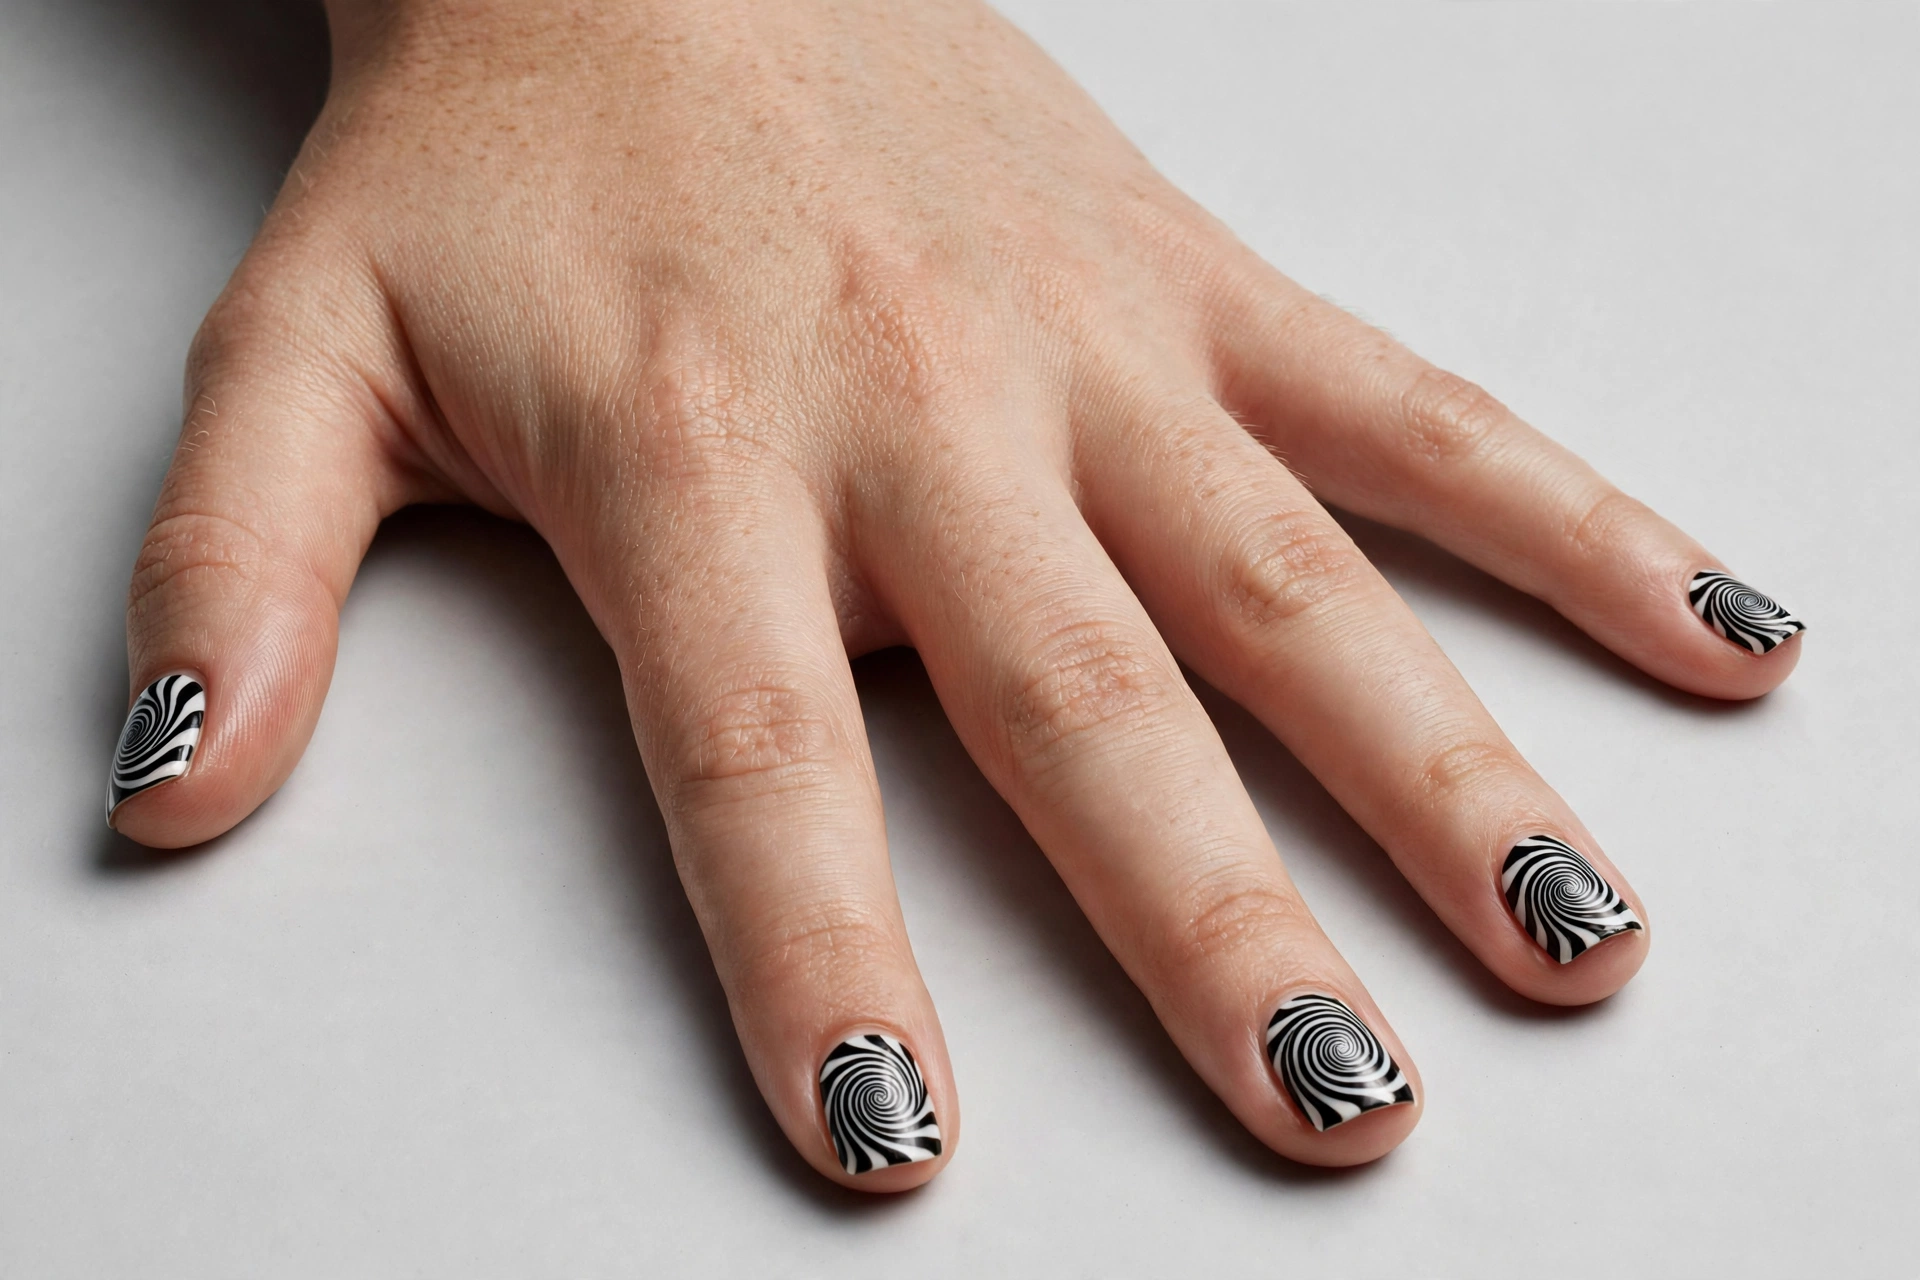
17. Black-and-White Op Art Spirals
Bold hypnotic spirals in pure black and white that create a genuine optical-illusion effect. It is the most graphic design here and doubles as a conversation starter.
Short square nails keep the spirals readable. Precision matters, so work slowly with a fine liner brush, or use nail stickers for the spiral and seal with top coat if freehand spirals defeat you. There is no shame in the sticker route; the result is identical from a normal viewing distance. Difficulty: medium.
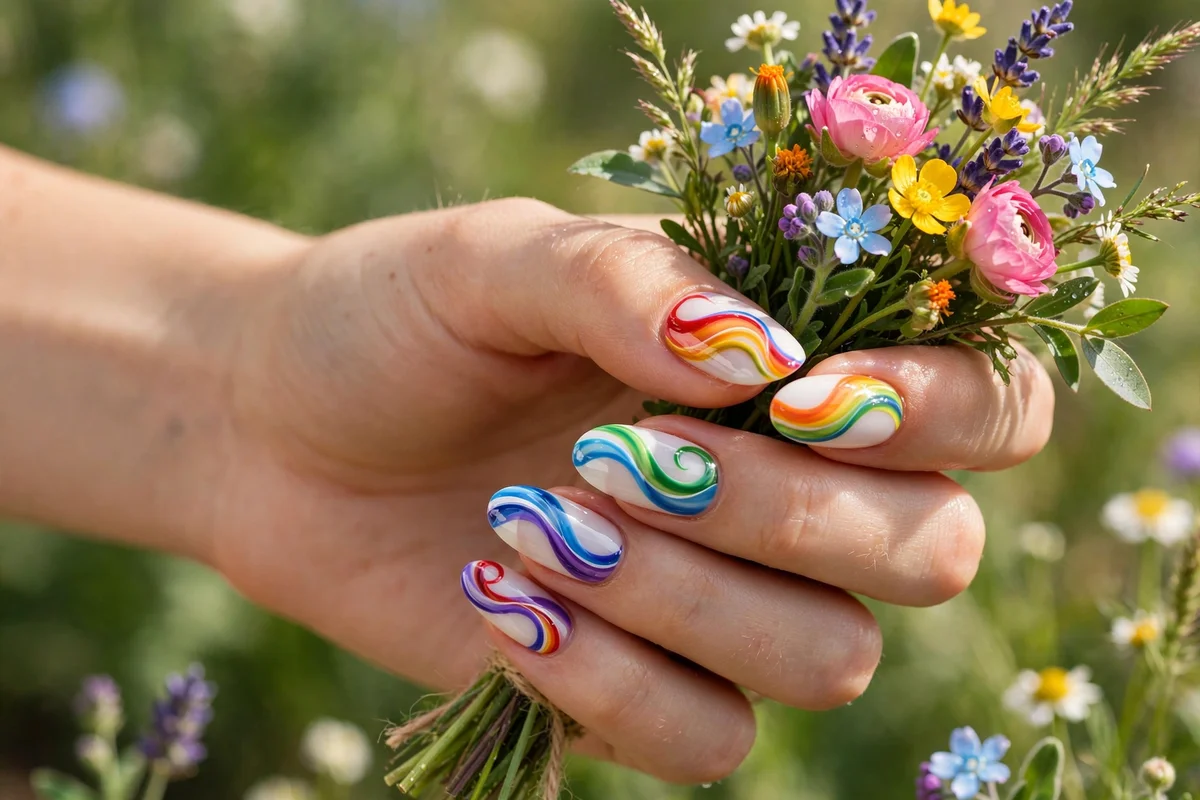
18. Rainbow Ribbon Swirls
Glossy ribbon waves in red, orange, yellow, green, blue, and purple sweeping across a white base. It is the happiest design in this article and a festival-season favorite.
Long oval nails give each ribbon room to sweep. Paint the white base, then draw each color ribbon with a liner brush, working from one edge and letting the ribbons overlap slightly. For more rainbow inspiration, see our rainbow nail designs and pastel nail designs collections. Difficulty: medium.
Which Swirl for Which Season (and Occasion)
The 18 designs above are grouped by style, but most people choose by calendar. Here is the same guide, remapped:
Spring: blush wet-marble (10) and blooming gel watercolor (11) are the season’s soft-focus pair, with tonal taupe (7) for the days in between. Summer: ocean waves (14) were made for vacations, rainbow ribbons (18) own festival season, and the disco sunset gradient (4) is the warm-evening statement. Autumn: harvest gold (5) and lava lamp blobs (3) carry the retro palette into knitwear weather, and smoky quartz (13) is the grown-up evening pick. Winter: micro black lines (9) and op art spirals (17) give the party season its graphic edge, while Y2K chrome (16) is the New Year finish.
By occasion: for weddings and formal events, stay in the minimal group — the single white wave (6), French tip swirls (8), and smoky quartz (13) photograph beautifully without competing with the outfit. For the office, designs 6, 7, and 9 are the safe three. For nights out and photos, go graphic: neon contrast (15), chrome (16), and op art (17) are built to be noticed.
Swirl Mistakes to Avoid
Most failed swirl nails fail for the same handful of reasons, and all of them are fixable. Avoiding these mistakes matters more than artistic talent.
Overloading the brush. Too much polish on the liner brush creates thick, clumpy lines instead of fine waves. Load only the tip and wipe excess on the bottle neck before every stroke.
Swirling on a wet base. Painting swirls before the base color is fully dry (or cured, for gel) drags base color into your lines and muddies everything. Patience here is a technique.
Skipping the cure between colors. With gel, flash-cure each color layer for a few seconds before adding the next. Uncured layers bleed into each other and erase your crisp lines.
Forcing a bad angle. When your wrist feels awkward mid-line, lift the brush and reposition rather than pushing through. Manicurists lift and continue constantly; the join is invisible once sealed.
Crowding the nail. Four or five colors on one nail usually read as chaos. Two or three colors with real negative space between them look deliberate and expensive.
How to Choose Your Swirl
Match the swirl to your nail length and your week. Short nails suit high-contrast, simple swirls like the harvest gold waves, micro black lines, and op art spirals, since bold patterns read clearly on a small canvas. Long nails carry busy art: psychedelic swirls, ocean waves, and water marble need the real estate.
For shape guidance, medium to long almond and oval nails flatter nearly every swirl here, while square and coffin shapes suit graphic and fluid designs. If you are unsure which shape suits your hands, our nail shapes guide breaks down all eight shapes with photos.
Consider your finish too. Glossy top coat makes every swirl look liquid and professional; matte top coat over graphic swirls gives an editorial edge but shows wear faster. Gel polish holds swirl art for two to three weeks, while regular polish needs a fresh top coat every few days to protect the lines.
At the Salon: Cost, Time, and What to Ask For
Not everyone wants to paint their own swirls, and salons do them well — if you ask precisely. Swirl art is usually charged as nail art on top of your manicure: expect roughly $10–25 added to a gel set for liner-brush swirls on all ten nails, less for accent nails only, and more for hand-painted marble or chrome work. A full gel manicure with swirl art typically lands between $55 and $95 depending on your city and the salon. Timing matters too: simple waves add about 10–15 minutes to an appointment; wet-marble, water-marble, and chrome designs can add 30 minutes or more, so mention the art when you book, not when you sit down.
Bring a photo of the exact design — this article’s pictures work fine — and name the method if you know it: “liner-brush waves,” “wet marble,” or “blooming gel” tells an experienced tech exactly which technique you mean. If the salon quotes swirls as a per-nail charge, ask for the design on two accent nails first; it is the standard way to test a new salon’s line work before committing all ten nails to it.
Swirls in 2026: The Pucci Print Moment
If swirls feel suddenly everywhere again, there is a reason. The swirling psychedelic prints of Italian designer Emilio Pucci became one of 2026’s defining fashion references, and nail artists translated them straight onto nails: kaleidoscopic waves in teal, coral, lime, and lilac over a nude or milky base. The good news is that you already own this trend. A Pucci-style set is simply the retro group above (designs 1, 4, and 18) repainted in that brighter Mediterranean palette, drawn with the same liner-brush method. Swap the 70s sunset colors for Pucci brights, keep the base sheer so the print breathes, and the most current swirl look of the year is a palette change, not a new skill.
Frequently Asked Questions
Can I do swirl nails with regular polish, or do I need gel?
You can absolutely do swirl nails with regular polish. The liner-brush and wet-marble methods work with both; the only method that requires gel is blooming gel. The main difference is working time: regular polish dries as you work, so paint decisively, while gel stays workable until you cure it, which is more forgiving for beginners.
What is the best brush for painting swirl nails?
A fine liner brush with long, thin bristles is the standard tool. The long bristles hold enough polish to draw a continuous curve without reloading, and the fine tip keeps lines thin. Keep a second small brush dipped in acetone or alcohol for cleaning up edges and erasing lines you dislike.
Why do my swirl lines look thick and messy?
Almost always because the brush is overloaded with polish. Load only the tip, wipe the excess on the bottle neck, and draw each line in one smooth motion. Painting swirls on a base that is not fully dry is the other common cause, since wet base color bleeds into the lines.
Do swirl nails work on short nails?
Yes, and some swirls look better short. High-contrast designs like harvest gold waves, micro black lines, and op art spirals read clearly on short nails. Keep the pattern simple on short nails: one or two colors with real negative space looks intentional, while busy multicolor art needs more length to avoid looking crowded.
How long do swirl nail designs last?
Swirl designs in gel polish last about two to three weeks with normal care, the same as other gel art. In regular polish, expect five to seven days before tip wear shows, and reapply top coat every two to three days to protect the swirl lines. Cuticle oil and gloves for housework extend any manicure.
What nail shapes suit swirl designs best?
Almond and oval shapes flatter nearly every swirl, from minimal waves to psychedelic spirals, because their curved edges echo the curves of the art. Square and coffin shapes suit graphic and bold swirls. Short rounded nails work well for simple high-contrast swirls. Our nail shapes guide covers all eight shapes in detail if you want to match shape to design.
Is water marbling too hard for beginners?
It is the hardest swirl method here, but it is learnable. Protect the skin around your nails with tape or liquid latex, work quickly while the polish is wet, and expect your first attempt to be a practice run rather than a finished set. If water marbling frustrates you, the wet-marble method on the nail itself gives a similar marbled look with far less mess.
How much do swirl nails cost at a salon?
Swirl art is normally an add-on to your manicure rather than a separate service. Expect roughly $10–25 on top of a gel set for liner-brush swirls on all ten nails, less for accent nails, and more for marble or chrome work; a full gel manicure with swirl art typically totals $55–95 depending on the salon and city. DIY costs almost nothing beyond polish and a liner brush once you own the basics.
Are swirl nails still in style in 2026?
Yes — swirls are one of 2026’s recycled-with-a-twist trends. The Pucci-print revival pushed psychedelic swirl patterns back onto runways and nails alike, and the minimal single-wave version never really left. Because the technique spans retro, minimal, marble, and graphic looks, some version of the swirl is almost always current; only the palette changes.
Can you do swirl nails with dip powder?
Yes, with an adjustment. Dip powder itself cannot be drawn into lines, so the usual route is a dipped base color with the swirls painted on top in gel or regular polish, then sealed. Some techs also paint the swirl in dip base liquid and dip it into colored powder before activating. The liner-brush method in this article works over a finished dip set exactly as it does over polish.
Can you put swirl designs on press-on or acrylic nails?
Yes. Swirls are surface art, so they sit on press-ons, acrylics, and gel extensions the same way they sit on natural nails. Press-ons are actually the easiest practice canvas: paint the swirls while the nails sit on a stand, let them dry or cure fully, then apply them. Long acrylic and press-on shapes give busy designs like psychedelic swirls and water marble the room they need.