18 Cute Christmas Nail Designs You’ll Love to Wear
What “cute” honestly means here
Most “cute Christmas nails” lists are not cute. They are the same glamour roundups with a reindeer pasted in, or a list of glitter and red polish with the word cute in the title. That is why so many of them disappoint: you open the list looking for a snowman and get forty chrome nails.
This guide is built the other way around. Cute here means character-led and joyful: Santa, Rudolph, a snowman, a penguin in a scarf, an elf, a Nutcracker, a polar bear, a gingerbread house, a gnome. Every one of the 18 designs below is genuinely cute, every photo shows the design on a real hand in a real Christmas setting, and every idea carries the full expert block no competitor gives you in one place: the best shape, whether it suits short nails, difficulty, time, DIY versus salon, wearability against real December life, the exact words to say at the salon, and one honest watch-out. There is also a cute taxonomy so you can shop by lane, a section on keeping cute grown-up, a choosing guide, and a care and rescue guide for character art.
If you want the broader Christmas picture first, start with our main Christmas nail designs guide. If your December is all parties, our Christmas party nail designs guide groups designs by occasion. If your nails are short, our short Christmas nails guide is built for them, and if you want the easiest possible versions, our simple Christmas nails guide grades every design honestly by skill. This guide answers a different question: which cute design should I pick, and how do I wear it without looking like a Christmas card exploded on my hands?
The cute taxonomy: shop by lane
Cute is not one look. It is four lanes, and knowing which lane you are in stops you buying the wrong polishes and painting the wrong design. Pick your lane first, then pick your idea inside it.
- Classic character cute (ideas 1–7): The faces everyone recognises: Santa, Rudolph, a snowman, a penguin, an elf, a Nutcracker, a polar bear. Bold, joyful, unmistakably Christmas. Best for family gatherings, school gates, and anyone who wants their nails to make people smile.
- Sweet treats and festive scenes (ideas 8–12): Gingerbread houses, hot cocoa, Christmas pudding, snow globes, stockings. The food-and-scene lane: cute without a face to paint, so it is the easiest lane for shaky hands.
- Pastel and kawaii cute (ideas 13–15): Soft, pale, and gentle: pastel baubles, lilac snow dots, mint with tiny hearts. The lane for people who want cute without loud red and green.
- Coquette and bow cute (ideas 16–17): Bows, velvet, pearls. The pretty, slightly glamorous lane: cute that reads as styled rather than silly.
- Cozy cute (idea 18): The gnome. One warm, soft character for the coldest days.
One rule holds across all five lanes: one character per hand, at most. A snowman beside a penguin beside a reindeer is not a set, it is a crowd. Put the character on one or two accent nails and let a matching solid colour carry the rest.
Classic characters: the faces everyone recognises
These seven are the full cute-character bench no competitor gives you in one place. Every other list covers two or three of them and ignores the rest. Each one is its own idea, its own photo, and its own expert block.
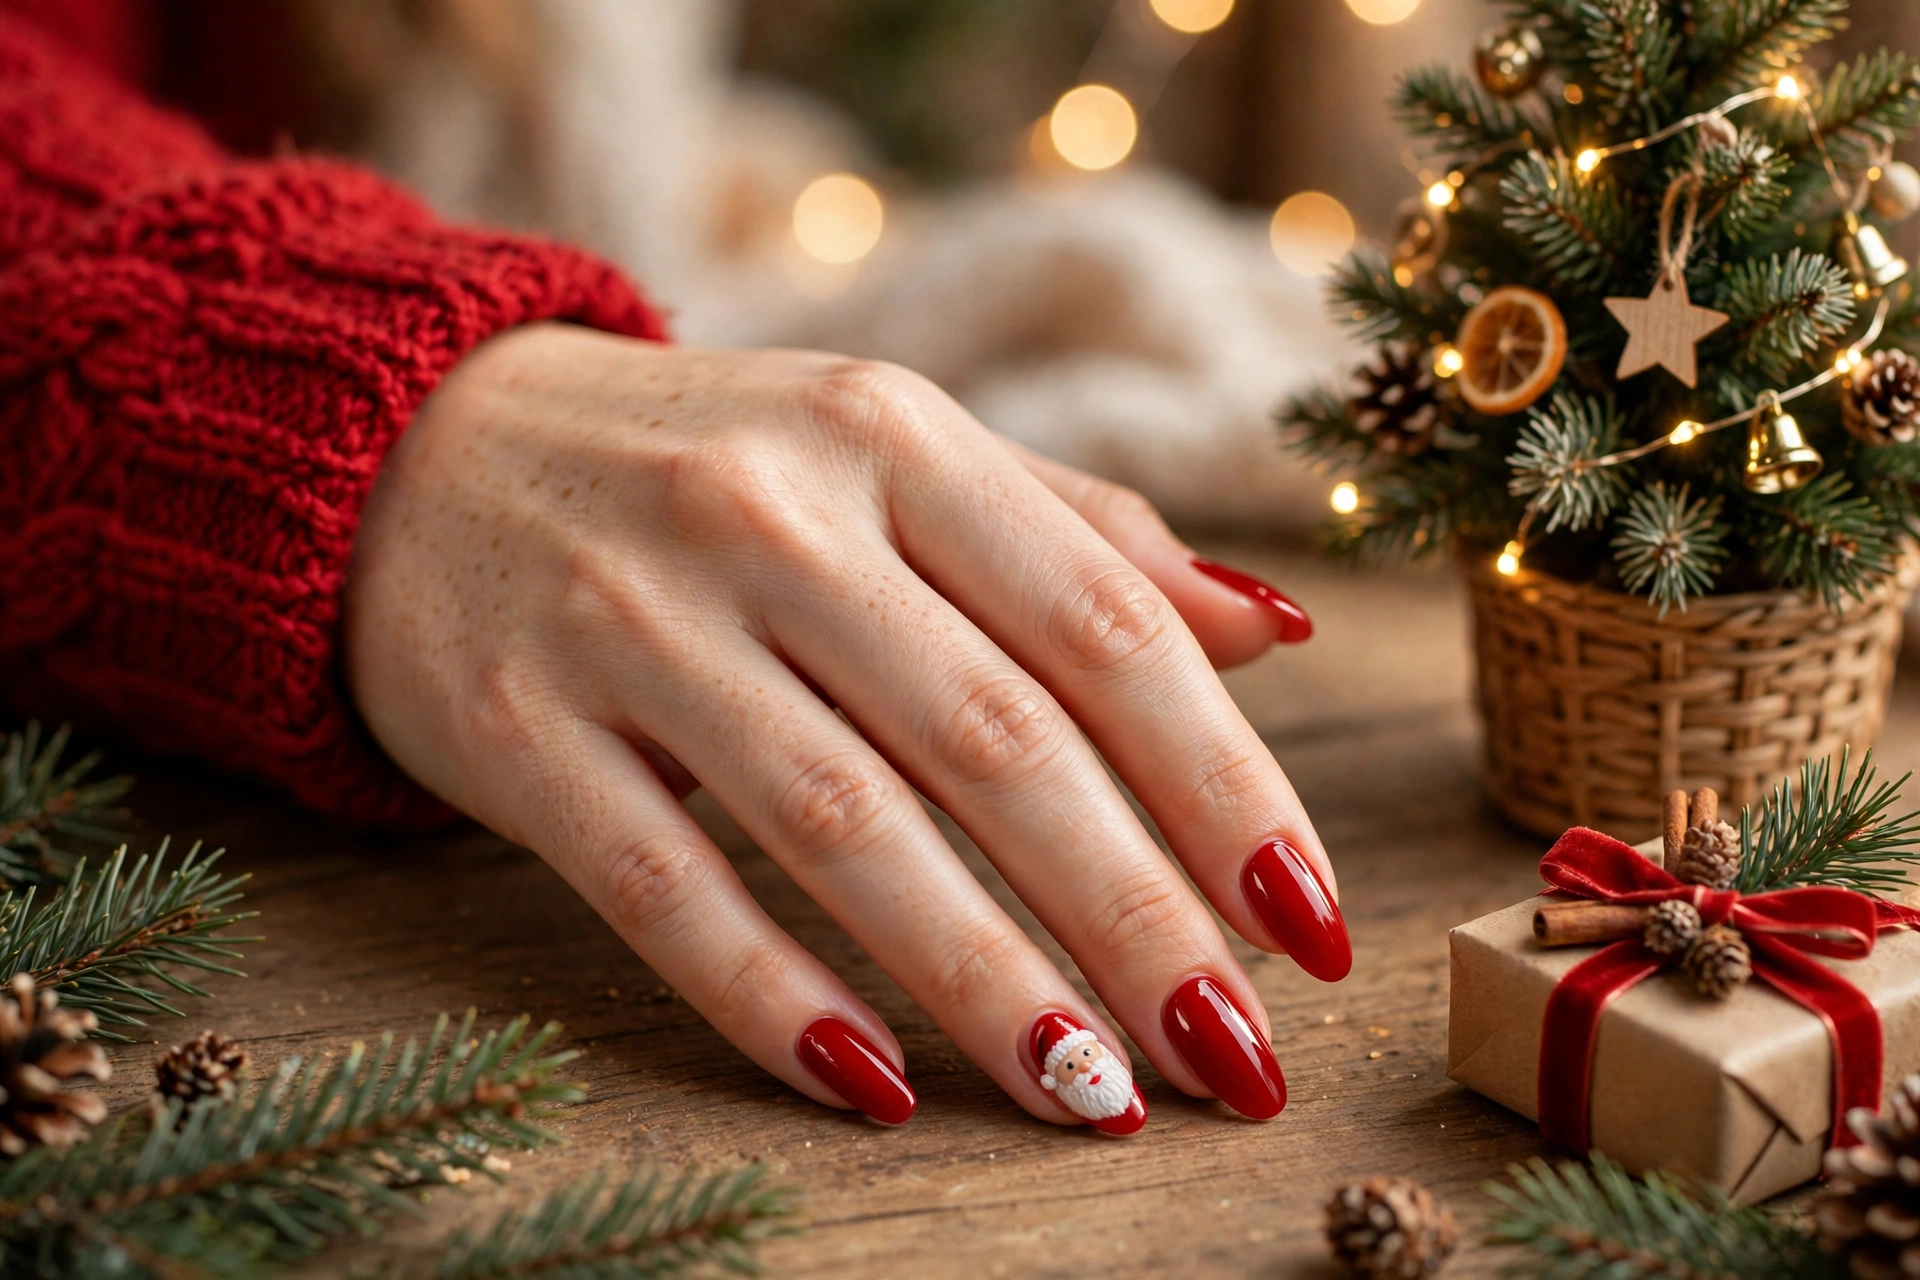
1. Santa Face — the jolly one
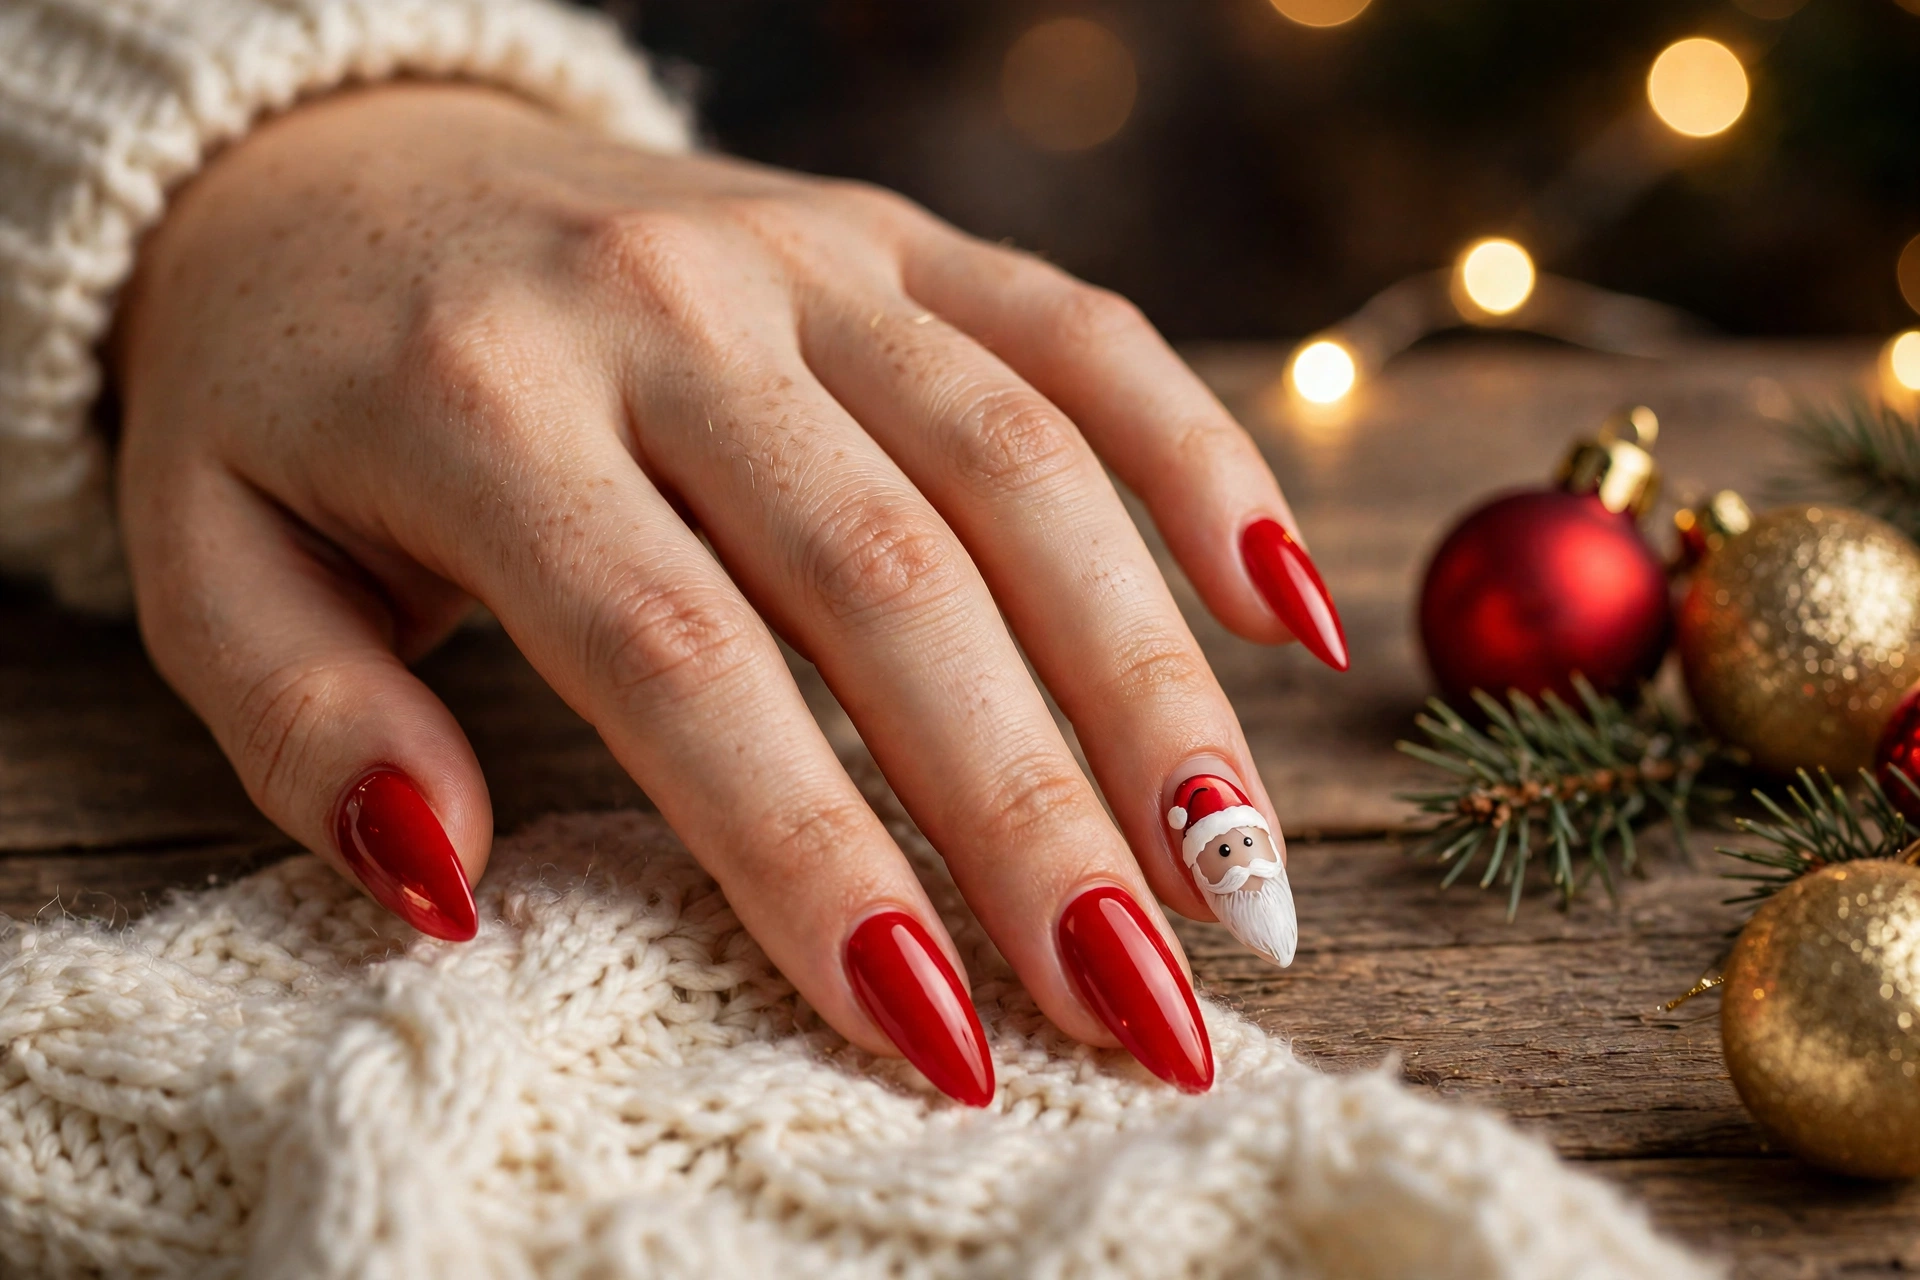
A full Santa face on one accent nail: white beard, red hat, two dot eyes, a pink nose. The other nine nails stay classic red, so the face reads as a joke you are in on, not a costume. This is the design to pick if you only paint one character all December.
- Shape: Short almond or oval. The accent nail needs a little length for the beard to read.
- Best for: Family Christmas, school gates, and anyone who wants the single most recognisable cute design.
- Difficulty: Medium. The face is dots and one curved line, but the beard needs a steady hand or a sticker.
- Time: 30–40 minutes DIY; 45–60 minutes at a salon.
- DIY vs salon: DIY with a Santa face sticker or water decal looks painted once sealed. Salon for a hand-painted face.
- Wearability: Medium to high. Red hides wear well; the face is on one nail only, so a chip there is easy to repaint.
- Say at the salon: “Classic red on nine nails, one Santa face accent on the ring finger — white beard, red hat, keep the face small.”
- Watch out: Do not paint the beard too low or it crowds the tip and reads as a white blob. Keep the face in the top two-thirds of the nail.
2. Rudolph the Red-Nosed Reindeer
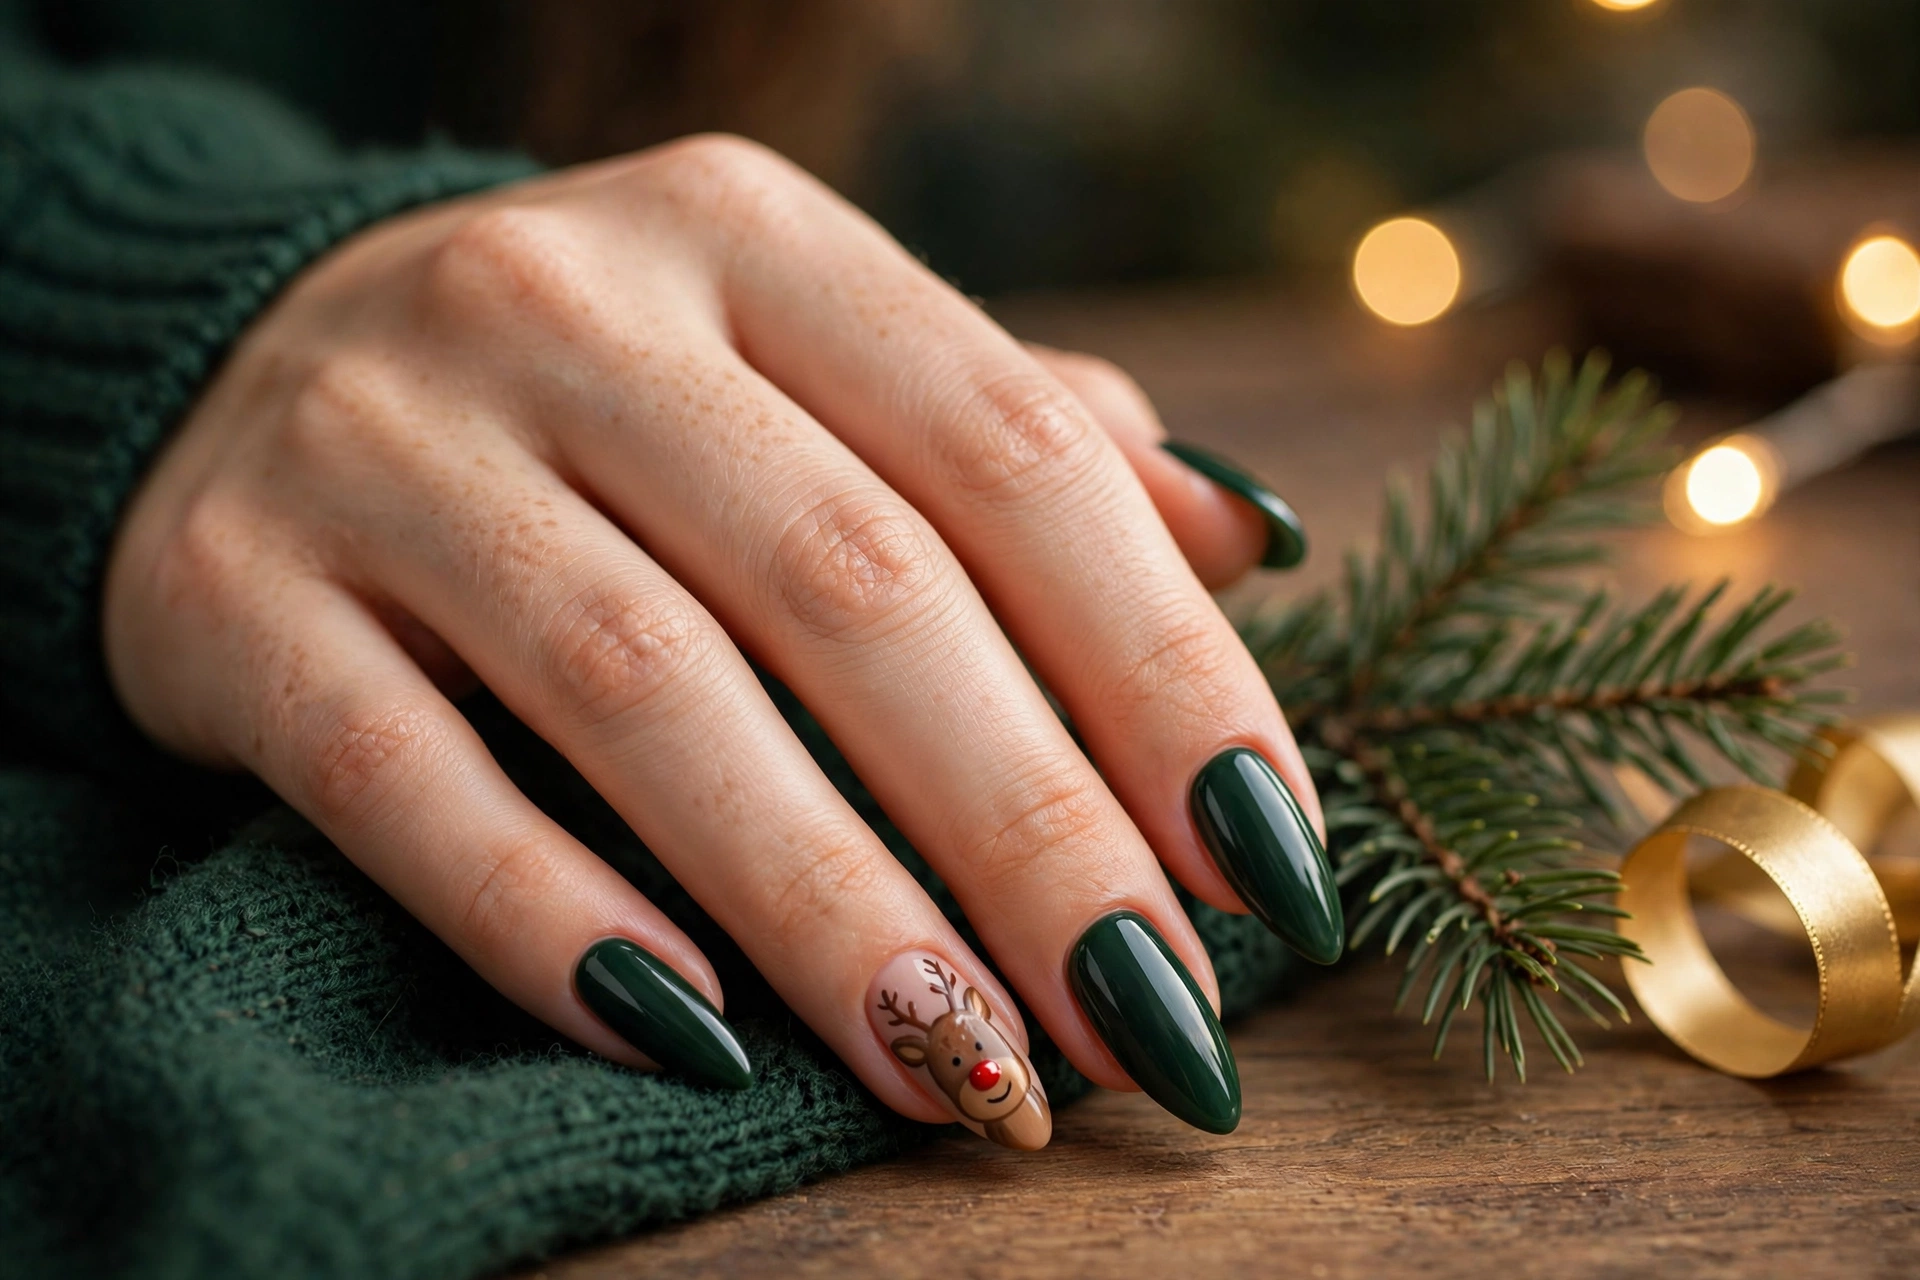
A brown reindeer face on one accent nail, with a bright red nose that is the whole joke. The other nails are deep forest green, so the set reads as Christmas even before anyone spots the reindeer.
- Shape: Short squoval or oval. The face needs a flat, even nail bed.
- Best for: A playful set for Christmas Day itself, and for anyone who finds Santa overdone.
- Difficulty: Medium. The face is two ears, two dot eyes, and one red nose dot — simple shapes, but the nose must be dead centre.
- Time: 25–35 minutes DIY; 40–50 minutes at a salon.
- DIY vs salon: DIY-friendly with a reindeer sticker or stamp. Salon for a hand-painted face with antlers.
- Wearability: High. Dark green hides growth and chips, and the red nose is one dot to repair.
- Say at the salon: “Deep forest green on nine nails, one Rudolph accent on the ring finger — brown face, bright red nose, small antlers.”
- Watch out: Do not draw the antlers too large or they swallow the face. Keep them as two short lines at the top corners of the nail.
3. Snowman Face on Soft Blue
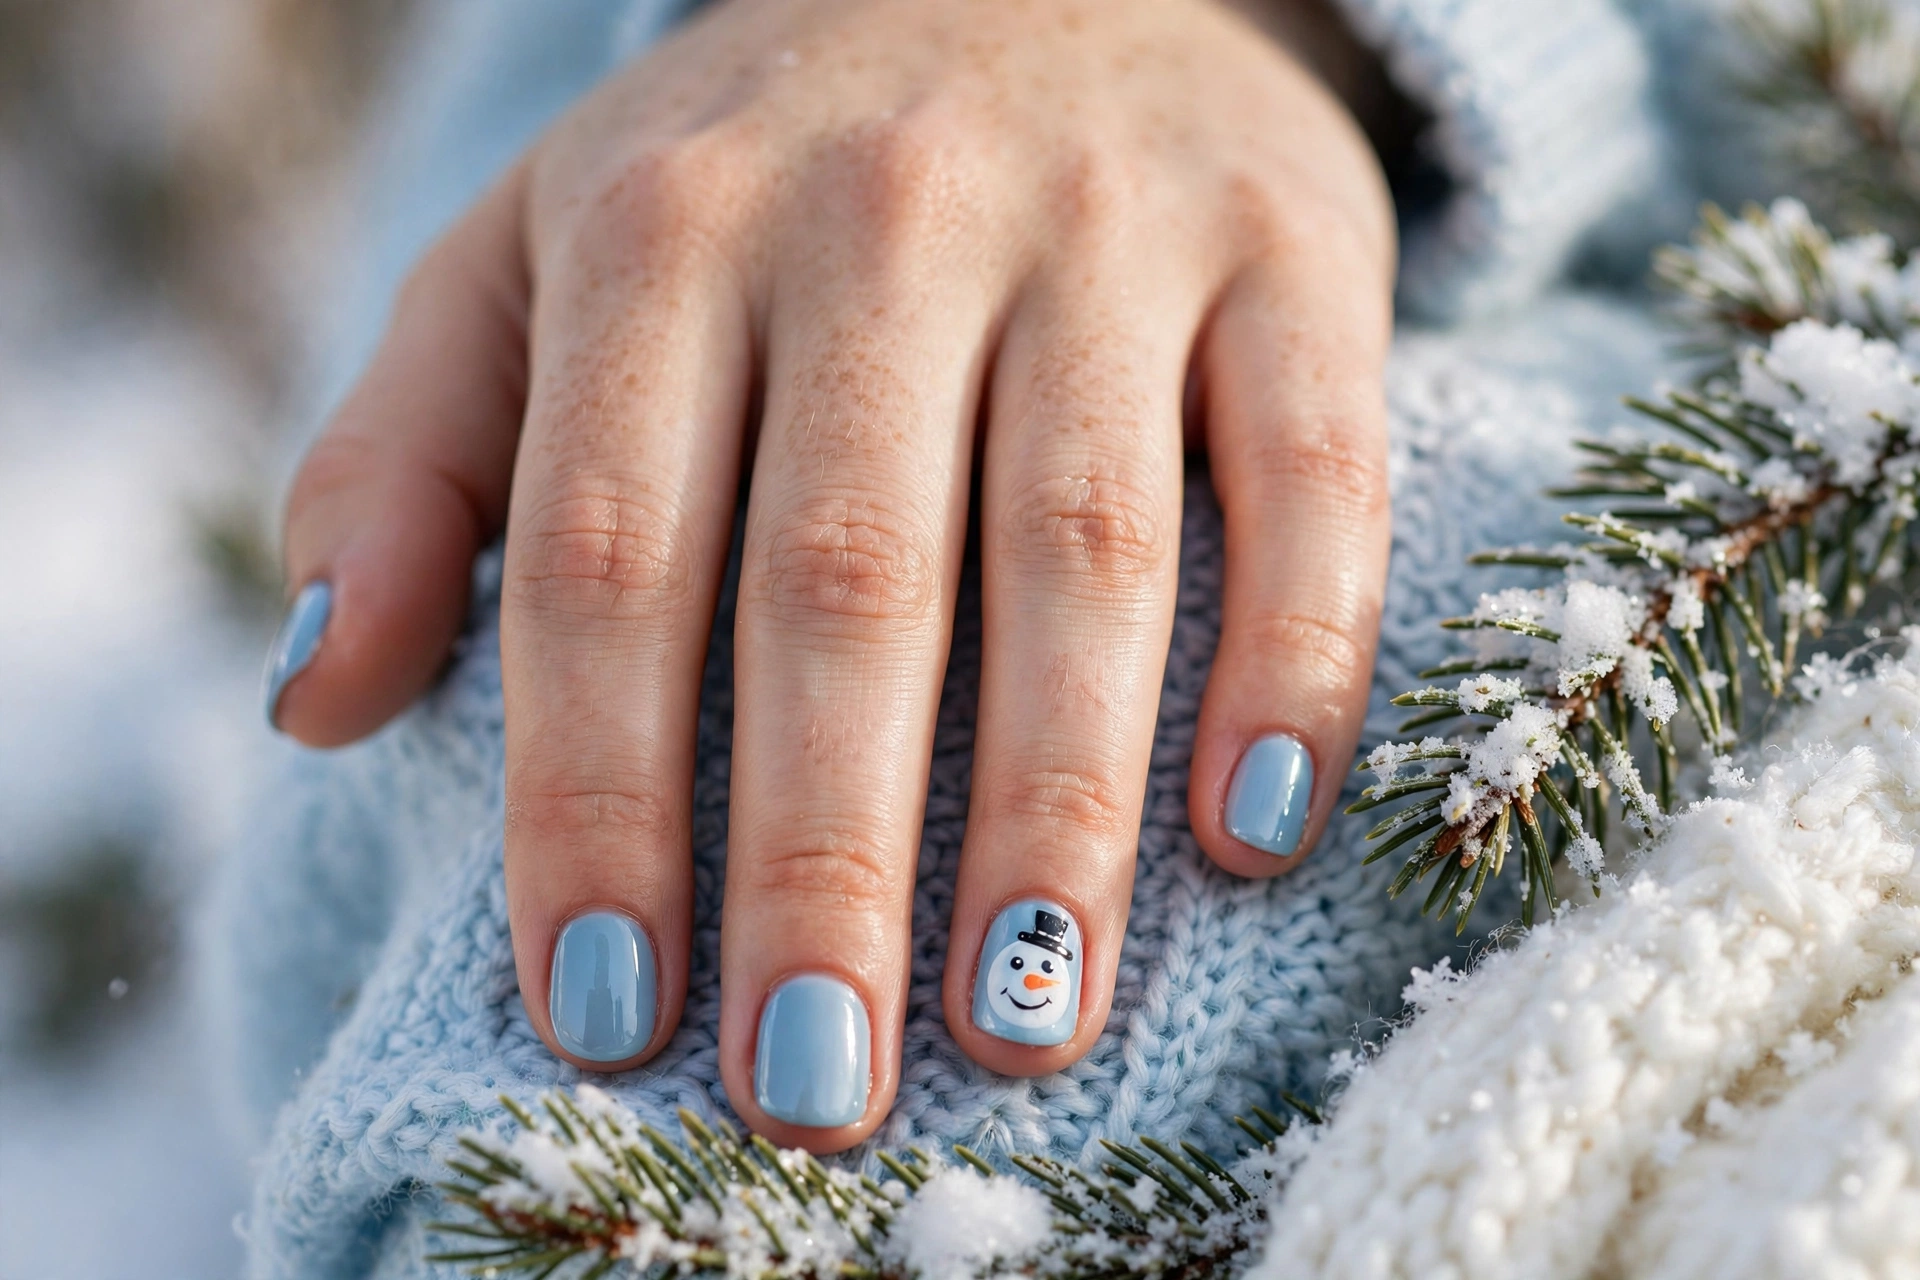
A snowman face on one accent nail: two black dot eyes, a tiny orange carrot nose, a curved dot smile, and a small black top hat. The other nails are soft icy blue, so the whole set feels like a cold morning.
- Shape: Short round or oval. Round suits the snowman best because there are no corners to fight.
- Best for: The cutest design in this guide for short nails, and for snowy-day photos.
- Difficulty: Easy to medium. The face is three dots and a triangle nose; the hat is two straight lines.
- Time: 20–30 minutes DIY; 30–40 minutes at a salon.
- DIY vs salon: DIY-friendly — a dotting tool does the whole face. Salon only if you want a hand-painted scarf as well.
- Wearability: Medium to high. Pale blue shows chips sooner than dark shades, so add a second top coat.
- Say at the salon: “Soft icy blue on nine nails, one snowman face accent on the ring finger — two dot eyes, orange carrot nose, tiny black top hat.”
- Watch out: Paint the carrot nose as a narrow triangle pointing sideways. A round orange dot reads as a clown nose, not a carrot.
4. Penguin in a Red Scarf
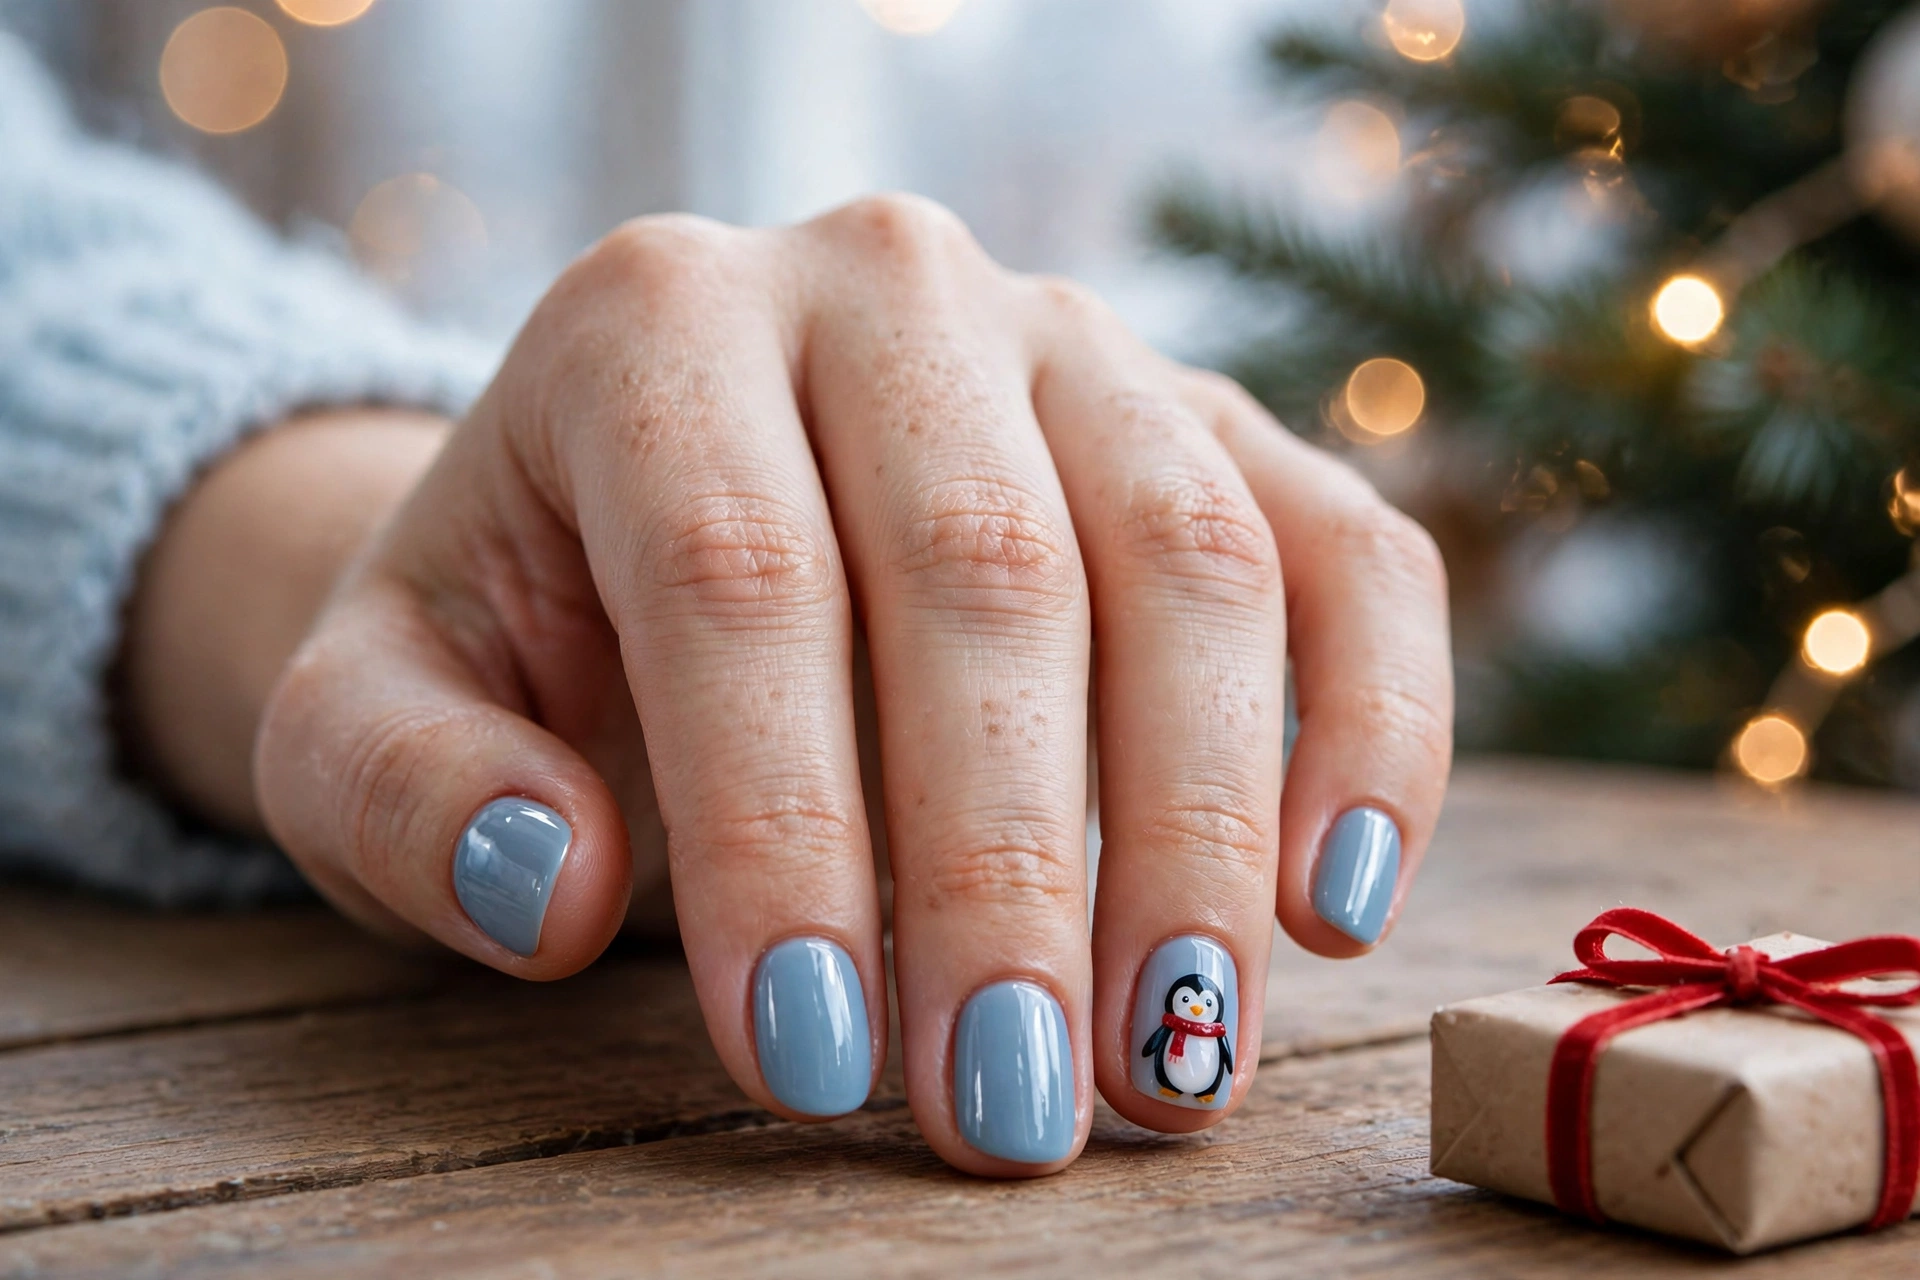
A small penguin on one accent nail: black oval body, white belly, orange beak, and a red scarf wrapped around its neck. The scarf is what turns a winter penguin into a Christmas penguin. The other nails are icy blue with a single gold star on the thumb.
- Shape: Short oval. The penguin needs a rounded nail bed to sit on.
- Best for: The sweetest design for anyone who loves animals, and for kids’ Christmas parties (on an adult hand, it reads as playful, not childish).
- Difficulty: Medium. The body is one oval, the belly one smaller oval, and the scarf is two short lines — but the beak must be tiny.
- Time: 30–40 minutes DIY; 45 minutes at a salon.
- DIY vs salon: DIY with a penguin sticker or stamp. Salon for a hand-painted penguin with a scarf.
- Wearability: Medium. Pale blue shows tip wear, so cap the free edge carefully and refresh the top coat on day three.
- Say at the salon: “Icy blue on nine nails, one penguin accent on the ring finger — black body, white belly, orange beak, red scarf.”
- Watch out: Do not paint the penguin on every nail. One penguin is cute; ten penguins are a colony, and the set turns busy.
5. Elf on the Shelf
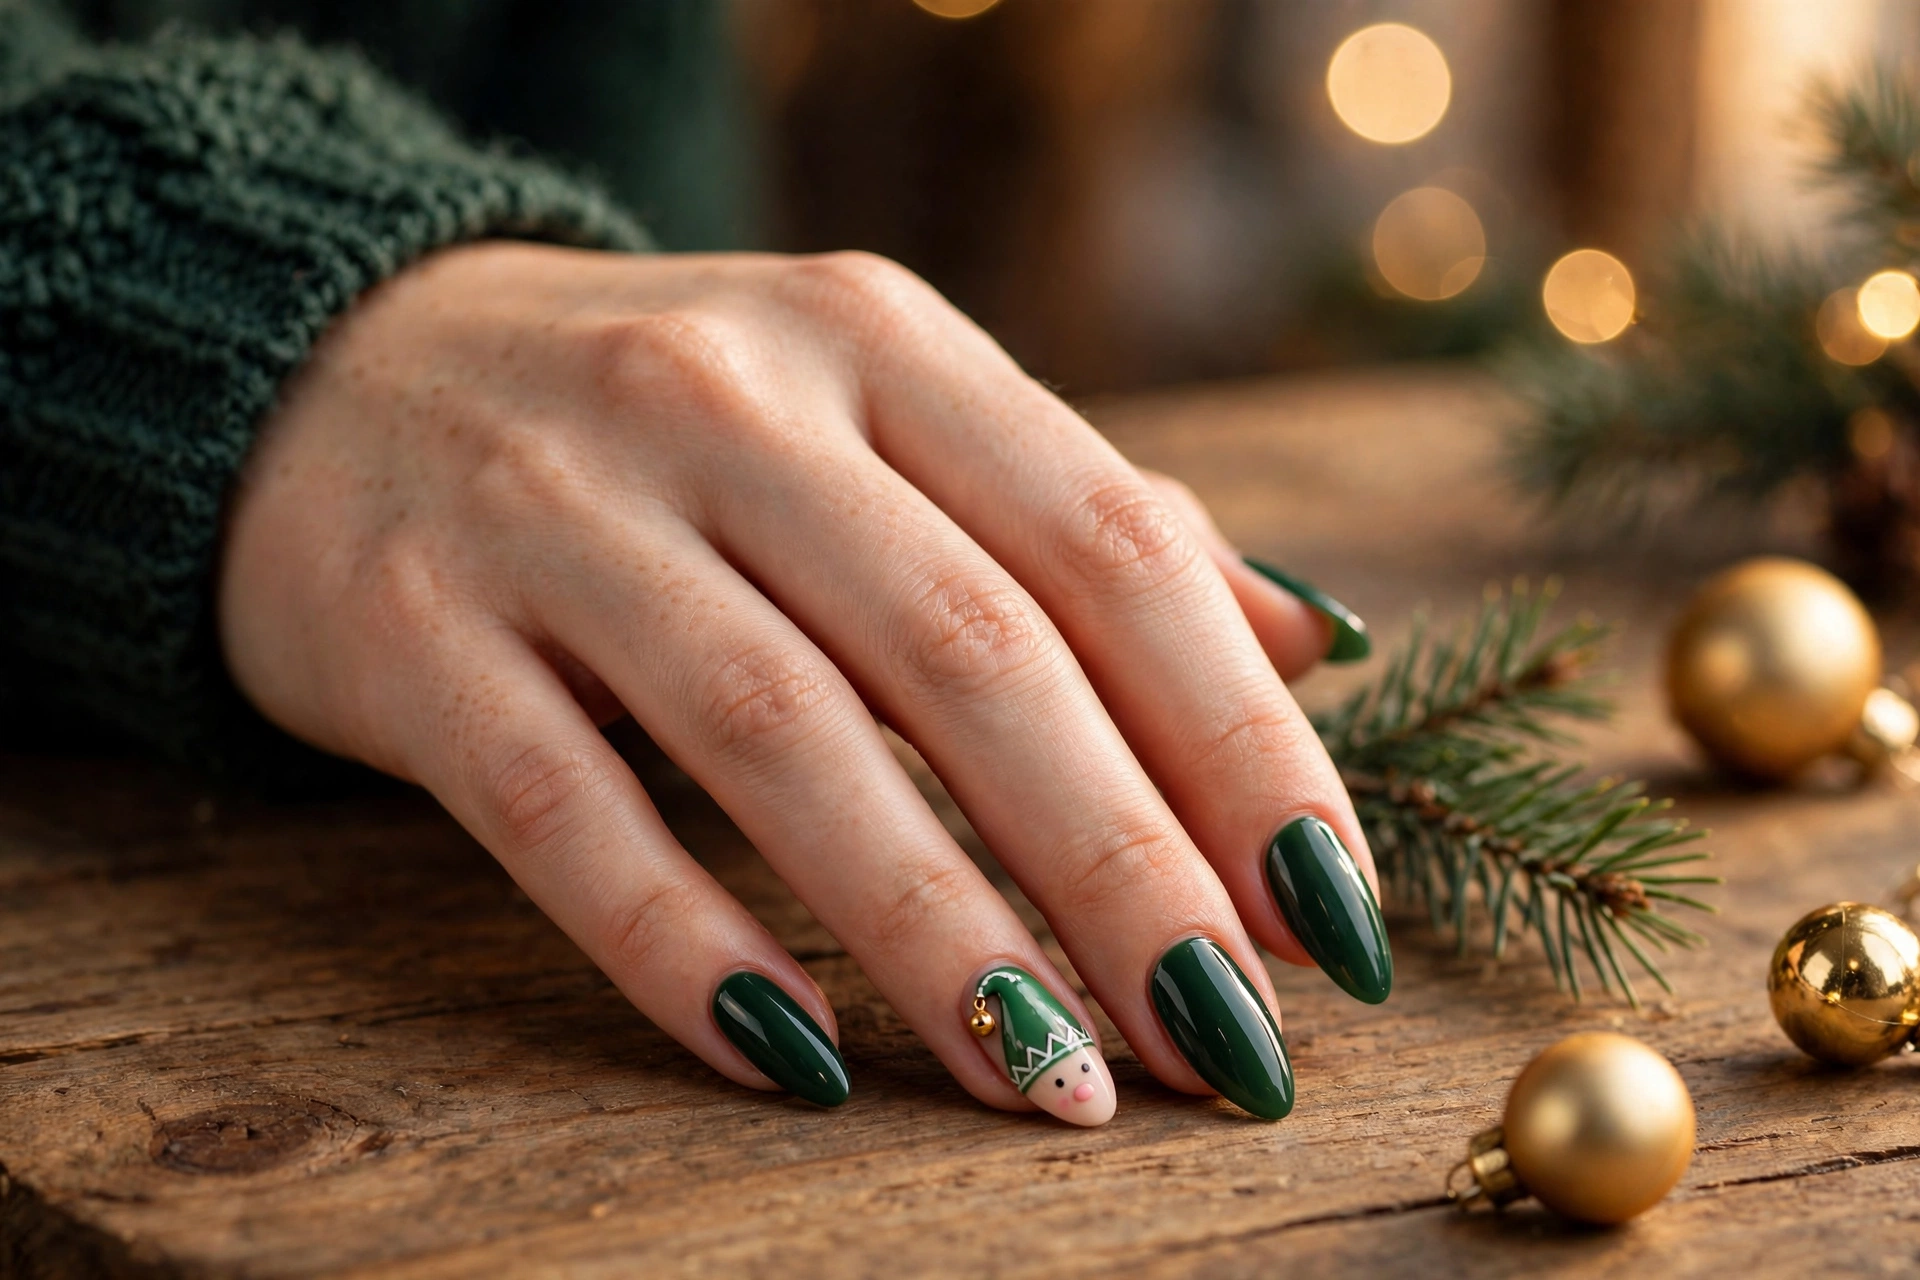
An elf face on one accent nail: green pointy hat with a white trim and a tiny gold bell, two dot eyes, and a pink nose. The other nails are forest green with one gold glitter accent, so the set looks like it came straight off the shelf.
- Shape: Short almond or oval. The hat needs a little length to point properly.
- Best for: A fun set for Christmas Eve, and for anyone with kids who know the elf.
- Difficulty: Medium to hard. The hat is a triangle, the face is dots, but the bell and trim need a fine brush.
- Time: 35–45 minutes DIY; 50–60 minutes at a salon.
- DIY vs salon: Salon-best for a hand-painted elf. DIY only with an elf sticker or decal — freehanding the hat is the hardest part of this guide.
- Wearability: High. Dark green hides wear, and the face is on one nail only.
- Say at the salon: “Forest green on nine nails, one elf face accent on the ring finger — green pointy hat, white trim, tiny gold bell, pink nose.”
- Watch out: Do not let the hat cover the whole nail or the face disappears underneath it. The hat should take the top third, the face the rest.
6. The Nutcracker
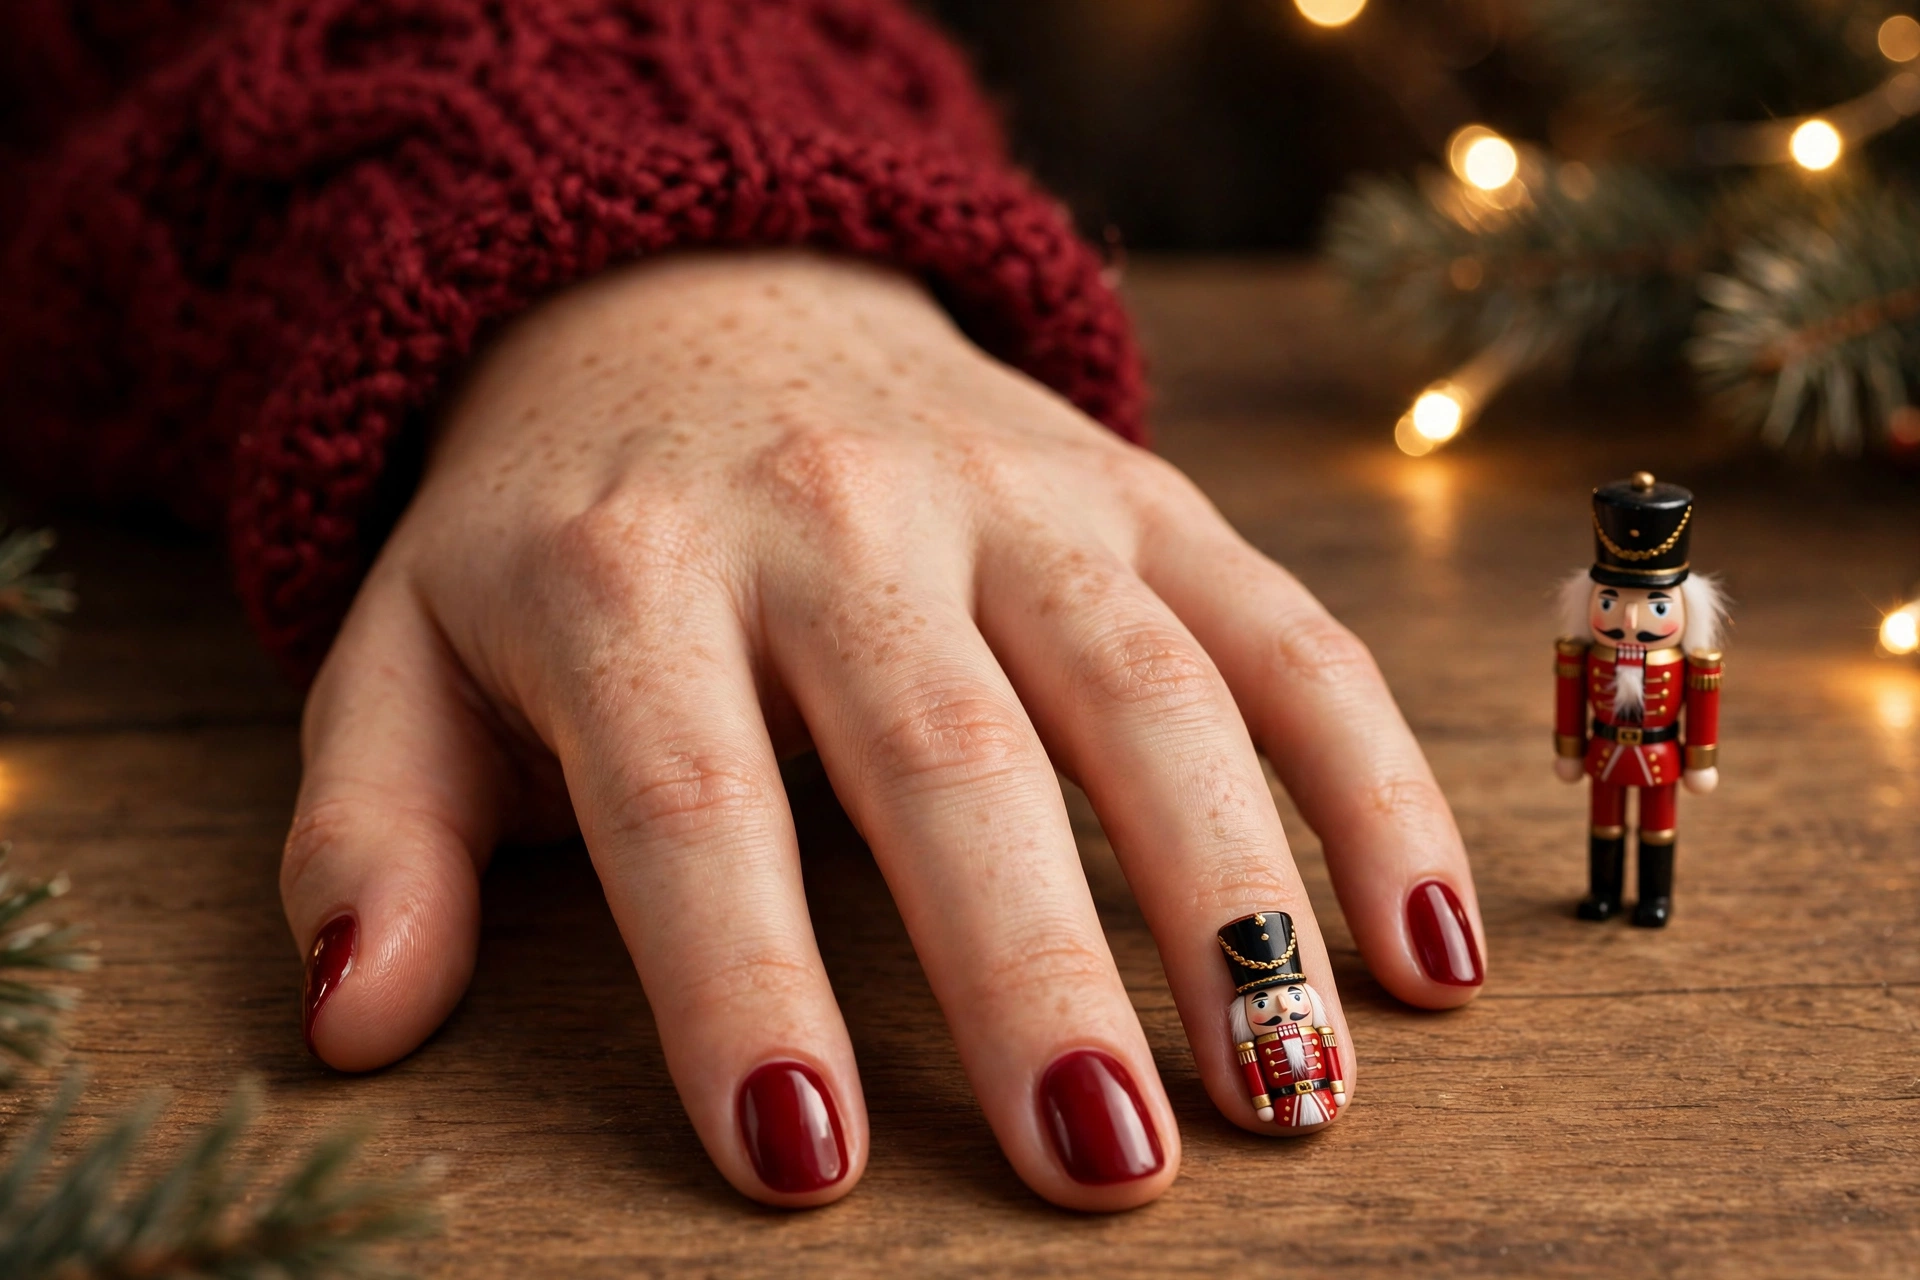
A Nutcracker soldier on one accent nail: tall black hat, white face, red jacket, and a gold belt. The other nails are deep red with one gold foil accent, so the set looks like a toy shop window. No competitor gives the Nutcracker its own idea — here it is, with its own photo.
- Shape: Short squoval. The soldier needs a straight, even nail bed for the hat and jacket lines.
- Best for: A striking set for Christmas parties, and for ballet and theatre lovers.
- Difficulty: Hard. The Nutcracker has the most parts of any character here: hat, face, jacket, belt, buttons.
- Time: 45–60 minutes DIY; 60–75 minutes at a salon.
- DIY vs salon: Salon-best. DIY only with a Nutcracker water decal — freehanding this one is a project, not a quick paint.
- Wearability: Medium. The design is detailed, so a chip on the accent nail shows. Keep a dotting tool handy for the buttons.
- Say at the salon: “Deep red on nine nails, one Nutcracker soldier accent on the ring finger — tall black hat, red jacket, gold belt, keep the face simple.”
- Watch out: Do not add a second character to this set. The Nutcracker is detailed enough alone; a reindeer beside it turns the hand into a toy box.
7. Polar Bear with a Red Scarf
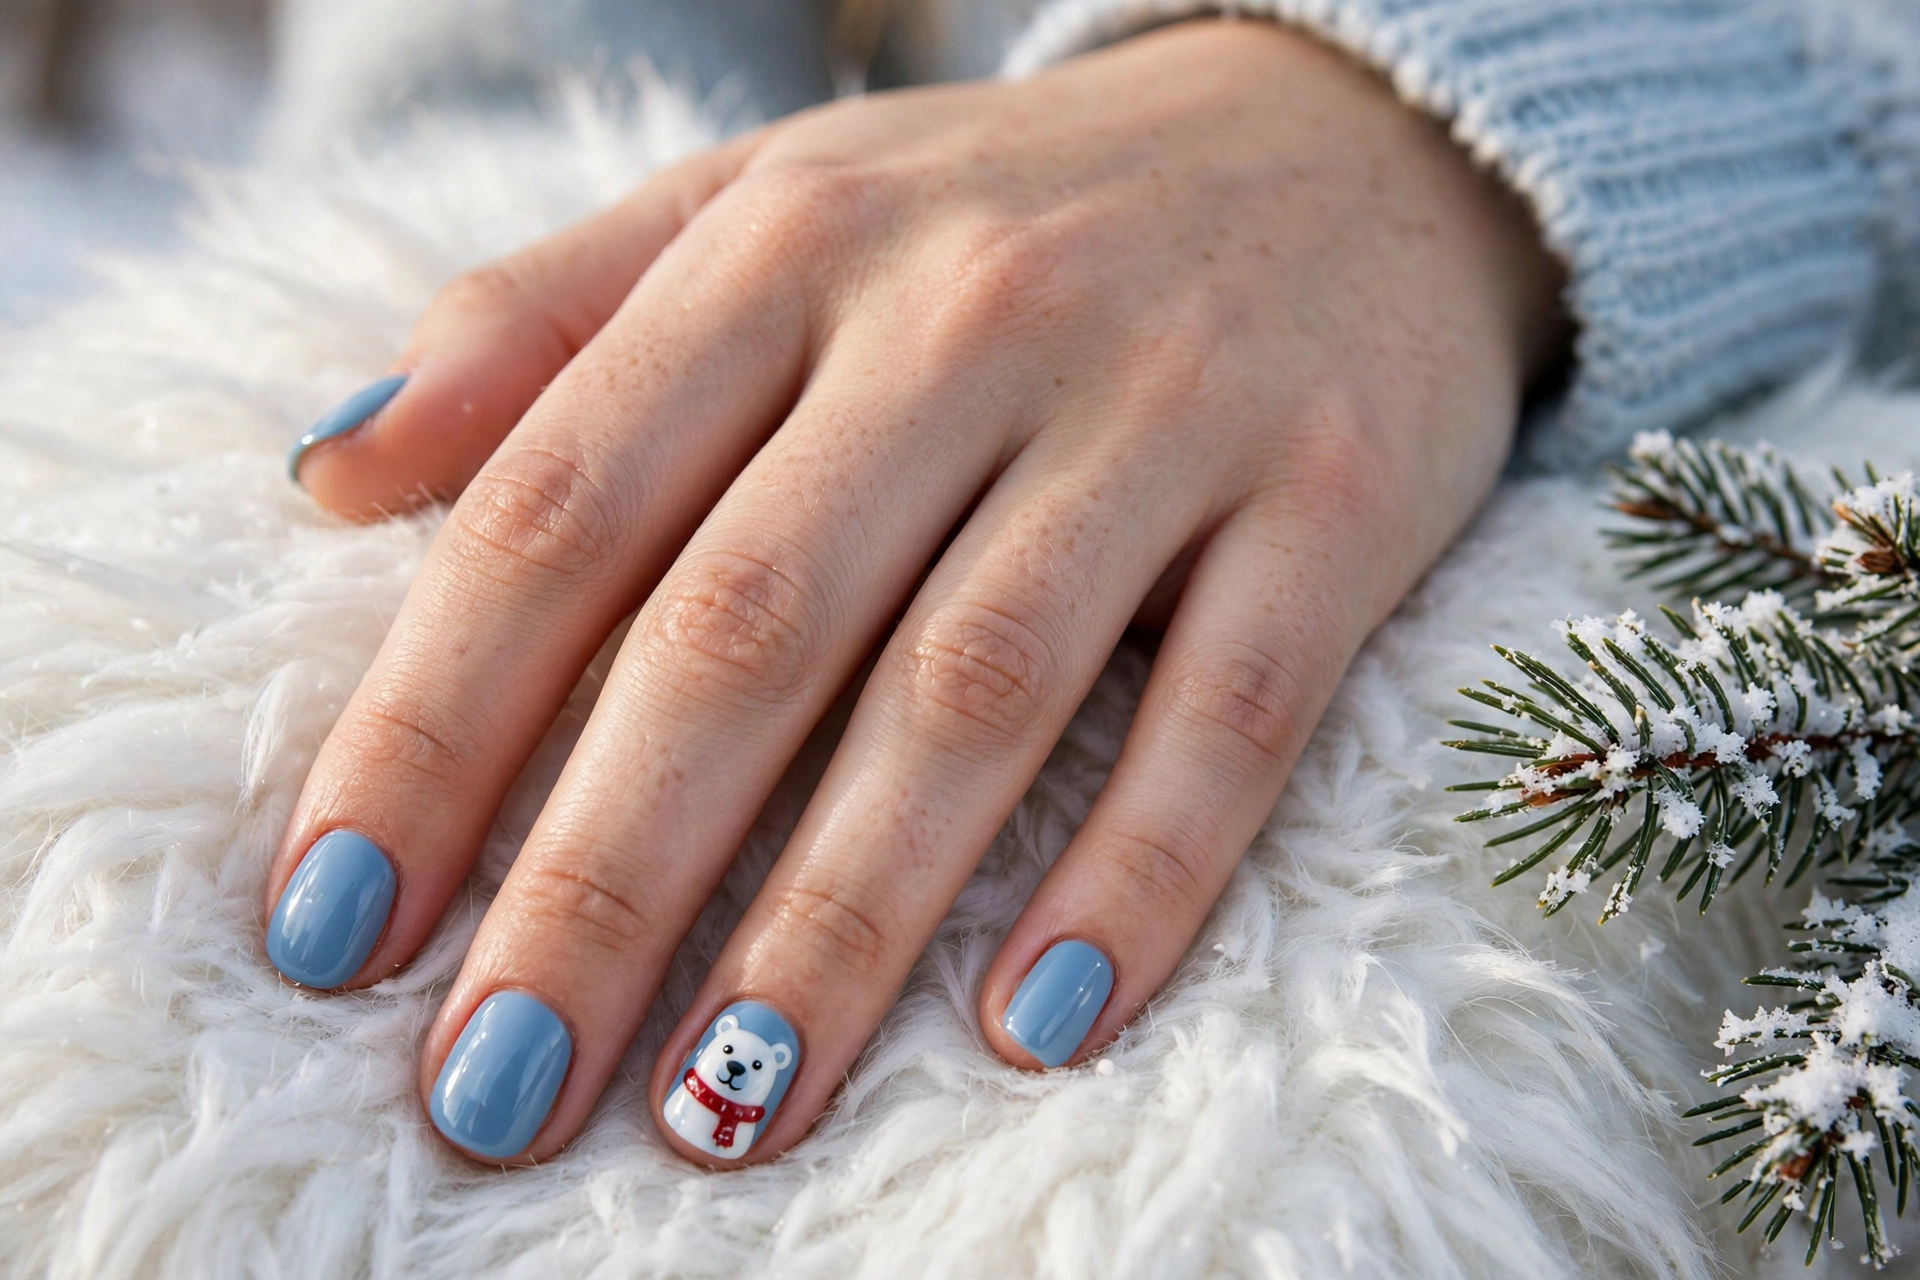
A polar bear face on one accent nail: white fur, two dot eyes, a black nose, and a red scarf around its neck. The other nails are icy blue, so the bear looks like it just stepped out of the snow.
- Shape: Short round or oval. The bear’s face is round, so a rounded nail suits it best.
- Best for: The softest, cosiest character in this guide, and for snowy-day photos.
- Difficulty: Easy to medium. The face is a white circle, two dot eyes, and a black nose — the scarf is two short red lines.
- Time: 20–30 minutes DIY; 30–40 minutes at a salon.
- DIY vs salon: DIY-friendly with a dotting tool. Salon only if you want the scarf hand-painted with texture.
- Wearability: Medium. Pale blue shows chips, so use two top coats and refresh on day three.
- Say at the salon: “Icy blue on nine nails, one polar bear face accent on the ring finger — white fur, black nose, red scarf.”
- Watch out: Keep the bear’s face small and centred. A face that touches the sidewalls looks like a white blob, not a bear.
Sweet treats and festive scenes: cute without a face to paint
Not every cute design needs a character face. This lane is for shaky hands and short evenings: gingerbread houses, cocoa, puddings, snow globes, and stockings. The art is shapes, not faces, so these are the easiest cute ideas in the guide — and the ones most likely to survive a week of real December life.
8. Gingerbread House
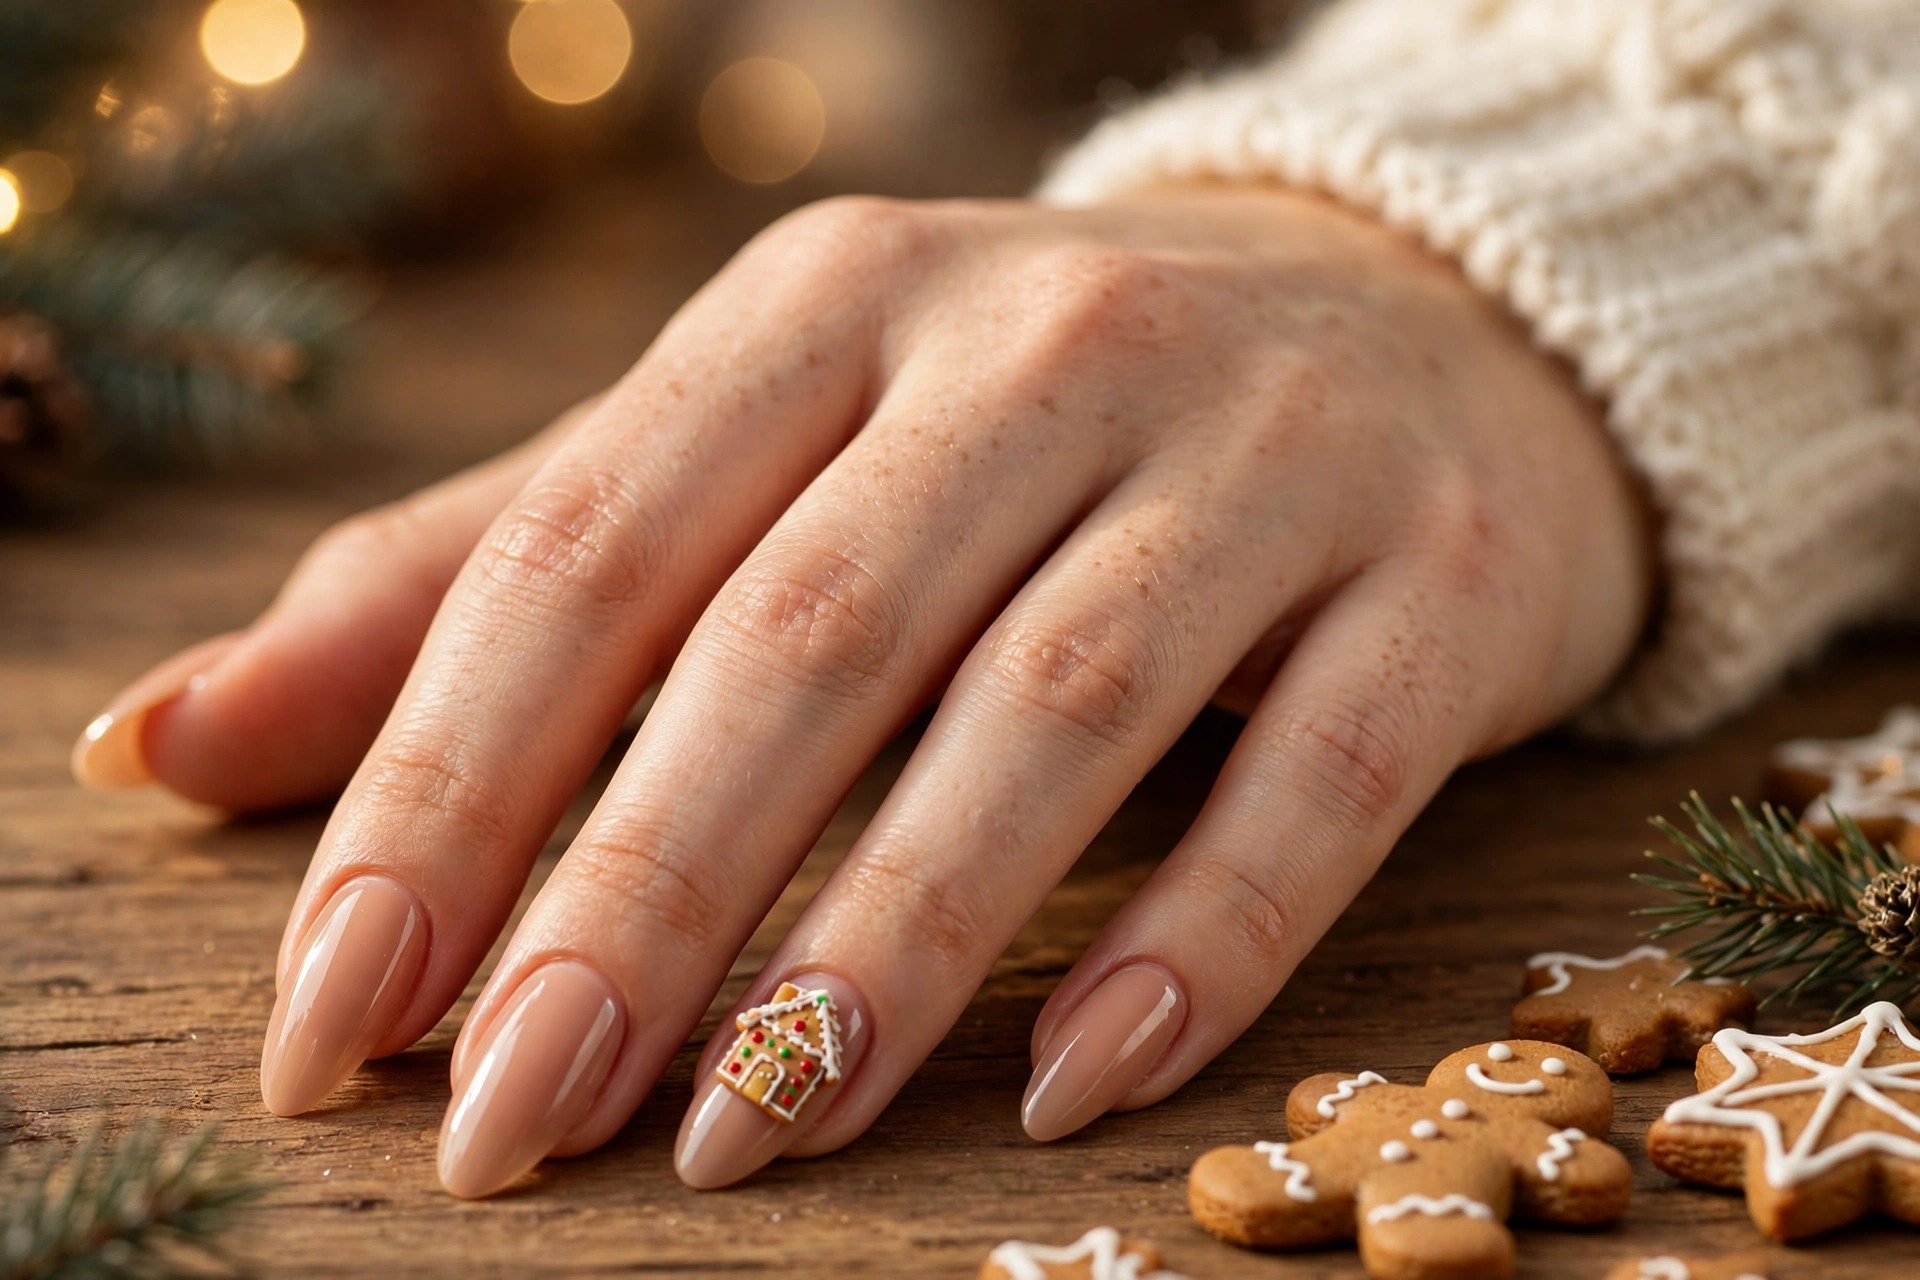
A tiny gingerbread house on one accent nail: a tan square with a triangle roof, white icing along the roof edge, and red and green candy dots for a door and windows. The other nails are warm nude with one chocolate brown accent, so the set smells like a bakery even before you open the cookie tin.
- Shape: Short squoval or oval. The house needs a flat, even nail bed for the roof line.
- Best for: Baking days, cookie swaps, and anyone who wants gingerbread without painting a gingerbread man.
- Difficulty: Medium. The house is a square and a triangle, but the icing lines need a fine brush and a steady hand.
- Time: 30–40 minutes DIY; 45 minutes at a salon.
- DIY vs salon: DIY with a gingerbread-house sticker or stamp. Salon for a hand-painted house with candy details.
- Wearability: High. Nude and brown hide wear well, and the house is on one nail only.
- Say at the salon: “Warm nude on nine nails, one gingerbread house accent on the ring finger — tan house, white icing roof, red and green candy dots.”
- Watch out: Do not make the house too large or it becomes a brown square. Keep it small, with visible nude base around it, so it reads as a house.
9. Hot Cocoa Mug with Marshmallows
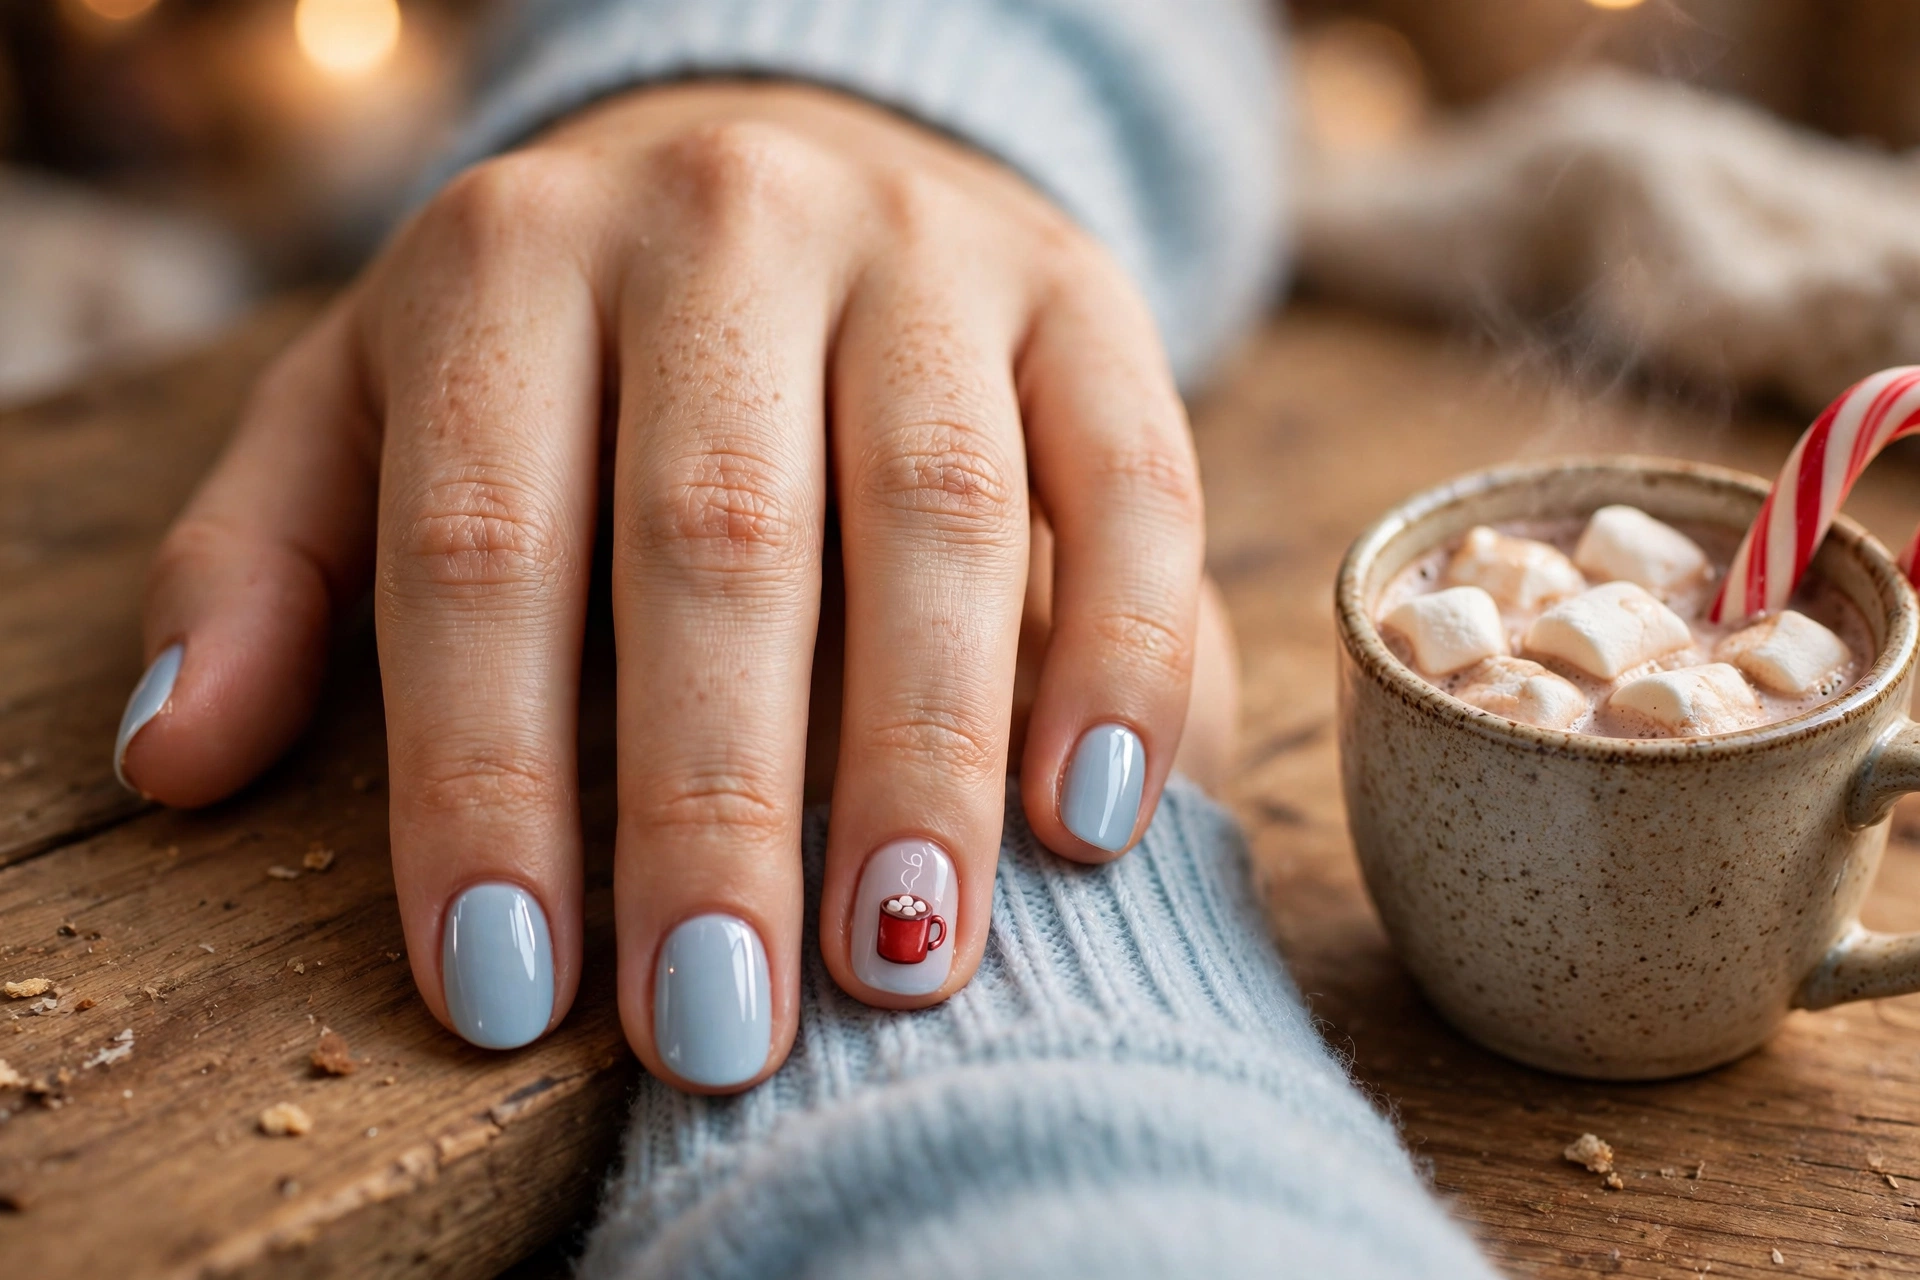
A tiny red mug with three white marshmallow dots peeking over the top, painted on a pale blue accent nail, with a thin curl of white steam above it. The other nails are pale blue with one white glitter accent, so the set feels like a cold evening indoors.
- Shape: Short oval or round. The mug needs a rounded nail bed.
- Best for: Cosy nights in, cocoa dates, and the easiest sweet-treat design in this guide.
- Difficulty: Easy to medium. The mug is a rectangle, the marshmallows are three dots, and the steam is one curved line.
- Time: 20–30 minutes DIY; 30–40 minutes at a salon.
- DIY vs salon: DIY-friendly — a dotting tool does the marshmallows. Salon only if you want the steam hand-painted.
- Wearability: Medium. Pale blue shows chips, so add a second top coat.
- Say at the salon: “Pale blue on nine nails, one hot cocoa mug accent on the ring finger — red mug, three white marshmallow dots, thin white steam curl.”
- Watch out: Do not paint the steam too thick or it reads as a white smear. One thin curved line is enough.
10. Christmas Pudding
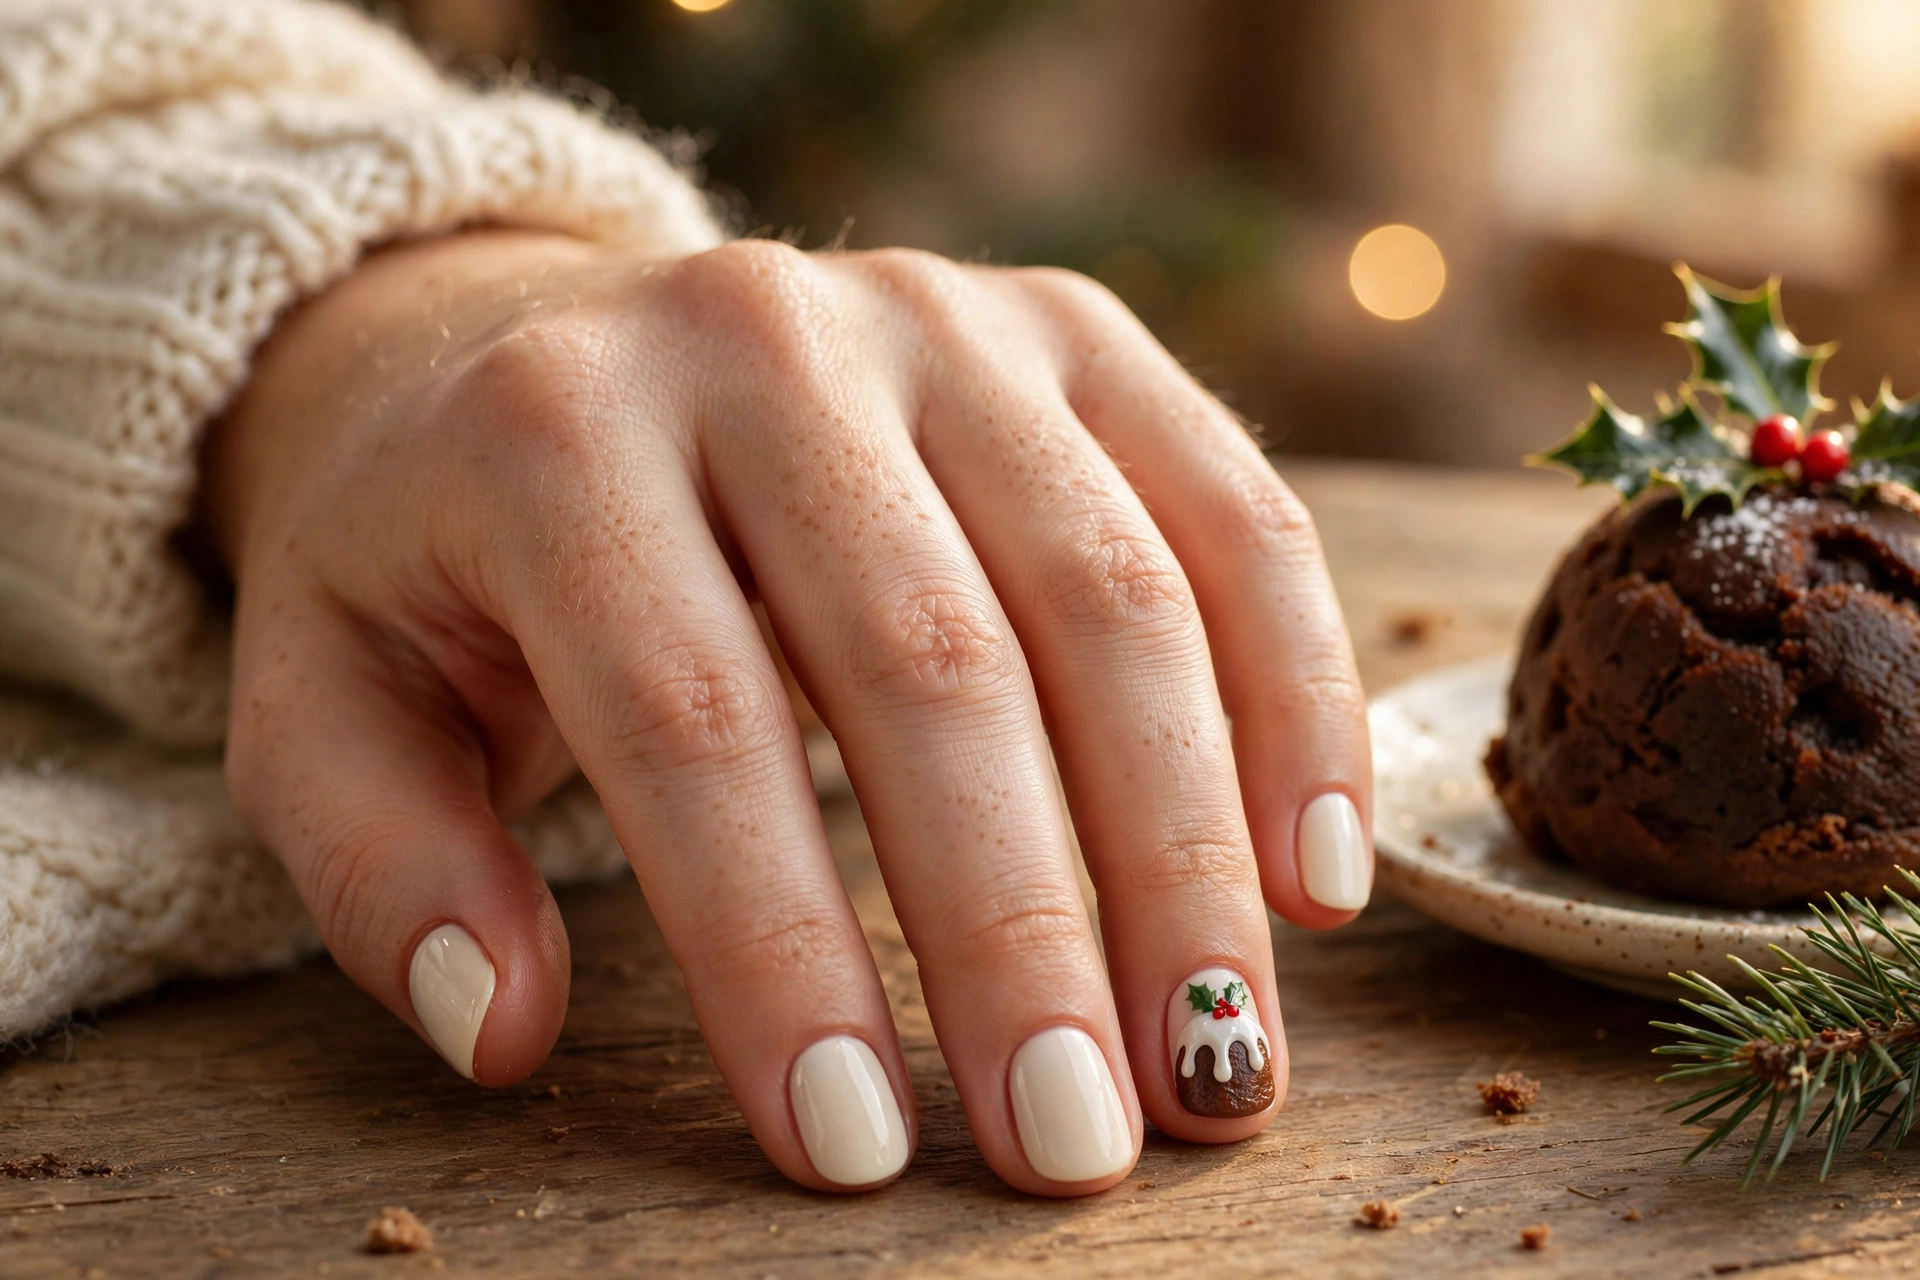
A tiny Christmas pudding on one accent nail: a brown dome, white icing dripping down the sides, and a small green holly sprig with two red berries on top. The other nails are cream with one deep green accent, so the set looks like the dessert table.
- Shape: Short round. The pudding is a dome, so a rounded nail suits it best.
- Best for: Christmas dinner itself, and for anyone who wants a cute design nobody else at the table will have.
- Difficulty: Easy to medium. The dome is a half circle, the icing is a wavy line, and the holly is two dots and a leaf.
- Time: 20–30 minutes DIY; 30–40 minutes at a salon.
- DIY vs salon: DIY-friendly with a dotting tool. Salon for a hand-painted pudding with icing texture.
- Wearability: High. Cream and brown hide wear well, and the pudding is on one nail only.
- Say at the salon: “Cream on nine nails, one Christmas pudding accent on the ring finger — brown dome, white icing dripping down, tiny holly sprig on top.”
- Watch out: Do not paint the icing too far down or the pudding reads as a white blob. Keep the icing to the top third of the dome.
11. Snow Globe
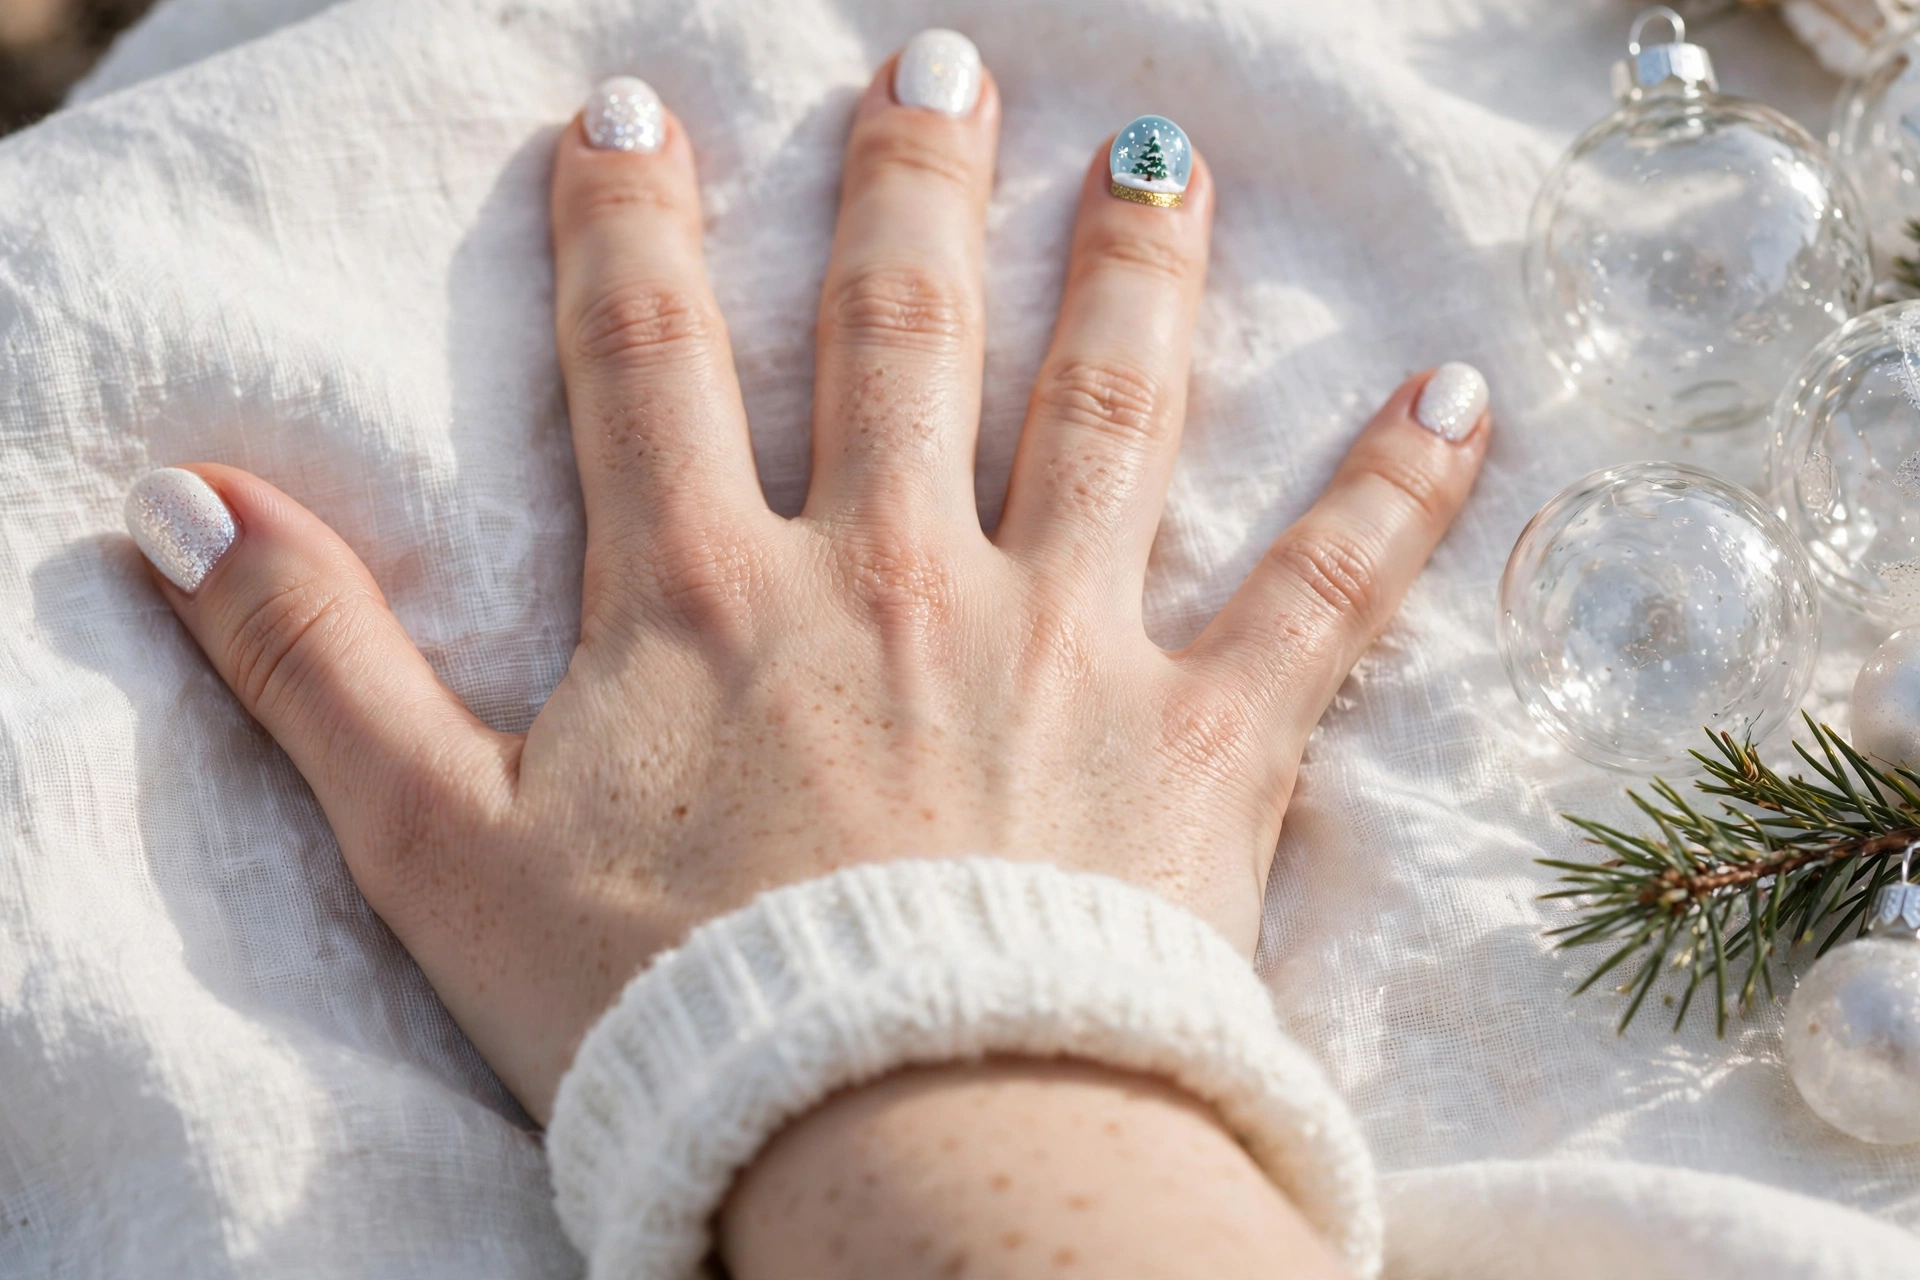
A round snow globe on one accent nail: a pale blue dome with a tiny green tree inside, white snow dots, and a gold base. The other nails are white glitter, so the whole set sparkles like shaken snow.
- Shape: Short oval or almond. The dome needs a little length to read as round.
- Best for: A magical set for Christmas Eve, and for anyone who loves the snow-globe idea but has never tried it.
- Difficulty: Medium. The dome is a circle, the tree is a small triangle, and the snow is dots — but the dome must be a clean circle.
- Time: 30–40 minutes DIY; 45 minutes at a salon.
- DIY vs salon: DIY with a snow-globe sticker or a round stencil for the dome. Salon for a hand-painted globe with a tree inside.
- Wearability: Medium. White glitter hides chips well, but the globe is detailed, so a chip on the accent nail shows.
- Say at the salon: “White glitter on nine nails, one snow globe accent on the ring finger — pale blue dome, tiny green tree inside, white snow dots, gold base.”
- Watch out: Do not fill the dome with too much detail or it turns into a blue blob. One tree and a few snow dots are enough.
12. Christmas Stocking
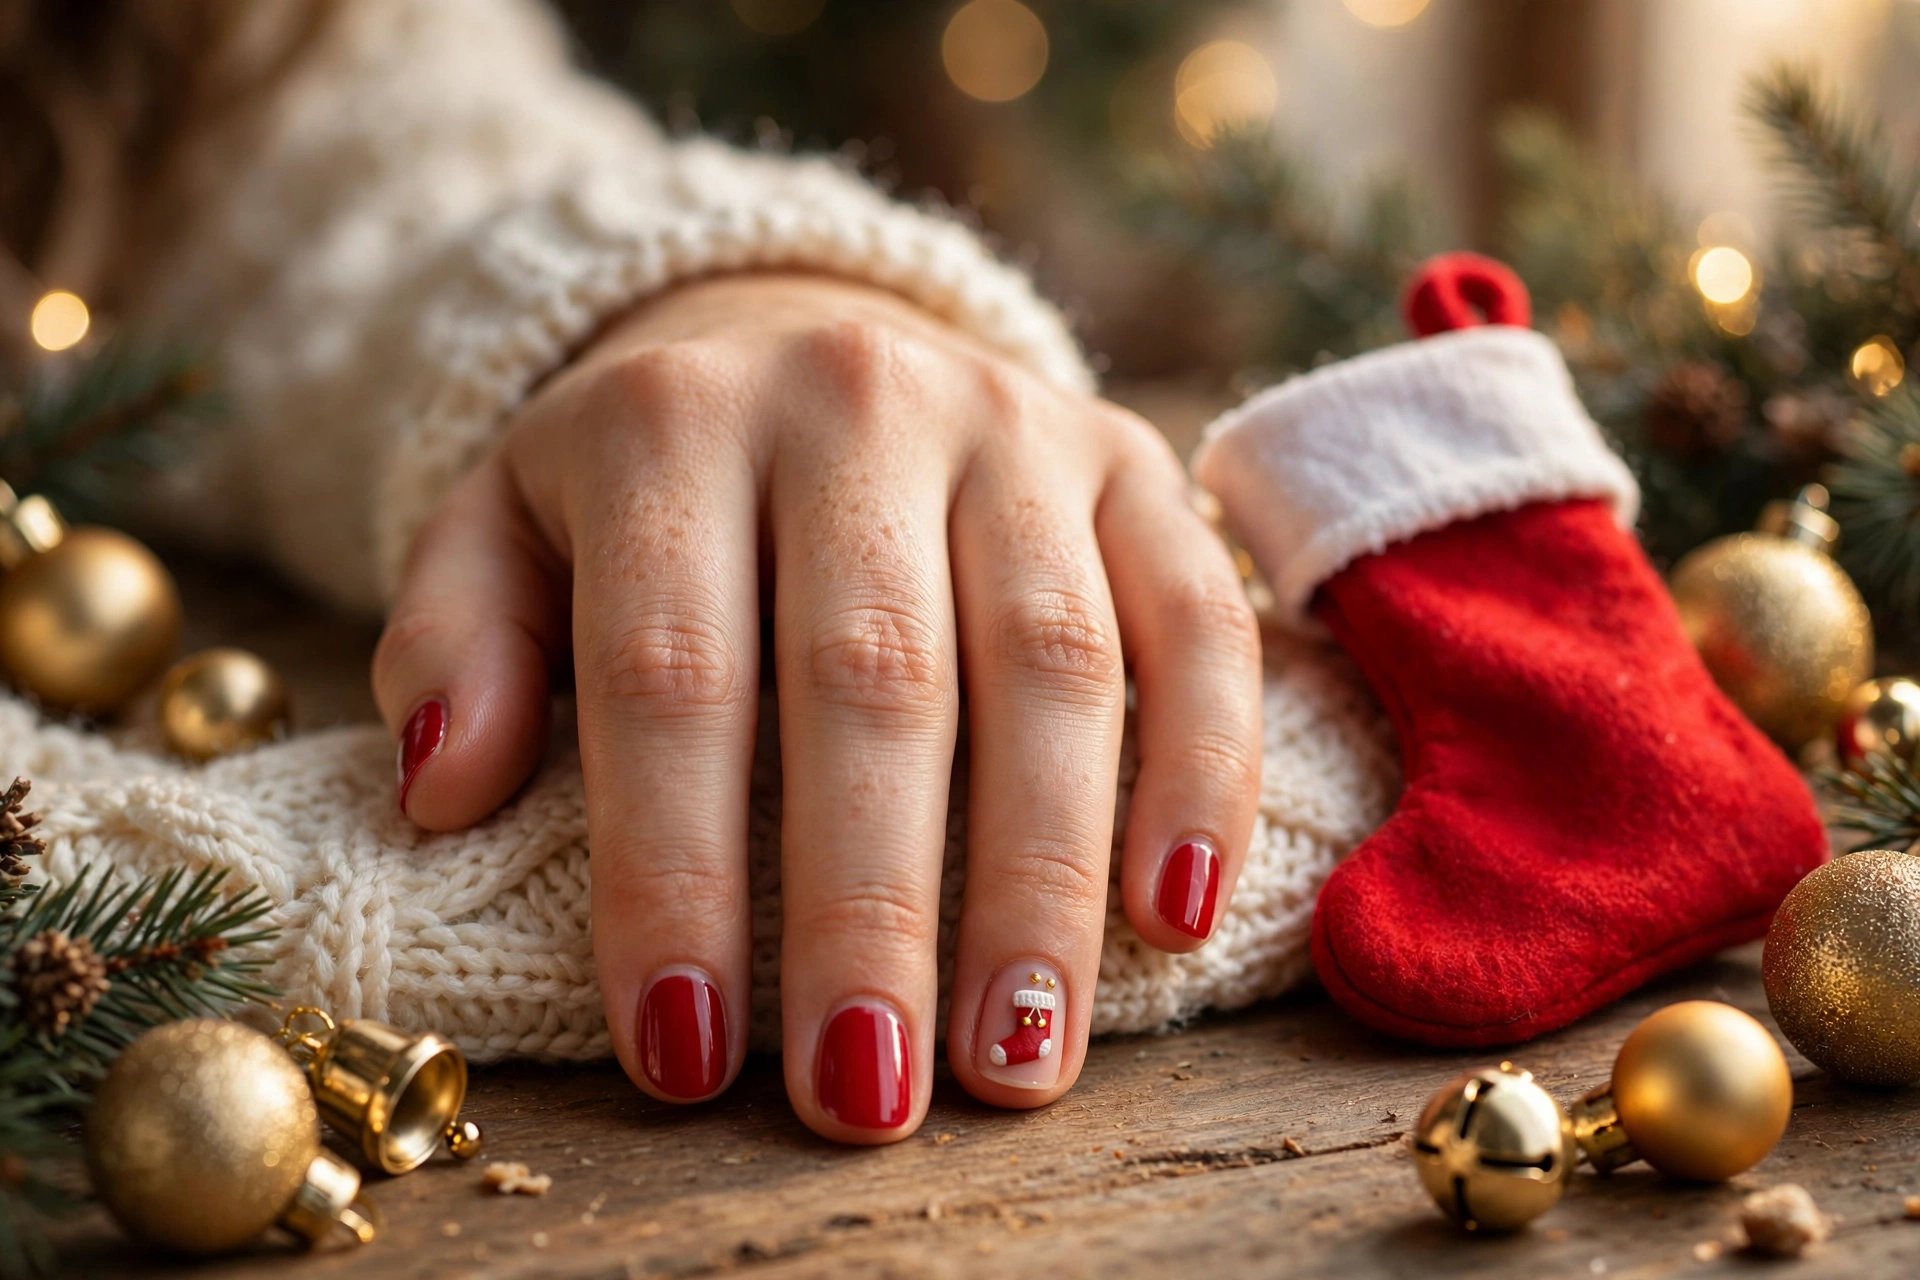
A Christmas stocking on one accent nail: a red stocking with a white cuff and two tiny gold bells, on a nude ring finger. The other nails are classic red, so the set looks like a fireplace mantel.
- Shape: Short squoval or oval. The stocking needs a flat nail bed for the cuff line.
- Best for: Christmas morning itself, and for anyone who hangs a real stocking every year.
- Difficulty: Medium. The stocking is an L-shape, the cuff is a straight line, and the bells are tiny dots — simple shapes, but the cuff must be straight.
- Time: 25–35 minutes DIY; 40–50 minutes at a salon.
- DIY vs salon: DIY with a stocking sticker or stamp. Salon for a hand-painted stocking with gold bells.
- Wearability: High. Classic red is forgiving of wear, and the stocking is on one nail only.
- Say at the salon: “Classic red on nine nails, one Christmas stocking accent on the ring finger — red stocking, white cuff, tiny gold bells.”
- Watch out: Do not paint the stocking on every nail. One stocking is a stocking; ten stockings are wallpaper.
Pastel and kawaii cute: soft, pale, and gentle
This is the lane for people who want cute without loud red and green. Pastel bases, tiny motifs, and soft colours that read as gentle rather than shouty. These are also the most work-safe cute designs in the guide.
13. Pastel Ornament Baubles
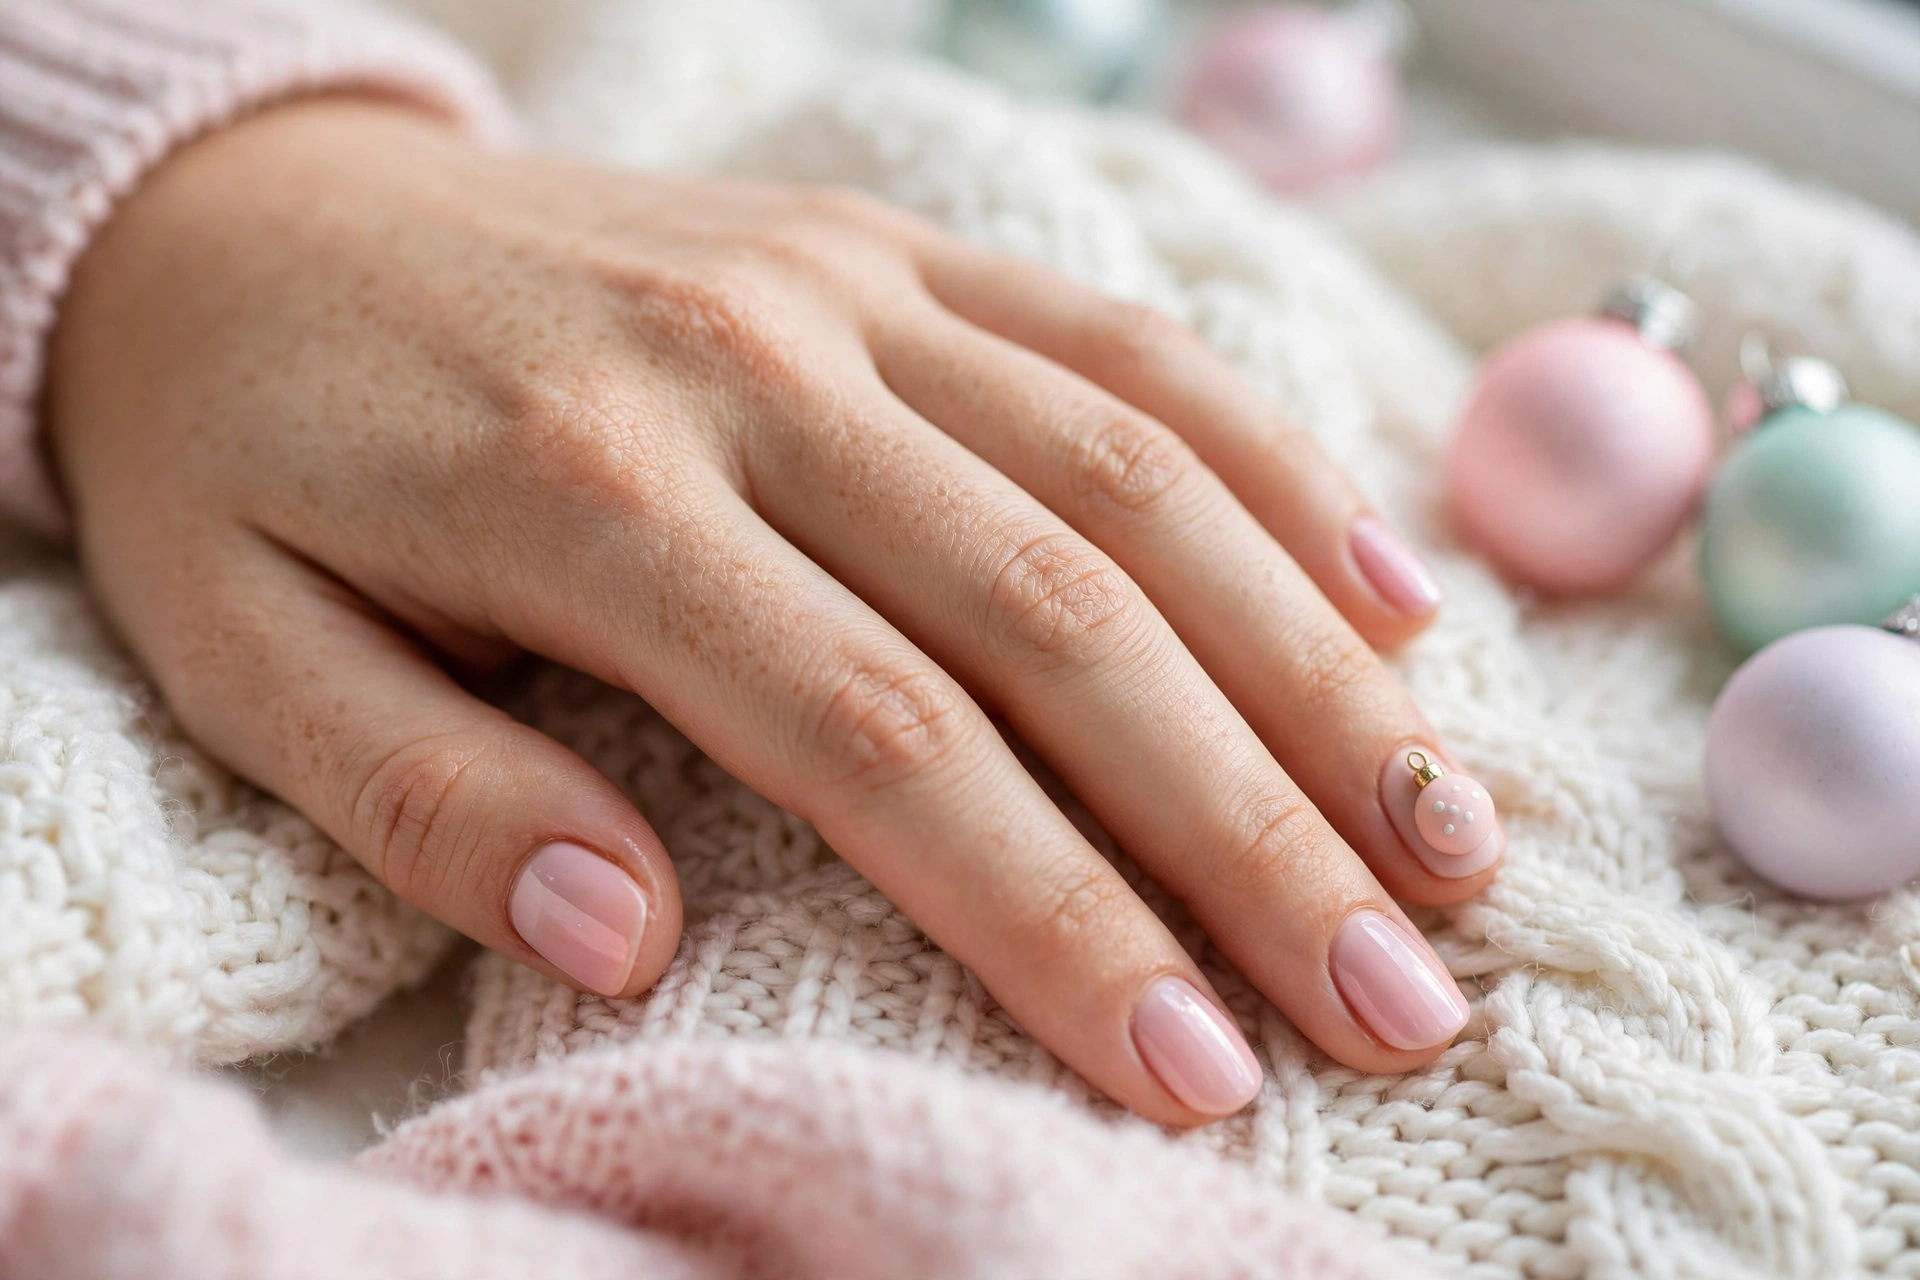
A small pastel bauble on the ring finger: a blush-pink circle with a tiny gold cap and white polka dots so it reads as glass. The other nails are pastel pink, so the set looks like a pastel Christmas tree.
- Shape: Short oval or round. The baubles are circles, so a rounded nail suits them best.
- Best for: A soft, pretty set for daytime parties, and for anyone who finds red and green too loud.
- Difficulty: Easy. The baubles are circles and dots — the highlight dot is the whole trick.
- Time: 20–25 minutes DIY; 30 minutes at a salon.
- DIY vs salon: DIY-friendly with a dotting tool. Salon only if you want the caps hand-painted.
- Wearability: Medium. Pastel pink shows chips less than white, but add a second top coat and refresh on day three.
- Say at the salon: “Pastel pink on all nails, one blush-pink bauble accent on the ring finger — tiny gold cap, white polka dots.”
- Watch out: Do not use dark or jewel-tone baubles here. The pastel palette is the point; dark baubles turn this into a different, louder design.
14. Icy Lilac Snow Dots
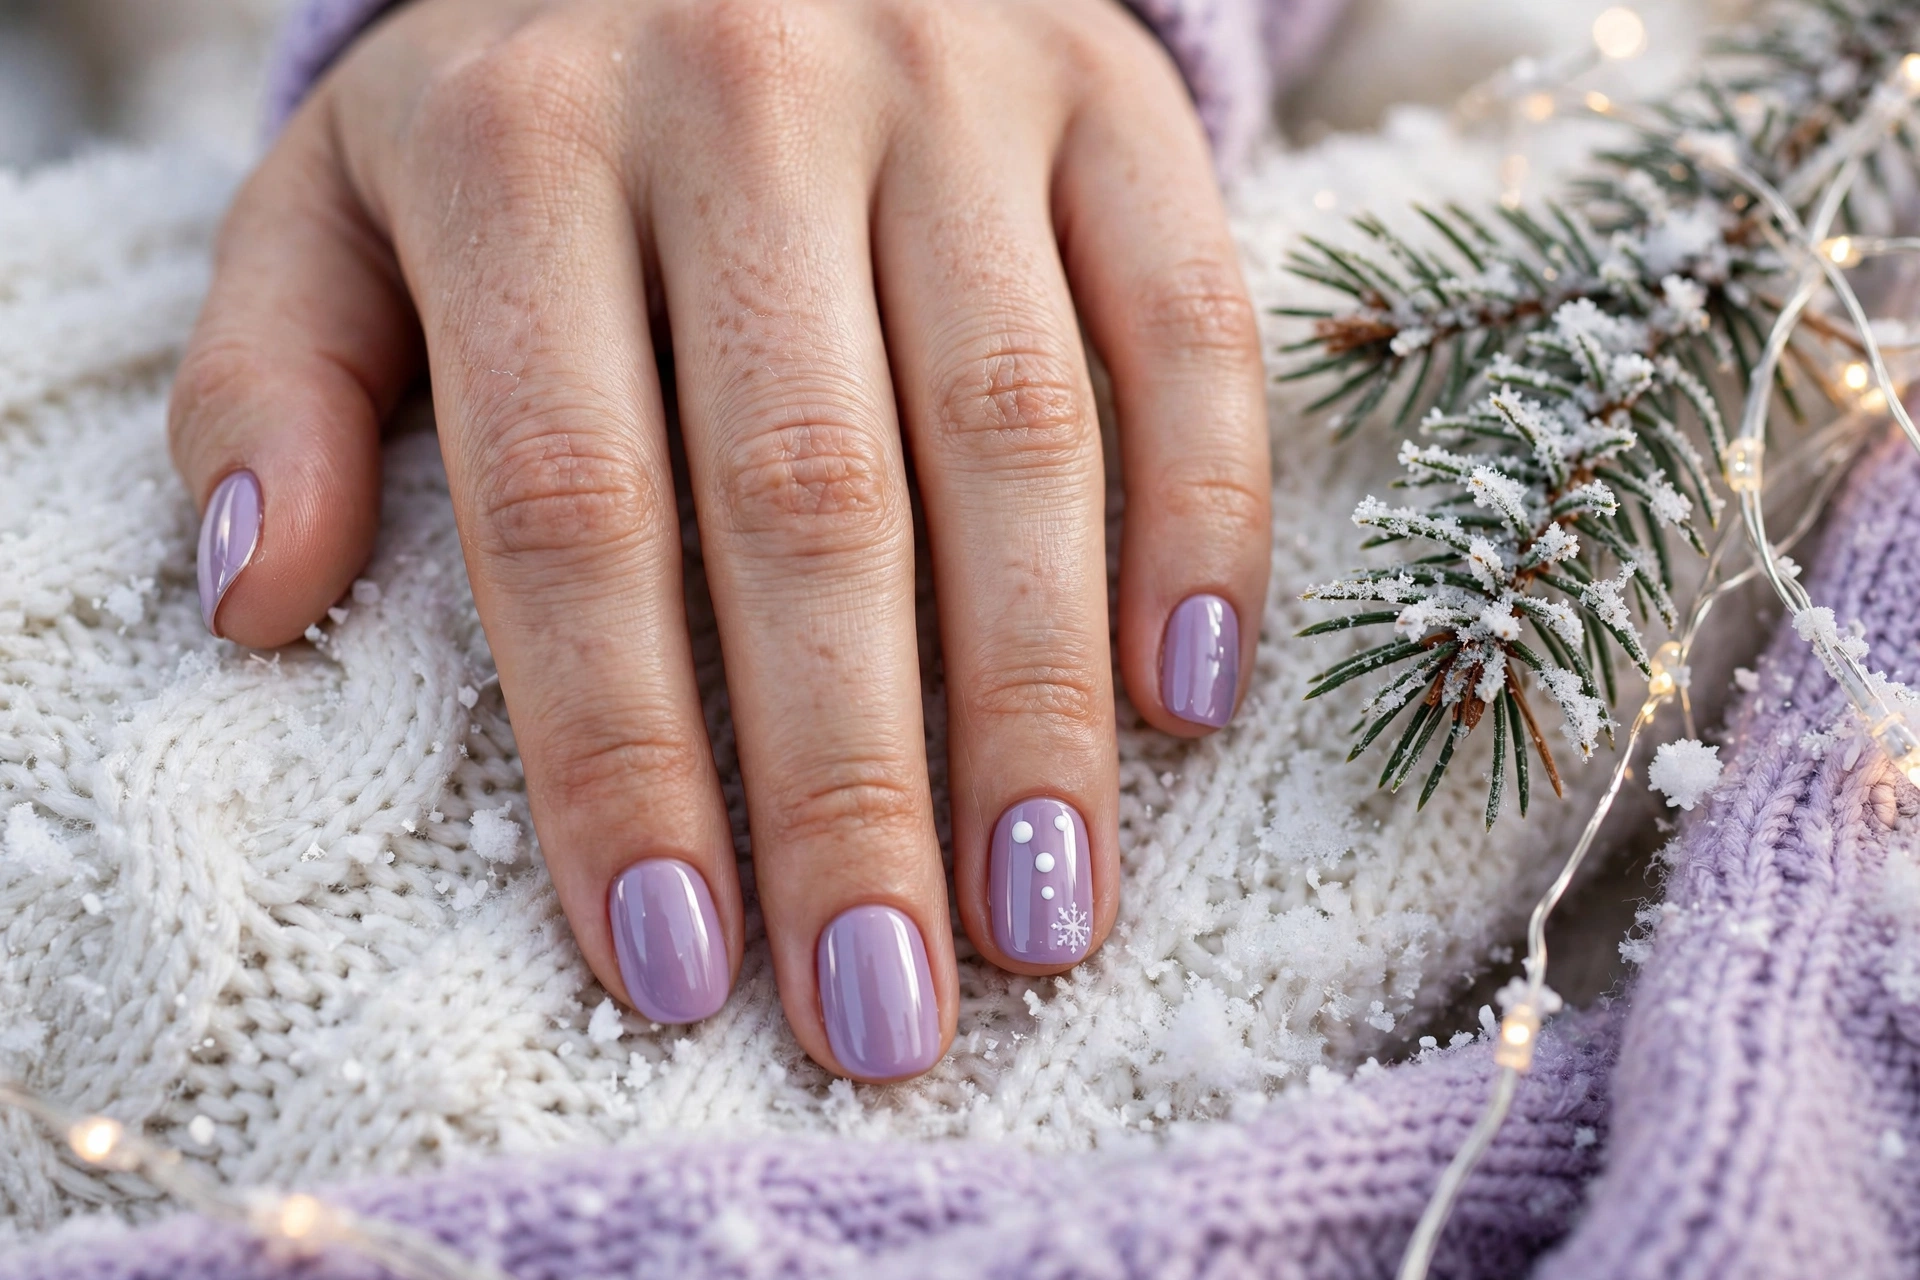
Icy lilac nails with three tiny white dots and one small white snowflake on the ring finger, like snow falling on a winter evening. The other nails are plain lilac — the dots are the whole design, and that is why it works: it is cute without trying hard.
- Shape: Short squoval or oval. Any shape suits this one because the dots are the design.
- Best for: The easiest cute design in this guide, and for work-safe December nails.
- Difficulty: Easy. A dotting tool and ten minutes is the whole design.
- Time: 15–20 minutes DIY; 25 minutes at a salon.
- DIY vs salon: DIY — this is a one-tool design. A salon visit is only worth it if you are already there for a full manicure.
- Wearability: High. Dots hide chips well, and lilac hides growth better than white.
- Say at the salon: “Icy lilac on all nails, three tiny white dots and one small snowflake on the ring finger, glossy top coat.”
- Watch out: Keep the dots small and unevenly spaced. Big even dots read as polka dots, not snow — and polka dots are a different design.
15. Mint with Tiny Red Hearts
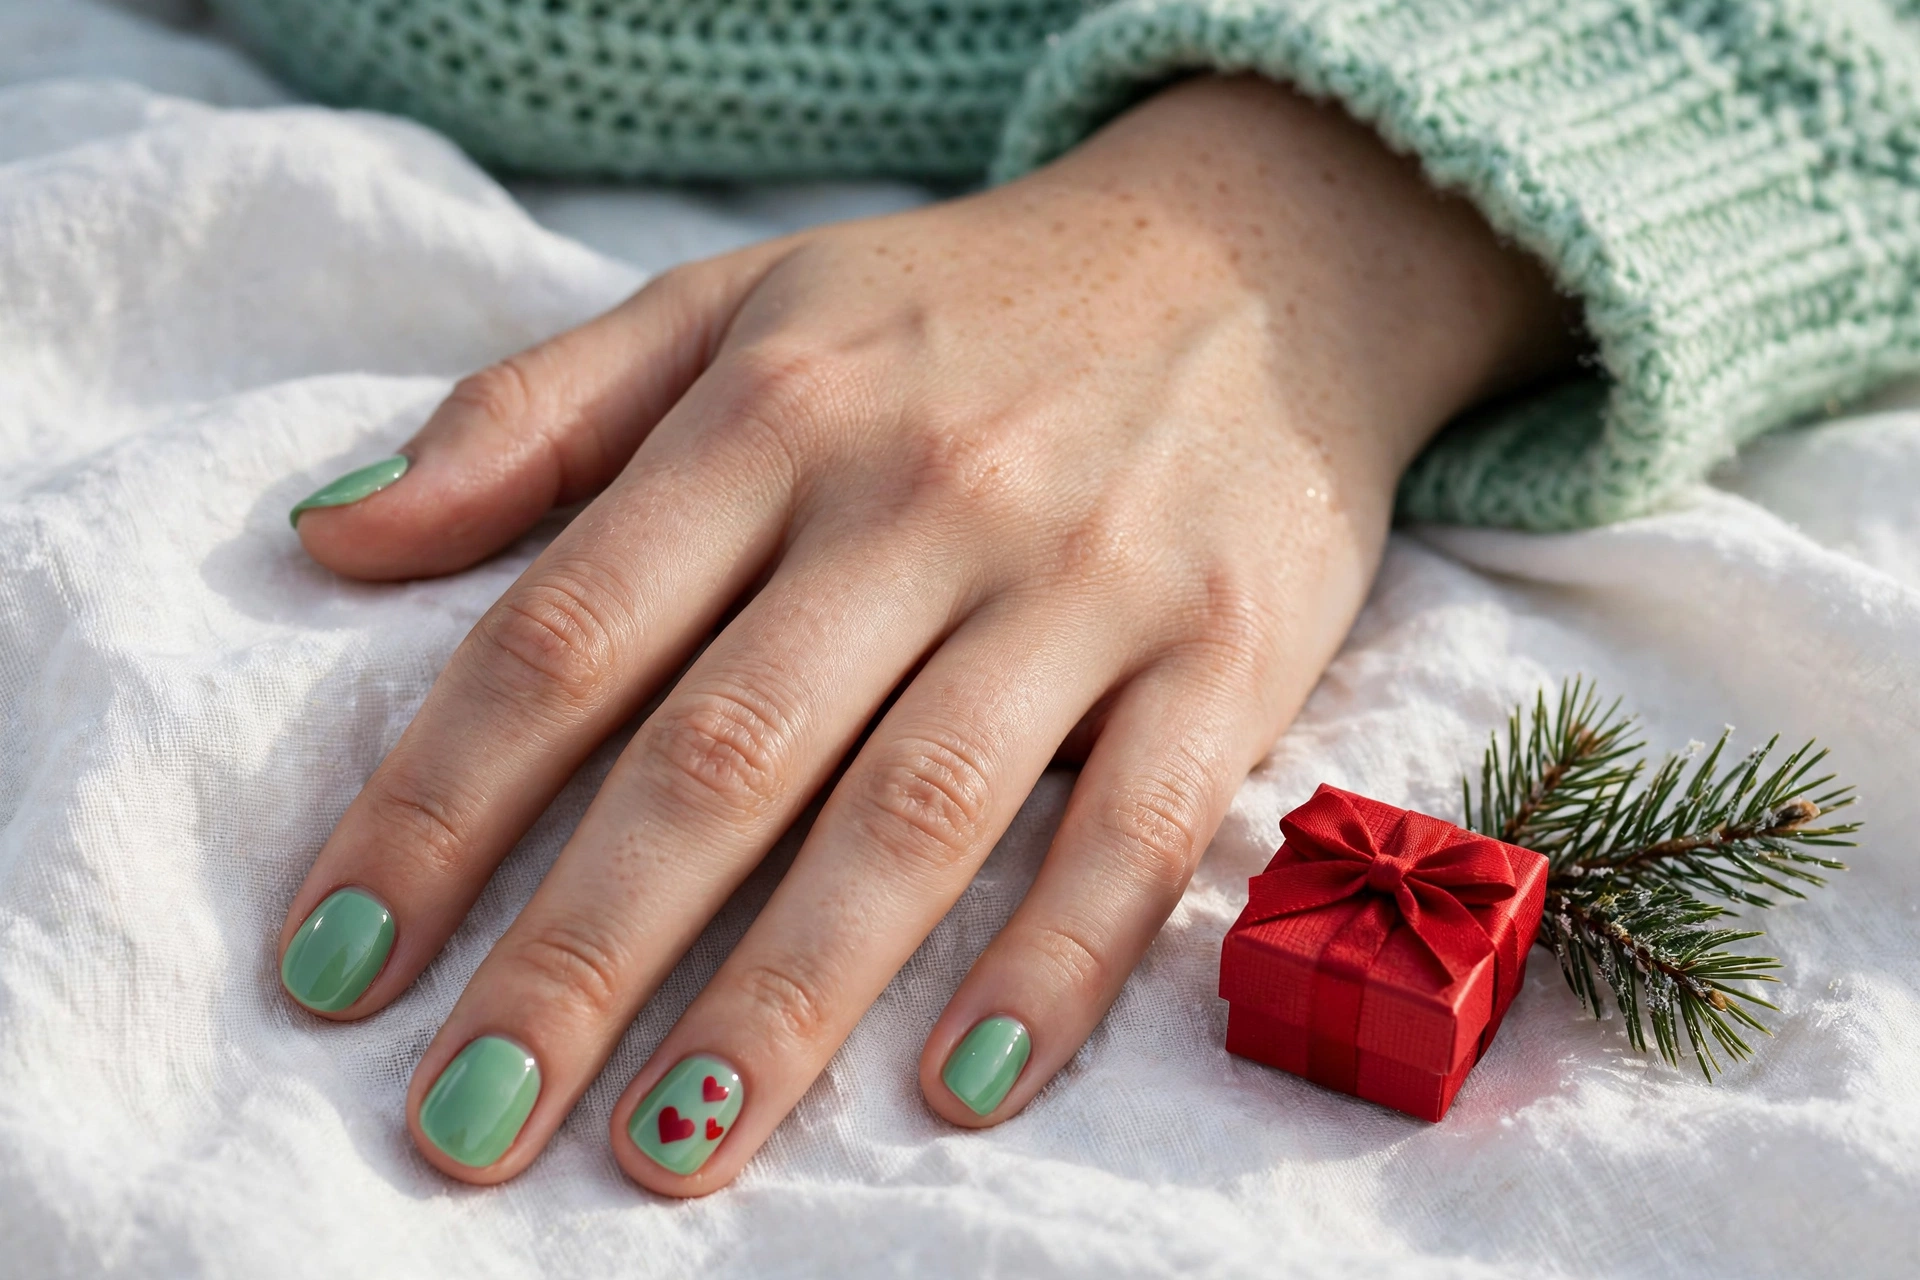
Mint green nails with two tiny red hearts on the ring finger and one small red heart on the middle finger. The hearts are small enough to read as cute, not romantic, and the mint keeps the set firmly in December.
- Shape: Short oval or squoval. The hearts need a flat, even nail bed.
- Best for: A kawaii set for Christmas week, and for anyone who wants cute that is not a character.
- Difficulty: Easy. The hearts are two dots and a small triangle — a dotting tool does them.
- Time: 15–20 minutes DIY; 25 minutes at a salon.
- DIY vs salon: DIY-friendly with a dotting tool or a heart stamp. Salon only for perfectly even hearts.
- Wearability: High. Mint hides wear well, and the hearts are on two nails only.
- Say at the salon: “Mint green on all nails, two tiny red hearts on the ring finger, one small red heart on the middle finger, glossy top coat.”
- Watch out: Do not paint the hearts too large or they read as Valentine’s Day. Keep them tiny — a heart should fit in the top third of the nail.
Coquette and bow cute: pretty, slightly glamorous
Bows are the coquette lane: pretty, feminine, and a little glamorous. These two are cute that reads as styled rather than silly, and they are the best cute designs for parties.
16. Coquette Red Bows on Milky Pink
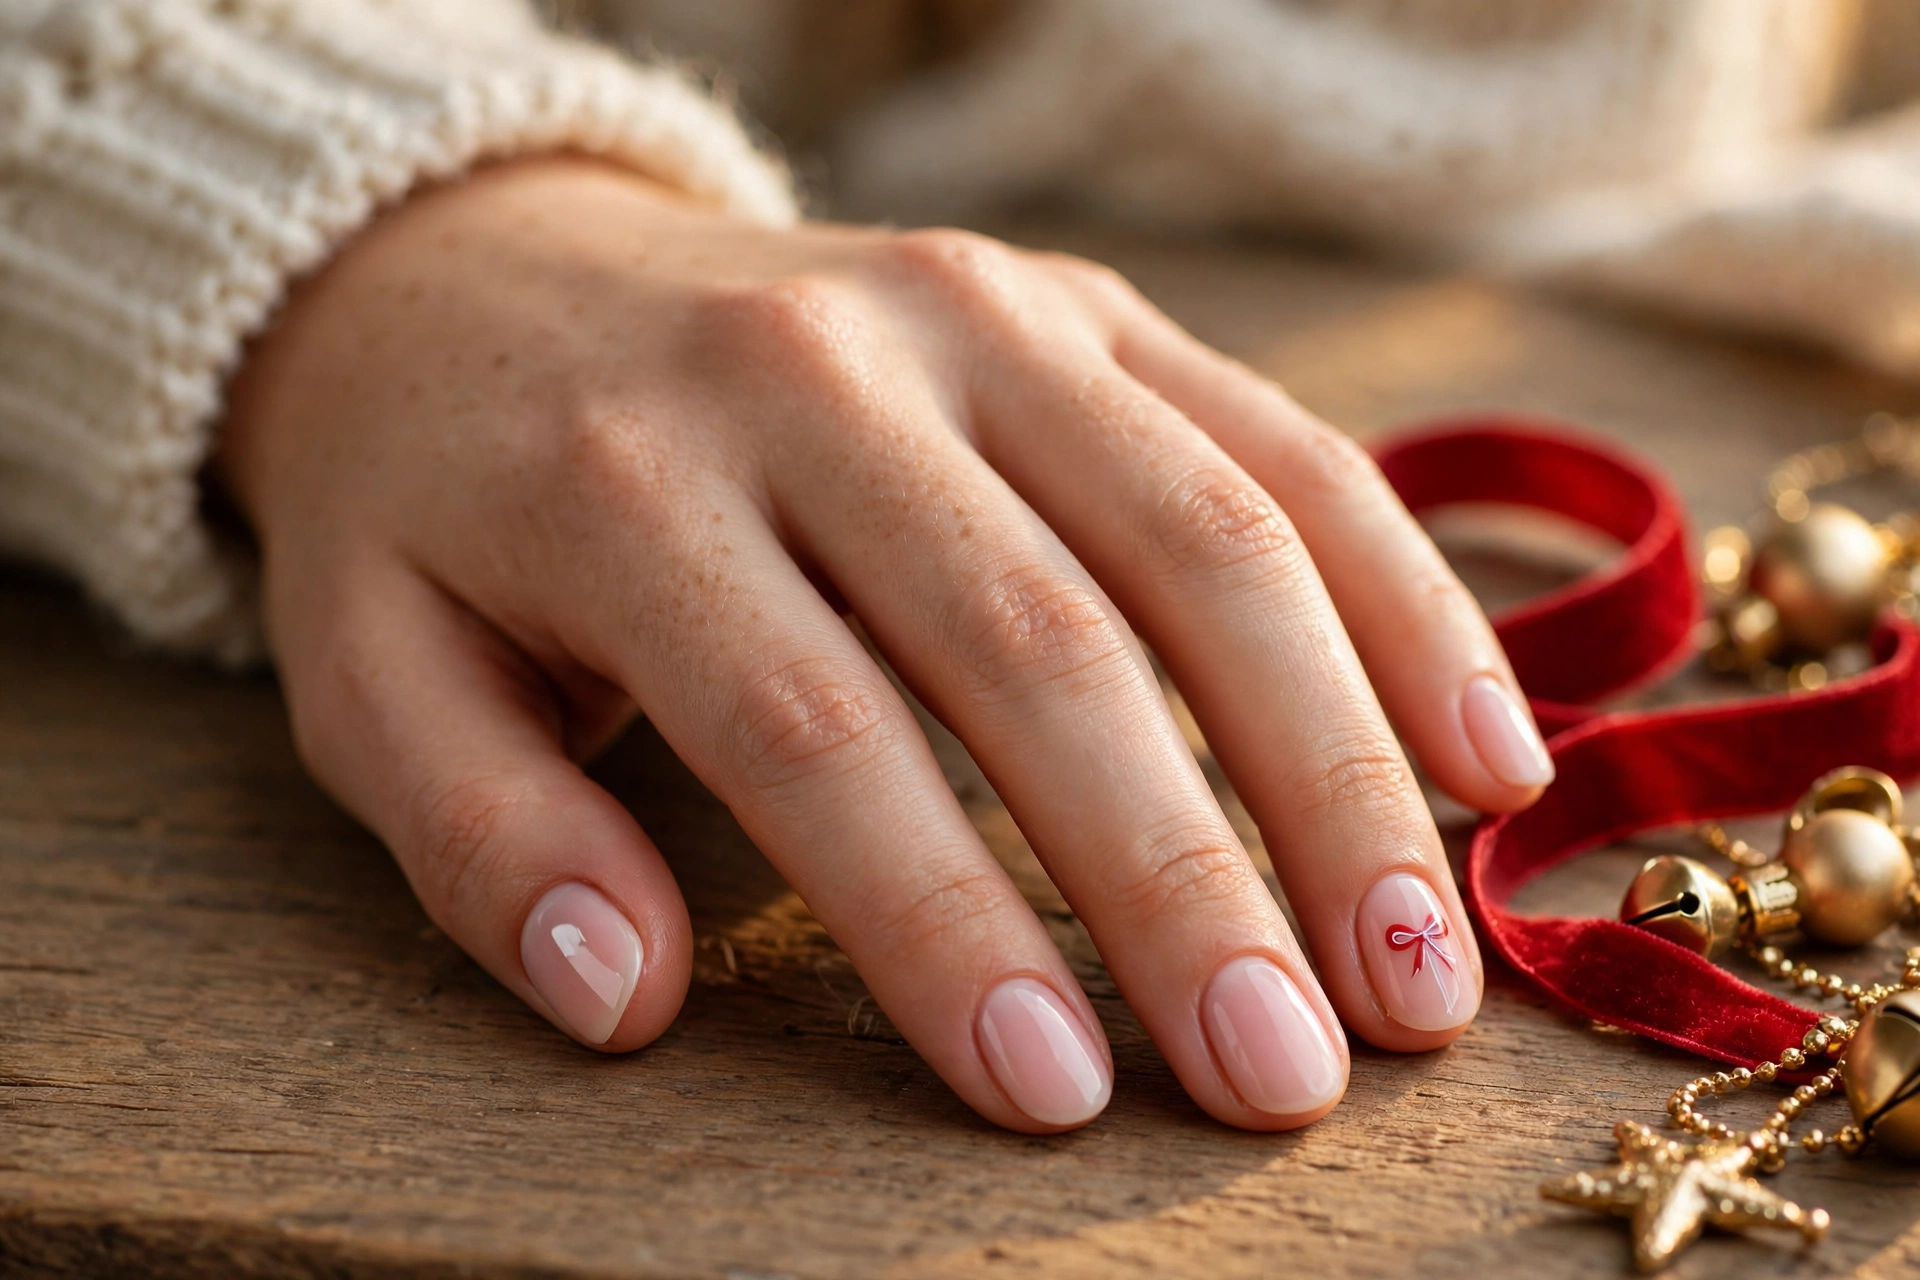
Tiny red bows on a milky pink base: one small bow on each ring finger, made from two loops and a centre knot, with the other nails plain milky pink. The bows are the whole design, and they are enough.
- Shape: Short almond or oval. The bows need a little length to sit properly.
- Best for: Christmas parties, date nights, and the prettiest cute design in this guide.
- Difficulty: Easy to medium. The bow is two triangles and a dot, but the triangles must be even.
- Time: 20–30 minutes DIY; 30–40 minutes at a salon.
- DIY vs salon: DIY with bow stickers or 3D bow charms. Salon for hand-painted bows with a fine brush.
- Wearability: Medium. Milky pink shows chips, so use two top coats — and seal 3D bows well or they catch on fabric.
- Say at the salon: “Milky pink on all nails, one tiny red bow on each ring finger, glossy top coat.”
- Watch out: Do not put a bow on every nail. Two bows are coquette; ten bows are a gift-wrapping station.
17. Red Velvet Bows with Pearls
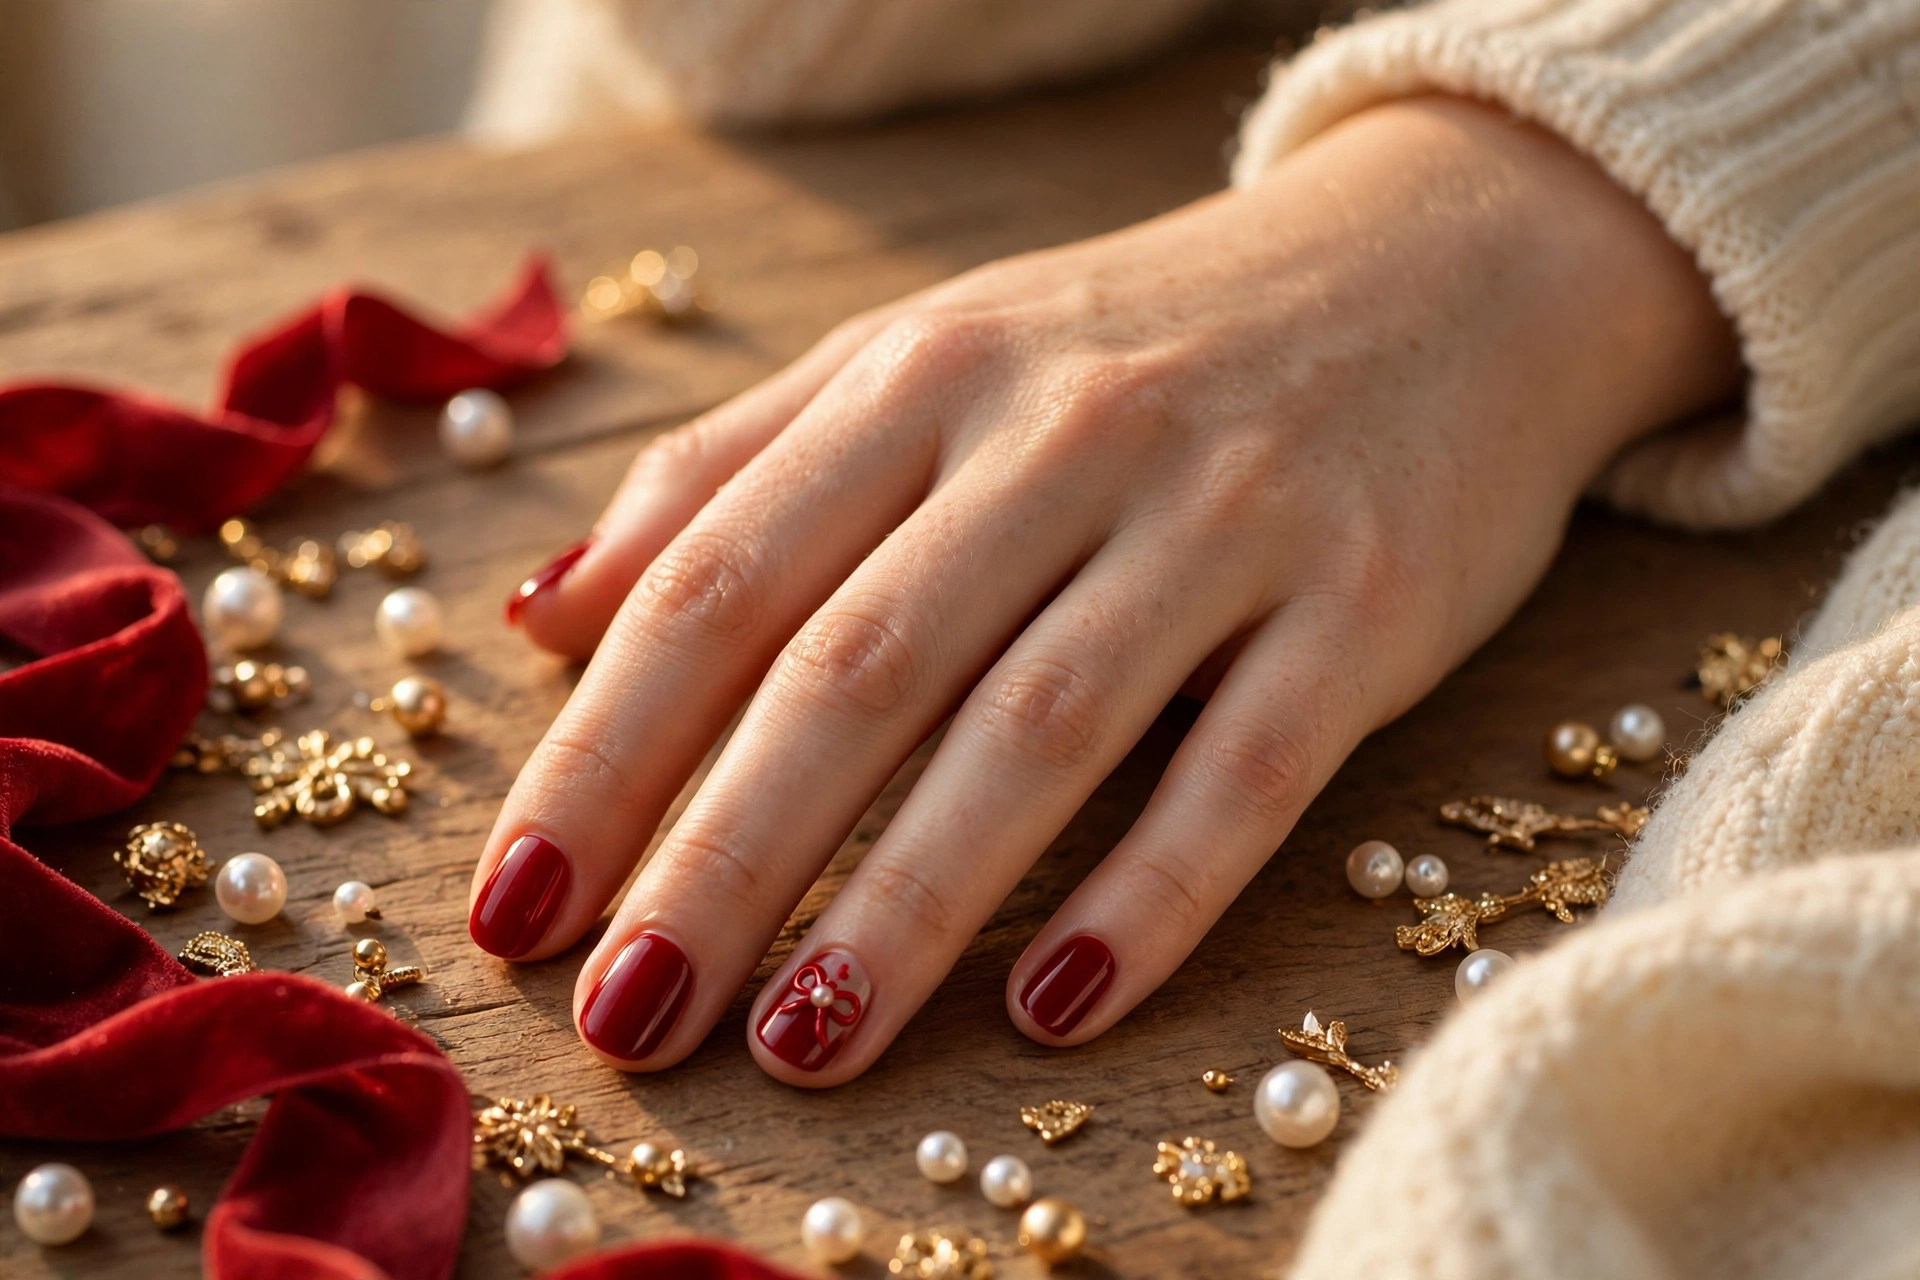
Deep red velvet nails with one tiny red bow and a single pearl dot at its centre on the ring finger. The velvet finish makes the set look like fabric, and the pearl makes it look expensive. This is cute that could walk into a formal dinner.
- Shape: Short oval or almond. The velvet finish needs a lengthening line, and almond gives it one.
- Best for: Formal Christmas dinners, New Year’s Eve, and the most grown-up cute design in this guide.
- Difficulty: Medium. The velvet top coat does the hard work; the bow is two loops and a knot, and the pearl is one dot.
- Time: 25–35 minutes DIY; 40–50 minutes at a salon.
- DIY vs salon: DIY with a velvet or matte top coat and pearl stickers. Salon for a hand-painted bow with real pearls.
- Wearability: Medium. Matte finishes show oils and smudges, so carry a matte top coat for touch-ups — and seal pearls well or they lift.
- Say at the salon: “Deep red with a velvet or matte top coat, one tiny red bow with a pearl centre on the ring finger.”
- Watch out: Do not use a glossy top coat under the matte one or the velvet effect dies. Apply matte directly over the colour.
Cozy cute: one warm character for the coldest days
18. Christmas Gnome
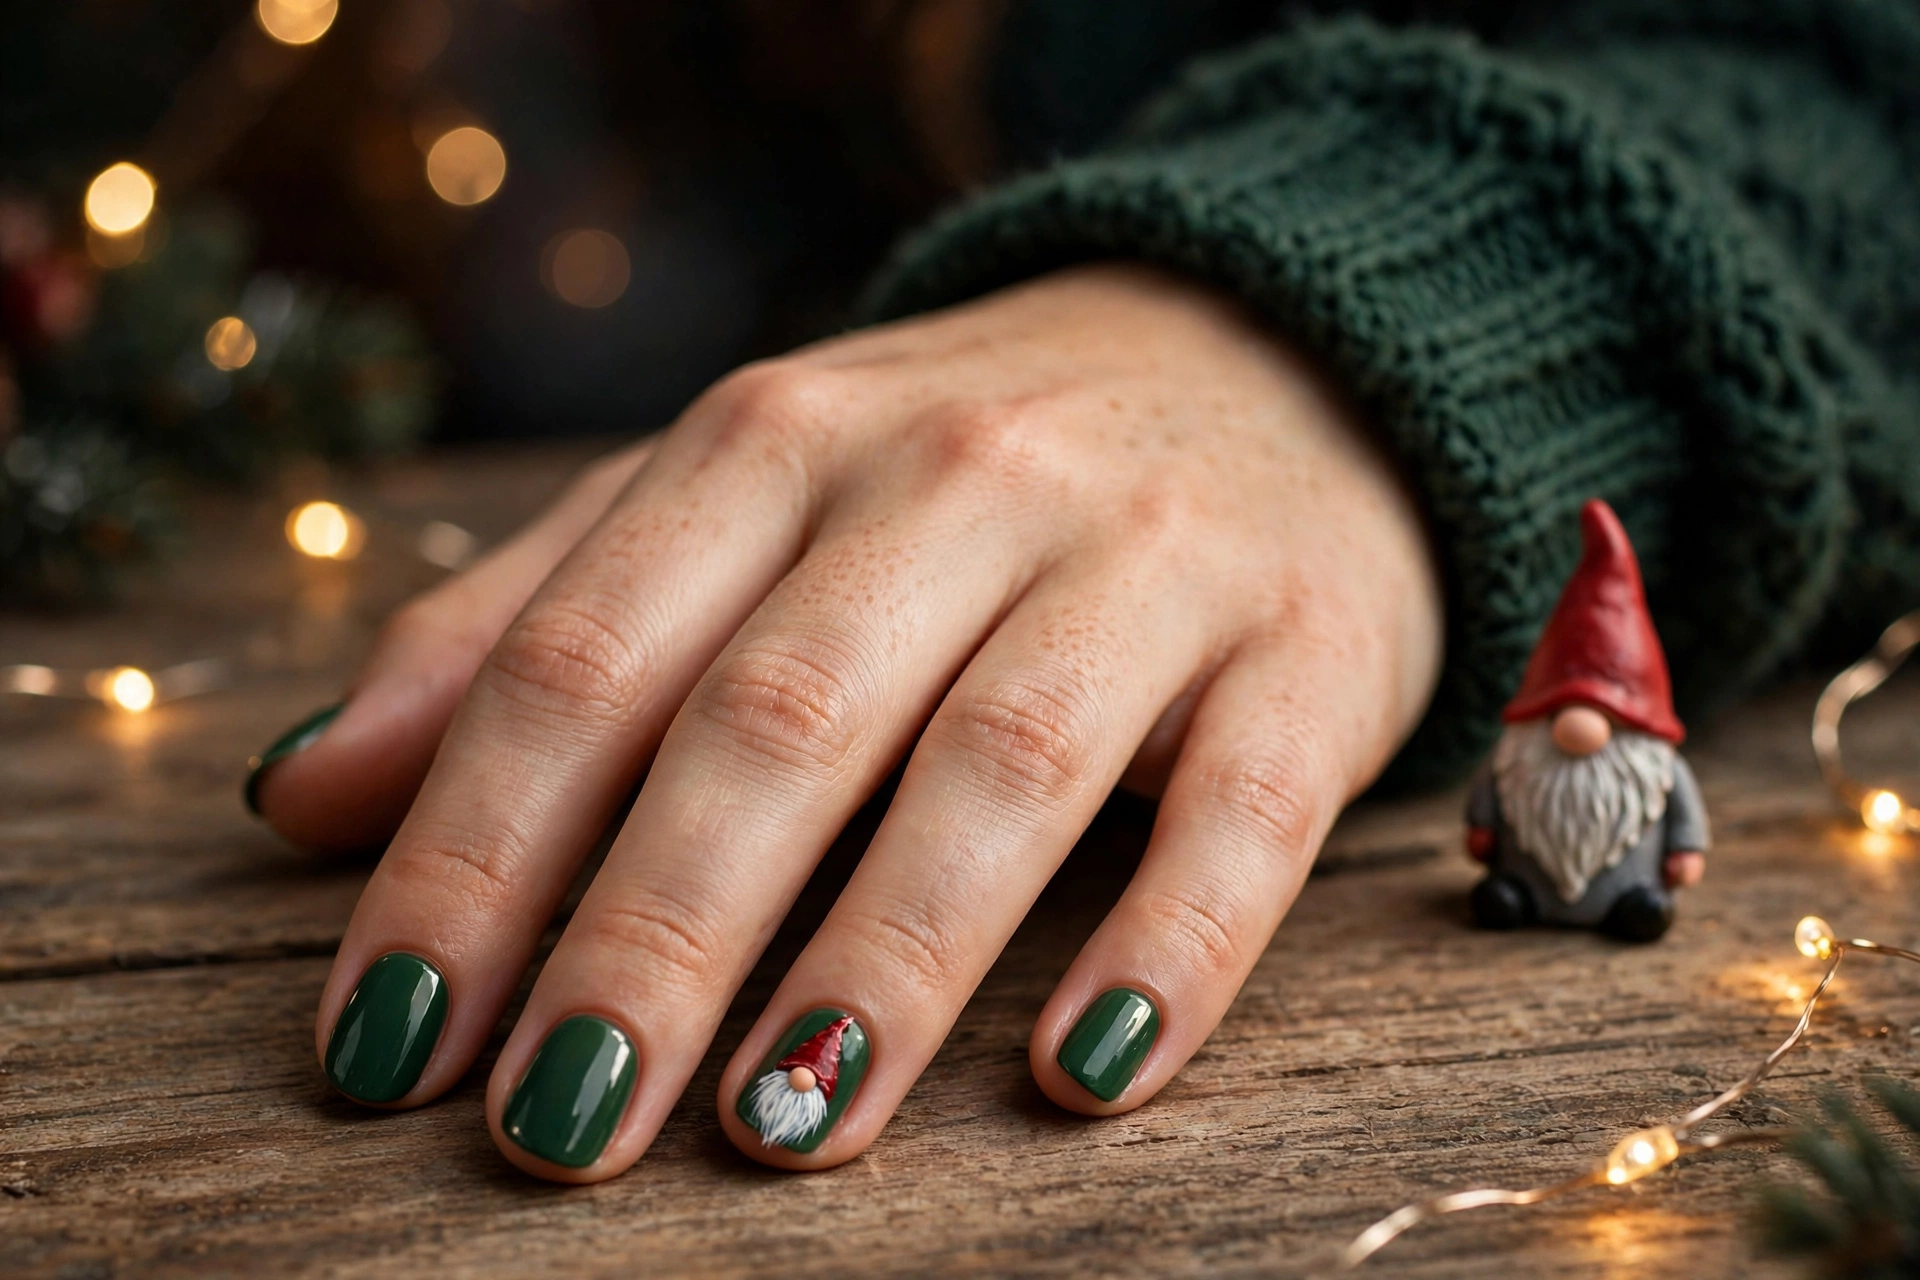
A Christmas gnome on one accent nail: a tall red hat, a round pink nose, and a long white beard. A gnome has no eyes to paint, which makes it far more forgiving than most characters — and far cuter for it. The other nails are forest green, so the gnome is the star.
- Shape: Short oval or squoval. The gnome’s hat needs a little length to stand tall.
- Best for: The cosiest design in this guide, and for anyone who wants a character without painting a face.
- Difficulty: Easy to medium. The hat is a triangle, the nose is a dot, and the beard is a white shape — no eyes, no mouth, nothing to smudge.
- Time: 20–30 minutes DIY; 30–40 minutes at a salon.
- DIY vs salon: DIY-friendly — a dotting tool does the nose, and the beard is one white shape. Salon only for a hand-painted gnome with texture.
- Wearability: High. Dark green hides growth, and the gnome is on one nail only.
- Say at the salon: “Forest green on nine nails, one Christmas gnome accent on the ring finger — tall red hat, pink nose, long white beard.”
- Watch out: Do not paint the beard too short or the gnome reads as a red triangle. The beard should take at least half the nail.
Cute that still looks grown-up
Cute does not have to mean childish. The difference between a cute set and a childish set is restraint, and it comes down to four rules.
- One character per hand. A snowman on the ring finger is cute. A snowman, a penguin, and a reindeer on the same hand is a nursery wall. Keep the character to one or two accent nails and let a matching solid colour carry the rest.
- One palette, not five. Pick two colours plus one metallic, maximum. Red, white, and gold. Green, cream, and gold. Blue, white, and silver. A character painted in five colours looks busy; the same character in two colours looks deliberate.
- Matte or gloss, not both at once. A velvet finish makes a cute design look expensive. A glossy finish makes it look playful. Mixing finishes on the same hand makes it look unfinished — unless the contrast is the design itself, as in idea 17.
- Keep the base grown-up. Sheer nude, milky white, deep green, classic red, icy blue: these are adult bases. A character on a grown-up base reads as a joke you are in on. The same character on a neon or glitter-everywhere base reads as a costume.
If you are wearing cute nails to work, pick from the pastel lane (ideas 13–15) or the coquette lane (ideas 16–17). If you are wearing them to a family Christmas, pick any character in the classic lane. If you are wearing them to a formal dinner, pick idea 17 and nothing else.
Choosing guide: pick by length, occasion, and skill
By nail length
- Very short or bitten: Ideas 3 (snowman), 7 (polar bear), 13 (pastel baubles), 14 (snow dots), 15 (mint hearts), and 18 (gnome). These need no free edge and no length: dots, circles, and small faces that sit on the nail bed itself.
- Short: All 18 ideas work, but keep the character on the ring finger or thumb, where the nail bed is widest. Avoid putting a detailed character on the pinky.
- Medium to long: Ideas 5 (elf), 6 (Nutcracker), 8 (gingerbread house), and 11 (snow globe) need a little length for their detail. On very short nails, shrink them to one accent nail or use a sticker version.
By occasion
- Work or school-safe: Ideas 13, 14, 15, and 16. Pastel, dots, hearts, and small bows read as polished at arm’s length.
- Family Christmas: Ideas 1, 2, 3, 4, and 18. Santa, Rudolph, snowman, penguin, and gnome are the characters children recognise and adults smile at.
- Parties: Ideas 6, 16, and 17. The Nutcracker, coquette bows, and velvet bows with pearls are the most glamorous cute designs here.
- Christmas dinner: Idea 10 (Christmas pudding) and idea 17 (velvet bows with pearls).
By skill
- No skill at all (stickers and dots): Ideas 13, 14, 15, and 18. Dots, circles, and a gnome with no eyes.
- Beginner (one tool): Ideas 3, 7, 9, 10, and 16. A dotting tool does the whole design.
- Intermediate (fine brush): Ideas 1, 2, 4, 8, 11, and 12. Faces, houses, globes, and stockings need a fine brush and patience.
- Salon-best: Ideas 5 and 6. The elf and the Nutcracker have the most parts and the finest lines — book these, or use a water decal at home.
How long will a cute set last, and how do I look after it?
Character art chips first, and it chips on the accent nail, because the accent nail carries the most paint layers. That is the honest truth behind every cute set, and it is fixable.
- Regular polish: 5–7 days. Dark bases (red, green) last longest; pale bases (milky white, pale blue) show chips soonest. A top-coat refresh on day three adds two days.
- Gel: 2–3 weeks. Character art sealed under gel lasts the whole Christmas week, which is why gel is the safer choice for ideas 5 and 6.
- Press-ons: Several days to over a week with glue, 1–2 days on sticky tabs. Press-ons are the best route for a one-night cute set: buy a short-length set in a plain colour, add one character sticker, and file the sides to fit.
Why character art chips first: Each colour in a face is a separate layer, and layers lift at the edges. Seal character art with two thin top coats, not one thick one, and cap the free edge with every coat.
3D charms, pearls, and bows: They snag on sweaters, scarves, and tights. That is the real cost of ideas 16 and 17. Seal every charm with top coat around its base, not over its top, and carry a spare charm and a dot of nail glue in your bag. If a charm catches, do not pull it — slide a toothpick under it and lift it off, then re-glue it.
Fixing a smudged face without redoing the whole nail: Let the smudge dry completely, then paint over just the face with the base colour and repaint the face on the same nail. That is faster than starting the whole hand over. For a smudged nose or eye, a dotting tool and one dot of the right colour is the whole repair.
Glitter removal: Soak a cotton pad in remover, press it on the nail for a minute, and slide it off — do not scrub. Scrubbing drags glitter across the nail and scratches the art underneath.
Safe gel removal: Soak off with proper remover and foil wraps. Never peel gel off — peeling takes the top layer of your nail with it, and a peeled nail will not hold its next set.
What you’ll need (generic types only)
- Clear base and glossy top coats; matte or velvet top coat for idea 17
- Polishes: classic red, deep red, forest green, deep green, icy blue, pale blue, soft blue, cream, sheer nude, warm nude, milky white, milky pink, mint green, icy lilac, chocolate brown, black, white
- Metallics: fine gold glitter, gold chrome or foil, silver glitter
- Tools: dotting tool (or bobby pin), thin striping brush, fine detail brush, toothpick, striping tape, makeup sponge
- Shortcuts: Santa, snowman, penguin, elf, Nutcracker, gnome, and gingerbread-house stickers or water decals; 3D bow charms; small pearl stickers; French tip guides
Frequently asked questions
Which cute Christmas designs work on short nails?
Snowman (idea 3), polar bear (idea 7), pastel baubles (idea 13), snow dots (idea 14), mint hearts (idea 15), and the gnome (idea 18). They need no free edge: dots, circles, and small faces that sit on the nail bed itself. The elf and the Nutcracker need a little length, so shrink them to one accent nail or use a sticker version on very short nails.
How long do cute Christmas nails last?
Regular polish lasts 5–7 days, gel lasts 2–3 weeks, and press-ons last several days to over a week with glue. Character art chips first because it carries the most paint layers, so seal it with two thin top coats and refresh the top coat on day three.
What do I say at the salon for a cute Christmas character?
Use the exact wording in each idea’s expert block — for example, “Classic red on nine nails, one Santa face accent on the ring finger — white beard, red hat, keep the face small.” Naming the character, the base colour, and the finger is the whole trick.
Which cute designs are work-safe?
Pastel baubles (idea 13), snow dots (idea 14), mint hearts (idea 15), and coquette bows (idea 16). They read as polished at arm’s length. Save Santa, Rudolph, and the Nutcracker for family Christmas and parties.
Can I do cute Christmas nails at home with no skill?
Yes — start with ideas 13, 14, 15, and 18. They need only a dotting tool: dots, circles, and a gnome with no eyes to paint. Stickers and water decals make every other character in this guide paintable too, once sealed under top coat.
How do I fix a smudged Santa face or reindeer nose?
Let it dry completely, paint over just the face with the base colour, and repaint the face on the same nail. For a single smudged eye or nose, one dot of the right colour from a dotting tool is the whole repair. Do not redo the whole hand.
Are 3D charms, pearls, and bows practical for everyday wear?
They are practical if you seal them properly and accept the trade-off: they snag on sweaters, scarves, and tights. Seal each charm with top coat around its base, carry a spare and a dot of nail glue, and never pull a caught charm — lift it off with a toothpick and re-glue it.
What is the easiest cute Christmas design of all?
Snow dots (idea 14): icy lilac with tiny white dots, one dotting tool, fifteen minutes. Pastel baubles (idea 13) and mint hearts (idea 15) are nearly as easy.
Do cute Christmas nails look childish on adults?
Not if you follow the four grown-up rules: one character per hand, two colours plus one metallic at most, one finish at a time, and a grown-up base like sheer nude, milky white, deep green, or classic red. A character on a grown-up base reads as a joke you are in on.
When should I get my cute Christmas nails done?
Book for 23 or 24 December, or paint them on the evening of the 23rd, so the set is fresh before the cooking starts. Gel booked on the 23rd will still look good on New Year’s Eve; regular polish painted on the 23rd will need a top-coat refresh on the 27th.