18 Simple Christmas Nail Designs That Are Actually Easy
What “simple” honestly means here
Most “simple Christmas nails” lists are not simple. They call a hand-painted reindeer simple, a five-colour plaid simple, a knit texture simple — and then a beginner tries one, it goes wrong, and she blames her own hands. The problem is not her hands. The problem is that nobody graded the list.
This guide grades every single design, honestly, before you pick one:
- Easy — you can do it with polish alone, no special tools, no steady-hand tricks.
- Easy with one shortcut — one cheap helper (guides, a dotting tool, a matte top coat, reinforcement rings) makes it beginner-proof.
- Zero-skill — stickers, stamping, or press-ons do the art for you. If you can paint one solid colour, you can do these.
- Salon-best — genuinely needs a trained hand. Listed so you know to book it, not struggle with it — and each one still has a simpler swap.
Every idea also carries a real time estimate, the best shape and length, numbered at-home steps, the exact words to say at the salon, and how it wears. No idea is labelled simple unless a beginner can actually do it, or a named shortcut makes it so.
If you want the broader Christmas picture first, start with our main Christmas nail designs guide. If your December is all parties, our Christmas party nail designs guide groups designs by occasion instead. This guide answers a different question: what can I actually do myself, quickly, at home?
Fastest first: the under-20-minute quick picks
In a hurry? Start here. These eight take 20 minutes or less including drying time between coats, and none needs a special tool:
- Idea 1. Classic Red Cream — 15 minutes, Easy.
- Idea 2. One Gold Glitter Accent Nail — 15 minutes, Easy.
- Idea 3. White Dots on Red — 20 minutes, Easy.
- Idea 4. Alternating Red and Green Solids — 15 minutes, Easy.
- Idea 5. Deep Green Cream — 15 minutes, Easy.
- Idea 12. Sticker Snowflakes on Blush Pink — 10 minutes, Zero-skill.
- Idea 14. Press-On Classic Red — 10 minutes, Zero-skill.
- Idea 15. Tiny Gold Star Decals on Deep Green — 15 minutes, Zero-skill.
The honest truth behind this list: the fastest Christmas manicure is a solid colour plus one accent. Everything else in this guide is a variation on that truth, not a harder trick pretending to be easy.
Easy: no special tools, polish alone
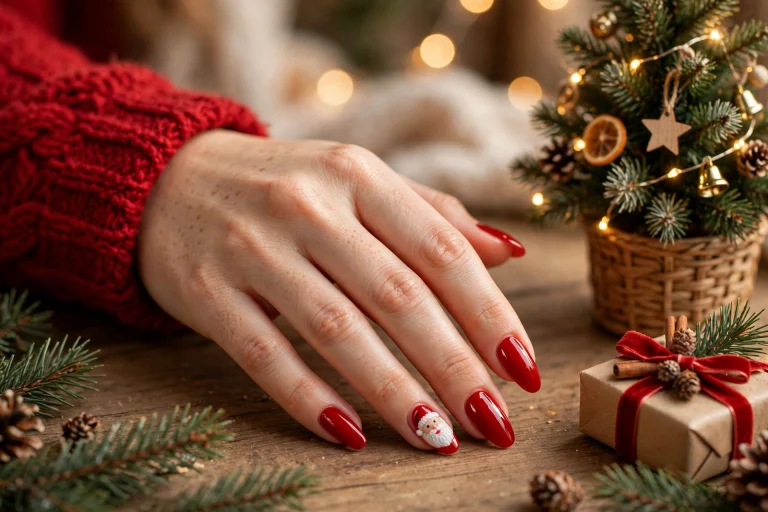
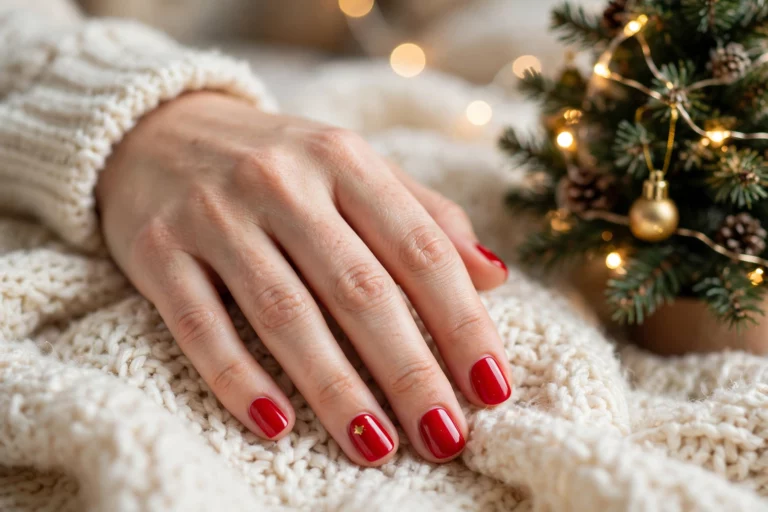
1. Classic Red Cream

One colour, done well, is the most Christmas thing there is — and it is the easiest design in this entire guide. A classic red cream needs no art, no tools, and no apology. It suits every outfit, every skin tone, and every nail length, including very short nails.
- Difficulty: Easy. Time: 15 minutes.
- Best shape: Any shape, any length. Short squoval looks especially clean.
- DIY steps: 1. Shape and push back cuticles. 2. One thin base coat. 3. Two thin coats of classic red cream, capping the free edge each time. 4. One glossy top coat.
- Ask for: “Classic red cream, two coats, high-gloss top coat, no art.”
- Wear: Regular polish 5–7 days; gel 2–3 weeks. Red hides tip wear better than pale shades. A chip dabs over nearly invisibly with the same polish.
2. One Gold Glitter Accent Nail
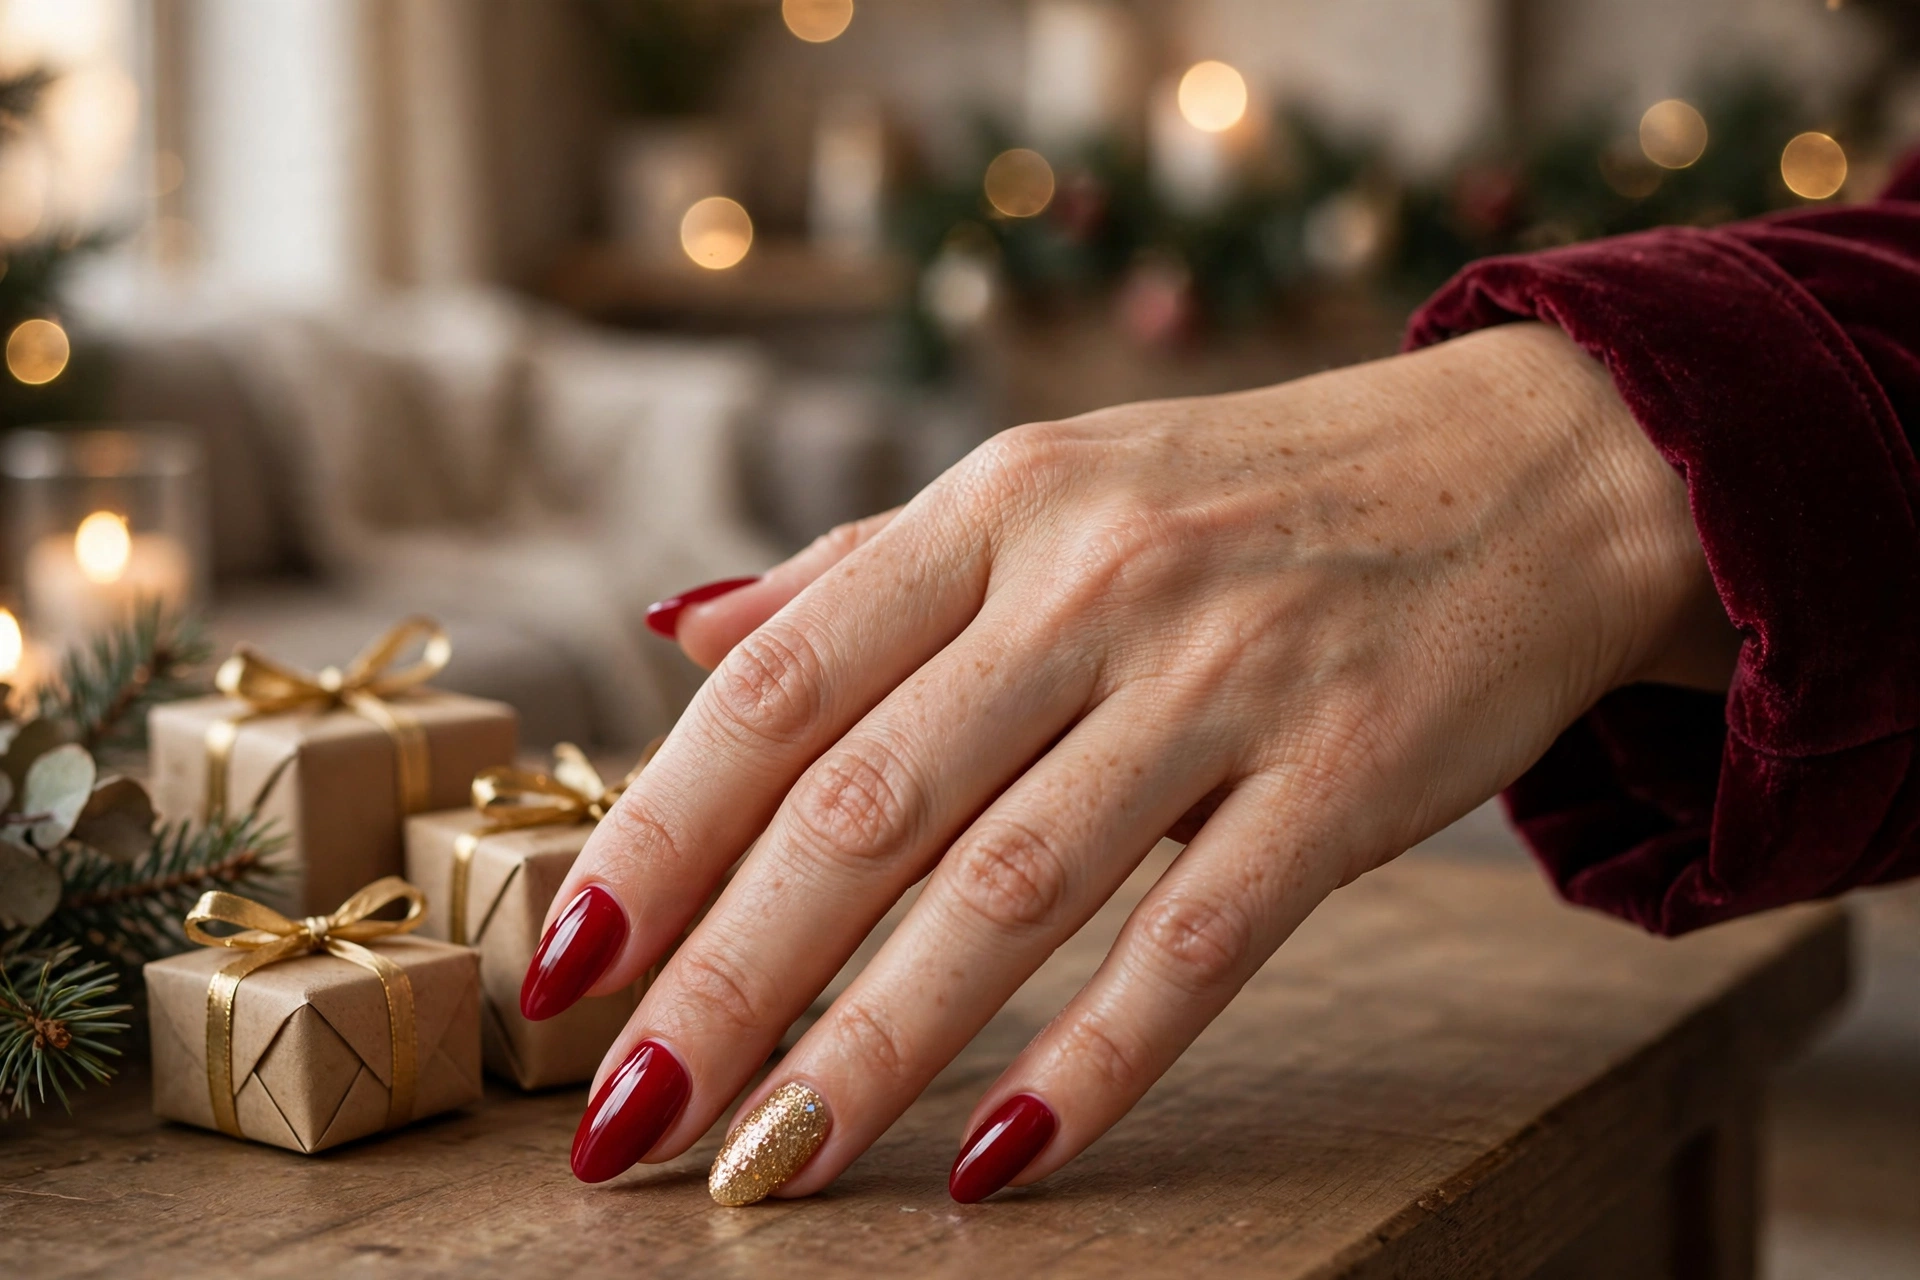
Paint nine nails red and one nail — the ring finger — in gold glitter. That is the whole design, and it is why it works: the glitter reads as intentional festive detail, while the other nine nails stay simple. This is the design to pick if solid red feels too plain but art feels too much.
- Difficulty: Easy. Time: 15 minutes.
- Best shape: Any shape, any length. The accent works even on very short nails.
- DIY steps: 1. Base coat on all nails. 2. Two coats of red on every nail except the ring finger. 3. Two coats of gold glitter polish on the ring finger. 4. Top coat everywhere, two coats over the glitter to smooth it.
- Ask for: “Classic red with a gold glitter accent on the ring finger, glossy top coat.”
- Wear: Regular polish 6–8 days; gel 2–3 weeks. Glitter is the most chip-forgiving finish — it hides small chips completely.
3. White Dots on Red

White dots scattered over red look like snowfall, and the tool is a bobby pin, not a brush. Dip the round end of a bobby pin in white polish, touch it to the nail, and you get a perfect dot every time. No freehand skill is involved at all — that is why this design is honestly easy while painted snowflakes are not.
- Difficulty: Easy. Time: 20 minutes.
- Best shape: Oval or almond, short to medium. Dots suit shorter nails because the pattern stays proportionate.
- DIY steps: 1. Two coats of red, fully dry. 2. Dip a bobby pin head in white polish. 3. Touch 4–6 dots per nail in a scattered pattern — uneven spacing looks more like snow. 4. Seal with top coat once the dots are dry.
- Ask for: “Red base with scattered white dots, done with a dotting tool, glossy top coat.”
- Wear: Regular polish 5–7 days; gel 2–3 weeks. Dots hide chips well; a lost dot re-dots in seconds.
4. Alternating Red and Green Solids
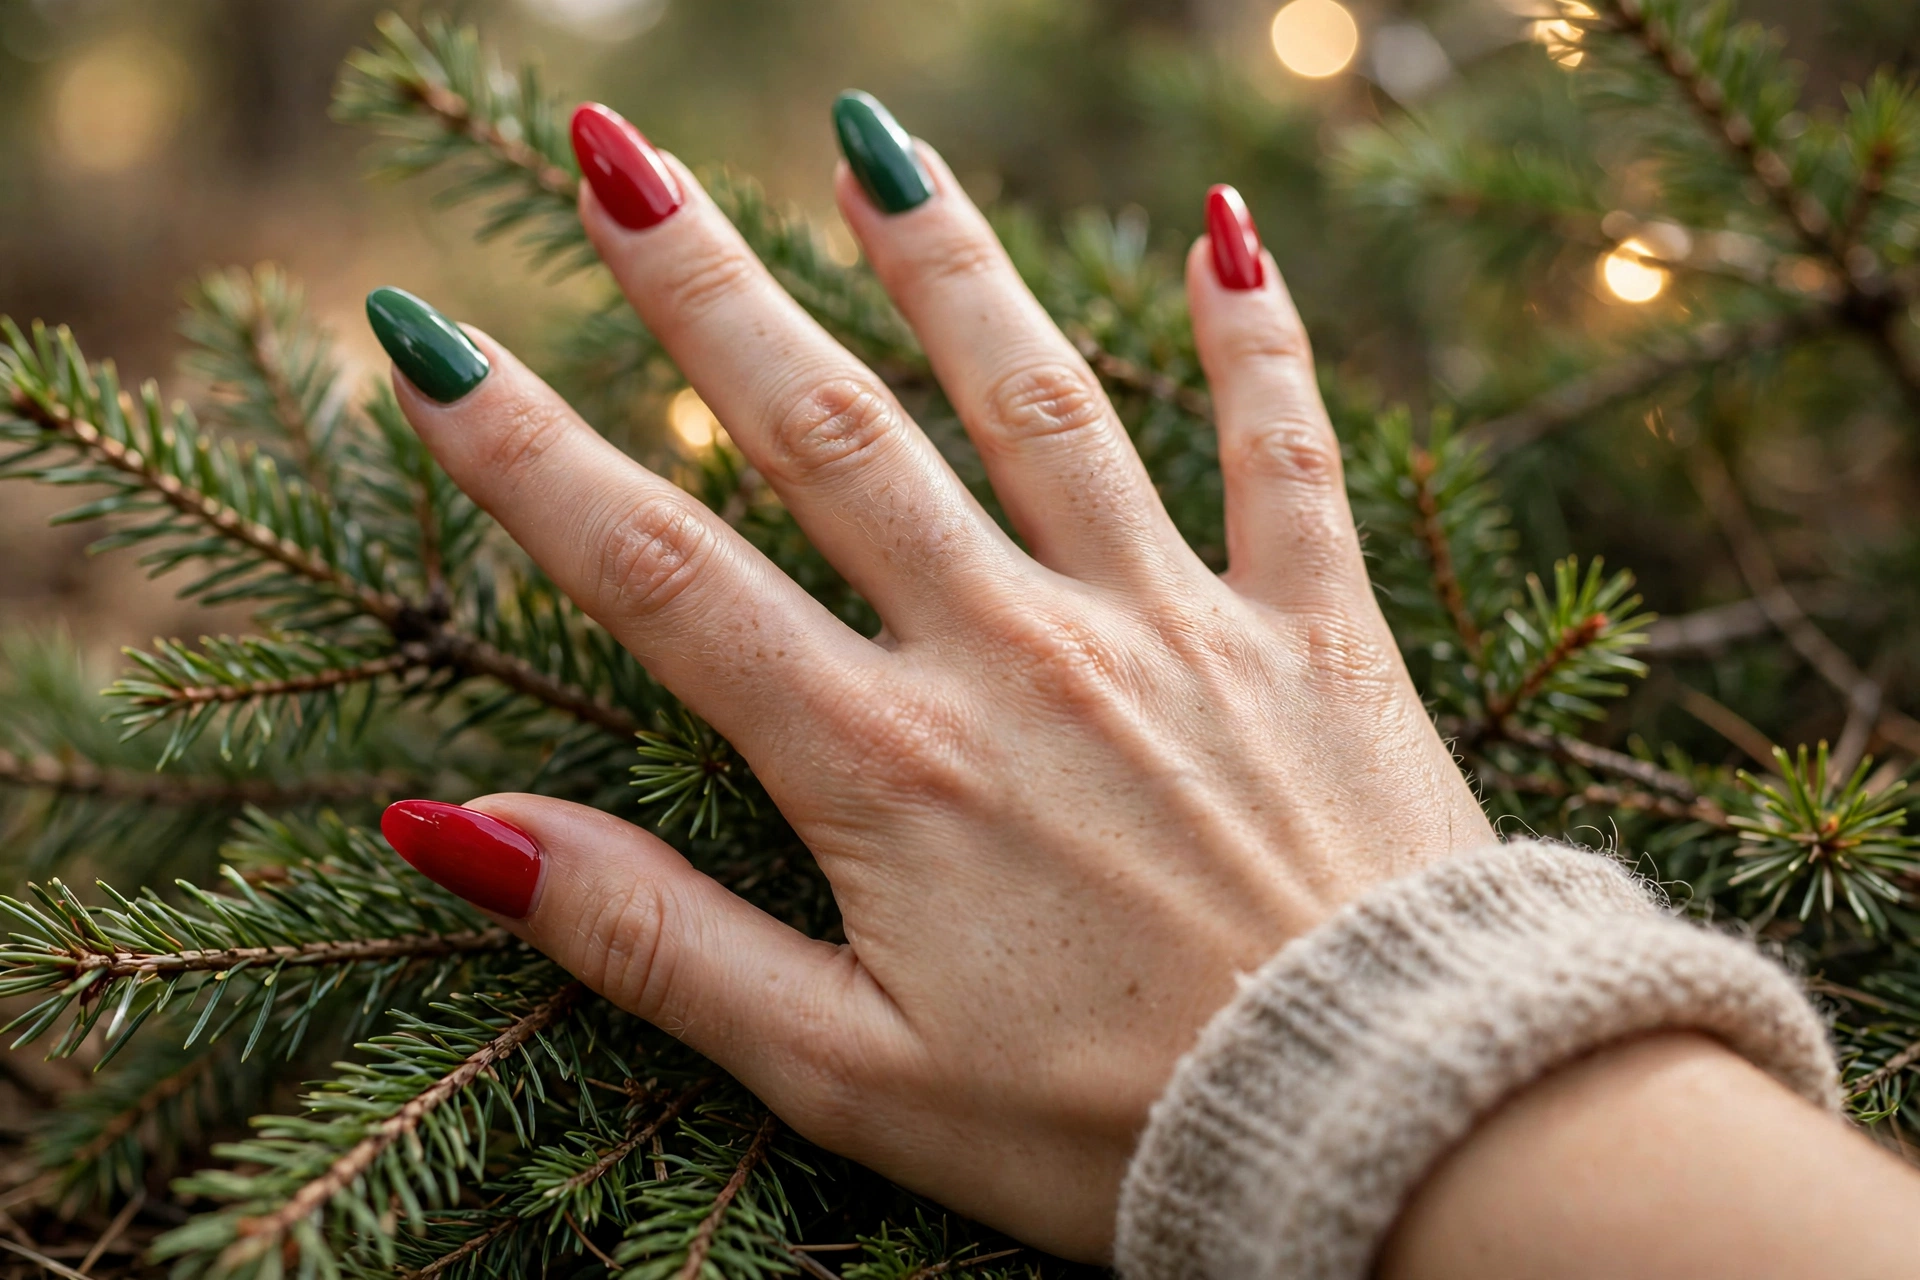
Alternate red and green nails — red, green, red, green — and you have a Christmas manicure with zero art. The colour pairing does all the festive work. Keep both shades deep and creamy (classic red, forest green) so the set reads as polished rather than novelty.
- Difficulty: Easy. Time: 15 minutes.
- Best shape: Any shape, any length. Short nails suit this best because two bold solids stay balanced.
- DIY steps: 1. Base coat. 2. Paint alternate nails red and green, two thin coats each. 3. Glossy top coat.
- Ask for: “Alternating classic red and forest green solid nails, glossy top coat, no art.”
- Wear: Regular polish 5–7 days; gel 2–3 weeks. Two dark shades hide wear equally well.
5. Deep Green Cream

Deep green is the quiet Christmas colour: festive without a single motif, elegant enough for work, and far less common than red, so it looks considered rather than default. Like classic red, it is one colour done well — and that is exactly what makes it simple.
- Difficulty: Easy. Time: 15 minutes.
- Best shape: Short almond or squoval. Deep shades look most expensive on shorter, well-shaped nails.
- DIY steps: 1. Shape and base coat. 2. Two thin coats of deep green cream, capping the free edge. 3. Glossy top coat.
- Ask for: “Deep forest green cream, two coats, high-gloss top coat, no art.”
- Wear: Regular polish 5–7 days; gel 2–3 weeks. Dark green hides tip wear as well as red does.
Easy with one shortcut: one helper makes it beginner-proof
6. Green French Tips with Guides
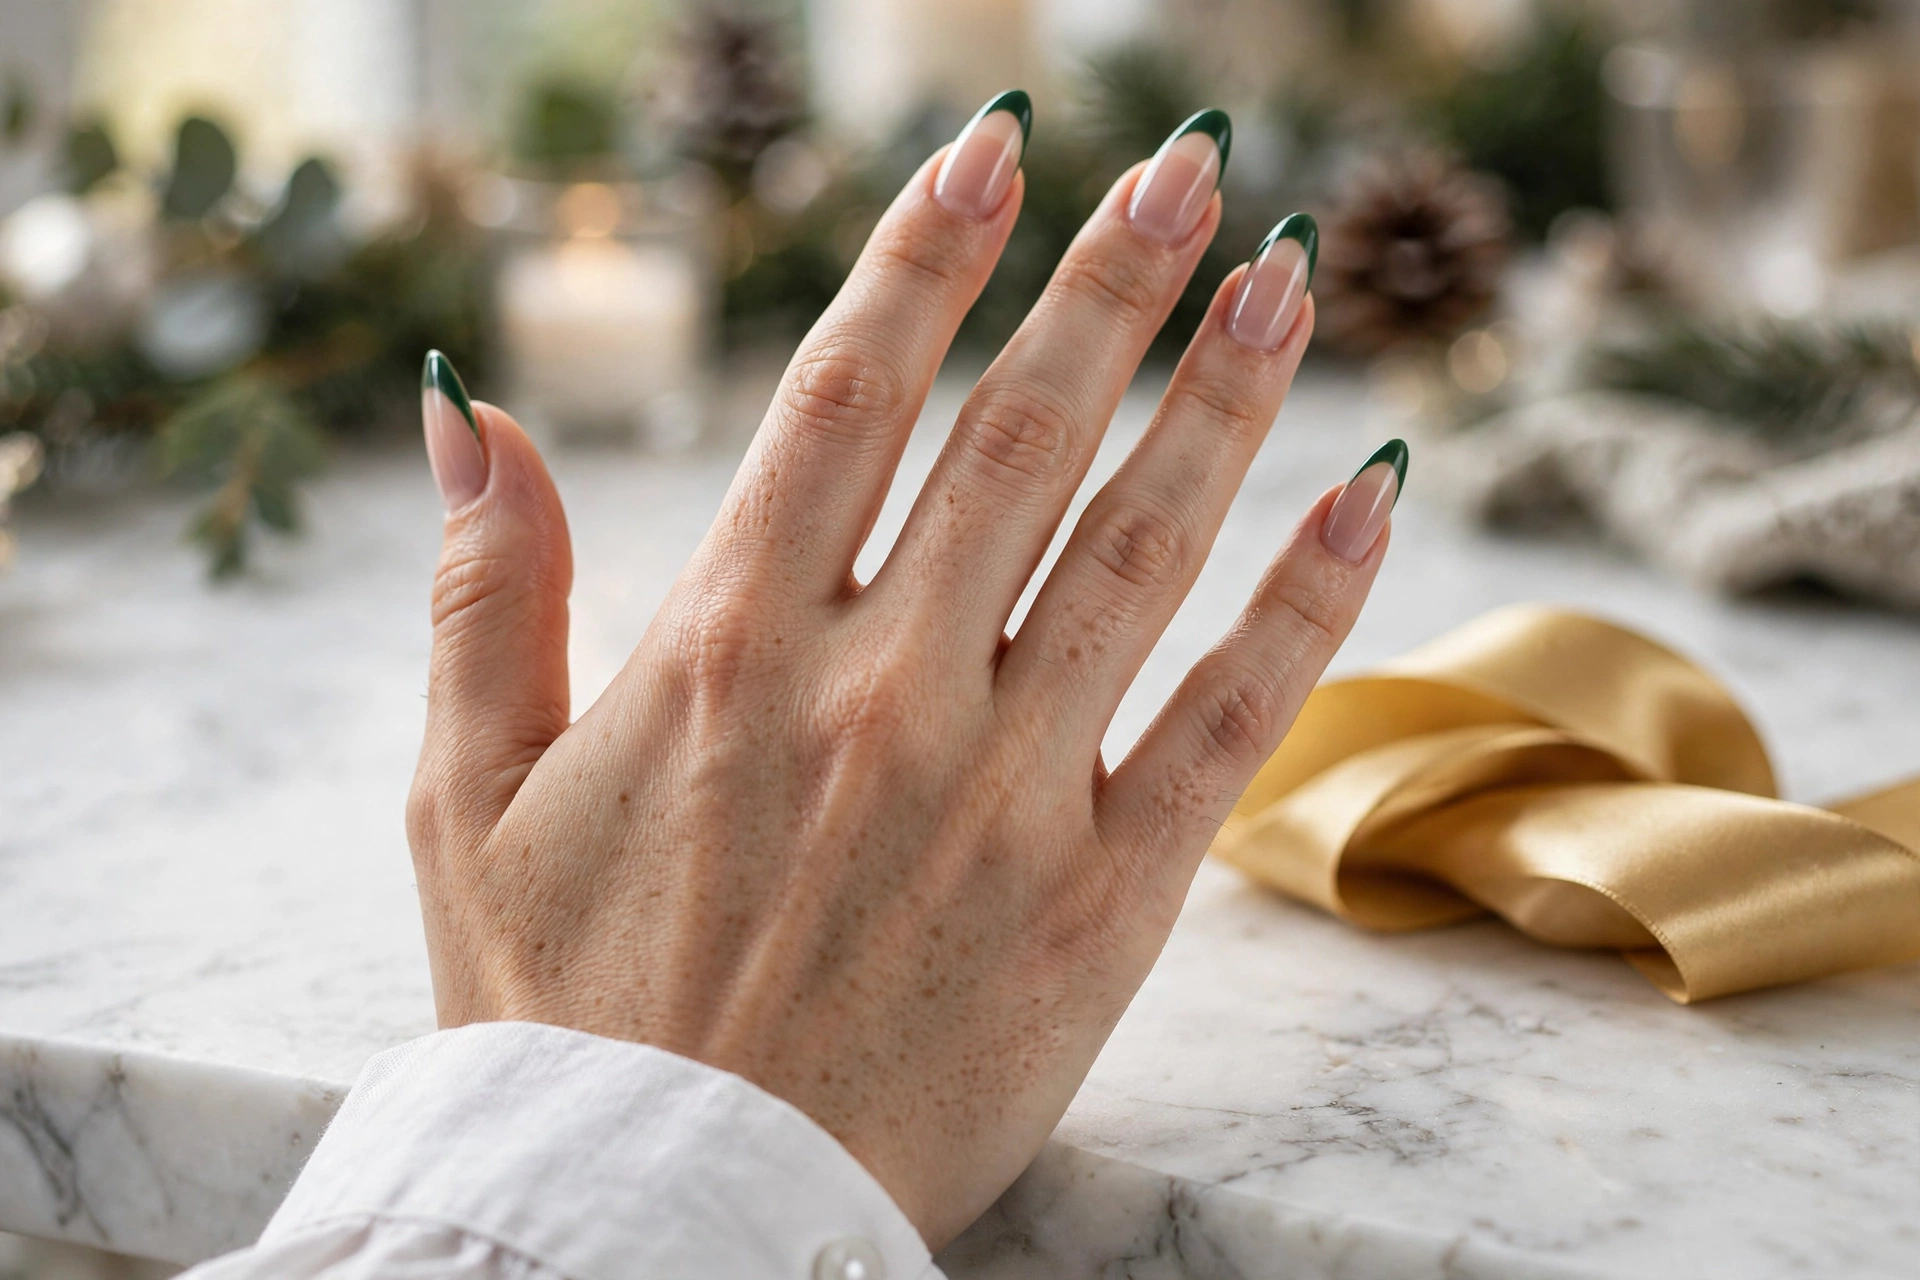
French tips are the design competitors most dishonestly call easy — freehand, they are not. With adhesive French guides, they are. Stick the guide on, paint the tip green, peel the guide off, and the smile line is crisp. The shortcut is the whole design; without guides, book this one instead.
- Difficulty: Easy with one shortcut (French tip guides). Time: 25 minutes.
- Best shape: Almond or oval, medium to long. French proportions suit longer nails best, and the green tip reads clearly at this length.
- DIY steps: 1. Sheer nude base, two coats, fully dry. 2. Press a French guide onto each nail at the tip line. 3. Paint the tip forest green, two thin coats. 4. Peel guides off while the second coat is still slightly tacky. 5. Top coat.
- Ask for: “Sheer nude base with forest green French tips, almond shape, glossy top coat.”
- Wear: Regular polish 5–7 days; gel 2–3 weeks. A worn tip repaints easily with the guide trick.
7. Santa Hat Accent Nail

A Santa hat on one accent nail — a red triangle, a white trim line, a white dot for the pom-pom — is the simplest character design that actually exists, because it is three shapes, not a face. Use a sticker for the hat if your hand shakes; nobody can tell once it is sealed. Full Santa faces, by contrast, belong in the “looks simple, isn’t” box below.
- Difficulty: Easy with one shortcut (a Santa hat sticker, or tape to mask the triangle). Time: 20 minutes.
- Best shape: Almond or oval, medium length. The accent nail needs a little length for the triangle to read.
- DIY steps: 1. Two coats of red on all nails except the ring finger; sheer nude on the ring finger. 2. Stick a Santa hat sticker on the ring finger — or mask a triangle with tape, paint it red, add a white trim line and a white dot. 3. Top coat, two coats over the sticker edges.
- Ask for: “Red nails with a Santa hat accent on the ring finger, glossy top coat.”
- Wear: Regular polish 5–7 days; gel 2–3 weeks. Seal sticker edges fully or they lift.
8. Peppermint Swirl Accent
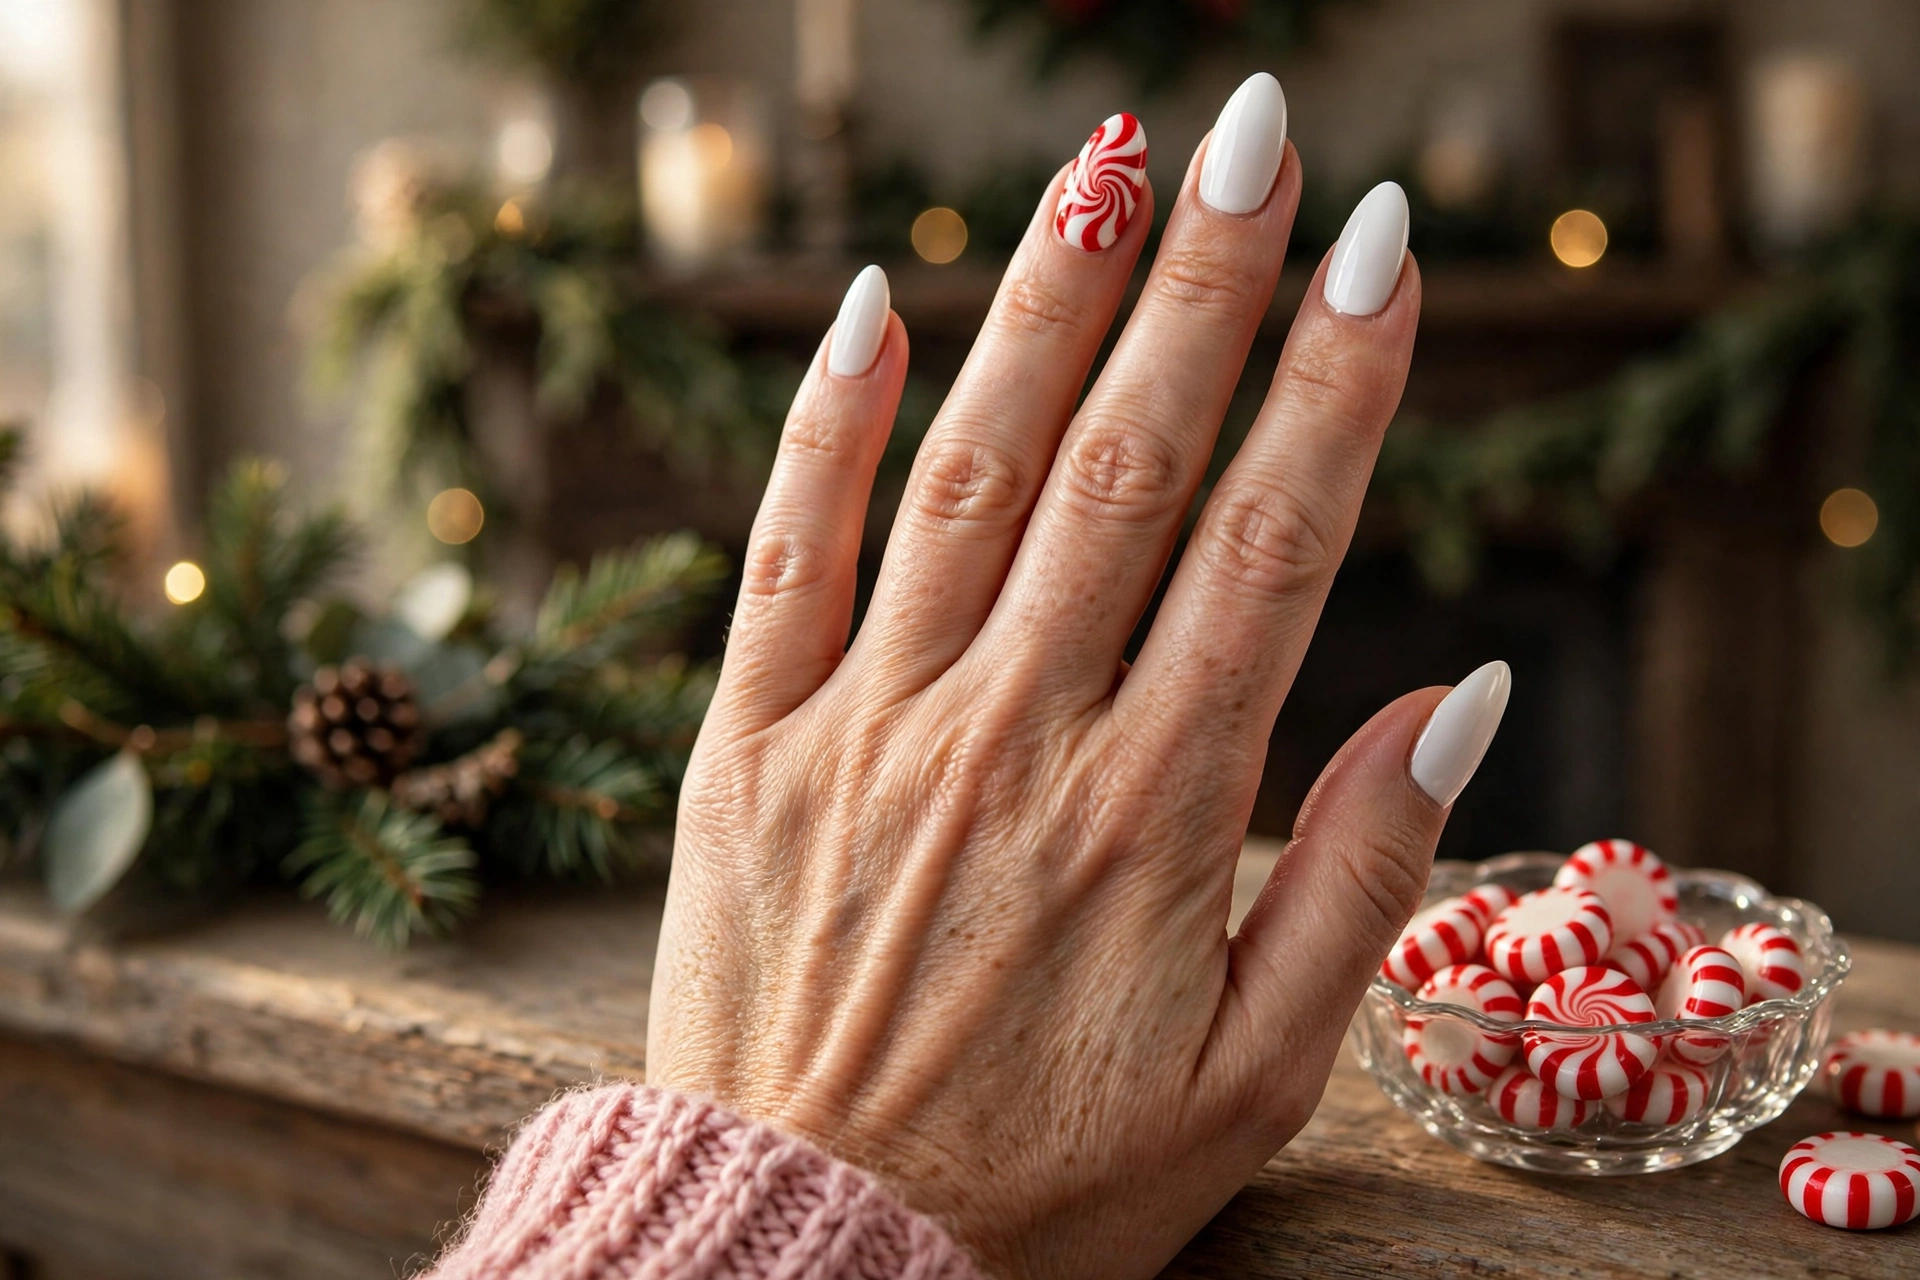
One accent nail carries a red swirl on white — the peppermint look — while the other nine nails stay plain white or sheer. The swirl is one curved line, not a striped French tip, which is why it stays easy: a single spiral drawn with a thin brush or a toothpick, sealed well, reads as peppermint from any distance.
- Difficulty: Easy with one shortcut (a thin brush or toothpick for the spiral). Time: 20 minutes.
- Best shape: Almond, medium to long. The swirl needs a little length to read clearly.
- DIY steps: 1. Two coats of white or sheer nude on all nails. 2. On the ring finger, draw one red spiral from the centre outward with a thin brush or toothpick. 3. Let it dry fully, then top coat twice.
- Ask for: “White nails with a red peppermint swirl accent on the ring finger, glossy top coat.”
- Wear: Regular polish 5–7 days; gel 2–3 weeks. The swirl hides small chips; a broken curve redraws easily.
9. Gold Dots on Sheer Nude
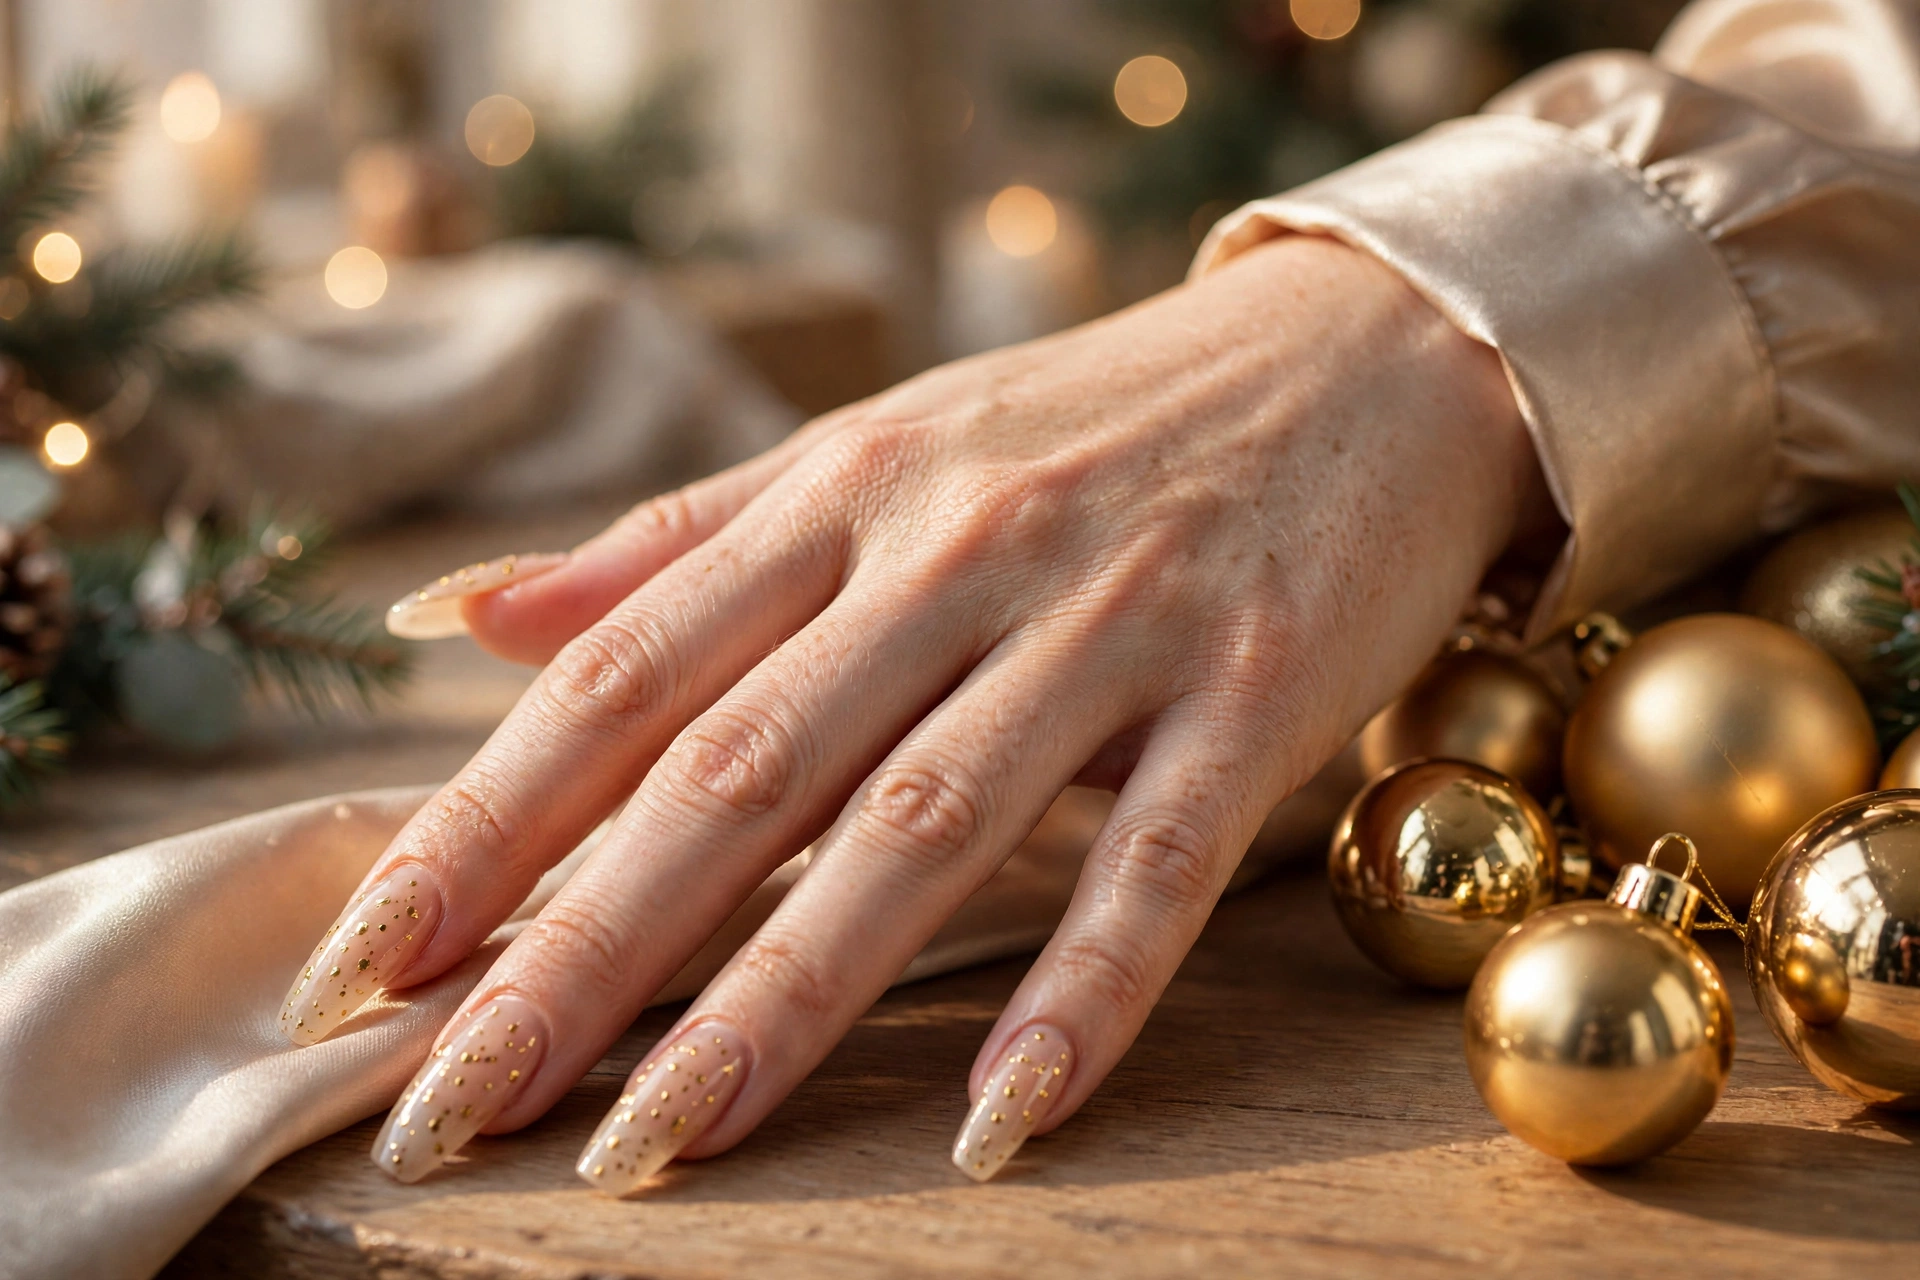
Sheer nude with scattered gold dots is the most office-safe design in this guide: it reads as polished jewellery, not holiday novelty, and it takes one tool — a dotting tool or bobby pin. The dots do the festive work while the nude base keeps it restrained.
- Difficulty: Easy with one shortcut (a dotting tool or bobby pin). Time: 20 minutes.
- Best shape: Squoval or oval, short to medium. Short nails suit this best because the dots stay proportionate.
- DIY steps: 1. Two coats of sheer nude, fully dry. 2. Dip a dotting tool in gold metallic polish. 3. Place 3–5 dots per nail, denser near the cuticle or tip, not in rows. 4. Top coat.
- Ask for: “Sheer nude base with scattered gold dots, squoval shape, glossy top coat.”
- Wear: Regular polish 5–7 days; gel 2–3 weeks. Sheer shades show chips sooner, so cap the free edge carefully.
10. Silver Glitter Half-Moons
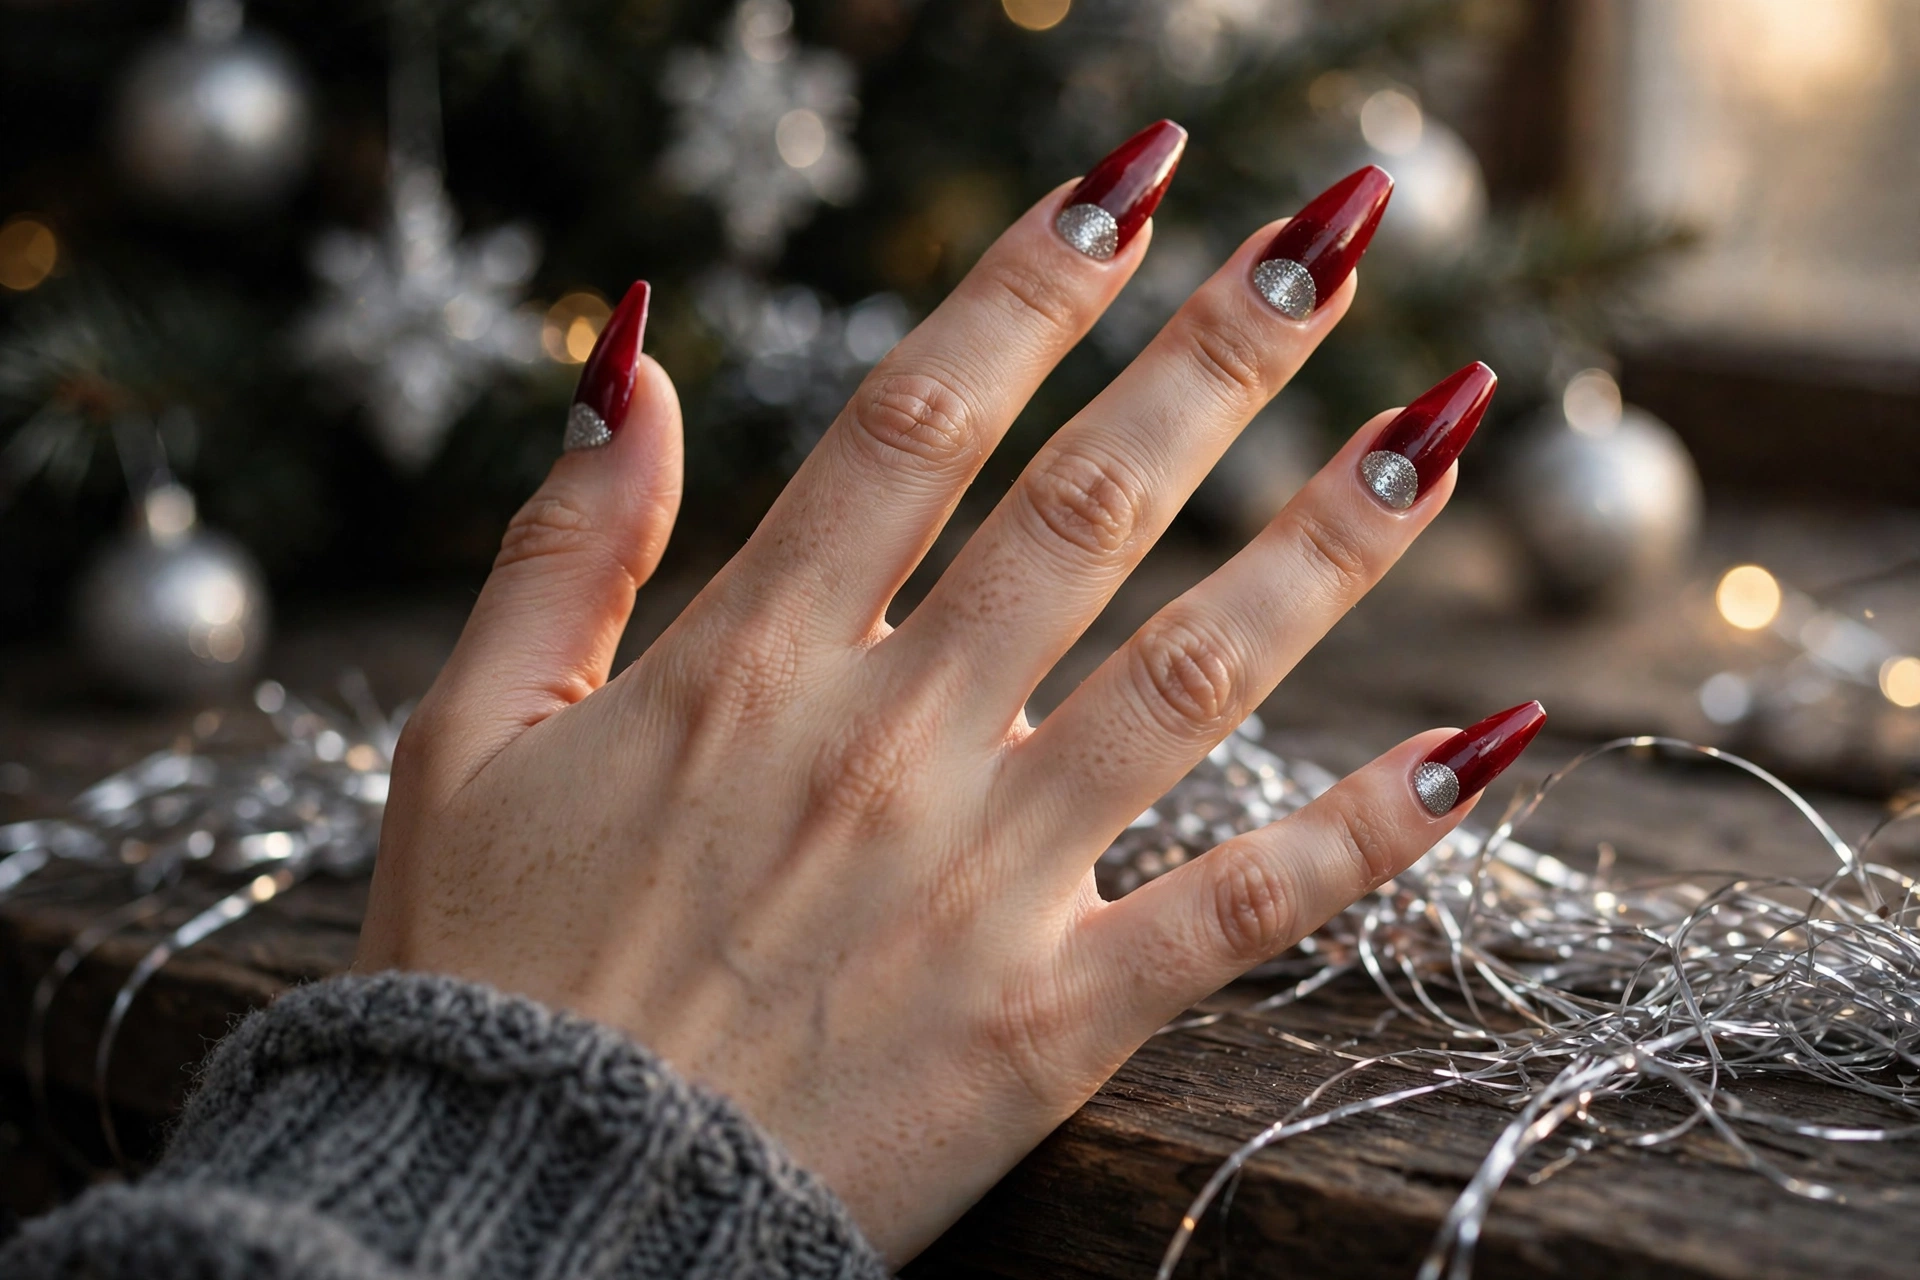
A silver glitter half-moon at the cuticle turns a plain red manicure into something special, and reinforcement rings — the little stickers for punched paper — make the curve perfect. Stick the ring at the cuticle, paint glitter over the exposed moon, peel, seal. Without the rings this is a steady-hand job; with them it is foolproof.
- Difficulty: Easy with one shortcut (reinforcement rings as masks). Time: 25 minutes.
- Best shape: Almond or oval, medium length. The moon needs a little nail bed to show.
- DIY steps: 1. Two coats of deep red, fully dry. 2. Press a reinforcement ring onto each nail at the cuticle. 3. Paint silver glitter polish over the exposed half-moon. 4. Peel rings off, top coat twice.
- Ask for: “Deep red nails with silver glitter half-moons at the cuticle, glossy top coat.”
- Wear: Regular polish 6–8 days; gel 2–3 weeks. Glitter moons hide growth well because the cuticle area is already decorated.
11. Matte Red with Glossy Tips
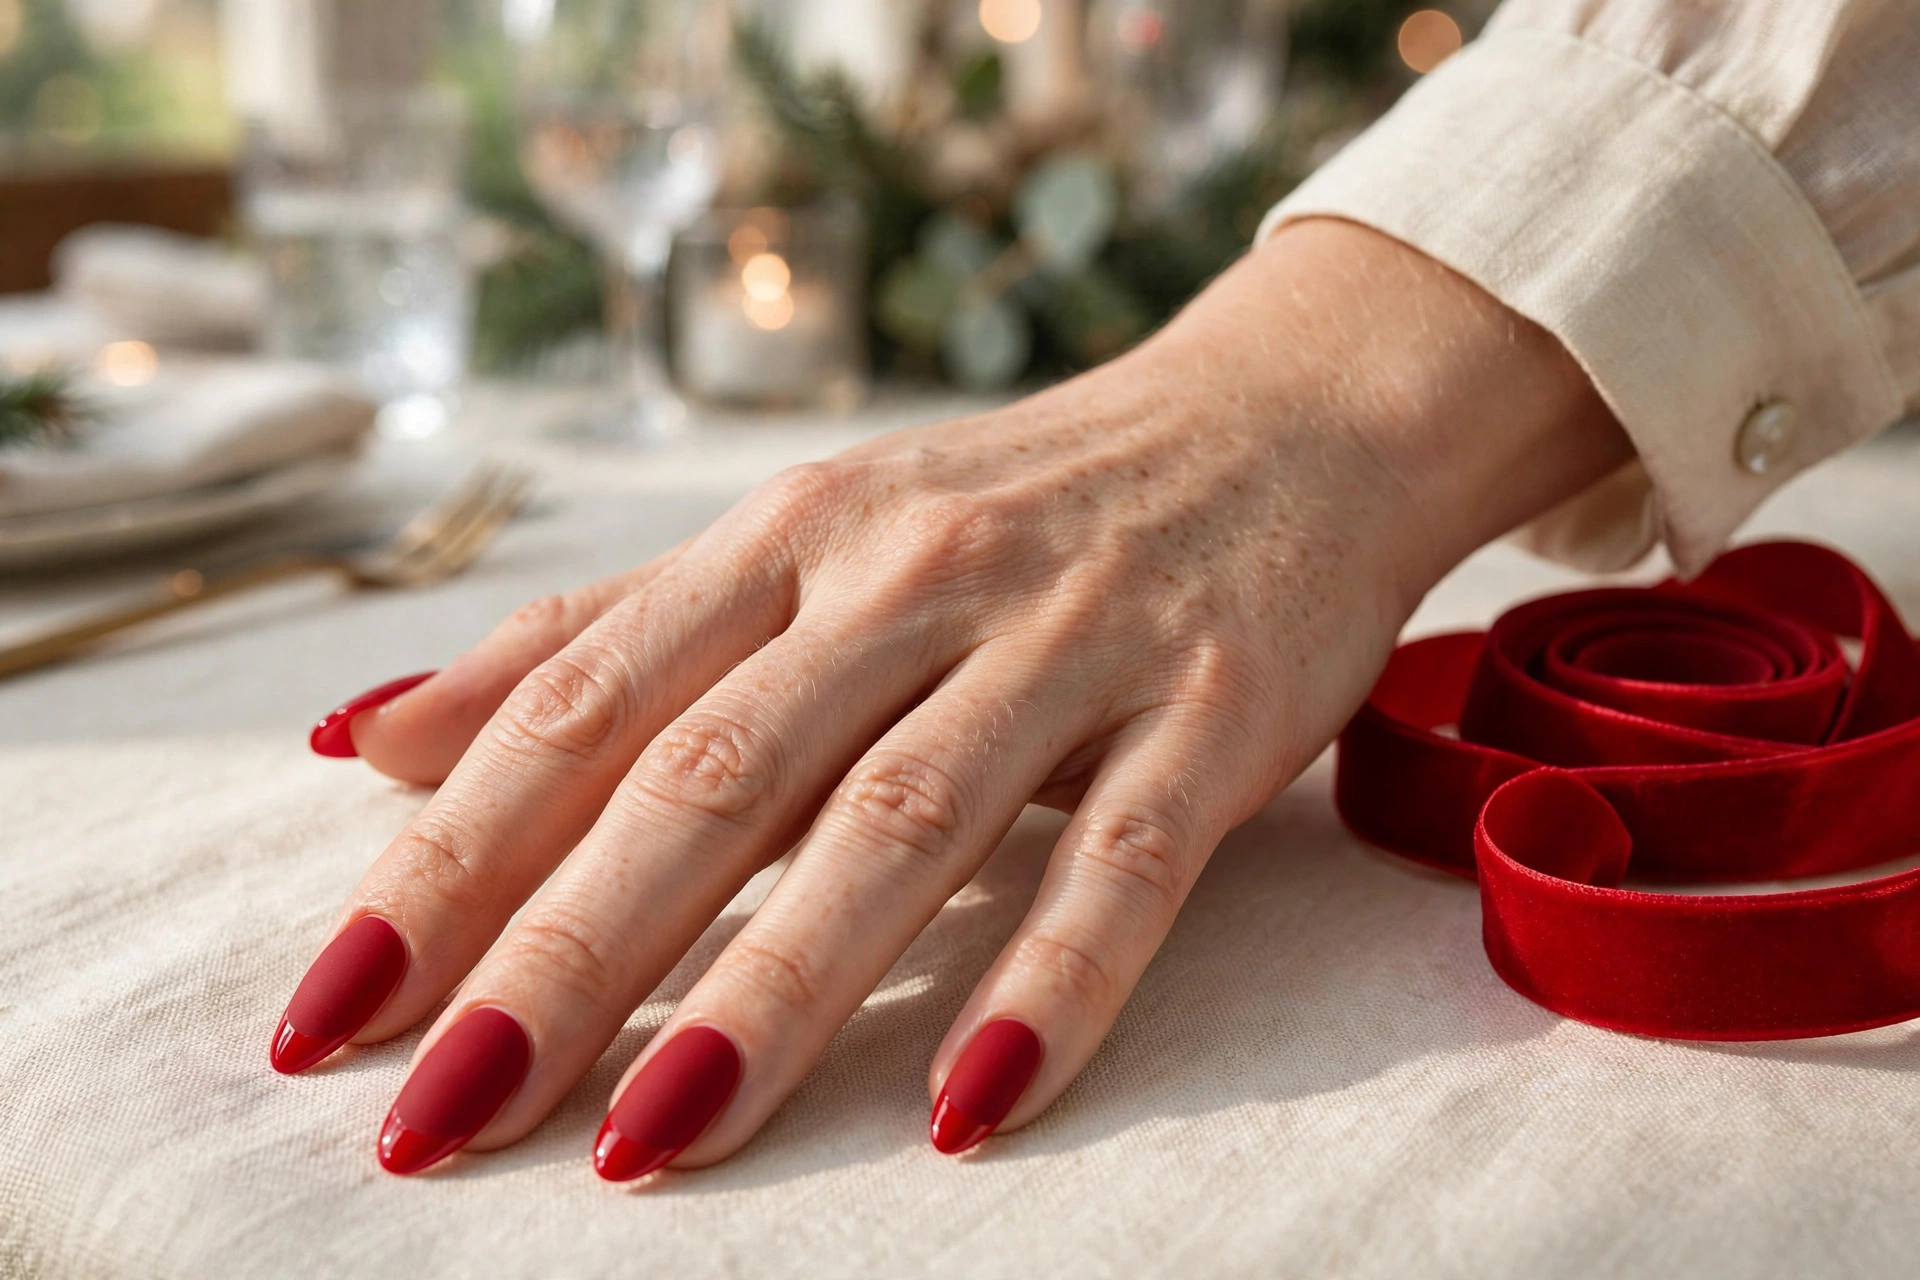
Paint the nail matte red, then paint just the tip glossy red. The contrast between matte and shine creates a French-tip effect with no line to draw freehand — the tip boundary can be slightly uneven and still look intentional, because the finish change, not the line, is the design. One bottle of matte top coat is the only extra purchase.
- Difficulty: Easy with one shortcut (a matte top coat). Time: 20 minutes.
- Best shape: Almond or squoval, short to medium.
- DIY steps: 1. Two coats of red, fully dry. 2. One coat of matte top coat over the whole nail. 3. Once matte, paint a glossy top coat over the tip third only. 4. No further top coat — it would undo the matte.
- Ask for: “Matte red nails with glossy red tips, almond shape.”
- Wear: Regular polish 5–7 days; gel 2–3 weeks. Matte shows wear sooner than gloss, so carry matte top coat for refreshes.
Zero-skill lane: stickers, stamping, and press-ons
This is the lane competitors barely cover, and it is the honest answer to “what if I have no skill at all?” If you can paint one solid colour, you can do every design here — the art comes from a sticker, a stamp, or a ready-made nail.
12. Sticker Snowflakes on Blush Pink

Real painted snowflakes need a fine brush and a steady hand — that is why competitors who call them “easy” are misleading you. Snowflake stickers need neither. Stick one or two per nail onto blush pink, seal with two top coats, and the result is cleaner than most hand-painted attempts. This is the design to pick when you want snowflakes without the skill requirement.
- Difficulty: Zero-skill (stickers). Time: 10 minutes.
- Best shape: Oval or almond, short to medium. Blush pink keeps the look soft rather than novelty.
- DIY steps: 1. Two coats of blush pink, fully dry. 2. Place snowflake stickers with tweezers — one per nail, or two on accent nails. 3. Press flat, then two thin top coats, wrapping the free edge so sticker edges never lift.
- Ask for: “Blush pink nails with white snowflake stickers, sealed with top coat, oval shape.”
- Wear: Regular polish 5–7 days; gel 2–3 weeks. Two top coats are non-negotiable — one coat lets sticker edges peel.
13. Gold Star Stamping
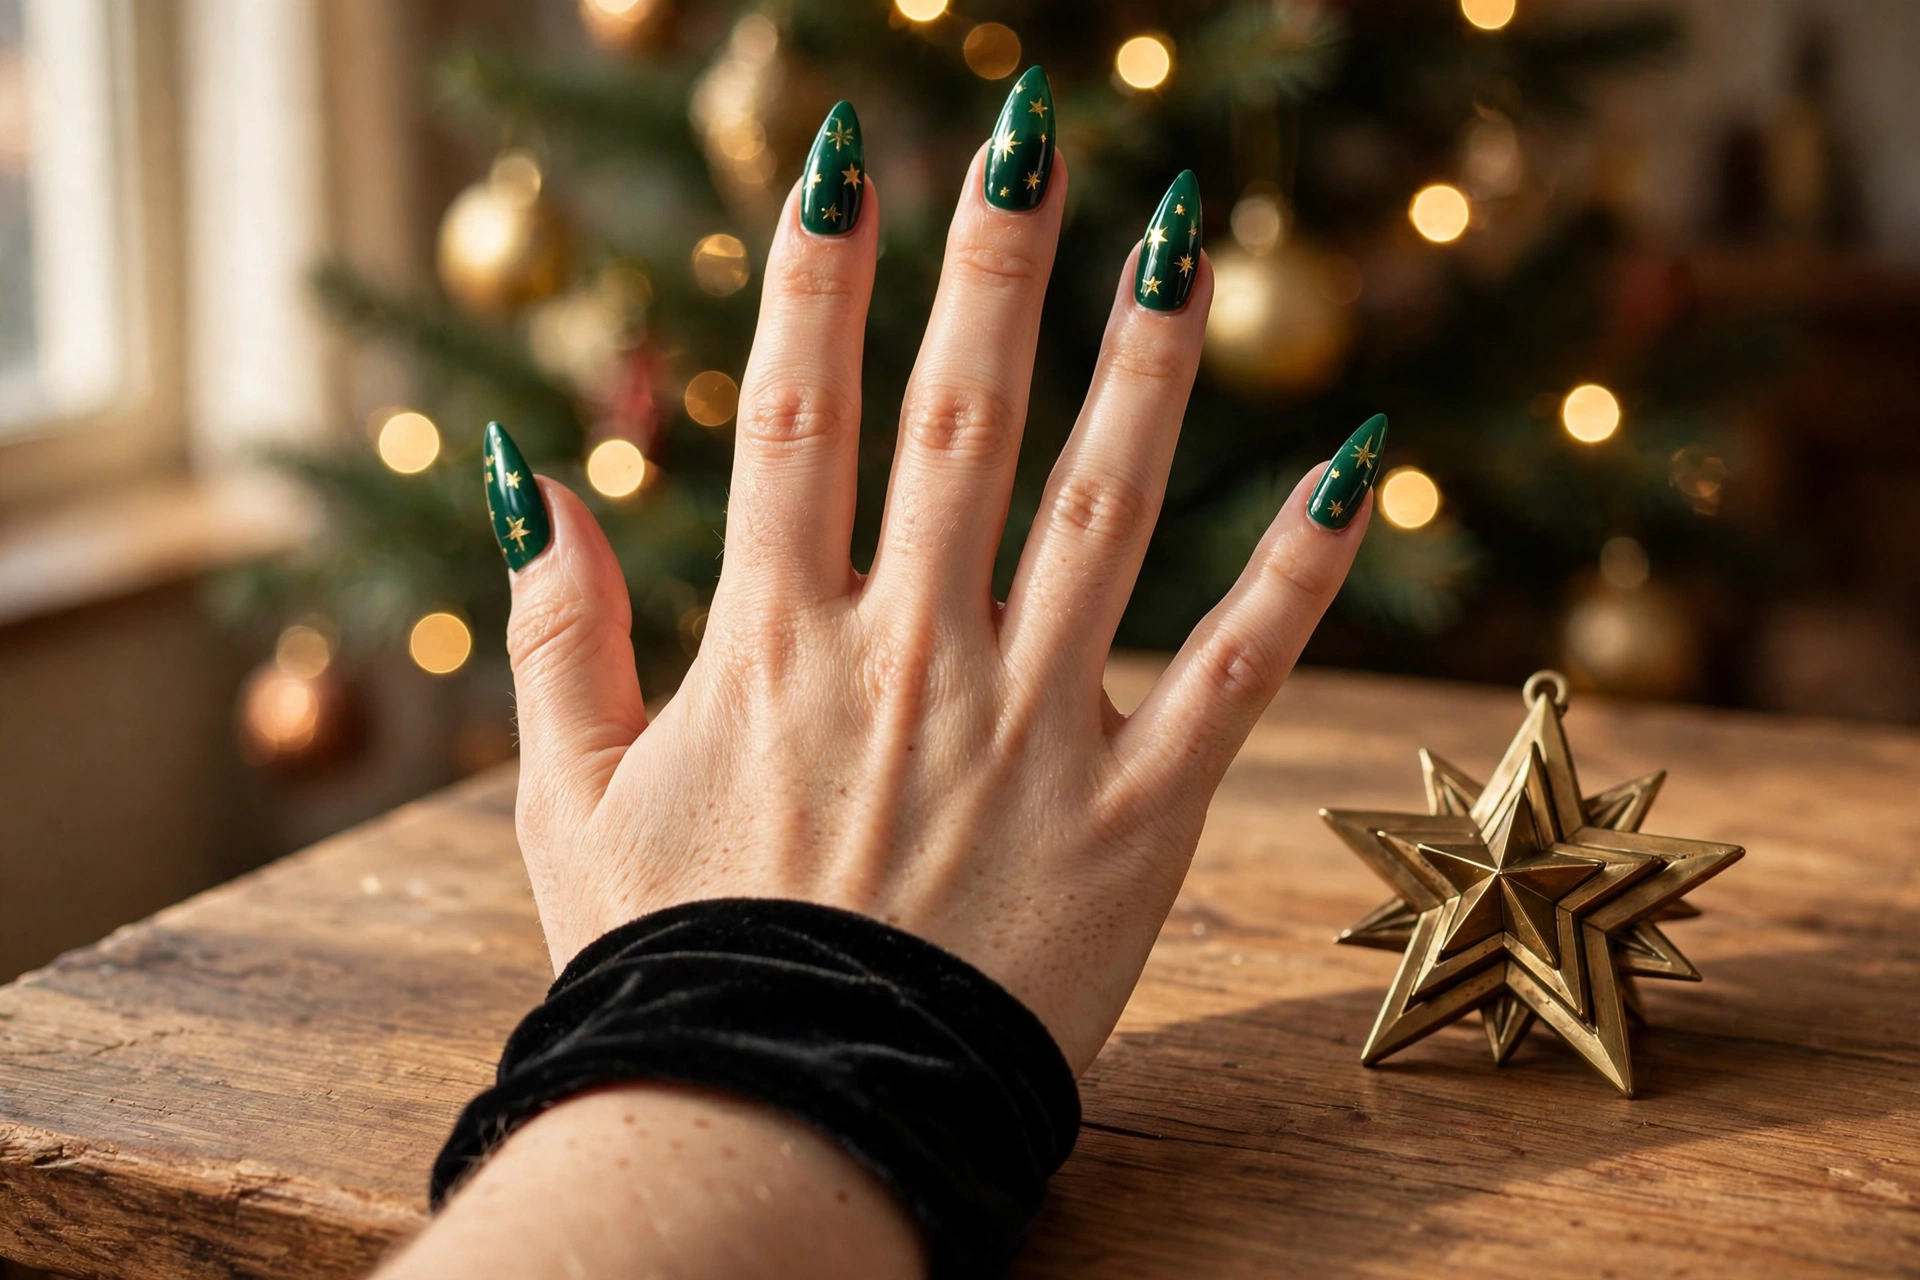
Stamping plates print perfect stars: paint gold polish onto the star etch, scrape, pick it up with the stamper, press it onto the nail. The plate does the drawing, so every star is identical — something no freehand attempt achieves. One plate and one stamper cover you for every Christmas after this one, too.
- Difficulty: Zero-skill (stamping plate). Time: 15 minutes.
- Best shape: Any shape, any length. Stars suit short nails because one small star fills the nail nicely.
- DIY steps: 1. Two coats of deep green, fully dry. 2. Paint gold stamping polish over the star etch, scrape once at 45 degrees. 3. Press the stamper straight down, then straight onto the nail — no rolling. 4. Top coat once dry.
- Ask for: “Deep green nails with gold stamped stars, glossy top coat.” (Or buy a stamping kit — the technique is the same at home.)
- Wear: Regular polish 5–7 days; gel 2–3 weeks. Stamped art chips like polish, not like stickers — repairs re-stamp cleanly.
14. Press-On Classic Red

Press-ons are the zero-skill option nobody should be embarrassed about: glued press-ons last 7–14 days, look salon-finished, and take ten minutes with no drying time at all. For a single party or a busy December week, they beat a rushed home manicure outright. Choose a classic red set — the colour does the Christmas work, so the nails themselves can stay simple.
- Difficulty: Zero-skill (press-ons). Time: 10 minutes.
- Best shape: Whatever the set offers — almond and squoval look most natural.
- DIY steps: 1. Push back cuticles, buff lightly, wipe with alcohol. 2. Size each nail, then glue from cuticle outward, pressing 30 seconds each. 3. File the free edge only if needed — never file the sides, which breaks the seal.
- Ask for: Nothing to ask — buy a short red set. At a salon, ask for a “press-on application” only if you want them applied professionally.
- Wear: 7–14 days with glue (2–3 days with adhesive tabs). Avoid hot water for the first few hours; carry one spare nail and glue in your bag.
15. Tiny Gold Star Decals on Deep Green
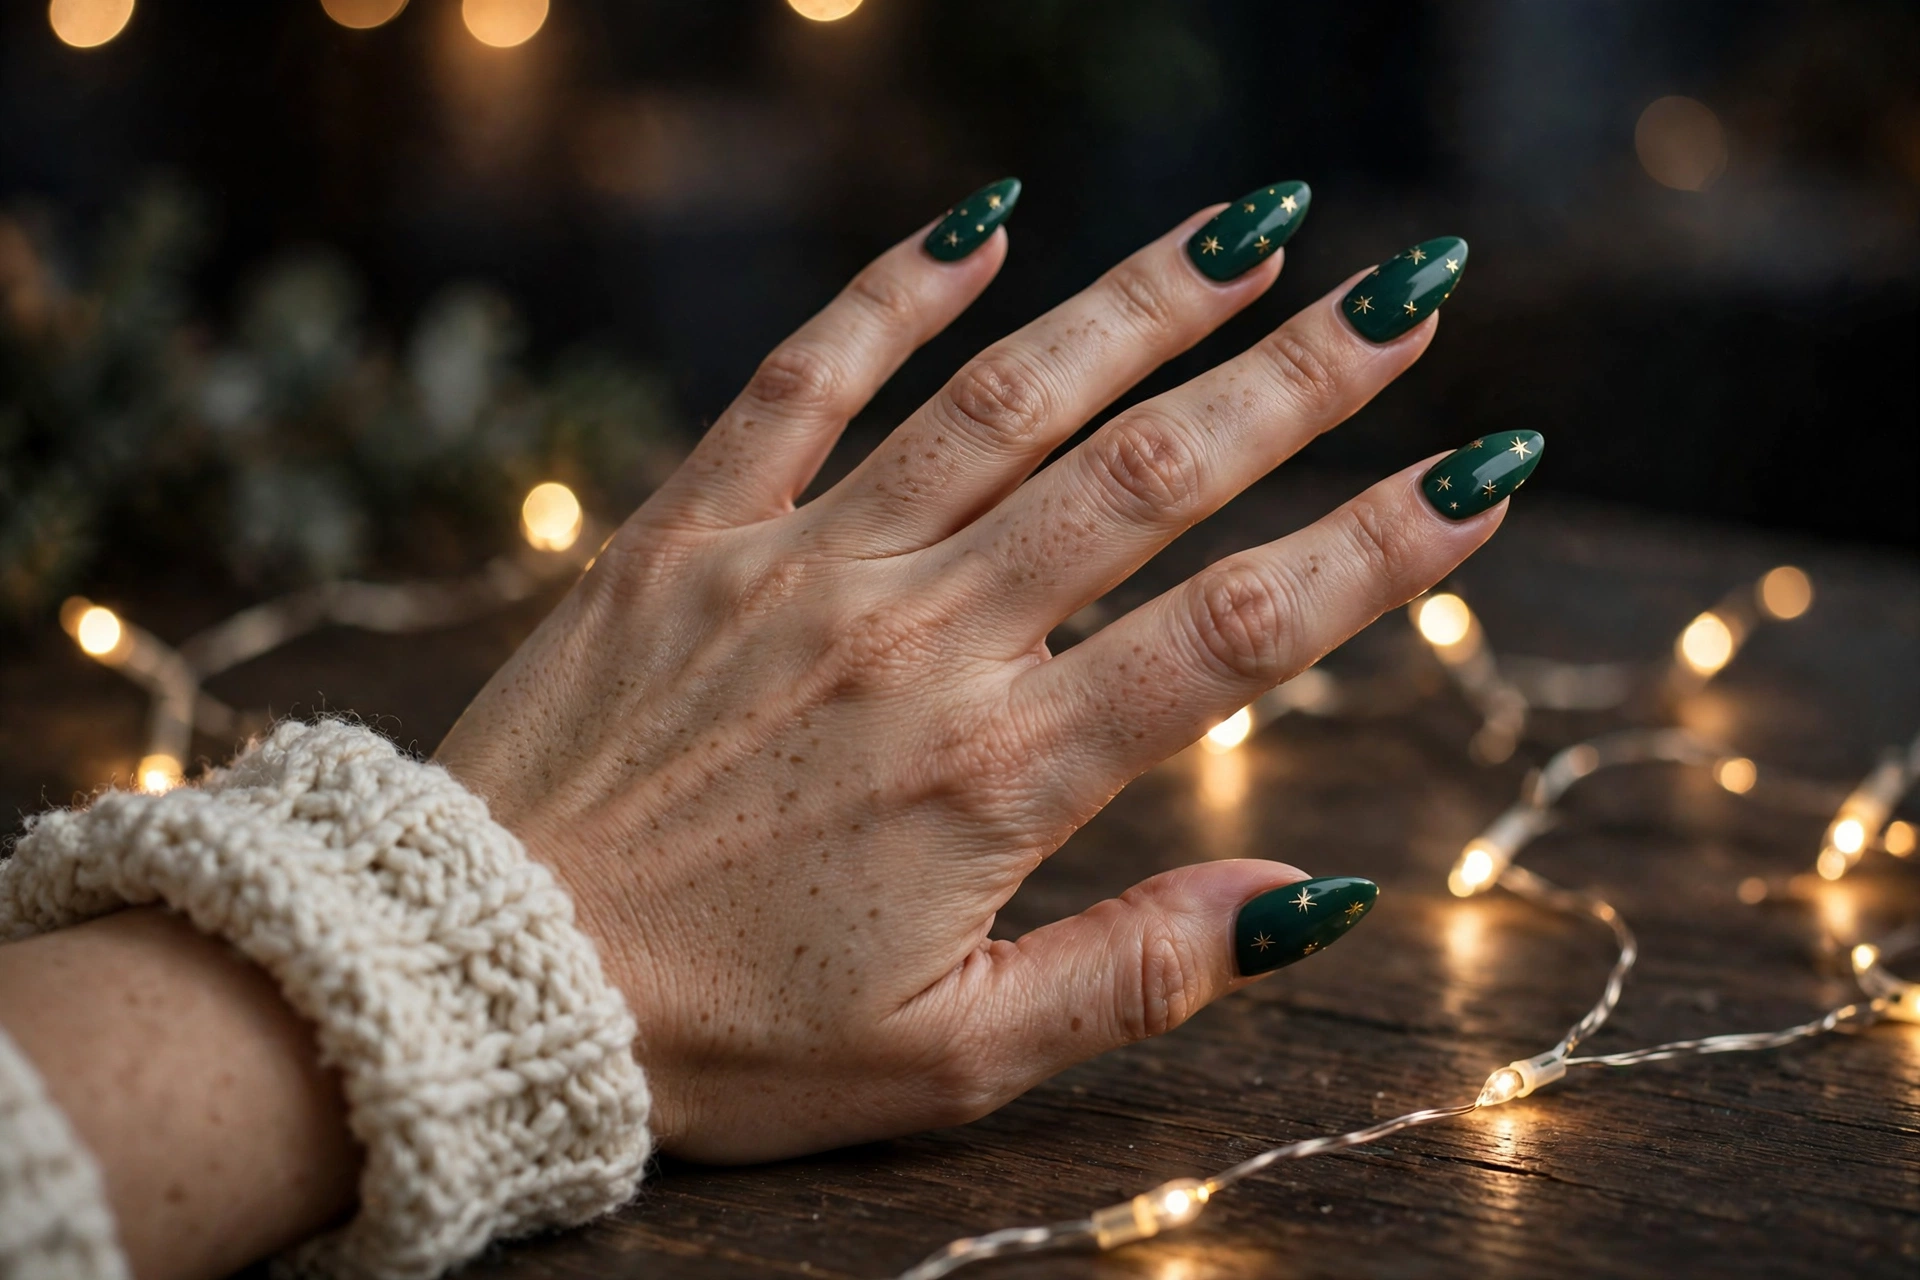
Tiny gold star decals scattered over deep green look like a Christmas tree in the dark — and they are the smallest, easiest art in this guide. Decals slide off their backing with water, sit flat with no edge to lift, and seal under one top coat. If stickers feel too thick, decals are the thinner, flatter upgrade.
- Difficulty: Zero-skill (water decals). Time: 15 minutes.
- Best shape: Almond or squoval, medium length. Small decals suit medium nails because one star per nail is enough.
- DIY steps: 1. Two coats of deep green, fully dry. 2. Cut out stars, soak 10 seconds, slide onto the nail with tweezers. 3. Blot gently, let dry, one glossy top coat.
- Ask for: “Deep green nails with tiny gold star decals, glossy top coat.”
- Wear: Regular polish 5–7 days; gel 2–3 weeks. Decals sit flatter than stickers, so they rarely lift.
Salon-best: book these, don’t struggle with them
Three designs in this guide are honestly salon-best. They are here so you can recognise them — and so you know the simpler swap for each, rather than attempting a multi-step painting job the night before a party.
16. Hand-Painted Christmas Tree Accent
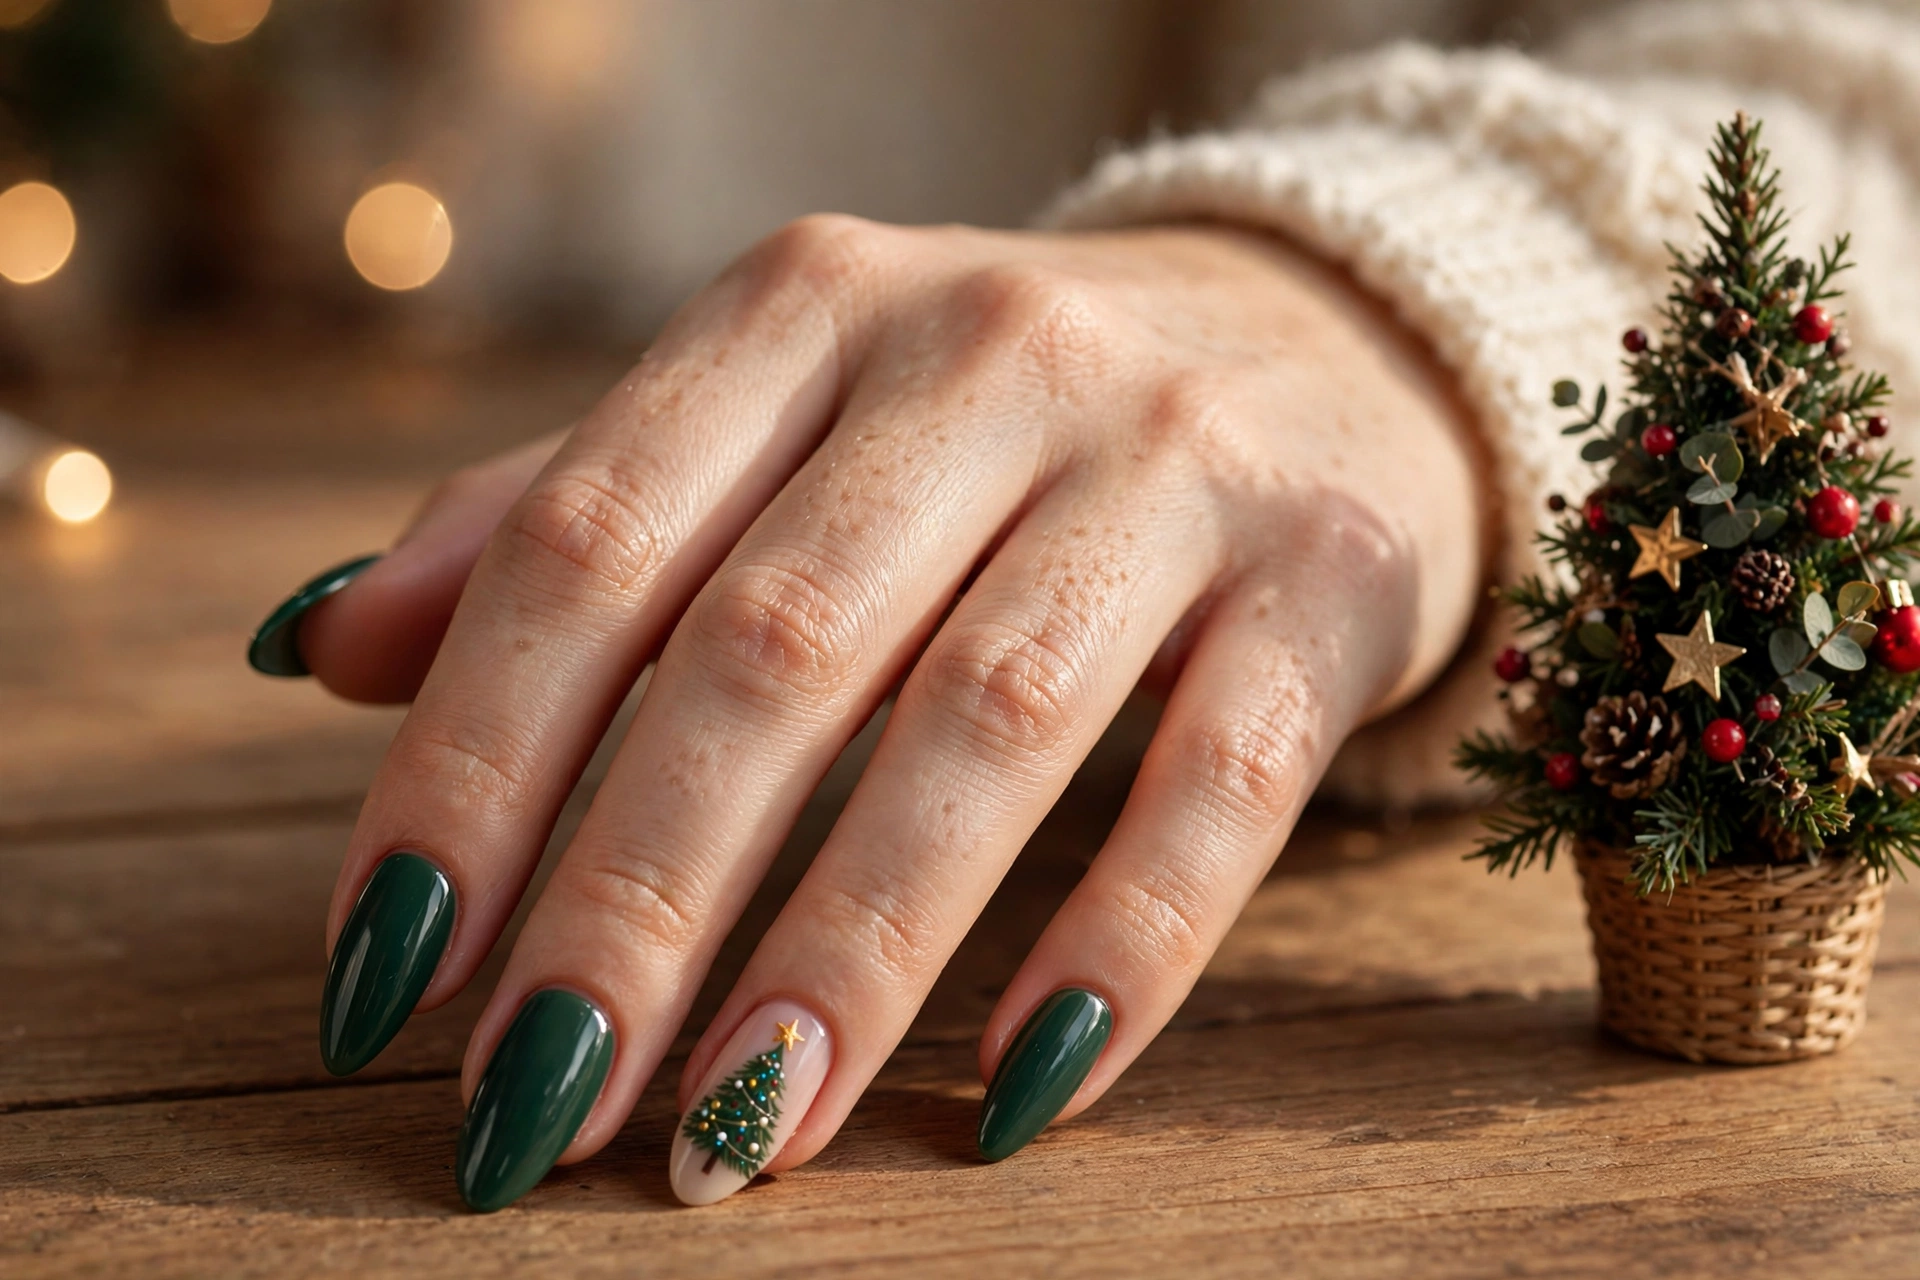
A single hand-painted tree on one accent nail — layered green triangles, a gold star on top, tiny dot ornaments — is beautiful and genuinely skilled work. The triangles must stack evenly and the dots must stay round, which takes a trained hand and a fine brush. The honest swap is Idea 13 (stamped stars) or Idea 12 (stickers): same festive feeling, no skill requirement.
- Difficulty: Salon-best. Time: 30 minutes at the salon.
- Best shape: Almond, medium length. The tree needs length to stack its layers.
- DIY steps (only if attempting): 1. Deep green base on all nails except the accent; sheer nude on the accent. 2. Paint three stacked green triangles, smallest on top. 3. Gold star on top, dot ornaments, thin trunk line. 4. Top coat twice. Expect uneven triangles on the first try — that is normal, and it is why this is salon-best.
- Ask for: “Deep green nails with a hand-painted Christmas tree accent on the ring finger, gold star on top, glossy top coat.”
- Wear: Gel 2–3 weeks; regular polish 5–7 days. Sealed art lasts as long as the base colour.
17. Hand-Painted Holly Sprig Accent

A holly sprig — two or three pointed leaves and three red berries — looks simple and is not. The leaves need pointed, symmetrical strokes and the berries must sit round and even, which is fine-brush work. The swap is Idea 15 (star decals) or Idea 3 (dots): berries are just red dots, and leaves are the hard part — so dots alone capture most of the look.
- Difficulty: Salon-best. Time: 30 minutes at the salon.
- Best shape: Almond or oval, medium length.
- DIY steps (only if attempting): 1. Classic red on all nails except the accent; sheer nude on the accent. 2. Paint two pointed green leaves with a fine brush. 3. Three round red dots as berries at the leaf base. 4. Top coat twice.
- Ask for: “Classic red nails with a hand-painted holly sprig accent on the ring finger, glossy top coat.”
- Wear: Gel 2–3 weeks; regular polish 5–7 days.
18. Ribbon-and-Bow French
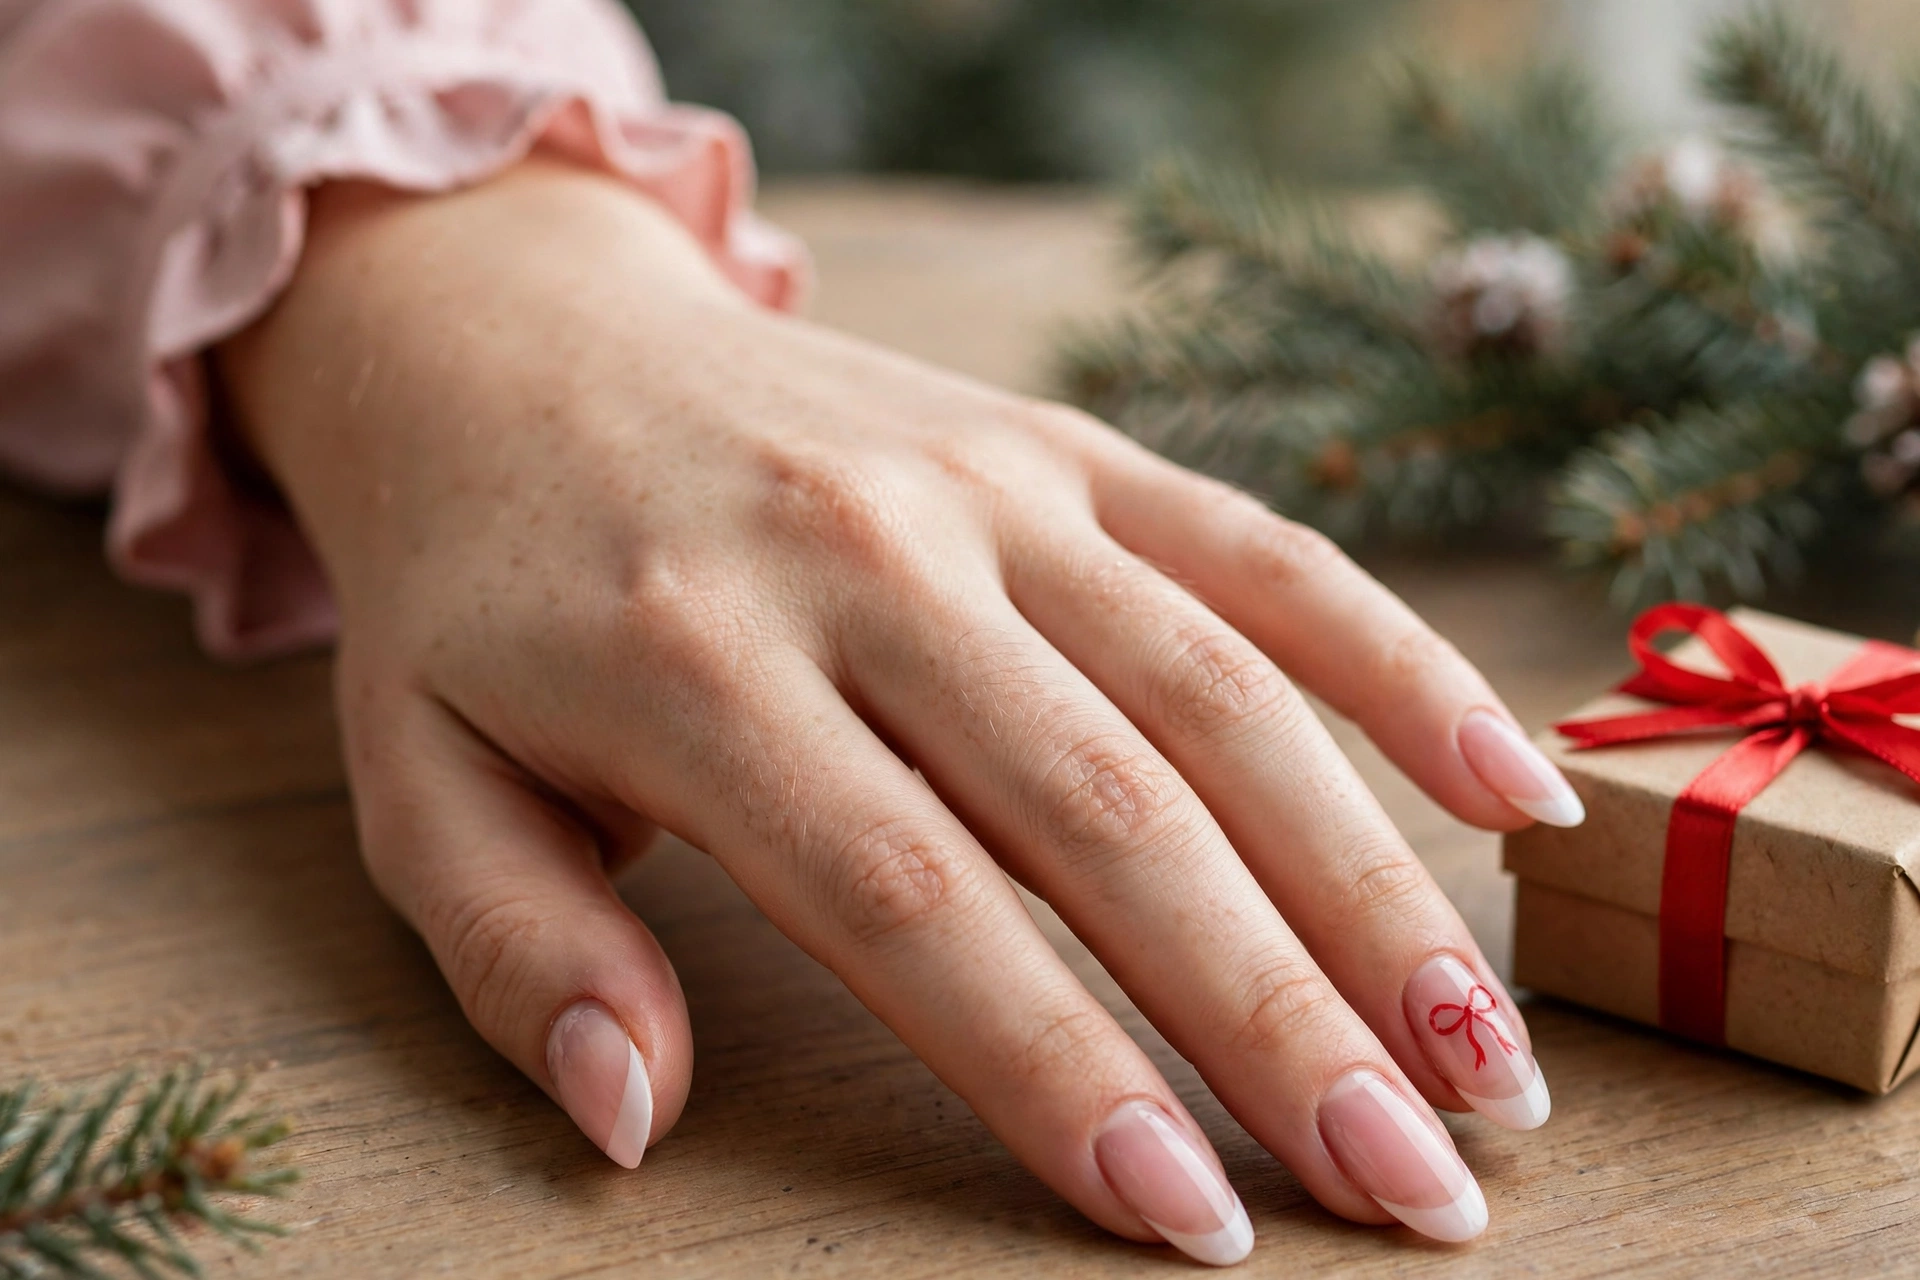
A French manicure with a tiny painted bow at the base of one nail is the prettiest salon design in this guide — and the bow is two loops, two tails, and a centre knot, all in miniature. Freehand bows smudge easily and the French line must be crisp first, so this is two skills stacked. The swap is Idea 6 (guided French tips) plus a bow sticker: same look, no double skill.
- Difficulty: Salon-best. Time: 35 minutes at the salon.
- Best shape: Almond or squoval, medium length. French proportions need some length.
- DIY steps (only if attempting): 1. Sheer pink base, French white tips with guides. 2. On the ring finger, paint two small red loops, two tails, and a centre dot for the knot. 3. Top coat twice.
- Ask for: “Sheer pink French manicure with a small red ribbon bow accent on the ring finger, glossy top coat.”
- Wear: Gel 2–3 weeks; regular polish 5–7 days. French tips show wear at the smile line first — cap the free edge well.
Looks simple, isn’t: the honesty box
Four things competitors sell as “simple” that are not — and the simpler swap for each:
- Full-hand character art (reindeer faces, gingerbread men, gnomes, Grinch faces). Faces need symmetry and fine detail on a tiny surface. Swap: one character accent nail via sticker (Idea 7’s approach), solids everywhere else.
- Multi-colour plaid on every nail. Plaid needs layered lines with drying time between them, and spacing must stay even across ten nails. Swap: one plaid accent nail, or Idea 4’s alternating solids.
- Knit sweater texture. The raised knit pattern needs thick gel worked with a fine brush before curing. Swap: a cosy solid (Idea 5’s deep green) with an actual knit sweater — the sweater does the texture work.
- 3D charms and heavy gems. Charms catch, lift, and need sealing skill. Swap: glitter or decals (Ideas 2, 15), which give the sparkle with none of the lifting risk.
If a design needs more than one new skill at once, it is not a beginner design — no matter what the title of the list says.
Choosing guide: pick by length, workplace, and skin tone
By nail length
- Very short / bitten nails: Ideas 1, 2, 4, 5, 12, 13, 14, 15. Solid colours, one accent, stickers, stamps, and press-ons all work beautifully short because their impact comes from colour, not length. Avoid Ideas 16, 17, and 18, which need length for their art to read.
- Short nails: Everything in the Easy and Zero-skill lanes, plus Ideas 6, 9, and 11. Keep art to one accent nail and keep motifs small.
- Medium to long nails: Everything, including the Salon-best lane — length gives painted trees, holly, and bows room to show.
By workplace dress code
- Strict office: Ideas 1, 5, 9, 12 (blush pink version), 14 (short red set). Deep solids, nude with gold dots, and soft pink read as polished, not novelty.
- Relaxed office: Add Ideas 2, 3, 4, 10, 11, 13, 15. Glitter accents, dots, and decals stay professional while reading festive.
- No dress code: Everything, including the character accent (Idea 7) and the salon designs.
By skin tone
Deep red, forest green, and gold suit every skin tone. On fair skin, blush pink (Idea 12) and sheer nude with gold dots (Idea 9) look especially soft; on medium skin, classic red and gold glitter photograph most strikingly; on deeper skin, deep green, gold stars, and rich reds are the most luminous combinations. If you are unsure, a deep shade with a gold accent is the safest festive choice across tones.
Wearability: chips, removal, and December-through-New-Year timing
The chip-fix routine (2 minutes, works for every design here)
Keep your base shade and a clear top coat in your bag. Dab the shade over the chip, wait one minute, seal with top coat. On glitter, dot, and decal designs the repair is invisible; on solids it passes in normal light. For sticker or decal edges that lift, press flat and seal immediately — never peel, which takes polish with it.
Glitter and gel removal without damage
Soak a cotton pad in acetone-based remover, wrap the nail in foil for 10 minutes, then slide the glitter or gel off gently. Never peel or scrape — that removes layers of your natural nail with them. Follow with cuticle oil and a strengthening base coat. Press-ons come off the same way: soak, don’t force.
One set from early December through New Year’s
Book gel a week before your first event and choose a forgiving design — glitter accents (Idea 2), dots (Idea 3), or deep solids (Ideas 1, 5) hide growth best, because there is no harsh line at the cuticle to betray it. Refresh the top coat every two to three days, wear gloves for washing up and gift wrapping, and avoid using nails as tools. A gel set booked in the first week of December, in one of these designs, will still look intentional at New Year’s Eve with top coat refreshes — which is exactly why the forgiving finishes matter more than the fanciest art.
For cold-weather nail care between events, see our winter nail designs guide.
What you’ll need (generic types only)
- Base coat and glossy top coat (plus one matte top coat for Idea 11)
- Cream polishes: classic red, deep red, forest green, sheer nude, blush pink, white
- Gold and silver glitter polishes, gold metallic polish
- A bobby pin or dotting tool (Ideas 3, 9)
- French tip guides (Idea 6), reinforcement rings (Idea 10)
- Snowflake stickers, gold star decals, one Santa hat sticker (Ideas 7, 12, 15)
- A stamping plate with stars + stamper + stamping polish (Idea 13)
- A short red press-on set + nail glue (Idea 14)
- Fine brushes (salon-best Ideas 16–18 only — or skip them and use the swaps)
FAQs
What is the easiest Christmas nail design of all?
Classic red cream (Idea 1), ranked first honestly: one colour, two coats, no tools, no art, 15 minutes. Second is one gold glitter accent nail (Idea 2) — same base, one extra bottle. Everything else in this guide is ranked behind those two, because anything needing a tool or a sticker is, by definition, one step harder.
Can I do simple Christmas nails at home with no skill?
Yes — start in the zero-skill lane: sticker snowflakes (Idea 12), gold star stamping (Idea 13), press-ons (Idea 14), or star decals (Idea 15). If you can paint one solid colour, you can do all four, because the sticker, stamp, or press-on does the art for you.
How do I paint Christmas nails with my non-dominant hand?
Paint your dominant hand first while your patience is fresh, then use shortcuts for the other hand: stickers and decals instead of freehand, a dotting tool instead of a brush (dots forgive shaking), and one accent nail instead of art on all ten. Keep coats thin — thick polish is what smudges when hands shake. And keep a cleanup brush dipped in remover for edges; every beginner needs one.
What is the fastest simple Christmas manicure?
Sticker snowflakes on blush pink (Idea 12) or press-on classic red (Idea 14) — both 10 minutes, no drying time for press-ons and almost none for stickers. The fastest polish-only option is classic red cream (Idea 1) at 15 minutes.
What do I say at the salon for a simple Christmas design?
Use the “Ask for” line under each idea, word for word — for example, “Classic red with a gold glitter accent on the ring finger, glossy top coat.” Saying the design, the accent nail, and the finish in one sentence is what stops a salon from adding art you did not ask for.
How do I fix a chipped simple manicure?
Dab your base shade over the chip, wait one minute, seal with top coat. Glitter, dots, and decals hide repairs completely; solids pass in normal light. For lifting sticker or decal edges, press flat and seal immediately — never peel.
How do I remove glitter or gel polish safely?
Soak a cotton pad in acetone-based remover, wrap the nail in foil for 10 minutes, and slide the polish off gently. Never peel or scrape glitter or gel — that removes layers of your natural nail. Follow with cuticle oil and a strengthening base coat.
Can I wear simple Christmas nails to work?
Yes. Deep solids (Ideas 1, 5), sheer nude with gold dots (Idea 9), blush pink with stickers (Idea 12), and short red press-ons (Idea 14) all read as polished in a strict office. Save character accents and salon art for outside work.
Do simple Christmas designs look good on very short nails?
Yes — better than fussy art does. Solid colours, one glitter accent, dots, stickers, stamps, and press-ons all work beautifully on very short nails, because their impact comes from colour rather than length. Avoid painted trees, holly, and bows, which need length to read.
How do I make one manicure last from December through New Year’s?
Choose gel in a forgiving design — glitter accent, dots, or a deep solid — book it a week before your first event, refresh the top coat every two to three days, and wear gloves for washing up and gift wrapping. Avoid pale shades and matte finishes for a multi-week set; both show wear sooner.